Spiced Udon Stir-Fry How to Make It Easy
You know those recipes that just feel like a warm hug? The ones you pull out when you need a little comfort, or when you want to impress someone without breaking a sweat? Well, this zucchini bread is *that* recipe for me. It’s not just any zucchini bread; it’s the one that made my kids actually *ask* for more, the one I bring to potlucks and it’s gone in minutes, and honestly, the one that gets me through those unexpected sweet cravings at 10 pm without having to whip up a whole cake. My grandma used to make something similar, and every time I bake this, I’m transported back to her sunny kitchen, the air thick with the sweet, comforting aroma. It’s like a little slice of my childhood, but even better because, well, I’ve had years to perfect it!
What is Ultimate Zucchini Bread?
So, what exactly makes this zucchini bread so “ultimate”? Think of it as your classic, beloved zucchini bread, but elevated. It’s got that perfect balance of moistness from the zucchini, a hint of spice, and a tender crumb that practically melts in your mouth. The “ultimate” part comes from a few little tweaks I’ve picked up over the years – like a secret ingredient that makes it extra tender and a glaze that’s just the right amount of sweet without being cloying. It’s essentially a warm, comforting loaf cake that just happens to be packed with good-for-you zucchini. It’s the kind of thing that reminds you that simple ingredients can create something truly magical, and it’s surprisingly easy to pull off, even on a weeknight. Forget those dry, bland zucchini breads you might have encountered; this one is a game-changer.
Why you’ll love this recipe?
Honestly, there are so many reasons why this zucchini bread has become my go-to. First off, the flavor is just out of this world. It’s not overly sweet, but it has this wonderful depth from the cinnamon and a hint of nutmeg. The zucchini doesn’t just add moisture; it gives it this subtle, earthy sweetness that just works. And don’t even get me started on the texture! It’s incredibly moist and tender, thanks to a little trick I learned (more on that later!).
But beyond the incredible taste, this recipe is a lifesaver on busy nights. I can whip up the batter in about 15 minutes, and then it just bakes away while I tidy up or help with homework. It’s so forgiving, too! I’ve thrown in a handful of chocolate chips, some chopped nuts, or even a swirl of cream cheese filling, and it’s always turned out delicious. It’s one of those versatile recipes that feels special enough for company but is perfectly at home with a cup of coffee on a lazy Sunday morning.
And let’s talk about budget-friendliness. Zucchini is usually pretty affordable, especially when it’s in season, and the other ingredients are pantry staples. This means you can make a gorgeous, homemade treat without spending a fortune. It’s a far cry from those fancy bakery loaves, and in my opinion, way more satisfying because you made it with your own two hands. What I love most is that it’s a sneaky way to get more veggies into my kids without them even realizing it. They just see a delicious, sweet treat, and I see a happy, well-nourished family.
How do you make Zucchini bread?
Quick Overview
This recipe is all about simplicity and maximizing flavor. We’ll start by getting our dry ingredients mixed, then whisking together the wet ingredients, and finally, gently combining them. The star of the show, the zucchini, gets grated and stirred in, adding that essential moisture. We’ll then pour the batter into a prepared pan and let the oven do its magic. A simple glaze finishes it off, bringing everything together. It’s a straightforward process that guarantees a moist, flavorful loaf every single time.
Ingredients
For the Main Batter:
2 cups all-purpose flour (I like to use a good quality unbleached all-purpose flour for the best texture)
1 teaspoon baking soda
1/2 teaspoon baking powder
1 teaspoon ground cinnamon
1/4 teaspoon ground nutmeg (optional, but it adds such a lovely warmth!)
1/2 teaspoon salt
1 1/2 cups granulated sugar (you can reduce this slightly if you prefer a less sweet loaf)
2 large eggs, at room temperature
1 cup vegetable oil (or a neutral-flavored oil like canola or grapeseed. I’ve even tested this with melted coconut oil and it was great too!)
1 teaspoon vanilla extract
1 1/2 cups grated zucchini, well-drained (about 2 medium zucchinis)
For the Filling (Optional, but highly recommended for swirls!):
1/2 cup packed brown sugar
1 teaspoon ground cinnamon
1/4 cup chopped walnuts or pecans (optional)
For the Glaze:
1 cup powdered sugar
2-3 tablespoons milk (any kind works, but I find whole milk gives the creamiest consistency)
1/2 teaspoon vanilla extract (or a tiny splash of lemon juice for a zesty kick!)
Step-by-Step Instructions
Step 1: Preheat & Prep Pan
First things first, let’s get your oven preheated to 350 degrees Fahrenheit (175 degrees Celsius). Now, grab a 9×5 inch loaf pan. I like to grease it really well with butter or cooking spray, and then lightly flour it. This ensures that beautiful loaf slides right out when it’s done. Some people like to line it with parchment paper, leaving an overhang on the sides – that’s a great trick if you’re worried about sticking!
Step 2: Mix Dry Ingredients
In a large bowl, whisk together the flour, baking soda, baking powder, cinnamon, nutmeg (if you’re using it), and salt. Give it a good whisk until everything is nicely combined. This step is important because it distributes the leavening agents evenly, which helps your bread rise beautifully. If you just dumped everything in, you might get some weird pockets where it rises more than others. Nobody wants that!
Step 3: Mix Wet Ingredients
In a separate medium bowl, whisk together the granulated sugar, eggs, vegetable oil, and vanilla extract until they’re all well combined. It should look smooth and slightly thickened. I always make sure my eggs are at room temperature for this; it helps them emulsify better with the oil, leading to a more tender crumb.
Step 4: Combine
Now, pour the wet ingredients into the bowl with the dry ingredients. Using a spatula or a wooden spoon, gently fold them together until *just* combined. Be careful not to overmix! Seriously, this is the most common mistake people make with quick breads. A few streaks of flour are perfectly fine; they’ll disappear as you add the zucchini. Overmixing develops the gluten too much, which can make your bread tough.
Step 5: Prepare Filling
If you’re making the filling swirl, now’s the time. In a small bowl, mix together the brown sugar and cinnamon. If you’re adding nuts, toss them in here too.
Step 6: Layer & Swirl
Gently fold in the grated zucchini until it’s just distributed throughout the batter. Then, pour about half of the batter into your prepared loaf pan. Sprinkle the brown sugar and cinnamon mixture (and nuts, if using) over the top. Dollop the remaining batter over the filling, trying to cover it as much as possible. Now, here’s the fun part: take a knife or a skewer and gently swirl the filling into the batter. Don’t go crazy; just a few passes will create beautiful ribbons of cinnamon goodness throughout your loaf.
Step 7: Bake
Pop that pan into your preheated oven and bake for 50-60 minutes. The best way to check if it’s done is to insert a toothpick into the center of the loaf. If it comes out clean or with a few moist crumbs attached, it’s ready! If there’s wet batter on the toothpick, give it another 5-10 minutes and check again. Ovens can be so finicky, so just trust your intuition and the toothpick test!
Step 8: Cool & Glaze
Once it’s baked, let the loaf cool in the pan for about 10-15 minutes. This is crucial – if you try to take it out too soon, it might fall apart. After that initial cooling, carefully turn the loaf out onto a wire rack to cool completely. Once it’s fully cool (and I mean *completely* cool, otherwise your glaze will melt right off!), it’s time for the glaze. Whisk together the powdered sugar, milk, and vanilla extract in a small bowl until you have a smooth, pourable consistency. You can add more or less milk to get it just right. Drizzle it over the top of the cooled loaf and let it set a bit before slicing.
Step 9: Slice & Serve
Now for the moment of truth! Slice your beautiful, homemade zucchini bread with a sharp knife. It’s best served at room temperature, but honestly, I’ve snuck a warm slice fresh from the oven more times than I can count. Enjoy the moist crumb, the subtle spice, and that delightful swirl!
What to Serve It With
This zucchini bread is a true chameleon when it comes to serving. For a cozy
For Breakfast:
This is pure perfection with a steaming mug of coffee or a strong cup of tea. I love it plain, but sometimes a little smear of butter takes it over the top. The subtle sweetness is just enough to wake up your taste buds without being overwhelming first thing in the morning.
For Brunch:
For a more elegant brunch spread, I’ll slice it a little thinner and arrange it nicely on a platter. It pairs wonderfully with fresh fruit salad or a dollop of Greek yogurt. If you’re serving it alongside other sweet items like pancakes or waffles, it offers a slightly more grounded, comforting flavor profile. A mimosa or a sparkling cider is also a lovely companion!
As Dessert:
While it’s delicious on its own, you can certainly elevate it for dessert. A scoop of vanilla bean ice cream melting into a warm slice is pure decadence. Or, serve it with a light raspberry coulis or a dollop of freshly whipped cream. It’s also fantastic alongside a cheese board – the slight sweetness and spice can be a surprising and delightful contrast to savory cheeses.
For Cozy Snacks:
This is where it truly shines for me. After dinner, or for an afternoon pick-me-up, it’s just the best. I’ll often just grab a slice (or two!) and settle in with a good book. It’s the ultimate comfort food, and it pairs wonderfully with hot chocolate or a glass of milk. It’s that perfect treat that feels indulgent but also somehow nourishing.
Top Tips for Perfecting Your Ultimate Zucchini Bread
Over the years, I’ve learned a thing or two about making the best possible zucchini bread. It’s not complicated, but a few key details make a world of difference.
Zucchini Prep: The most crucial step is draining the zucchini well. Grate your zucchini using the large holes of a box grater. Then, place the grated zucchini in a fine-mesh sieve set over a bowl and let it sit for at least 10-15 minutes. You’ll be amazed at how much liquid comes out! You can even gently press it with a spoon to speed things up. Excess moisture is the enemy of a good quick bread, leading to a gummy texture. Don’t skip this!
Mixing Advice: I cannot stress this enough: do NOT overmix the batter. Once you add the wet ingredients to the dry, mix only until you no longer see large streaks of dry flour. A few small lumps are perfectly fine. Overmixing will result in a tough, dense loaf. Trust me, I’ve been there!
Swirl Customization: If you’re making the cinnamon-sugar swirl, don’t over-swirl. Too much swirling will cause the sugar mixture to become gummy and sink to the bottom. Just a few gentle passes with a knife or skewer is all you need to create beautiful marbling. You can also experiment with adding a tablespoon or two of cocoa powder to the filling for a chocolate-swirl version, or even a swirl of softened cream cheese mixed with a little sugar.
Ingredient Swaps: I’ve had great success substituting half of the all-purpose flour with whole wheat flour for a slightly nuttier flavor and added fiber. You can also swap out the granulated sugar for brown sugar if you prefer a deeper, caramel-like sweetness, but you might need to adjust the liquid slightly as brown sugar can hold more moisture. For a dairy-free version, use a plant-based milk like almond or soy milk in the glaze, and ensure your oil is plant-based.
Baking Tips: Always start checking for doneness a bit before the recommended baking time. Ovens vary, and you don’t want to overbake this delicious loaf. If the top is browning too quickly but the inside isn’t cooked, you can loosely tent the loaf with aluminum foil for the remainder of the baking time. Placing your loaf pan in the center of the oven will ensure even heat distribution.
Glaze Variations: If you’re not a fan of a thick glaze, you can make a thinner drizzle by adding more milk. For a different flavor profile, try adding a pinch of ground cardamom or a tiny bit of orange zest to the glaze. If you’re short on time or prefer a less sweet finish, a simple dusting of powdered sugar or a sprinkle of cinnamon sugar after cooling is also lovely.
Storing and Reheating Tips
This zucchini bread is so good, it’s hard to imagine any leftovers, but if you’re lucky enough to have some, storing it properly will keep it delicious for days.
Room Temperature: Once the loaf is completely cooled, you can store it in an airtight container at room temperature for up to 3 days. Make sure it’s fully cooled before sealing it up, or condensation can form and make it soggy. I often just wrap the whole loaf tightly in plastic wrap, then in foil, and it stays wonderfully moist.
Refrigerator Storage: If you live in a very warm climate, or if you want it to last a bit longer, refrigerating it is a good option. Store it in an airtight container in the fridge for up to a week. The texture might firm up slightly, but it will still be perfectly enjoyable. The key is that airtight container to prevent it from drying out.
Freezer Instructions: This bread freezes beautifully, making it perfect for baking ahead. Once completely cooled, wrap the loaf tightly in plastic wrap, then in a layer of aluminum foil, or place it in a freezer-safe bag. It will keep well in the freezer for up to 3 months. To thaw, unwrap it and let it come to room temperature on the counter for a few hours. You can also gently reheat slices in a toaster oven or a low oven if you prefer them warm.
Glaze Timing Advice: For the best results, I always recommend glazing the loaf *after* it has completely cooled and just before serving or storing at room temperature. If you refrigerate or freeze it with the glaze on, the glaze can sometimes become a bit sticky or weep. If you plan to freeze it, it’s best to bake and cool the loaf, then freeze it plain. Glaze it once it has thawed and come back to room temperature.
Frequently Asked Questions
Final Thoughts
There you have it – my go-to recipe for the most incredible zucchini bread. It’s more than just a recipe; it’s a feeling, a memory, and a guaranteed crowd-pleaser. It’s the perfect example of how simple, wholesome ingredients can come together to create something truly special and comforting. I truly hope you give this a try and that it becomes a cherished recipe in your own kitchen, just like it is in mine. It’s amazing how a humble vegetable can transform into such a delightful treat!
If you love this recipe, you might also enjoy my Lemon Blueberry Scones or my Chocolate Chip Banana Bread – they’re also family favorites that bring that same warm, homemade feeling. I can’t wait to hear how your zucchini bread turns out! Please share your thoughts, any variations you tried, or even just tell me how much your family loved it in the comments below. Happy baking, everyone!
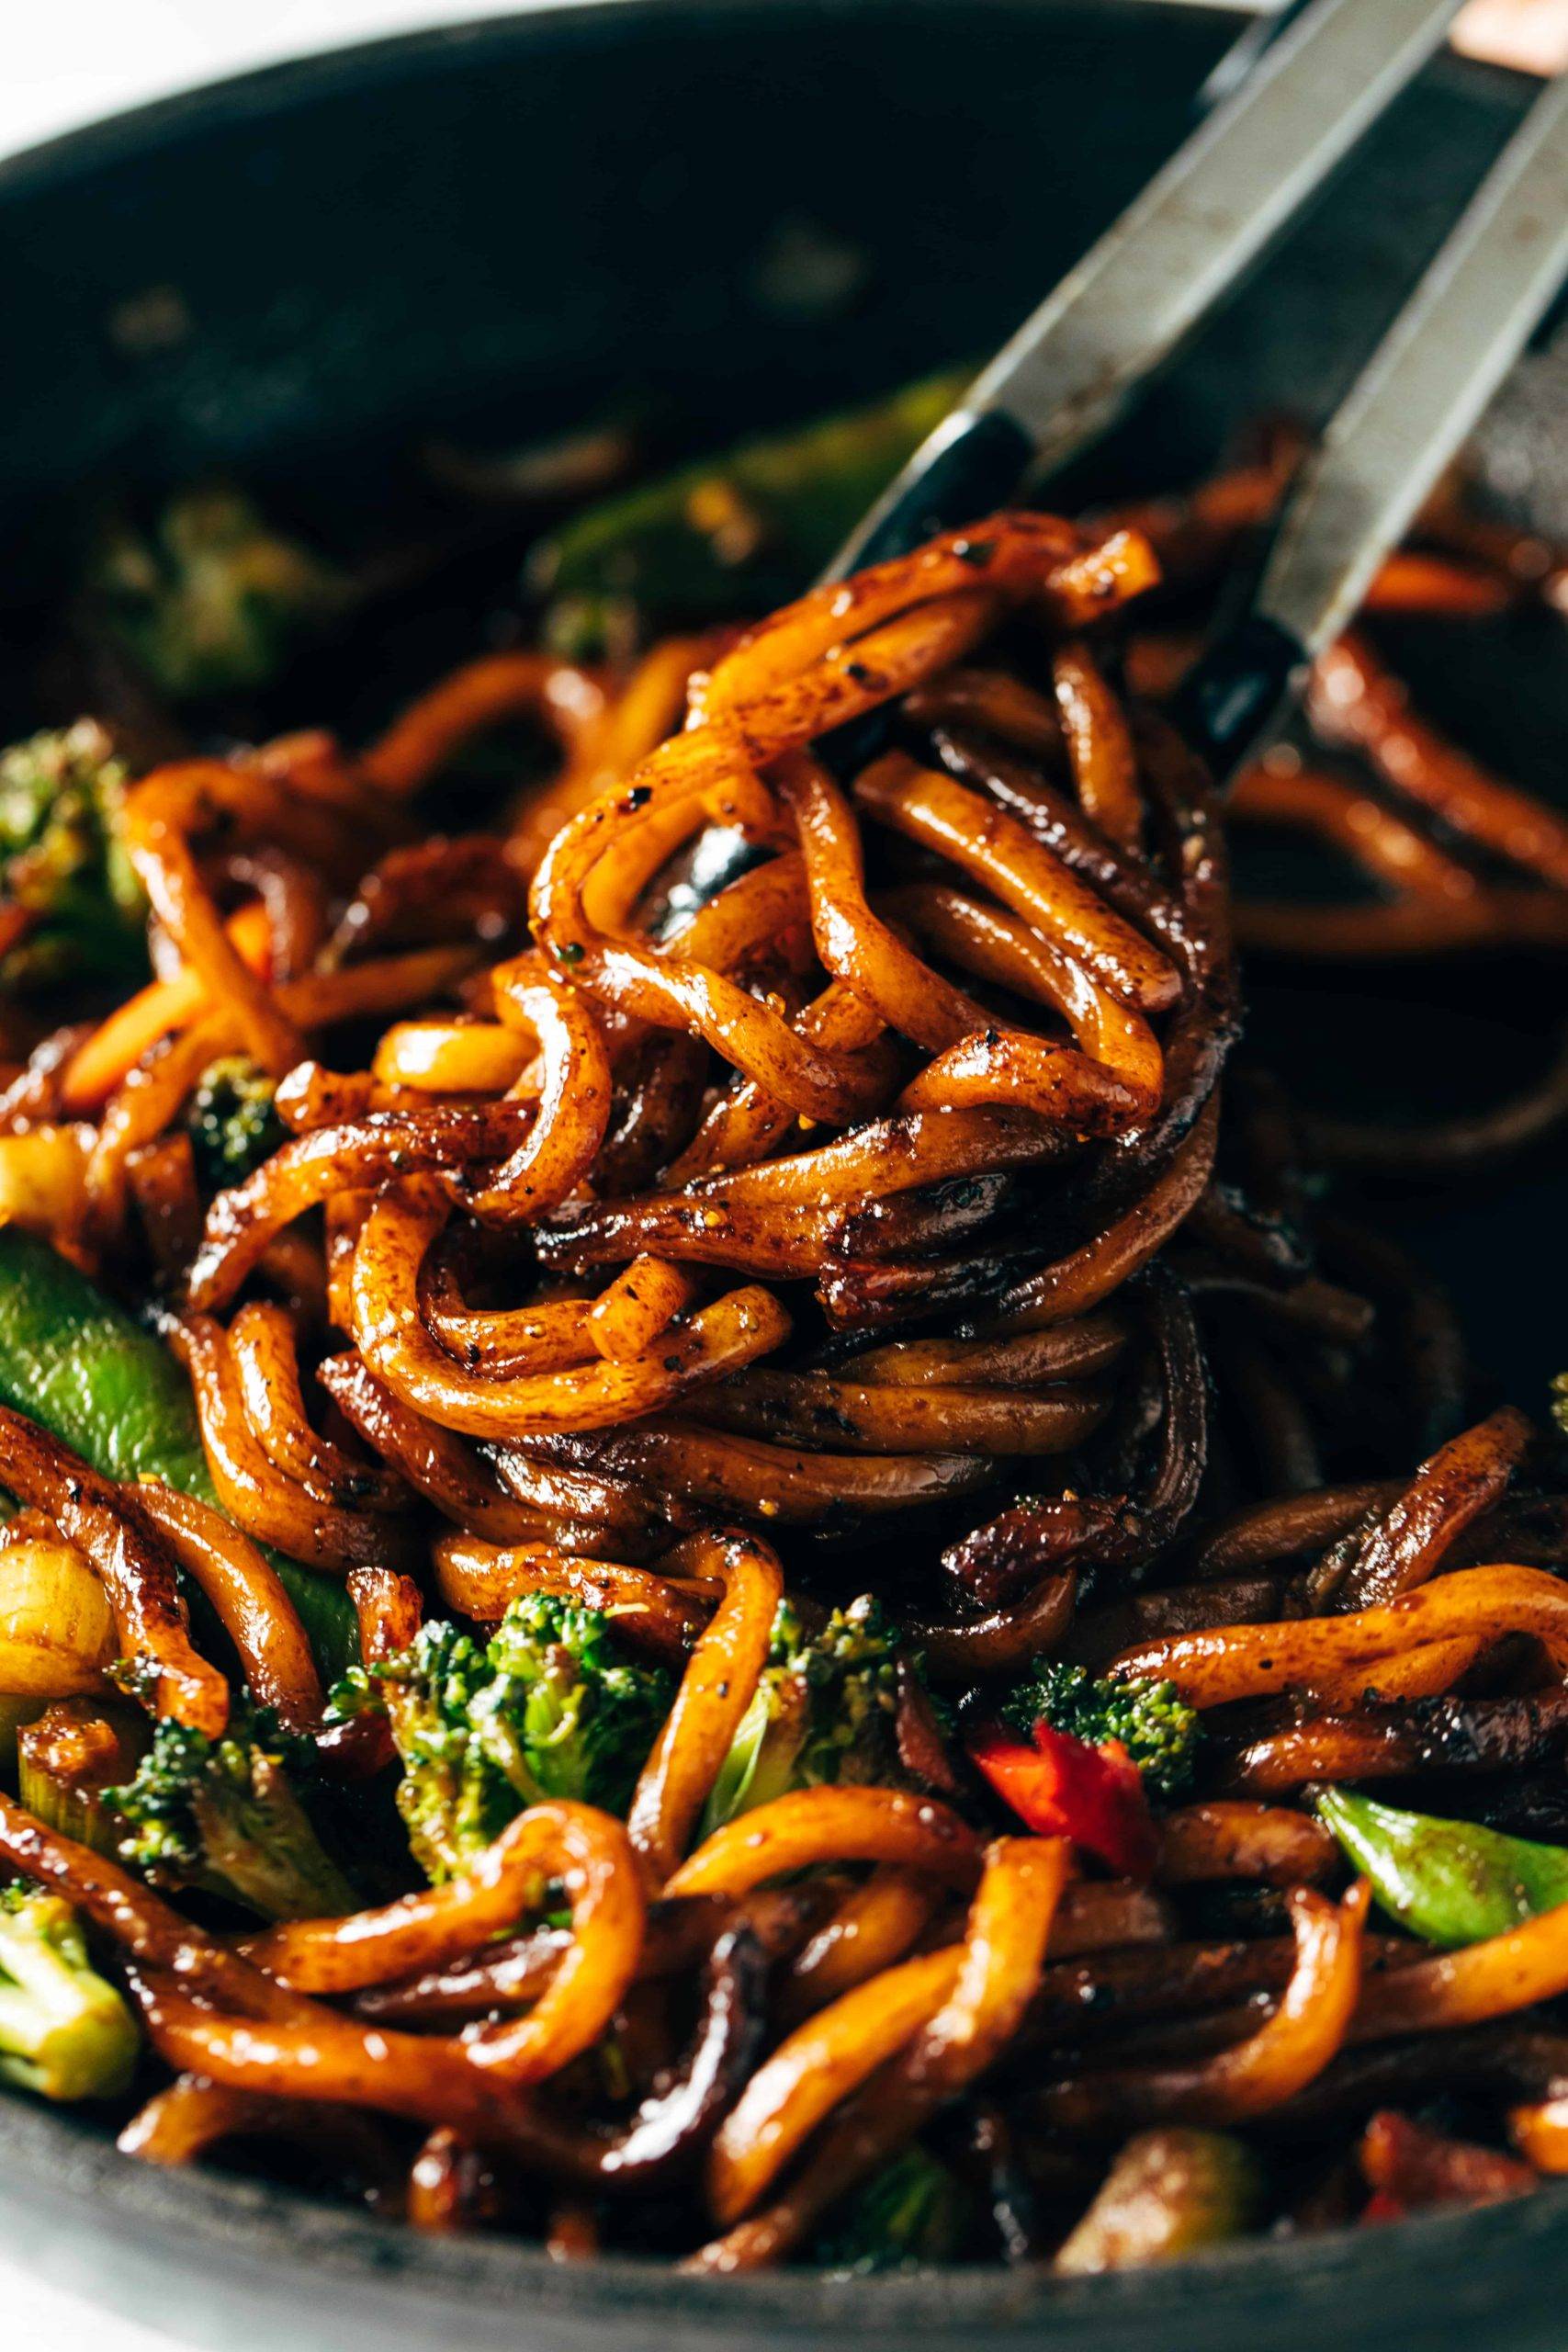
Black Pepper Stir-Fried Udon
Ingredients
Method
- Combine all sauce ingredients in a jar and shake well.
- Heat a nonstick skillet over medium-high heat. Add a swirl of oil. Add the udon noodles and enough sauce to coat. Stir-fry until caramelized and slightly browned.
- Add the stir-fry vegetables and pour a little more sauce over everything. Toss for 2-3 minutes until the vegetables are tender-crisp and everything is browned and sticky.
- Remove from heat. Stir in the minced garlic and a generous amount of freshly ground black pepper.