Presidential Chili Recipe: How to Make It Easy
There’s something about a warm, gooey muffin that instantly takes me back to childhood mornings, sitting at the kitchen table with a cozy blanket wrapped around my shoulders. I remember my mom slicing them thick, the smell of cinnamon wafting through the house, and my little sister sneaking an extra piece when she thought no one was looking. Over the years, I’ve tweaked and perfected this zucchini swirl muffin recipe, and let me tell you — these aren’t just any muffins. They’re my secret weapon on busy mornings, a perfect after-dinner treat, and honestly, a sweet little indulgence I always keep in mind when I want something homemade but don’t want to fuss much. And the best part? That rich, tender crumb, swirled with cinnamon and a surprise dollop of cream cheese filling, keeps everyone coming back for seconds. This recipe’s a lifesaver when you’re craving something sweet and satisfying but want to sneak in a little veggie love too. So, grab your zucchinis — or whatever’s languishing at the bottom of your fridge — and let’s get baking! Trust me, your family’s gonna ask for this all the time.
What is Zucchini Swirl Muffins?
Think of zucchini swirl muffins as the lovechild of a cozy breakfast muffin and a decadent dessert. It’s essentially a tender, moist muffin with a generous swirl of cinnamon-spiced batter and a creamy, dreamy filling tucked inside. The name says it all: fresh zucchini, grated so finely that it practically melts into the batter, adds moisture and a sneaky veggie boost. The swirl itself is what makes these muffins stand out — a swirl of cinnamon, sugar, and cream cheese that creates beautiful marbled patterns once baked. They’re inspired by classics like cinnamon rolls and coffee cake, but in muffin form — portable, adorable, and just as flavor-packed. The zucchini keeps things moist and tender without overwhelming the flavor, so it’s perfect for sneaking extra veggies into a treat your kids love. I’ve made these countless times for weekend brunches, school snacks, or whenever I want something that feels indulgent but isn’t totally loaded with sugar. Plus, they freeze beautifully, making mornings a breeze. Basically, they’re a small slice of heaven that’s surprisingly good for you — I promise!
Why you’ll love this recipe?
What I love most about these zucchini swirl muffins is how surprisingly versatile and easy they are. You don’t need fancy ingredients or hours of prep — just basic pantry staples, a little grated zucchini, and some love. The flavor? Absolutely incredible. That warm cinnamon aroma hits your kitchen the second they go into the oven, and the first bite is soft, moist, and packed with a light sweetness that’s just right. The cream cheese filling gives it a touch of richness that elevates it beyond an ordinary muffin — it’s like biting into a tiny, portable dessert. And honestly, these muffins are budget-friendly too. Instead of making a big cake or complicated pastry, you get perfectly portioned bites that satisfy any sweet craving, no matter the time of day. They’re also super versatile. Want more fruit? Toss in some blueberries or make a chocolate chip variation to switch things up. My kids ask for these all the time, especially when I sneak in that extra zucchini for a sneaky veggie boost — they don’t even notice! The fact that they’re portable, freeze well, and are simple to make makes this recipe a total winner in my kitchen. Plus, I think what makes me love these most is that every batch reminds me of cozy mornings with my family, laughter, and the warm smell of cinnamon filling the house. It’s comfort at its best.
How do you make Zucchini Swirl Muffins?
Quick Overview
This recipe comes together quickly and easily — no complicated steps or fancy gadgets needed. First, you grated the zucchini super fine so it blends right into the batter, adding moisture without changing the texture. Then, you mix up a simple vanilla muffin base, swirl in that cinnamon-sugar goodness along with a luscious cream cheese mixture, and bake until golden. What’s special about this method is how simple it is to create those beautiful marbled swirls — just a gentle swirl of the filling into the batter, and you’re good to go. The baking process fills your kitchen with that nostalgic cinnamon aroma, and in about 25-30 minutes, you’ve got muffins that look great and taste even better. The secret here is not overmixing — you want the batter to stay tender, so mix just enough until everything’s combined. And trust me, the first time I tried this, I was worried the swirl wouldn’t show well, but a gentle swirl keeps the beautiful pattern and keeps every bite as pretty as it is delicious.
Ingredients
For the Main Batter:
– 1 ½ cups all-purpose flour (I prefer unbleached for a richer flavor)
– 1 teaspoon baking powder
– ½ teaspoon baking soda
– ½ teaspoon salt
– 1 teaspoon cinnamon (because everything’s better with cinnamon!)
– ½ cup granulated sugar
– ½ cup brown sugar (adds that depth and molassesy richness)
– ½ cup vegetable oil (or melted coconut oil if you prefer a hint of coconut flavor)
– 2 large eggs
– 1 teaspoon vanilla extract
– 1 cup grated zucchini (squeeze out excess moisture – trust me on this!)
For the Filling:
– 4 oz cream cheese, softened
– ¼ cup granulated sugar
– 1 teaspoon vanilla extract
– 1 teaspoon cinnamon (more if you’re feeling extra cozy!)
For the Glaze (optional but recommended):
– ½ cup powdered sugar
– 1-2 teaspoons milk or cream
– A splash of vanilla or lemon zest for flavor variation
Step-by-Step Instructions
Step 1: Preheat & Prep Pan
Set your oven to 375°F (190°C). Line a muffin tin with paper liners or grease it well — I always do this over the weekend when I know I’ll be baking a bunch. Having muffins ready to grab on busy mornings is a total game-changer. Also, grate your zucchini beforehand and squeeze out as much moisture as possible — this step keeps the batter moist but not watery.
Step 2: Mix Dry Ingredients
In a large bowl, whisk together the flour, baking powder, baking soda, salt, and cinnamon. I find that mixing the dry ingredients first prevents clumps and gives a better rise. Once combined, set aside.
Step 3: Mix Wet Ingredients
In another bowl, whisk together the sugars, oil, eggs, and vanilla until smooth. I usually do this by hand to feel the consistency. Add the grated zucchini and mix until it’s evenly distributed. This step is where I’ve learned to be gentle; overmixing here can make the muffins dense — trust me, less is more.
Step 4: Combine
Add the wet mixture to the dry ingredients with a spatula or wooden spoon. Fold gently — no need to beat out all the air. Stop mixing once just combined. It’s okay if a few streaks of flour are visible; you want a tender crumb, not a gluten-filled rubber band.
Step 5: Prepare Filling
In a small bowl, beat the softened cream cheese, sugar, vanilla, and cinnamon until smooth. If it’s too runny, pop it into the fridge for a few minutes — you want a firm but spreadable consistency. For a fun flair, sprinkle in some chopped nuts or mini chocolate chips if you’re feeling decadent.
Step 6: Layer & Swirl
Pour half of the batter into the muffin cups. Using a small spoon or piping bag, dollop teaspoons of the cream cheese filling on top. Cover with the remaining batter carefully. Using a toothpick or skewer, gently swirl the filling into the batter — just a few twisting motions, enough to create marbling but not so much that it all blends together.
Step 7: Bake
Pop the muffins into the oven and bake for 25-30 minutes. They’re done when a toothpick inserted in the center comes out clean, and the tops are golden. Keep an eye toward the end — every oven is different, and I’ve had muffins that finished a little earlier or later. Do the toothpick test, and you’re good.
Step 8: Cool & Glaze
Let the muffins cool in the tin for about 5 minutes, then transfer to a wire rack. If you’re glazing, mix the powdered sugar with a splash of milk until it’s smooth and pourable. Drizzle over the muffins once they’re just barely warm — I love the glossy finish and that extra touch of sweetness. If you prefer, dust them with a little powdered sugar instead.
Step 9: Slice & Serve
These muffins are best enjoyed warm or at room temperature. For a special touch, serve with a cup of coffee or a glass of cold milk. They look adorable on a plate with a sprinkle of extra cinnamon or a dollop of whipped cream. My family just can’t get enough of these — they vanish in minutes at my house!
What to Serve It With
This recipe is versatile enough to serve at any time of day. For breakfast, pair it with a steaming mug of coffee or chai — the cinnamon smell alone is enough to wake you up. I love serving these muffins alongside a fresh fruit salad or some yogurt topped with honey and nuts for a balanced morning boost. They’re also perfect for brunch, with a spread of butter, more fresh fruit, or a smear of jam. My kids ask for these as an after-dinner treat, perhaps with a drizzle of honey or a scoop of vanilla ice cream on the side. For casual snacks, I wrap a muffin in parchment and stash them in the fridge — they reheat beautifully in the toaster or microwave. Trust me, these don’t just look and taste great; they make your house smell like a cozy bakery anytime you want — and they feel like a warm hug, no matter how busy your day is.
Top Tips for Perfecting Your Zucchini Swirl Muffins
After making these dozens of times, I’ve picked up a few tricks to really perfect them. First, when grating zucchini, always squeeze out as much moisture as possible. I use a clean kitchen towel and do a little twist — it’s surprising how much water can hide in those zucchinis! Too much moisture can make the batter too runny, which results in flat, dense muffins. Second, don’t overmix the batter once you add the wet ingredients; it’ll develop gluten and toughen the muffins. A gentle touch is key. When swirling the filling, take your time — a light, swirling motion creates those beautiful marbled effects and ensures every bite has a little burst of cream cheese goodness. I’ve tested this with almond milk instead of regular milk, and honestly, it made the muffins even more tender and subtly nutty — totally worth experimenting! For ingredient swaps, you can try coconut sugar instead of brown sugar or swap out the flour for a gluten-free blend. Just remember to adjust the liquids a bit, as gluten-free flours often absorb more moisture. Baking-wise, always position your oven in the middle rack and keep an eye on the muffins after 20 minutes, since ovens vary. I like to peek through the window for that perfect golden top without overbaking. And finally, if you want a more decadent glaze, mix in a spoonful of mascarpone or cream cheese for extra richness. Trust me, every little tweak makes these muffins just a tad better — and that’s part of the fun!
Storing and Reheating Tips
These muffins stay fresh surprisingly long, especially when stored properly. At room temperature, they’re best eaten within a day or two — I usually cover them with a clean cloth or store in an airtight container. If you want to keep them longer, pop them into an airtight container in the fridge for up to 4 days. They’ll be a little firmer but still delicious. For longer storage, freezing is the way to go: wrap each muffin individually in plastic wrap or slide into a freezer-safe bag. They can last up to 3 months and reheat beautifully in the microwave for about 20-30 seconds or in a low oven (about 300°F) for a few minutes. If you’re adding the glaze, I recommend freezing the muffins without it, then glazinge when they’re just warm. That way, the glaze stays shiny and fresh. Just make sure to thaw at room temperature before serving — this keeps that perfect moist crumb intact and prevents sogginess. Personally, I love grabbing one straight from the freezer on busy mornings — the smell once it’s warmed up is enough to make everyone’s day better. These muffins are truly forgiving in storage and reheating — a little planning keeps them tasting fresh as when they first came out of the oven.
Frequently Asked Questions
Final Thoughts
If you’ve ever wanted a muffin that’s just a little bit special but still simple enough to whip up on a weekday, these zucchini swirl muffins are your new best friend. They’re a wonderful way to sneak in some extra veggies without anyone noticing, all while enjoying that cinnamon-scented, moist crumb that makes mornings better and snacks more satisfying. I’ve made these dozens of times — each batch a little more perfect than the last — and every time, I fall in love all over again. They’re humble, cozy, and somehow feel like a warm hug in muffin form. Whether you’re baking for your family, a weekend brunch, or just that midnight craving, trust me — these will bring smiles around your table. I’d love to hear how yours turn out, or if you add your own twist — swap chocolate chips for fruit, go gluten-free, or add a splash of lemon zest. Happy baking, friends! Remember, the secret ingredient is always a little love. Enjoy your muffins and don’t forget to share the joy!
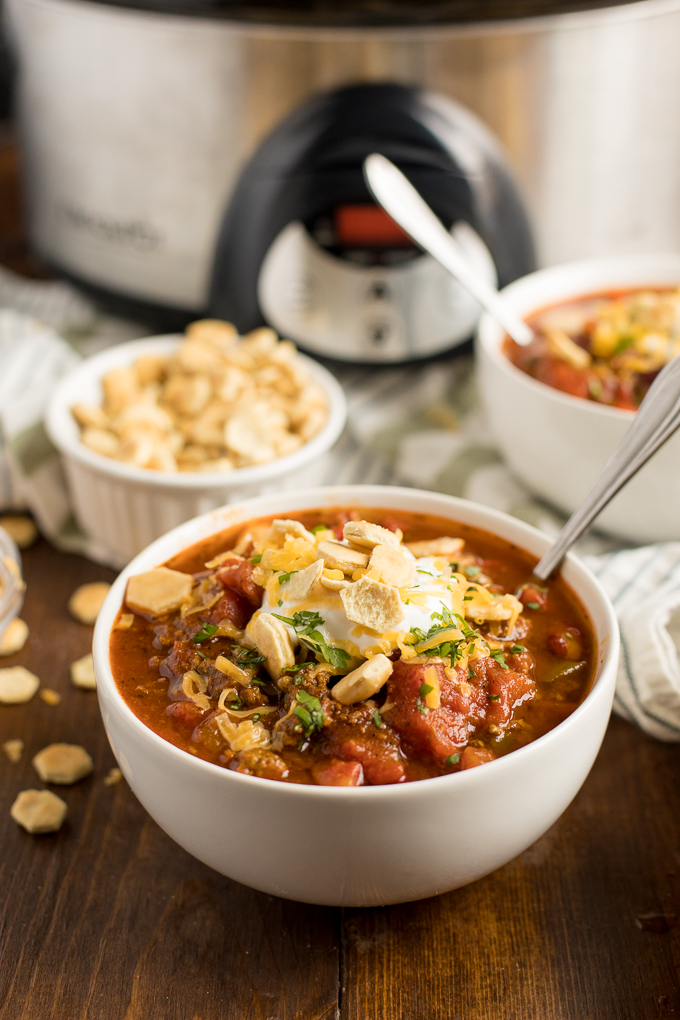
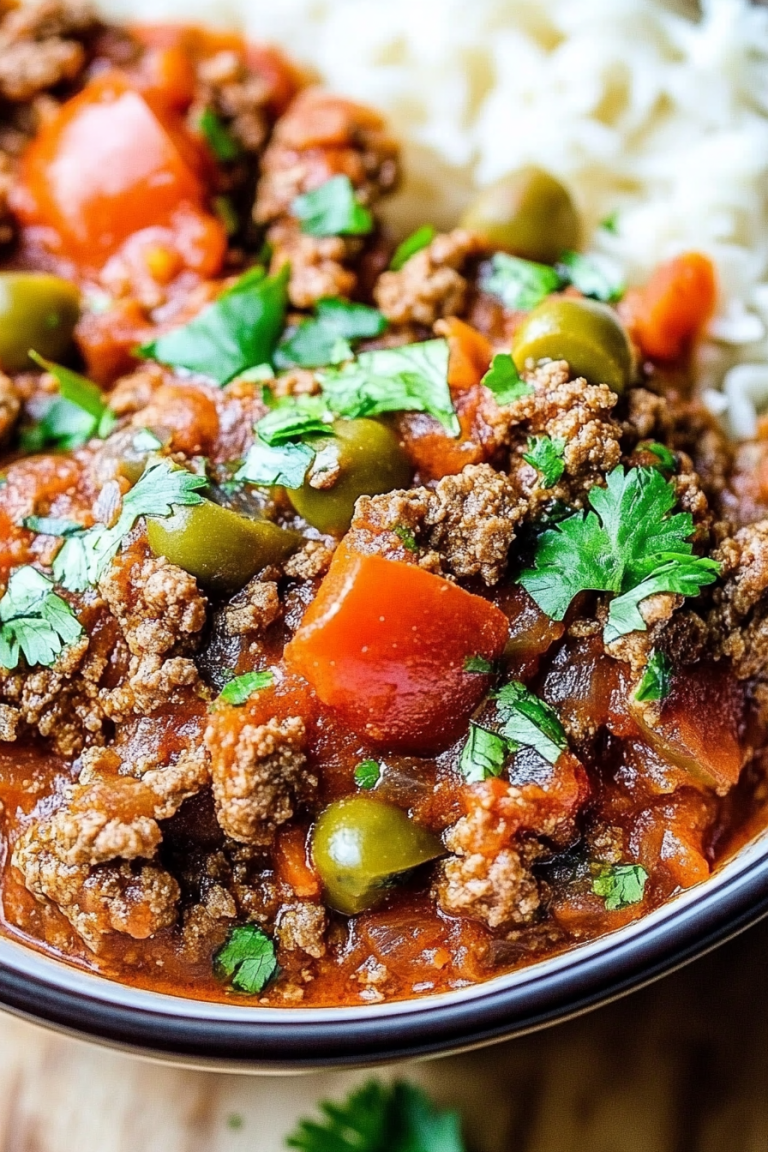
Presidential Chili
Ingredients
Method
- Brown the ground beef on the stove top. Drain the fat and transfer to a slow cooker.
- Add diced tomatoes, garlic, onion, green pepper, kidney beans, and spices into the slow cooker. Stir well to combine.
- Cover and cook on low for 8 hours. Stir occasionally and serve hot.