Peanut Butter Cupcakes How to Bake Bliss
There’s something about the smell of a freshly baked cake that instantly takes me back to my childhood — warm afternoons spent helping my mom in the kitchen, sneaking bits of batter tasting as we went. Over the years, I’ve tested so many versions of chocolate cake, but nothing beats the charm of this zucchini chocolate velvet cake. It’s surprisingly simple, incredibly moist, and honestly, it’s my go-to when I need a quick dessert that feels like a treat but uses everyday ingredients. Plus, I love how sneaky it is — my kids ask for seconds, not even realizing they’re eating a vegetable! My favorite part? The way the zucchini melts into the batter, making each bite super tender and fudgy, without any weird vegetable aftertaste. Trust me on this one: it’s a family favorite, and it’s disappeared in minutes whenever I make it for friends. It’s like a secret handshake — a cozy, warm hug of chocolate with a little secret hiding inside.
What is Zucchini Chocolate Velvet Cake?
Think of it as the chocolate cake you already love, but with a little twist — instead of butter or oil alone, it’s boosted with grated zucchini. It’s essentially a moist, fudgy cake that’s perfect for any occasion, from casual family dinners to potlucks. The name “velvet” comes from how insanely tender and melt-in-your-mouth the texture is, thanks to the zucchini’s moisture and the way I gently mix everything. The zucchini itself is pretty much invisible once baked, making this a sneaky way to get some greens into the kids’ diet (not that they’ll notice — they just say it’s ‘the best cake ever’). When I first discovered this recipe, I was skeptical — I mean, zucchini in cake? But I promise, the flavor is rich and chocolatey, and the texture, wow, it’s something special. Think of it as the mature, slightly more sophisticated cousin of your classic chocolate chip muffin — only here, it’s a full, decadent cake.
Why you’ll love this recipe?
Honestly, what I love most about this zucchini chocolate velvet cake is how it delivers incredible flavor with barely any fuss. It’s a lifesaver on busy nights or when friends drop by unannounced — I whip this up in no time, and it always gets rave reviews. The secret ingredient, zucchini, keeps the cake ridiculously moist, so even if you’re tired or in a hurry, it’s hard to mess up. Plus, it’s budget-friendly — you only need pantry staples like cocoa powder, flour, sugar, and zucchini, which I usually have lying around. And if you want to get creative, there are so many ways to customize this: add a dash of espresso powder for depth, swap out the chocolate chips for chunks of caramel, or top it with a luscious cream cheese frosting. I tested this with almond milk, and honestly, it made it even creamier — good thing I always keep a carton in the fridge! This cake is versatile enough for a cozy night at home or a family celebration, and my kids actually ask for it all the time, sometimes even asking for breakfast (don’t judge — it’s practically a veggie casserole, right?). It’s one of those recipes that you’ll find yourself making again and again, turning to it whenever you need a little chocolate pick-me-up, guilt-free and downright delicious.
How do I make Zucchini Chocolate Velvet Cake?
Quick Overview
This cake is honestly so easy, you’ll wonder why you didn’t try it earlier. It all comes together in one bowl — mix the dry ingredients, blend the wet, fold in grated zucchini and chocolate chips, then bake. The key is not overmixing — you want that tender, velvety crumb. After baking, let it cool a bit before glazing or serving it as is. It’s basically a one-bowl wonder that’s perfect for lazy mornings or last-minute snack emergencies. The prep takes about 15 minutes, and baking is roughly 30, which means in just under an hour, you have a luscious, moist cake ready to dazzle everyone. The oven’s aroma alone will make your house smell like a bakery, and trust me, this one’s a total crowd-pleaser. Better yet, it stays moist for days, making it perfect for transport to picnics or brunches. It’s honestly the kind of recipe I keep in my back pocket — simple enough for a beginner but impressive enough for special occasions.
Ingredients
For the Main Batter:
– 1 ½ cups all-purpose flour (or a blend of gluten-free flours if you prefer)
– ¾ cup unsweetened cocoa powder (use good quality for rich flavor)
– 1 ½ teaspoons baking powder
– ½ teaspoon baking soda
– ½ teaspoon salt
– 1 cup granulated sugar (trust me, don’t cut this down — it balances the chocolate)
– ½ cup vegetable or canola oil
– 2 large eggs
– 1 teaspoon vanilla extract
– ⅓ cup milk (dairy or plant-based — I tested with almond milk and loved how creamy it made it)
– 1 cup grated zucchini (squeezed dry — more on that in the tips!)
For the Filling (optional but highly recommended):
– ½ cup mini chocolate chips or chopped dark chocolate
– ¼ cup chopped nuts (pecans, walnuts, or almonds are great)
– 1 tablespoon instant espresso powder (if you want an extra flavor depth)
For the Glaze:
– ½ cup powdered sugar
– 1-2 tablespoons milk or cream
– 1 teaspoon vanilla extract
– Optional cocoa powder or melted chocolate for extra richness
Step-by-Step Instructions
Step 1: Preheat & Prep Pan
Set your oven to 350°F (175°C). Grease your favorite cake pan — I use an 8-inch round, but a square pan works fine too. Line the bottom with parchment for easy removal. I always do this — it saves me from pulling apart my masterpiece trying to get it out of the pan. Then, set aside while you mix up the batter.
Step 2: Mix Dry Ingredients
In a large bowl, whisk together the flour, cocoa powder, baking powder, baking soda, and salt. This step ensures everything is evenly distributed, so you won’t get pockets of baking soda or salt. It might seem like a small thing, but it makes all the difference for that uniformly tender crumb.
Step 3: Mix Wet Ingredients
In another bowl, beat the eggs with sugar, oil, and vanilla until smooth and slightly frothy. Add the milk and give it a quick stir. I’ve learned that slightly warm milk helps the batter come together better, especially if you’re using almond or oat milk. Then, fold in the grated zucchini — squeeze out as much moisture as possible with a clean kitchen towel or paper towel before adding it in. You want moisture, but not a soup in your batter.
Step 4: Combine
Pour the wet mixture into the dry ingredients, and gently fold until just combined. Do not overmix — this is where muffins go wrong, but not our velvety cake. Lumps are totally fine and even desirable here, as they help keep the texture light and fluffy. If you see streaks of flour or cocoa, just fold slightly until they disappear.
Step 5: Prepare Filling
If using chocolate chips or nuts, stir them into the batter gently. If you want a layered effect, you can prepare the filling separately and swirl it in. I love sprinkling a handful of chocolate chips on top before baking for an extra gooey burst of chocolate.
Step 6: Layer & Swirl
Pour the batter into your prepared pan, smoothing the top with the back of a spoon. If you’re adding a swirl (say, peanut butter or cream cheese), dollop your filling and use a toothpick or skewer to gently swirl it through the batter. For marbling, just a few gentle swirls are enough — don’t overdo it! You want pretty ribbons of flavor, not a full-blown mixed mess.
Step 7: Bake
Pop the cake in the oven and bake for 30-35 minutes — start checking at 30 with a toothpick inserted in the center. If it comes out clean, it’s done. Keep in mind that oven quirks happen — bake a minute longer if needed or cover loosely with foil if it starts to brown too fast. The house will smell like heaven, trust me. Let it cool in the pan for about 15 minutes before transferring to a wire rack. This avoids cracking and helps the cake set perfectly.
Step 8: Cool & Glaze
While the cake cools, mix your glaze. Powdered sugar, vanilla, and just enough milk to make a pourable consistency. I often add a pinch more cocoa powder for richness or a splash of coffee liqueur for an adult twist. Pour the glaze over the cooled cake, letting it drip over the edges for that bakery look. It’s the best part, honestly.
Step 9: Slice & Serve
Use a serrated knife and a gentle sawing motion to cut perfect slices. I prefer serving it slightly warm or at room temperature with a big cup of coffee or a glass of cold milk. If you’re feeling fancy, a dollop of whipped cream or a scoop of vanilla ice cream can take it to the next level. Either way, it’s moist, fudgy, and full of chocolate-y goodness — even the zucchini skeptics at my house ask for seconds.
What to Serve It With
This cake is a little chameleon — perfect for breakfast or brunch with a strong coffee and some fresh fruit, like sliced strawberries or blueberries. I often serve it alongside a steaming mug of espresso or a cinnamon latte. For a brunch spread, add some yogurt and a crispy bacon side — the contrast of textures is divine. As a dessert, I keep it simple with a dusting of powdered sugar or a drizzle of caramel. If I want to elevate it a bit, I’ll add a smear of cream cheese frosting or a splash of whipped cream. My family adores it as a cozy snack on chilly afternoons, too — just a slice with a cup of tea is all you need to feel warm and content. It’s a crowd-pleaser that works for pretty much everything — I’ve even packed slices in lunchboxes!
Top Tips for Perfecting Your Zucchini Chocolate Velvet Cake
There are a few tricks I’ve learned after making this dozens of times. First, always squeeze out excess moisture from the zucchini — I keep a clean towel handy for this. It prevents the batter from becoming too watery, which can lead to falls in height and dense crumb. Second, don’t overmix once you add the wet to the dry ingredients. I used to do a frantic stir, but now I fold gently until just combined — much better texture. For swirl option lovers, take your time with the pattern — a few soft twists create beautiful marbling that’s visually enticing. When it comes to ingredient swaps, I’ve tested using coconut sugar and it attenuates the sweetness slightly but adds a lovely caramel note. Gluten-free flours like almond or oat flour work fine, but you need to tweak the liquid a bit. Baked at different oven temps, the cake still turns out well, but I find 350°F is reliable for that perfect fudgy center. For the glaze, adding a tablespoon of melted dark chocolate enriches the flavor while keeping the presentation elegant. All in all, patience and a gentle touch lead to the best results — and don’t forget to savor each bite!
Storing and Reheating Tips
This cake keeps surprisingly well, which is a good thing because it’s hard to stay out of it! For short-term storage, just cover it loosely with foil or plastic wrap and keep at room temperature — it’ll stay moist for about two days. If you want to keep it longer, pop it in an airtight container in the fridge for up to five days. I recommend bringing it to room temp before serving, as it softens the flavors and improves texture. For freezing, wrap tightly in plastic wrap and then foil, and it’ll hold for up to three months. Thaw in the fridge overnight, then reheat gently in the microwave or oven to revive that just-baked softness. Be cautious with the glaze — I prefer to add it after reheating, as it can get a bit runny if the cake isn’t cooled sufficiently. If you’re topping it with whipped cream, add it just before serving to keep it fluffy and fresh.
Frequently Asked Questions
Final Thoughts
This zucchini chocolate velvet cake is more than just a recipe — it’s a little piece of my kitchen, a secret I love to share with friends and family. The fact that it’s full of wholesome zucchini, yet packs a punch of rich chocolate flavor, makes it feel like a real win whenever I serve it. It’s moist, it’s tender, and it has just the right amount of sweetness — I swear, even the pickiest eaters ask for seconds! Plus, it’s endlessly adaptable: add spices, swap out chocolate chips, or swap out the glaze for frosting — whatever suits your mood. Baking this has become a sort of ritual for me, a cozy moment of mindfulness and love. I hope you try it and that it becomes just as cherished in your home as it is in mine. Happy baking, and I can’t wait to hear how yours turns out! Don’t forget to leave a comment or share your own variations — food is always better when we share our stories.

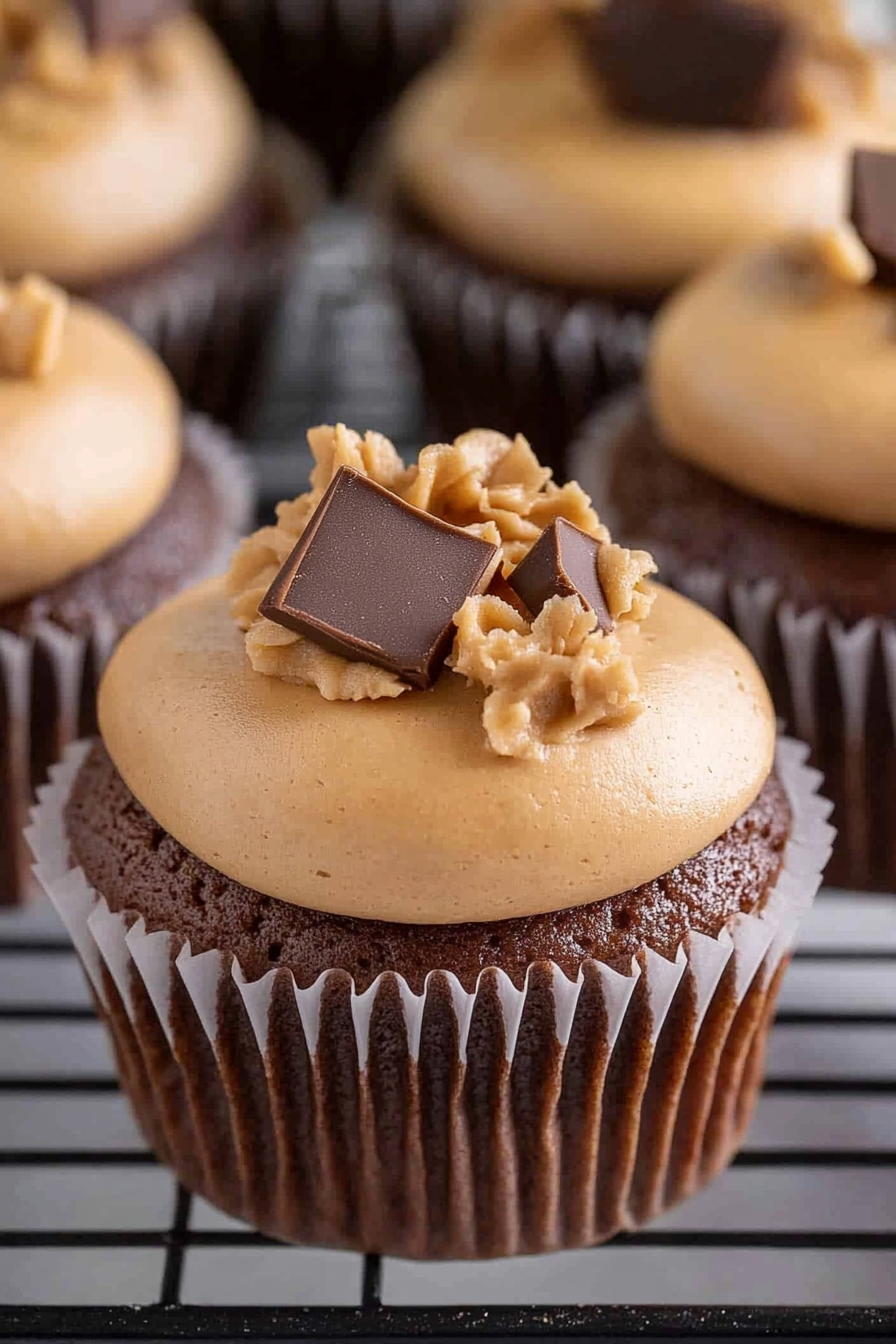
peanut butter cupcakes
Ingredients
Method
- Prepare the cake mix according to the package directions.
- Mix in chopped Reese’s Peanut Butter Cups.
- Pour batter into muffin tins and bake at the temperature specified on the cake mix box for approximately 20 minutes.
- Allow cupcakes to cool completely before applying the peanut butter glaze.
- To prepare the glaze, combine peanut butter chips and cream in a microwave-safe bowl. Microwave for 1 minute and stir.
- Add butter to the mixture and microwave for an additional 30 seconds. Stir well.
- Mix in powdered sugar until smooth.
- Spread the glaze over the cooled cupcakes and garnish each with a Reese’s Mini. Let set before serving.