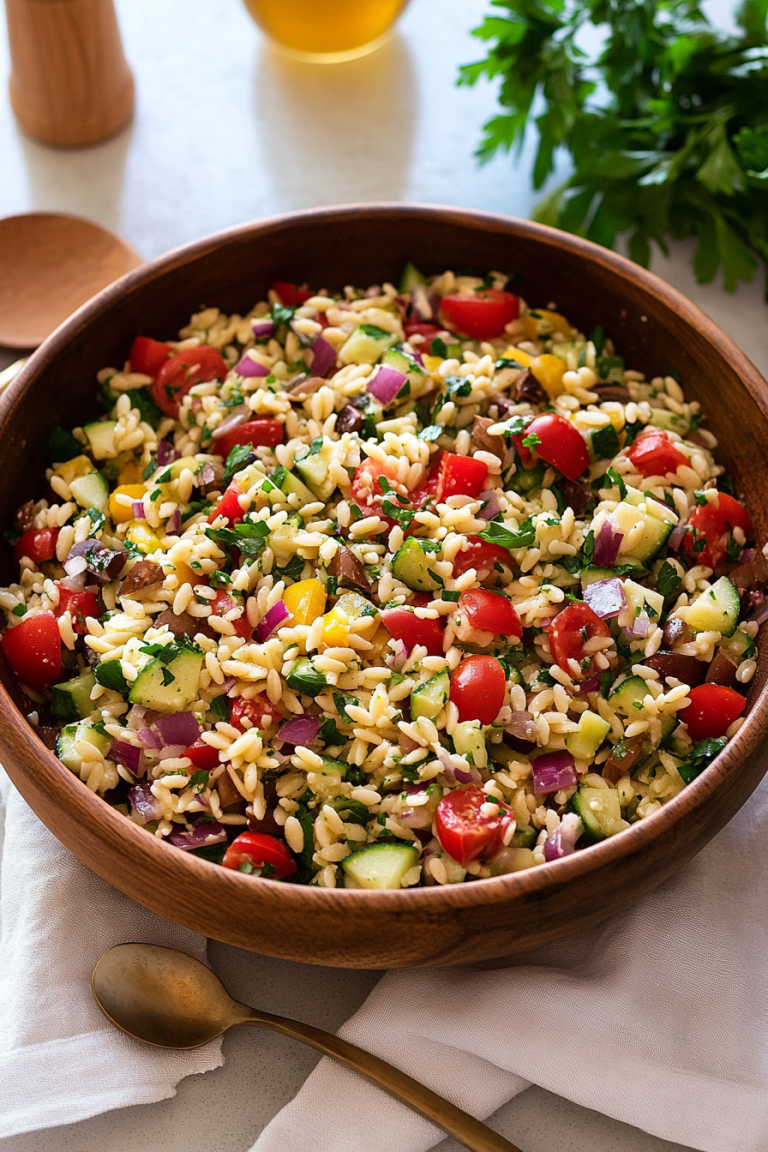
Easy Pasta Salad Recipe for Summer
There’s something magical about pulling a warm, moist slice of coffee cake out of the oven—especially when it’s filled with the cozy goodness of zucchini and walnuts. It takes me back to lazy Saturday mornings at my grandma’s house, where the aroma of baking just seems to fill every corner with happiness. I always do this when I want a little indulgence without feeling guilty—this zucchini walnut coffee cake is my go-to, especially because it’s so incredibly forgiving. My kids ask for it every weekend, and honestly, I love how easy it is to whip together on a busy morning or a relaxed brunch. Plus, the sneaky zucchini keeps it super moist and adds a subtle veggie boost I swear nobody notices—just pure deliciousness. Whether I’m serving it with a cup of strong coffee or a glass of milk after school, this one’s a lifesaver on busy nights or lazy Sundays. Trust me on this one: once you make it, it’ll become a staple in your kitchen, too!
What is Zucchini Walnut Coffee Cake?
This zucchini walnut coffee cake is like a big warm hug in dessert form—think of it as a delightful, slightly crumbly cake that’s perfect for breakfast, brunch, or whenever you crave something sweet and satisfying. It’s essentially a moist, tender loaf layered with shredded zucchini, toasted walnuts, and a hint of cinnamon, topped with a simple glaze that makes each bite irresistible. The name “coffee cake” comes from its roots as a comforting treat to enjoy with morning coffee, but honestly, I’ve eaten it for breakfast, dessert, and even as a midnight snack (don’t judge). The fun part? The zucchini keeps it surprisingly moist, and the walnuts add that perfect crunch every time. It’s a cozy, wholesome recipe that’s great for sharing, especially when you want something that tastes indulgent but doesn’t require a long list of fancy ingredients.
Why you’ll love this recipe?
What I love most about this zucchini walnut coffee cake is how it balances the best of both worlds—healthier sneaky veggies and rich, comforting flavors. The smell alone when it’s baking is enough to make everyone in the house come running. It’s incredibly simple to make, even if you’re not a seasoned baker. I’ve tested this with different kinds of walnuts—pecans work wonderfully too—and I’ve even tried swapping regular flour for almond or whole wheat, which actually makes it feel a tad healthier without sacrificing that tender, melt-in-your-mouth crumb. This cake is budget-friendly because it relies on ingredients I usually have on hand—zucchini, walnuts, flour, sugar—and it’s perfect when you want to impress friends or just spoil your family. Plus, it’s versatile—you can serve it plain, add a swirl of cream cheese, or top it with a dusting of powdered sugar. Honestly, what I love most about this is how adaptable it is; I’ve made it so many times, I’ve lost count. It’s one of those recipes that just feels like a warm hug, every single time.
How do you make Zucchini Walnut Cake?
Quick Overview
This cake comes together quickly, with a simple batter that’s ready in about 10 minutes. You start by grating zucchini—don’t forget to squeeze out the excess moisture—and mixing your dry ingredients. Then, whisk your wet ingredients, fold everything together gently, layer in the shredded zucchini and chopped walnuts, and swirl in your batter before popping it into the oven. The key is not overmixing; you want it light and tender. Once baked, it’s just a few minutes to cool, then drizzled with a simple glaze or served plain. The whole process is fuss-free but results in a deeply satisfying slice of cake that almost melts in your mouth. I always say, this one’s a lifesaver when you’re short on time but craving something homemade and comforting.
Ingredients
For the Main Batter:
– 2 cups all-purpose flour (I love using a bit of almond or whole wheat for extra flavor)
– 1 cup granulated sugar
– 1 teaspoon baking powder
– ½ teaspoon baking soda
– 1 teaspoon ground cinnamon
– ½ teaspoon salt
– ½ cup vegetable oil or melted butter
– 3 large eggs
– 1 teaspoon vanilla extract
– 1 ½ cups shredded zucchini (about 2 small zucchinis, grated and excess moisture squeezed out)
For the Filling:
– ½ cup chopped walnuts (toasted slightly for flavor)
– Optional: ¼ cup demarara sugar or brown sugar for added richness
For the Glaze:
– ½ cup powdered sugar
– 1-2 tablespoons milk or cream
– ½ teaspoon vanilla (or lemon juice for a zing)
Step-by-Step Instructions
Step 1: Preheat & Prep Pan
Set your oven to 350°F (175°C) and grease your baking pan—either a loaf pan or an 8×8 square pan works perfectly. I like to line it with parchment paper so there’s no fuss when removing the cake. I also like to give it a light spray of baking spray for extra non-stick magic.
Step 2: Mix Dry Ingredients
In a big bowl, whisk together the flour, sugar, baking powder, baking soda, cinnamon, and salt. This step ensures everything is evenly distributed, which is especially important for baked goods like this where you’d hate for some parts to be sweeter or more tender than others.
Step 3: Mix Wet Ingredients
In a separate bowl, beat the eggs with the oil (or melted butter) and vanilla until well combined. I usually do this with a fork or a whisk—quick, easy, and no fuss. If your eggs are cold, it’s okay; just mix until the oils and eggs are nicely blended. I’ve also tested with almond milk when I was out of dairy, and honestly, it made it even creamier!
Step 4: Combine
Add the wet mixture into the dry ingredients gently, folding with a spatula until just combined. Be careful not to overmix—this is what makes the cake tender, not rubbery. You’ll notice a thick batter—don’t worry if it’s a little lumpy, that’s perfect.
Step 5: Prepare Filling
Stir the chopped walnuts with a tablespoon of sugar if you like a little extra sweetness and crunch. If you prefer a more subtle walnut flavor, just toast them lightly and fold directly into the batter later.
Step 6: Layer & Swirl
Pour about half the batter into your prepared pan, spread evenly. Dollop the shredded zucchini over the batter, then sprinkle with the walnuts. Top with the remaining batter, smoothing it out. I love to swirl a toothpick or skewer through the batter for a marbled effect—looks pretty and keeps it interesting with each slice.
Step 7: Bake
Pop it into your preheated oven and bake for about 40-45 minutes, or until a toothpick inserted in the center comes out clean. Every oven is different; I suggest starting to check at 38 minutes. The smell alone will make your whole house smell like cozy mornings.
Step 8: Cool & Glaze
Let the cake cool in the pan for about 10 minutes before transferring it to a wire rack (if you used a loaf, just let it cool slightly in the pan). While it cools, whisk together your glaze ingredients—powdered sugar, vanilla, and milk—until smooth. Drizzle it over the warm cake for a shiny, tempting finish.
Step 9: Slice & Serve
Once cooled and glazed, slice it up with a sharp serrated knife. I like to serve it slightly warm or at room temperature—either way, it’s a slice of heaven. The texture holds beautifully, and the flavor gets even better the next day if you store it properly.
What to Serve It With
This zucchini walnut coffee cake is so versatile I serve it all the time. For breakfast, a strong cappuccino or a glass of cold milk pairs beautifully with it—my kids love dunking their pieces like a sandwich. When I make it for brunch, I like to add a dollop of mascarpone or a side of fresh berries to brighten the flavors. As a dessert, I keep it simple—maybe just dusted with powdered sugar or topped with a spoonful of whipped cream. Sometimes, I charm my friends with a little drizzle of honey or a splash of vanilla glaze. And when I need a quick snack, it’s perfect with an afternoon cup of tea—nothing fancy, just pure comfort in every bite. It’s also a great way to sneak in veggies without anyone noticing, which is a win around here, especially during busy weekdays or when I need an extra boost.
Top Tips for Perfecting Your Zucchini Walnut Coffee Cake
Having made this countless times, I’ve picked up a few tricks to make it even better. First, always squeeze out excess moisture from your zucchini—it helps prevent a soggy cake. I do this by placing shredded zucchini in a clean kitchen towel and giving it a good squeeze—trust me, it makes a huge difference. When mixing the ingredients, do it gently—overmixing is the enemy of tenderness. I’ve tried whisking too vigorously, and it makes the batter dense and chewy; nobody wants that. For the swirl pattern, I like to use a skewer to drag through the batter in a swirling motion—it creates a pretty marbling effect, and it’s so satisfying to see the result. You can swap walnuts for pecans or even pistachios, but toasted nuts really bring out their flavor. I also experimented with different sugars—I love using brown sugar for a caramel note, but a sprinkle of Demerara sugar on top adds a lovely crunch. When baking, keep an eye on the clock—ovens vary, and cursed hot spots can change the baking time. I always test with a toothpick—if it comes out with just a few moist crumbs, you’re good. If you want it extra moist, brushing with a little melted butter before baking works wonders. And, finally, the glaze—don’t skip it! It’s the finishing touch that makes this cake irresistible.
Storing and Reheating Tips
This cake keeps surprisingly well. Keep it covered in an airtight container at room temperature for up to two days—if it lasts that long! I recommend slicing it first, so you can grab a piece without exposing the whole cake to air. For longer storage, wrap it tightly in plastic wrap and pop it in the fridge; it stays fresh for up to a week. If you want to make it ahead for a party or brunch, freezing is your friend—wrap the entire cake tightly in plastic wrap followed by foil, and it’ll keep for up to three months. Just thaw it overnight in the fridge, and give it a quick reheat in the microwave if you like it warm. As for the glaze, I usually add that fresh right before serving—if it’s frozen or refrigerated, just give it a quick drizzle when you’re ready to serve. The moistness might change slightly over time, but I’ve found it’s still delicious—just maybe a little more dense than fresh. If you want that shiny glaze to stay perfect, I recommend adding it just before serving.
Frequently Asked Questions
Final Thoughts
Trying out this zucchini walnut coffee cake always feels like a little celebration in my kitchen. It’s easy, forgiving, and unbelievably tasty—plus, sneaking zucchini into something that tastes this good is one of those smart little tricks I’ve learned from years of baking. It’s become a family favorite because, honestly, it’s hard not to love a cake that’s moist, crunchy, and just the right amount of sweet. Whether I serve it at brunch, pack it in lunchboxes, or stash slices in the freezer for a rainy day, it never fails to bring a smile. My biggest tip? Don’t overmix the batter, and make sure to squeeze out that zucchini—the extra moisture rescue! I’d love for you to try it and tell me how it turns out. Maybe add your own twist, like swapping nuts or adding a splash of citrus—baking is so much fun when you make it your own. Happy baking, and I can’t wait to hear about your adventures in the kitchen!

pasta salad
Ingredients
Method
- Cook cheese tortellini according to package directions. Drain, rinse in cold water. Set aside.
- Add cheese tortellini, ham, red pepper, carrots, peas, and green onions to a large bowl and toss to combine.
- In a small bowl, whisk together olive oil, white wine vinegar, mustard, parsley, and garlic. Pour over salad and toss to combine.
- Chill for 2 hours before serving.