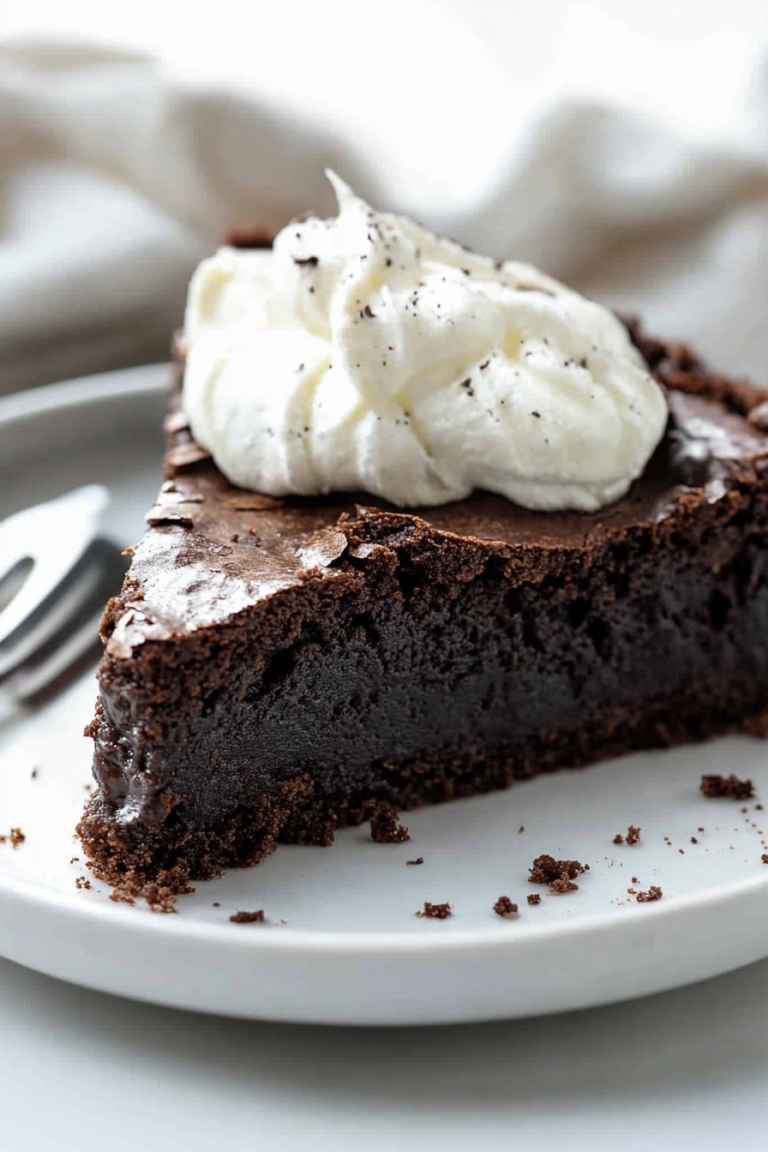
Decadent Chocolate Cheesecake Delight
If you’ve ever stood in your kitchen, craving something sweet but don’t want to turn on the oven for a full cake, this chocolate zucchini bread is exactly what you need. I remember the first time I made it — my kids were running around, and I had a couple of zucchinis left from the garden that I wasn’t sure what to do with. I’ve always loved bread with a little bit of chocolate (who doesn’t?), but I wanted to make it healthy-ish. That’s when I threw everything together — and wow, it disappeared in minutes at my house. The smell alone will bring everyone to the kitchen—rich, fudgy, with a hint of garden freshness. Plus, it’s so easy, I can whip it up on a busy weeknight. Honestly, it’s become our go-to for breakfast, snacks, and even dessert. Trust me on this one: it’s got just the right sweetness, moisture, and flavor. And your secret weapon? The zucchini keeps it moist and adds a little sneaky veggie goodness loved by my kids (but don’t tell them that).
What is chocolate Zucchini bread?
Think of chocolate zucchini bread as the lovechild of a decadent brownie and your favorite quick bread. It’s essentially a moist, cocoa-rich loaf filled with shredded zucchini, which acts like magic — making it super tender and almost fudgy without any added oils or butter. The name says it all: chocolate + zucchini + bread. It started as a way to sneak some veggies into my kids’ snacks without them realizing it. It’s a quick bread, so there’s no yeast, just a simple batter that comes together fast. The zucchini blends into the chocolate flavor seamlessly, giving the whole thing a surprisingly glossy, tender crumb. This dish is versatile, too — you can add nuts, chocolate chips, or even a sprinkle of sea salt on top for extra punch. Think of it as a little hug in bread form, perfect for cozy afternoons or when you need a little sweetness that’s still a bit nutritious.
Why you’ll love this recipe?
Honestly, what I love most about this chocolate zucchini bread is how forgiving and simple it is. I’ve tested it dozens of times, tweaking the amount of sugar or cocoa, and it just never fails to impress. The flavor? Rich, fudgy, with that subtle vegetal freshness that makes it feel wholesome but indulgent at the same time. Plus, the fact that it sneaks in zucchini always gets social points from my friends — “Is there zucchini in that?” they ask, eyes wide, and I just smile. It’s also budget-friendly because I almost always have the ingredients on hand — flour, cocoa powder, zucchinis, eggs, a little sugar, and chocolate chips if I’m feeling fancy. What’s funny is how versatile it is — serve it warm with a pat of butter or freeze slices for busy mornings. It’s my kids’ favorite after-school treat, and I love that I can feed them a slice and feel good about it. If you want a recipe that makes your kitchen smell divine and gets rave reviews, this one’s a lifesaver on busy nights.
How do I make Zucchini bread?
Quick Overview
This bread comes together quickly because it’s just a simple batter mixed with shredded zucchini. You start by preheating your oven, grating the zucchini, and mixing dry ingredients like flour, cocoa, baking powder, and salt. Then, you whisk together wet ingredients—eggs, oil, vanilla, and sugar—before combining everything into a thick, fudgy batter. Pour it into a loaf pan, sprinkle a few chocolate chips or nuts if you like, and bake until a toothpick comes out clean. The hardest part? Waiting for it to cool so you don’t burn your tongue on that gooey, chocolatey top. Once cooled, I like to glaze it with a quick chocolate drizzle or just dust it with powdered sugar for an extra special touch. That’s it — it’s basically a thrown-together, cozy recipe that tastes like a bakery splurge, but it’s really happy-making and foolproof.
Ingredients
For the Main Batter:
– 2 cups shredded zucchini (about 2 medium zucchinis, grated and drained slightly)
– 1 1/2 cups all-purpose flour
– 1/2 cup unsweetened cocoa powder (trust me, the good stuff makes a better bread)
– 1 teaspoon baking powder
– 1/2 teaspoon baking soda
– 1/2 teaspoon salt
– 3/4 cup granulated sugar
– 1/2 cup brown sugar (adds richness)
– 1/3 cup vegetable oil (or melted coconut oil for a different flavor)
– 2 large eggs
– 1 teaspoon vanilla extract
For the Filling:
– 1/2 cup chocolate chips (milk or dark, your call)
– Optional: chopped nuts or a handful of chopped walnuts or pecans for texture
For the Glaze:
– 1/4 cup melted chocolate or chocolate chips + 1 teaspoon coconut oil
– Or a simple dusting of powdered sugar for a light finish
Step-by-Step Instructions
Step 1: Preheat & Prep Pan
Preheat your oven to 350°F (175°C). Grease a standard loaf pan with butter or spray, then dust lightly with flour — or line it with parchment paper for easy removal. Trust me, clean slices are worth a little prep. When your oven hits temperature, set it aside and get ready to mix.
Step 2: Mix Dry Ingredients
In a large bowl, whisk together your flour, cocoa powder, baking powder, baking soda, and salt. Sifting the cocoa and flour together keeps the batter smooth and prevents lumps. I always do this step first so everything is evenly distributed. Plus, it makes your life easier later.
Step 3: Mix Wet Ingredients
In another bowl, whisk the eggs lightly, then add oil, sugar, vanilla, and the grated zucchini. I’ve learned to wring out some of the excess moisture from the zucchini using a paper towel — it helps keep the bread from being overly moist or dense. Mix until everything looks uniform. The batter will seem thick but scoopable — that’s what you want.
Step 4: Combine
Pour the wet mixture into the dry ingredients and gently fold together. Don’t overmix — just until the flour disappears. Overmixing can make the bread dense or tough, and nobody wants that. Keep a few streaks of flour, and that’s okay.
Step 5: Prepare Filling
Stir chocolate chips into the batter or sprinkle some on top before baking. If you’re feeling extra, fold in some chopped nuts for crunch. I usually save a few chips to sprinkle on top for that gooey, melty finish when baking finishes.
Step 6: Layer & Swirl
Pour the batter into your prepared loaf pan. To make it visually appealing, you can swirl in some additional chocolate or nuts. I love using a toothpick to create gentle swirls — it makes the bread look so appetizing when baked.
Step 7: Bake
Pop it into your oven and bake for about 50–60 minutes. Start checking around 50; insert a toothpick in the center — if it comes out clean, you’re good! If not, give it a few more minutes. The smell alone will have you counting down the minutes — rich, chocolatey, with just a hint of zucchini freshness.
Step 8: Cool & Glaze
Remove from the oven and let it cool in the pan for about 15 minutes, then transfer to a wire rack. If you’re doing a glaze, drizzle melted chocolate over the cooled loaf and let it set for a few minutes. Or sprinkle powdered sugar for an easy, elegant finish. I find that glazing while still warm gives a prettier, more glossy top.
Step 9: Slice & Serve
Once cooled, slice with a serrated knife for clean edges. Serve warm with a pat of butter or just as it is — it’s delicious either way. My kids love it for breakfast, and I often reheat slices in the microwave for a quick snack. Bonus: it’s fantastic toasted the next day!
What to Serve It With
This bread is so flexible — I serve it in different ways based on the occasion. For breakfast, I love it with a steaming cup of coffee or a glass of cold milk. My kids ask for it with a smear of peanut butter or a little extra chocolate chips melted on top. On brunch days, it pairs beautifully with a fresh fruit salad and some whipped cream or yogurt. Honestly, I’ve even served slices as a fancy dessert, topped with a scoop of vanilla ice cream and a drizzle of caramel. It’s perfect warm, slightly crispy on the edges, and the chocolate gooeyness just makes it special. During cozy evenings, I like to make small toasts with leftover slices, topped with a bit of Nutella or honey. It’s the kind of treat that feels indulgent but is also comforting and homemade — a little slice of happiness you can share anytime.
Top Tips for Perfecting Your Chocolate Zucchini Bread
I’ve learned a few tricks over the years that make this bread even better. First, when grating zucchini, use a box grater or a food processor with the shredding attachment — super quick! Then, always squeeze out excess moisture — I wrap the shredded zucchini in a clean dish towel and give it a good squeeze; otherwise, the bread might turn out too dense or soggy. Trust me, moisture control is key. When mixing the wet and dry, I fold gently — overmixing is the enemy, and it can turn the bread tough or rubbery. Also, don’t be shy with the chocolate chips — they make every bite feel like a little treat, so add a handful more if you’re a chocoholic like me. For extra richness, I tested swapping some oil for applesauce, and it turned out just as moist but a bit lighter. And here’s a pro tip: if you want a prettier top, sprinkle a few extra chocolate chips on right before baking — they’ll melt slightly and look beautiful. Ovens vary, so keep an eye near the 50-minute mark, especially if your oven runs hot or cool. And finally, store leftovers in an airtight container — it stays moist and delicious for days, and I swear it tastes even better the next day.
Storing and Reheating Tips
This bread is a weekend hero, but it keeps well, which is a lifesaver. Keep it at room temperature in an airtight container or wrapped tightly in plastic wrap — it’ll stay fresh for about 2 days. I usually slice it first, then store the slices in a resealable bag, so I can grab a piece quickly. If you want to keep it longer, pop it in the fridge — it’ll last 4–5 days and still stay moist. Just remember to bring slices back to room temperature or give them a quick microwave zap — like 10 seconds — for that freshly baked feel. For longer storage, I freeze slices individually wrapped in foil or freezer bags for up to 3 months. When I’m ready to eat, I just thaw them on the counter or microwave for a few seconds. As for the glaze, I prefer to add it just before serving; freezing might sometimes make the chocolate a little dull, so I recommend glazing after reheating. That little drizzle makes all the difference, and it keeps the bread looking tempting even after days in the freezer. Overall, this bread holds up beautifully — moist, chocolatey, and comforting, no matter how you store it.
Frequently Asked Questions
Final Thoughts
This chocolate zucchini bread has become a staple in my home because it’s so comforting and easy to make. It’s a reminder that baking doesn’t need to be complicated to taste extraordinary — especially when you can sneak in a vegetable and still satisfy that chocolate craving. Whether it’s a quick breakfast, a snack on busy days, or a casual dessert, this bread always wins everyone over. I love experimenting with variations — adding nuts, swapping out the cocoa for white chocolate chips, or even using different kinds of zucchini. Every time I bake it, I get a little giddy watching everyone’s eyes light up when they take that first bite. If you try it, I’d love to hear how it turns out — or better yet, share your own twists! Happy baking, and enjoy every gooey, chocolaty slice.
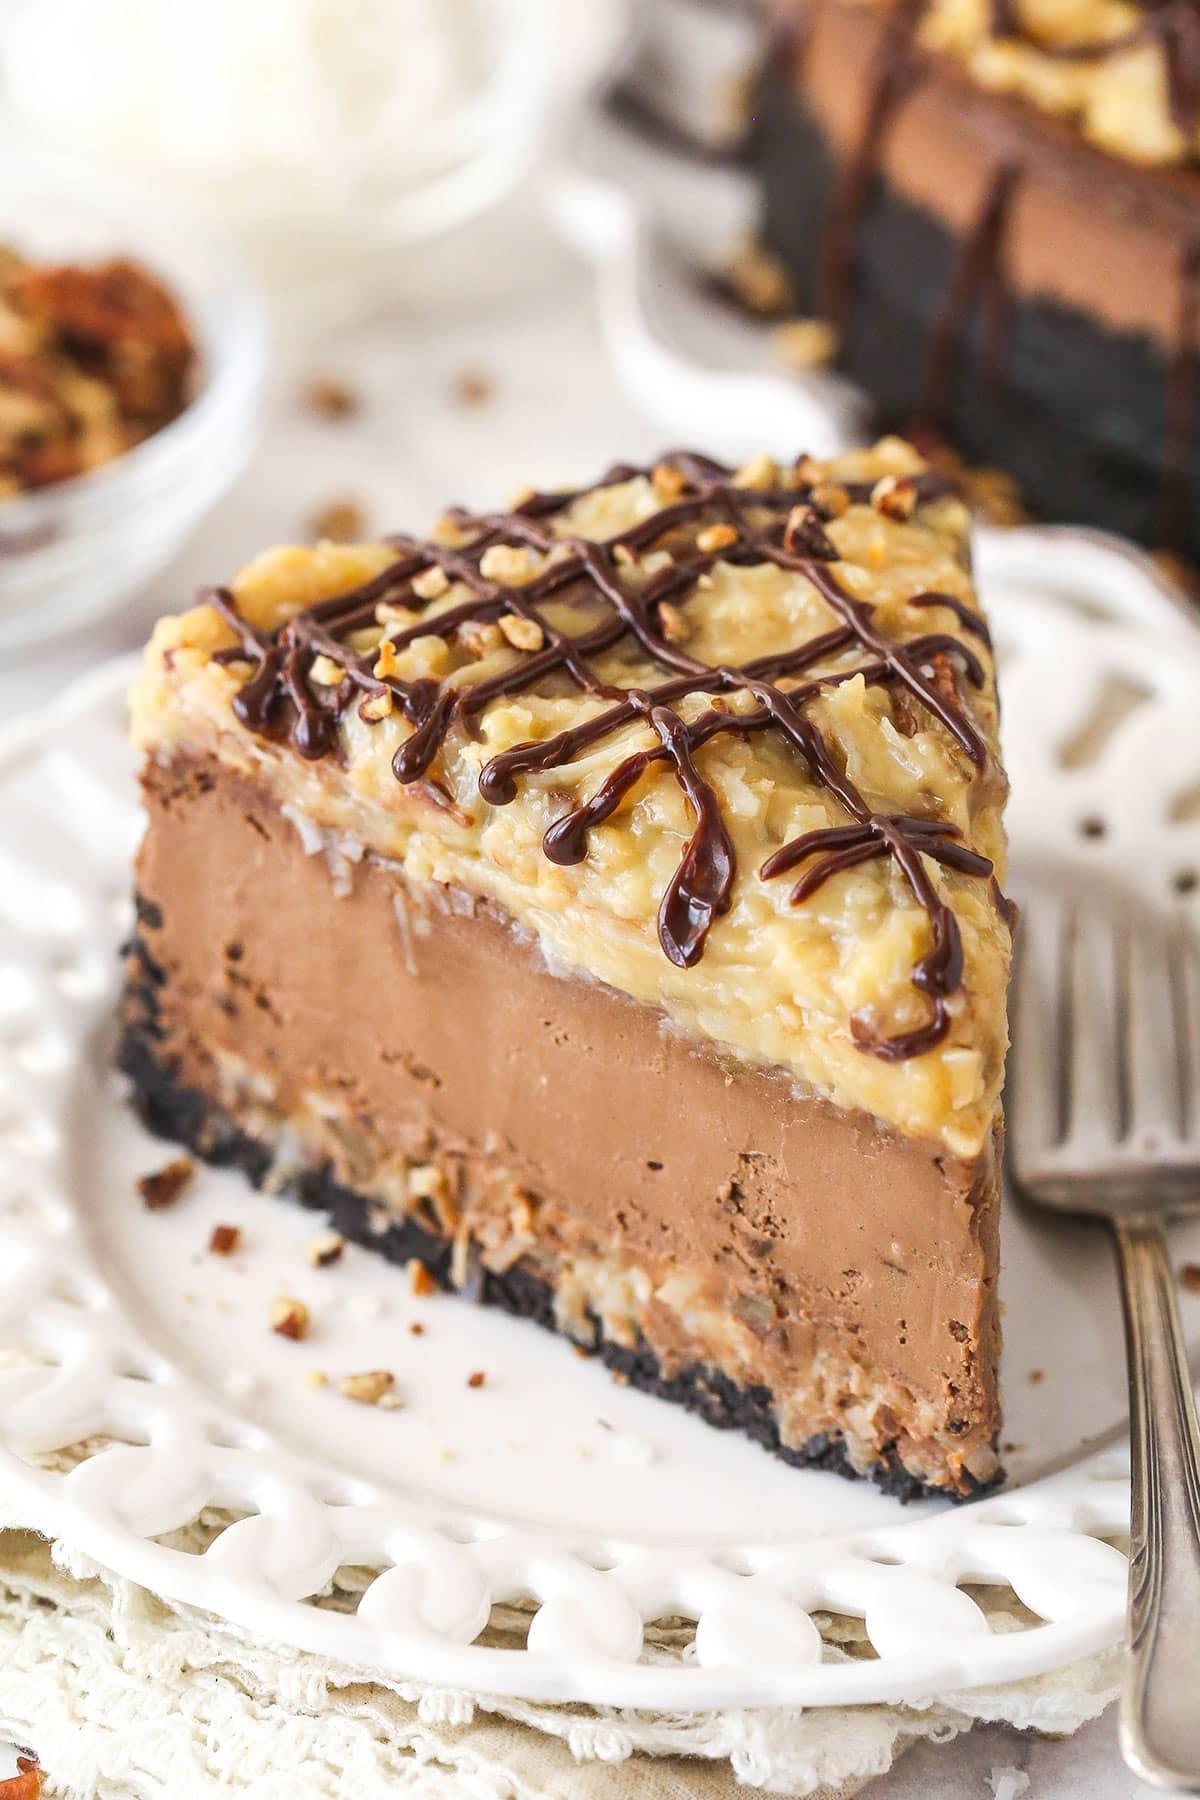
German chocolate cheesecake
Ingredients
Method
- Preheat oven to 325°F. Prepare a 9-inch springform pan with parchment paper and greasing.
- Combine Oreo crumbs and melted butter to form the crust; press into the bottom of the pan and bake for 10 minutes. Cool completely.
- In a large bowl, beat cream cheese until smooth. Add sugar, cocoa powder, and vanilla; mix well.
- Add eggs one at a time, mixing on low speed after each addition. Mix in sour cream and melted German chocolate.
- Pour filling over crust. Bake at 300°F for 1 hour 15 minutes or until set.
- Let cheesecake cool in pan for 1 hour, then refrigerate for at least 4 hours or overnight.
- Prepare coconut pecan topping by combining shredded coconut, toasted pecans, and some of the melted German chocolate. Spread over cooled cheesecake.
- Optional: Drizzle with chocolate ganache before serving.