Crispy Bacon Brussels Sprouts Recipe
If you’ve ever had one of those days where you just need a little sweet comfort, but you don’t want to spend hours in the kitchen, then let me introduce you to my secret weapon: zucchini crumble bars. I stumbled upon this gem during one of my busy weekends when I was craving something sweet and fresh — crunchy, moist, with a hint of that green veggie goodness that makes me feel a tiny bit virtuous. I always do this when I want something comforting but not too heavy, and honestly, my kids ask for this all the time now. The smell alone is enough to make everyone come rushing into the kitchen, and the best part? It’s ridiculously easy to whip up, even on those maxed-out weeknights. Believe me, I’ve made this dozens of times, and it never fails to bring a smile. Plus, it’s a fantastic way to sneak in some veggies without any protest! Trust me on this one — once you try it, it’ll definitely become a go-to treat for your family too.
What is a Zucchini Crumble Bar?
Think of zucchini crumble bars as a fluffy, slightly sweet treat that mixes the moisture of fresh zucchini with a crunchy crumble topping. It’s essentially a cross between a zucchini loaf and a buttery muffin bar, but in bite-sized pieces that are perfect for snacking or dessert. The name might sound a little funny—who puts zucchini in bars?—but once you taste it, you’ll understand why it’s such a beloved family recipe in my cozy kitchen. The zucchini adds a gentle moisture and a subtle earthy flavor that pairs beautifully with the sweetness of brown sugar and cinnamon, while the crumble topping adds that irresistible crunch we all crave. It’s a snack that’s wholesome enough to feel good about, yet indulgent enough to satisfy a sweet tooth. Think of it as a hidden vegetable secret that everyone actually loves—what’s not to adore?
Why you’ll love this recipe?
What I love most about these zucchini crumble bars is how they strike the perfect balance between simple comfort and a touch of something special. The flavor is out of this world—warm cinnamon, sweet brown sugar, and that mellow zucchini just melt together in every bite. It’s almost like a cozy hug wrapped in flaky crumble. Plus, they’re super easy to make, which means I can throw them together in under an hour — no fancy skills needed. I also love how budget-friendly this is! Most of the ingredients are pantry staples—flour, sugar, cinnamon, and a zucchini, of course. During zucchini season, I literally stash a few in the freezer just for this. The versatility is another win; you can serve these warm with a scoop of vanilla ice cream, or chilled for a quick snack. This is one of those recipes I keep coming back to because it’s budget-friendly, family-approved, and endlessly customizable. Trust me — once you make these, they’ll disappear in minutes at my house, and I’ll bet they’ll do the same for yours.
How do you make Zucchini Crumble Bars?
Quick Overview
This recipe is as straightforward as it gets. You start by grating your zucchini — no need to peel it unless you prefer a more polished look — then squeeze out some excess moisture. Mix the batter with a handful of warm spices, fold in a handful of chocolate chips if you’re feeling fancy, then layer it into a greased pan.Make a simple crumble with flour, butter, and brown sugar, sprinkle generously on top, and bake until golden and bubbly. It’s a no-fuss, one-pan situation that’s perfect for a quick dessert or snack. What makes this special is how moist and tender the zucchini keeps everything, while the crumble gives it that satisfying crunch. Once it’s baked to perfection, I like to let it cool a bit — but honestly, it’s tempting to dive right in while it’s still warm!
Ingredients
For the Main Batter:
– 2 cups grated zucchini (about 1 large zucchini, washed and grated)
– 1 ½ cups all-purpose flour
– 1 teaspoon baking powder
– ½ teaspoon salt
– 1 teaspoon ground cinnamon
– ½ teaspoon nutmeg (optional but nice!)
– ¾ cup brown sugar
– ¼ cup granulated sugar
– ½ cup melted unsalted butter or melted coconut oil
– 2 large eggs
– 1 teaspoon vanilla extract
For the Filling:
– (Optional) ½ cup chopped walnuts or chocolate chips for added texture and flavor
For the Crumble:
– 1 cup all-purpose flour
– ½ cup light brown sugar
– ½ cup cold unsalted butter, cut into small pieces
– ½ teaspoon ground cinnamon (for extra warmth)
Step-by-Step Instructions
Step 1: Preheat & Prep Pan
Set your oven to 350°F (175°C). Grease a 9×9-inch baking dish or line it with parchment paper for easy cleanup. This one’s a lifesaver on busy nights — easy to clean, and prevents sticking so you get perfect slices every time.
Step 2: Mix Dry Ingredients
In a large bowl, whisk together the flour, baking powder, salt, cinnamon, and nutmeg. I always do this first because it evenly distributes the leavening and spices. It also helps prevent clumping later on. Trust me, this small step makes a big difference in the final texture!
Step 3: Mix Wet Ingredients
In a separate bowl, whisk the eggs, melted butter, sugar, vanilla, and grated zucchini. The zucchini should be squeezed of excess moisture; I learned this trick after a couple of soggy results. Excess moisture can make the bars uneven or too dense, so give it a good squeeze with a kitchen towel. The mixture will look a little gloppy, but that’s exactly what you want.
Step 4: Combine
Pour the wet mixture into the dry ingredients and gently fold until just combined. Be careful not to overmix — I’ve made that mistake where the batter ends up tough, and it’s no fun. Just fold gently until you see no streaks of flour. Occasionally, I add a handful of chocolate chips here for extra yum — totally optional but highly recommended.
Step 5: Prepare Filling
If you’re adding nuts or chocolate, fold them into the batter now. Or just skip this step for a more straightforward zucchini bar. Personalize it however you like — I love the crunch of walnuts or the sweet surprise of mini chocolate chips.
Step 6: Layer & Swirl
Pour the batter into your prepared pan. Spread it out evenly with a spatula. For a pretty marble effect, sprinkle some extra chocolate chips on top before adding the crumble. Then, make your crumble by combining flour, brown sugar, and cold butter. Use your fingertips or a pastry cutter to work the butter into the dry ingredients until you get pea-sized crumbs. Sprinkle the crumble evenly over the batter, pressing lightly — this develop that crunchy topping I love.
Step 7: Bake
Slide the pan into the oven and bake for 30-35 minutes. The top should be golden brown and a toothpick inserted in the center will come out clean or with just moist crumbs. Oven times can vary, so start checking at 30 minutes. Once out, let it cool for at least 15 minutes — this helps it set and makes slicing easier.
Step 8: Cool & Glaze
If you want to add a glaze, do it while the bars are just warm or completely cooled — whichever you prefer. I sometimes mix powdered sugar with a splash of milk or lemon juice for a tangy twist. Drizzle generously to give your bars that beautiful, shiny finish.
Step 9: Slice & Serve
Use a sharp serrated knife to slice into squares. For clean cuts, wipe the blade between slices. Serve these warm with a dollop of whipped cream or a scoop of vanilla ice cream for an extra treat. My kids love these for breakfast, snack, or dessert — honestly, I don’t judge when they ask for seconds at breakfast!
What to Serve It With
Some quick ideas: for breakfast, pair it with a strong cup of coffee or a glass of cold milk. During brunch, serve slices with fresh berries and a splash of cream — it’s fancy enough for a lazy weekend. As a dessert, a scoop of vanilla ice cream or a dusting of powdered sugar makes it special. And when I need a cozy snack, I just warm a piece up in the microwave and nibble while I watch my favorite TV show. I’ve even tucked these into lunchboxes — they’re portable and satisfying.
Top Tips for Perfecting Your Zucchini Crumble Bars
This recipe is forgiving, but a few tricks make it even better. For the zucchini, I always give it a good squeeze to remove excess moisture — I’ve learned this after soggy bars once. If you want a richer flavor, try swapping half the butter for coconut oil or adding a pinch of cardamom. When making the crumble, don’t overmix — just press the ingredients together until you get those lovely crumbs. For visual perfection, I like swirling a bit of caramel sauce into the batter before baking — it’s delightful. Want to tweak the sweetness? Reduce the sugar slightly, especially if your zucchini is particularly sweet. For the gluten-free crowd, I’ve tested swapping all-purpose flour with a blend of almond and oat flour; it’s a bit denser but still really tasty. The key is to keep an eye on your bake time — your bars are done when the crumble is deep golden and the edges are just starting to pull away. Trust me, it’s a bit of a patience game, but so worth it. And last, play with toppings: toasted coconut, chopped nuts, or even a sprinkle of sea salt on top before baking can elevate this simple treat into something truly special.
Storing and Reheating Tips
To keep these delicious bars fresh, store them in an airtight container at room temperature for up to 2 days — if they last that long! For longer storage, pop them in the fridge, where they will stay moist and tasty for about a week. Just make sure to keep them covered so they don’t dry out. If you’ve made a big batch and want to keep some for later, wrapping individual pieces tightly in plastic wrap and freezing them works great — I usually thaw mine at room temp or pop them in the microwave for a quick reheat. I find that the crumb topping stays crispest if you add the glaze or topping just before serving, especially if they’re stored in the fridge. The chilling process firms everything up, which is perfect if you prefer your bars with a bite. Honestly, that’s the beauty of these; they’re pretty forgiving, and once you get the hang of it, you’ll be making a batch for every occasion!
Frequently Asked Questions
Final Thoughts
If you’re looking for a cozy, homemade treat that’s just as good for breakfast as it is for dessert, these zucchini crumble bars are it. They’re tender, crunchy, subtly sweet, and satisfyingly moist from the zucchini. I’ve tested this recipe with different kinds of flour, sweeteners, and add-ins, and each version has turned out delicious. It’s one of those baking projects that feels so homey — like a hug from the kitchen. Once you make them, I know they’ll become a regular in your rotation, too. And honestly, there’s nothing quite like sharing a warm bar with good friends or family, right? I’d love to hear how yours turn out — leave a comment below or share your own twist! Happy baking, and enjoy every bite!
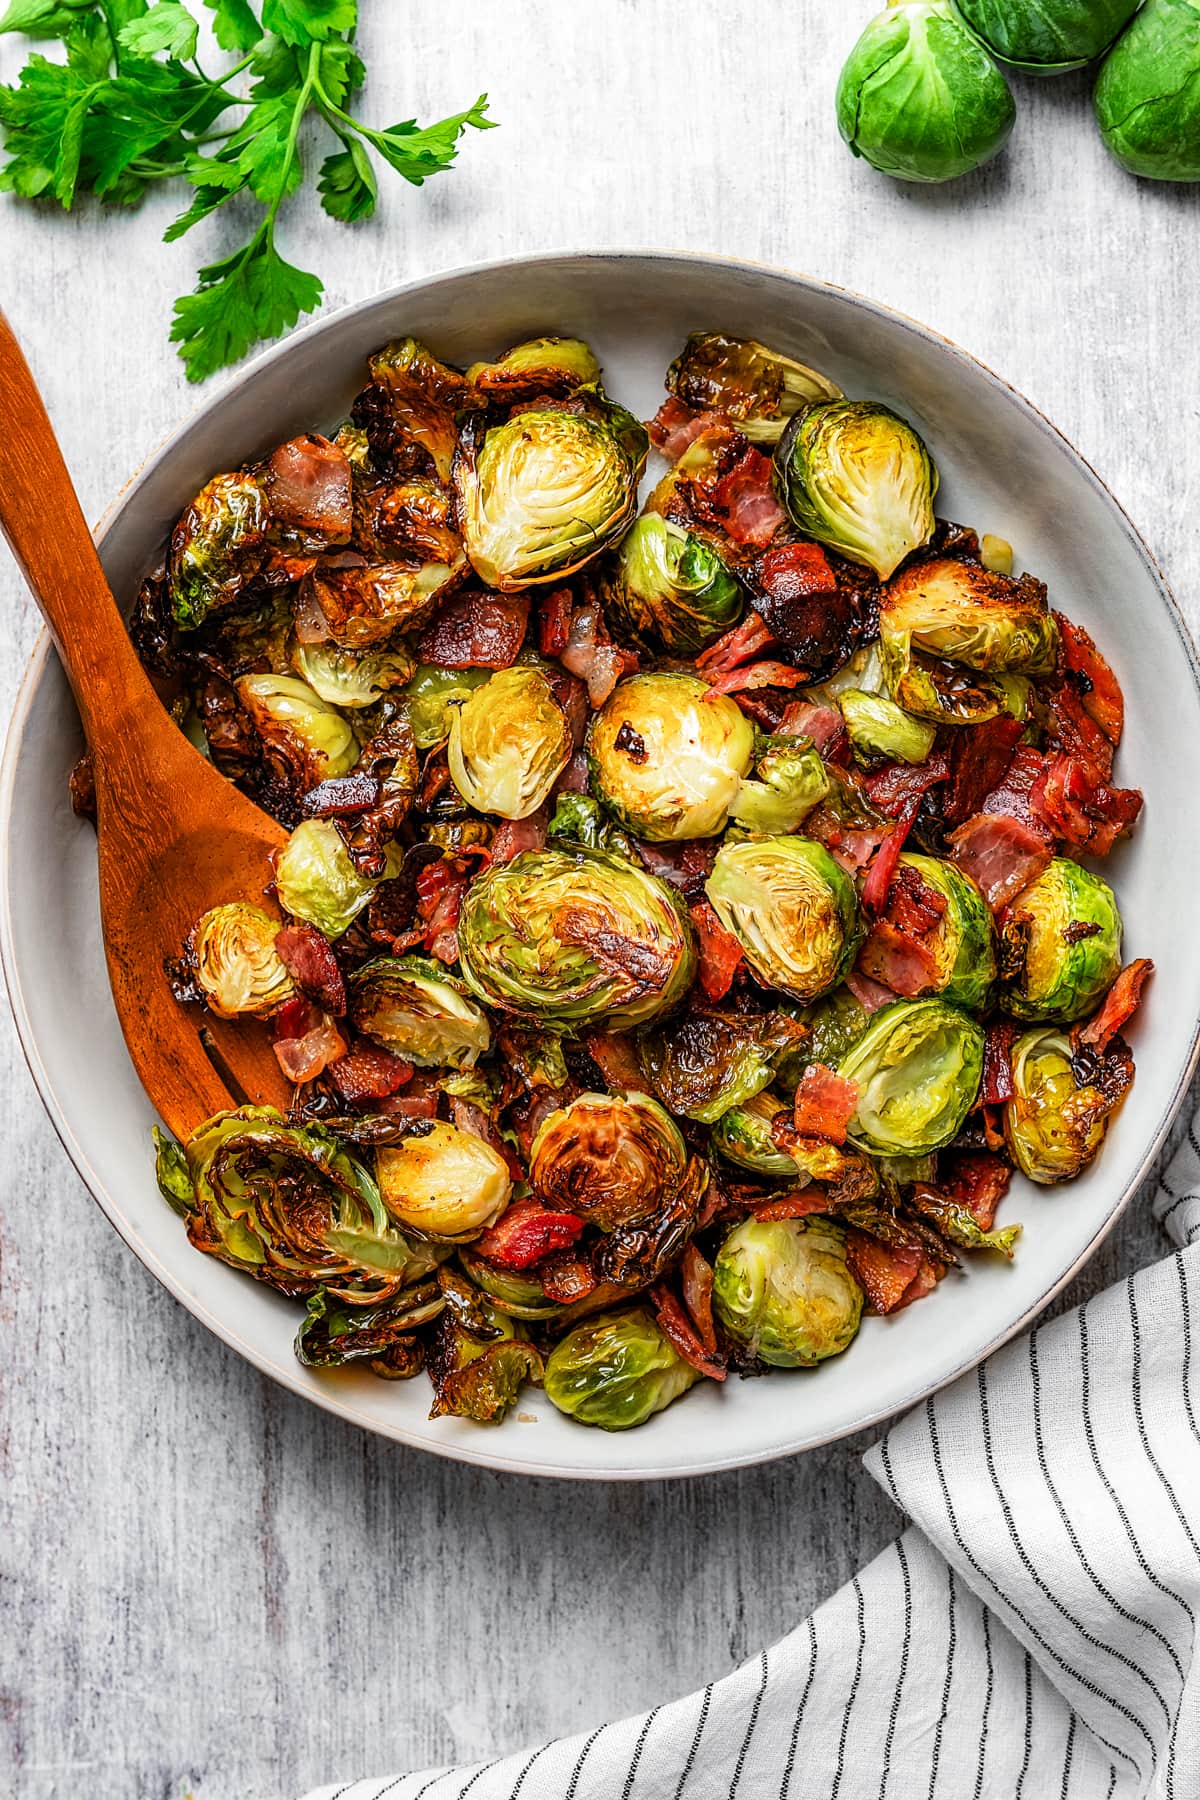
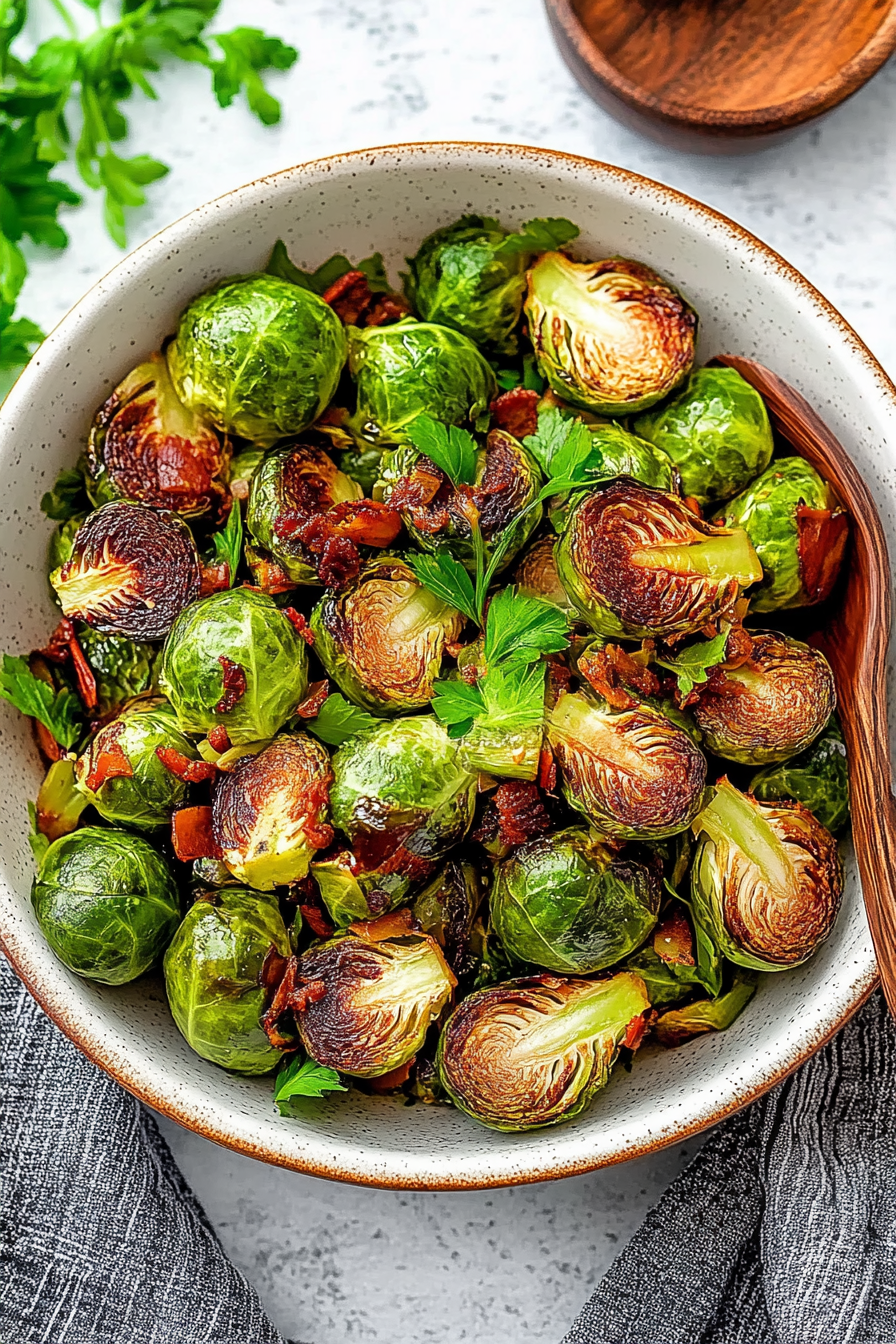
Brussels Sprouts with Bacon
Ingredients
Method
- Preheat the oven to 400°F and line a baking sheet with foil.
- Combine the Brussels sprouts, bacon, olive oil, salt, and black pepper in a large mixing bowl; toss to coat evenly.
- Spread the contents of the mixing bowl on the prepared baking sheet. Bake the brussel sprouts for 30 minutes or until tender, stirring occasionally for even cooking.
- Remove your Brussels sprouts with bacon from the oven and taste for salt and pepper. Adjust to taste and serve.