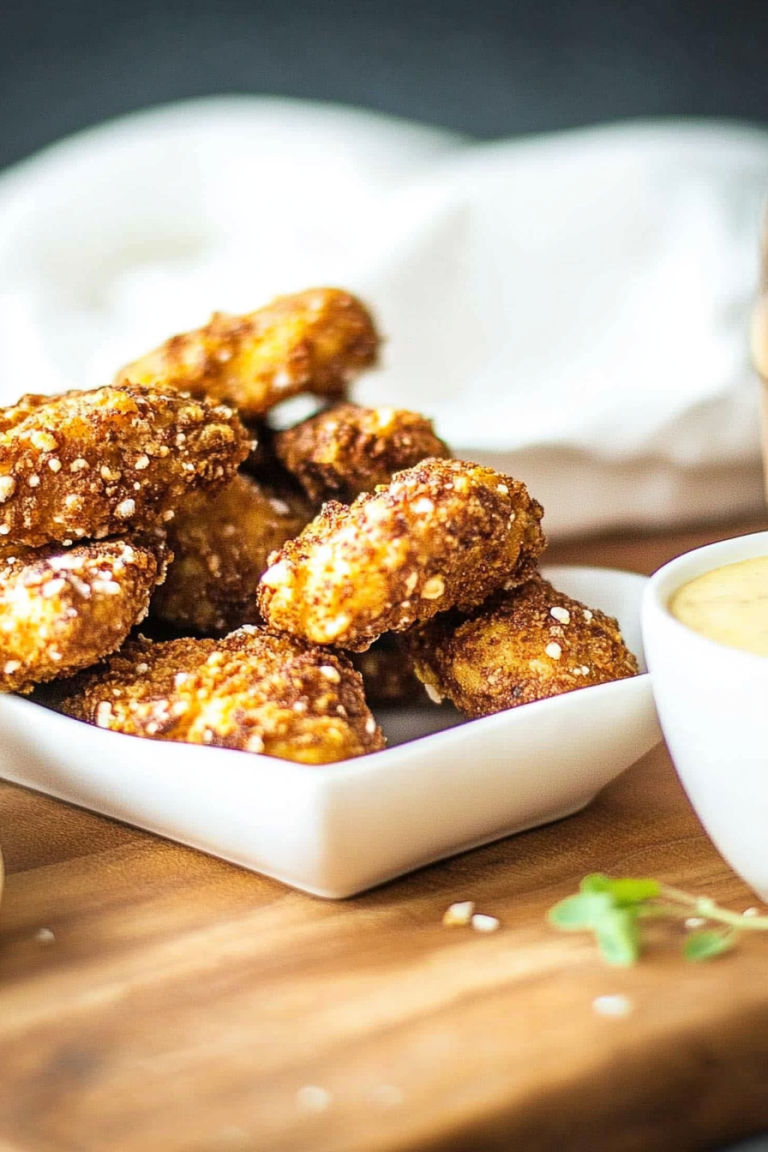
Crispy Air Fryer Parmesan Chicken Recipe
There’s something about the inviting smell of warm baked goods that instantly takes me back to Sunday mornings at my grandma’s kitchen. I remember how she’d casually sprinkle cinnamon over sweet, tender bread and call us over just as the first streaks of sunlight peeked through the curtains. Over the years, I’ve tested many recipes, but there’s one that’s become a real favorite at our house — this zucchini swirl coffee cake. It’s a cozy, slightly nostalgic treat that combines the moistness of zucchini with a tender crumb, all topped with a subtly sweet glaze. Honestly, I think what makes it so special is that it’s crazy easy to make, and it’s something my kids ask for all the time—especially with a large mug of coffee in hand. Plus, it’s a sneaky way to get extra veggies into the kids’ diets without any resistance. If you’ve ever wanted a cake that’s almost like eating a slice of Sunday comfort — but still feels like a quick, weekday treat — this one’s a lifesaver on busy nights or lazy weekend mornings. Trust me, once you try it, you’ll keep coming back for more!
What is Zucchini Swirl Coffee Cake?
Think of this zucchini swirl coffee cake as a happy marriage between a fudgy brownie and a tender, cinnamon-spiced cake. Its namesake treat is basically a moist, sweet batter dotted and swirled with grated zucchini — yes, zucchini! — which sounds weird till you taste it. The idea is simple: grated zucchini adds moisture and a little natural sweetness, so your cake isn’t dry at all. The swirl of cinnamon sugar runs through the batter, creating beautiful marbled patterns that are just as pretty as they are scrumptious. It’s essentially like a cross between a quick bread and a coffee cake, but with a veggie twist that many people find sneaky and delightful. I love how it’s versatile enough for breakfast, brunch, or even a cozy dessert. And the best part? If you have a bunch of summer zucchinis sitting around, this recipe is the perfect way to put them to good use without any fuss. It’s honest-to-goodness homemade comfort, with an ingredient I bet you already have in the fridge!
Why you’ll love this recipe?
Honestly, I could talk forever about why this zucchini swirl coffee cake has become a staple in my kitchen, but I’ll keep it real. First off, the flavor—oh my gosh, that cinnamon-sugar swirl is just addictive. It’s warm, mildly sweet, with a hint of earthiness from the zucchini that balances everything out. What I love most about this is how ridiculously simple it is to throw together, even when I’m short on time. The batter comes together in one bowl, and you probably already have everything you need — flour, sugar, eggs, and zucchini. No fancy ingredients or weird kitchen tools needed. Plus, it’s budget-friendly — using those zucchinis piling up on your counter? Perfect! This cake is incredibly versatile too. You can make it with walnuts or pecans for some crunch, or swap out the cinnamon for nutmeg or ginger for a totally different flavor vibe. I’ve even tested it with almond milk, and it turns out even creamier and more tender. My kids ask for this all the time, and it’s a hit at potlucks, family brunches, or just that quick treat when I want a little baking therapy. Basically, it’s cozy, satisfying, and so forgiving — a real keeper.
How do I make Zucchini Swirl Coffee Cake?
Quick Overview
This recipe is a breeze — you mix together a simple batter, fold in lots of freshly grated zucchini, and swirl in cinnamon sugar before baking. It’s the kind of cake that comes together quickly, with minimal fuss, yet tastes like you spent hours. The secret is in the grated zucchini, which keeps every bite beautifully moist. The swirl pattern isn’t just pretty; it distributes that warm cinnamon flavor throughout the cake, making every slice as delicious as the last. Once it’s baked to golden perfection, a quick drizzle of glaze makes it feel special — perfect for breakfast or a sweet afternoon snack. Trust me, once you get the hang of how easy this is, it’ll be your new go-to for brunch or whenever you’re craving something cozy but wholesome.
Ingredients
For the Main Batter:
– 2 cups all-purpose flour (plus a little extra for dusting)
– 1 cup granulated sugar
– 1 teaspoon baking powder
– ½ teaspoon baking soda
– ½ teaspoon salt
– 1 teaspoon cinnamon (more if you love it!)
– ½ cup vegetable oil or melted butter
– 3 large eggs
– 1 cup grated zucchini (squeeze out excess moisture — this is key!)
– 1 teaspoon vanilla extract
For the Filling:
– ¼ cup brown sugar
– 1 teaspoon cinnamon
– 2 tablespoons melted butter or coconut oil
For the Glaze:
– ½ cup powdered sugar
– 1-2 teaspoons milk or cream
– Optional: a dash of vanilla or lemon zest for extra flavor
Step-by-Step Instructions
Step 1: Preheat & Prep Pan
Set your oven to 350°F (175°C). Grease a 9-inch round or square baking pan, or line it with parchment paper. I always do this when I want an easy cleanup because trust me, sticky batter is no joke. To prevent the cake from sticking, I like to give the pan a light coating of butter or cooking spray, then dust it with flour. You want it ready to go as soon as your batter is mixed because the last thing you want is to have the cake stuck before it even hits the oven.
Step 2: Mix Dry Ingredients
In a large mixing bowl, whisk together the flour, sugar, baking powder, baking soda, salt, and cinnamon. Mixing dry ingredients separately helps prevent clumping and makes sure your leavening agents are evenly distributed — so your cake rises nice and evenly. I always do this step first to get it out of the way, and it feels good knowing I’ve laid a solid foundation for the batter.
Step 3: Mix Wet Ingredients
In a separate bowl, beat the eggs, then stir in the oil (or melted butter), vanilla, and grated zucchini. I like to squeeze out as much moisture as I can from the zucchini before adding it — it keeps the cake from getting soggy. Actually, I’ve learned this trick after making the mistake of adding too-wet zucchini, which led to a dense, heavy cake. Once everything’s well combined and uniform in color, you’re ready to bring it all together.
Step 4: Combine
Add the wet ingredients into the dry, gently folding just until combined. Do not overmix — the key to a tender cake is to handle the batter gently. It might look a little lumpy or thick, and that’s totally fine. Overmixing here will result in a tough crumb, and nobody needs that. Mix just enough to incorporate everything, and then set it aside for a moment while you prep the cinnamon swirl.
Step 5: Prepare Filling
Mix the brown sugar and cinnamon together in a small bowl. Melt the butter or coconut oil, then stir into the sugar mixture. This makes a gooey, cinnamon-sugar paste that’s perfect for swirling. If you want to get fancy, you could add chopped nuts or a little orange zest for a flavor twist. I usually keep it simple — and it’s still heavenly.
Step 6: Layer & Swirl
Pour half of the batter into your prepared pan, smoothing it out with the back of a spoon. Then sprinkle or dollop the cinnamon mixture over the top, spreading it evenly. Cover with the remaining batter, then use a knife or skewer to swirl through the batter gently. Don’t overdo it—you’re aiming for a marbled look, not a completely mixed mess. It’s such a satisfying step, seeing those pretty ripples form as you swirl.
Step 7: Bake
Pop it into your preheated oven and bake for about 40-45 minutes. You’ll know it’s done when a toothpick inserted in the center comes out clean and the top is golden brown. I sometimes check a little earlier—every oven is different! If the cake starts to brown too quickly, tent it loosely with foil. Let it cool in the pan for about 10 minutes, then transfer to a wire rack if you can wait that long — I usually don’t, but I promise it helps the cake settle and makes slicing easier.
Step 8: Cool & Glaze
While the cake cools, mix together the powdered sugar and milk until smooth. The glaze should be thick but pourable. When the cake is just warm or cooled, drizzle the glaze over the top, letting it drip down the sides. This step really brings everything together—sweet, shiny, and just a little sticky.
Step 9: Slice & Serve
Use a sharp knife to cut clean slices, starting from the corner. I like to serve this slightly warm, with a dollop of whipped cream or a cold glass of milk. For breakfast, I’ll often pair it with my morning coffee—the smell alone makes the whole day feel better. My family loves this chilled the next day too, and honestly, it tastes even better after sitting overnight—the flavors mingle and deepen. It’s amazing how a simple loaf can turn into a true comfort — everything about this feels homely and honest.
What to Serve It With
This zucchini swirl coffee cake is quite versatile. For breakfast, I love serving it with a steaming cup of coffee or a mug of cold milk. The soft texture and cinnamon notes make it a perfect morning pick-me-up. On weekends or special brunches, I like to pair it with a fresh fruit salad or some Greek yogurt topped with honey and nuts — kind of like a healthier-yet-indulgent combo. When it’s time for dessert, I skip the glaze and serve it alongside vanilla ice cream or a drizzle of caramel sauce. My kids think it’s like a veggie-studded cake dessert, which is a win. And, if you want to make it more casual for a cozy snack, just cut thick slices and enjoy with a cup of tea or hot cocoa. It’s honestly one of those recipes that’s just as homey and comforting as it looks — like a warm hug in cake form!
Top Tips for Perfecting Your Zucchini Swirl Coffee Cake
After making this dozens of times, I’ve picked up some tips that make all the difference. First, do not skip squeezing out excess moisture from the zucchini — it’s what keeps the cake moist without turning into a soggy mess. I’ve learned to grate the zucchini, then wrap it in a clean kitchen towel and give it a good squeeze. That way, you retain all the good zucchini flavor without watering down the batter. Second, be gentle when mixing; overmixing is the enemy of tender crumb. Fold just enough until everything’s combined. For the swirl pattern, pour half the batter into the pan, then evenly spoon the cinnamon mixture over it—spread it out carefully. Use a skewer or butter knife to swirl through the batter slowly, making a beautiful marbled effect. I’ve also tested substitutions — almond flour works beautifully if you want a gluten-free version, but you’ll need to reduce the flour and maybe add an extra egg or two to keep the moisture. Don’t skip the glaze — it’s like the cherry on top, adding a touch of sweetness and brightness. When baking, check your oven’s temperature, and if your cake browns too quickly, tent it with foil and keep an eye on it. I learned all this after making the same mistakes over and over! The best thing? Every time I switch things up a little, I discover new flavor combinations and textures that make this cake even more addictive. It’s such a forgiving recipe, and honestly, I love tinkering with it. Plus, the smell when it’s baking — I swear it’s like a full sensory hug.
Storing and Reheating Tips
This cake stays pretty fresh for a few days if stored properly. If you’re planning to keep it for more than a day, I recommend wrapping it tightly in plastic wrap or storing it in an airtight container. At room temperature, it’s good for about 2 days; just keep it out of direct sunlight or heat. In the fridge, it will last up to a week, but I find the texture changes a bit — it gets a little denser. If you want to keep it longer, pop slices in a freezer-safe bag or container for up to 3 months. To reheat, I usually microwave individual slices for about 15-20 seconds — enough to warm it through without drying it out. If it’s glazed, I add the glaze fresh after reheating for that perfect shiny finish. I also like to warm the cake slightly in a low oven (around 300°F) for about 10 minutes if I’m serving it for guests, which really restores that homemade feel. The key is to reheat gently so it stays moist and tender. Honestly, I’ve reheated slices that sat in the fridge for days, and I swear nobody can tell — it just tastes like freshly baked! I’ve learned that the secret to keeping it tasting amazing is to avoid over-drying it, so always cover or wrap tightly if you’re storing it.
Frequently Asked Questions
Final Thoughts
This zucchini swirl coffee cake has truly become a favorite in my cozy kitchen. It’s the kind of recipe that feels like wrapping yourself in a warm blanket—moist, flavorful, and forgiving enough for even beginner bakers. The best part? It sneaks in some zucchini, making it a little healthier and way more moist than your average cake. Whenever I bake this, the entire house fills with the smell of cinnamon and fresh-baked goodness, and it’s gone in minutes (seriously, I have to hide slices from my own family sometimes!). I love how adaptable it is—add a handful of walnuts, change up the spices, or leave the glaze off for a lighter treat. It’s honestly one of those recipes I keep coming back to because it never, ever disappoints. If you give it a try, I’d love to hear how yours turns out—leave a comment, share your favorite tweaks, or show me your gorgeous marbled slices! Baking is such a warm, imperfect art, and this cake is a sweet reminder that some of the best recipes are the simplest ones, made with love and a good splash of cinnamon.
Parmesan Chicken
Ingredients
Method
- Preheat air fryer to 400F.
- In a shallow dish, mix flour, garlic powder, salt, and pepper.
- Whisk eggs in a separate bowl.
- Combine Parmesan cheese and panko bread crumbs in another dish.
- Dredge chicken breasts in flour mixture, dip in eggs, then coat with Parmesan-panko mixture.
- Spray the air fryer basket with olive oil spray. Place chicken breasts in basket and spray tops.
- Cook for 6 minutes, flip, then cook for an additional 5 minutes until internal temperature reaches 165F.
- Rest chicken for 5 minutes before slicing. Garnish with lemon wedges if desired.