Cherry Cobbler Recipe Simple & Sweet
There’s something about the smell of cinnamon baking in the oven that instantly transports me back to my grandma’s kitchen. I can almost hear her humming softly while she’d stir batter, her hands dusted lightly with flour. I remember the first time I made this zucchini cinnamon swirl bread—I was a little nervous, honestly. It seemed so fancy with that gorgeous swirl of cinnamon goodness, but in reality, it’s one of the easiest quick treats you can whip up on a busy weekday. My kids ask for this all the time, especially when zucchinis are flooding the garden, and honestly, it’s become my go-to for sneaking in those veggies without complaints. Plus, the cozy aroma that fills the house? That’s what makes it feel like a warm hug from the kitchen. Trust me, this bread disappears in minutes at my house, and I love knowing I’ve made something that’s both indulgent and secretly healthy — well, as healthy as a cinnamon swirl bread can be!
What is Zucchini cinnamon swirl bread?
Think of this as a soft, moist quick bread with a beautifully marbled cinnamon swirl running through it. It’s essentially bread meets cake—a comforting treat that’s perfect for breakfast, brunch, or an afternoon snack. The name might sound a little fancy, but it’s really just a clever way to use zucchini, which keeps the bread incredibly moist and tender. The cinnamon swirl adds a spicy-sweet flavor that makes every bite addictive. It’s a loaf I’ve baked countless times, tweaking the ingredients here and there, trying to perfect that swirl pattern and the fluffiest crumb. What I love most about this is how forgiving it is—you don’t have to be a professional baker, and it’s practically impossible to mess up. The zucchini keeps it moist, the cinnamon adds warmth, and the whole thing is a lovely way to enjoy a bit of freshness and sweetness in one slice. It’s a bit like a comforting hug you can hold with your hands!
Why you’ll love this recipe?
Honestly? There are so many reasons why this zucchini cinnamon swirl bread is a staple in my kitchen. First off, the flavor—the blend of sweet cinnamon, nutty zucchini, and buttery batter is just heavenly. It’s sweet enough for a treat but not overly sugary, so I feel good about slicing a piece for myself in the morning with my coffee. The simplicity is a huge win; I always do this when I need something quick and satisfying—no lengthy rising times or complicated techniques. Plus, it’s super budget-friendly: a few basic pantry staples, a zucchini from the garden, and boom—you’ve got a bakery-quality loaf. And versatility? Oh, it’s got that in spades. You can serve it plain, add a dusting of powdered sugar, or even a drizzle of cream cheese frosting for a special occasion. My kids actually ask for seconds—a rare thing in our house—and I love how it sneaks in a veggie without fuss. Trust me on this one: once you make it, you’ll keep coming back for more.
How do you make Zucchini Swirl Bread?
Quick Overview
This bread comes together quickly—no waiting for dough to rise! You’ll grate zucchini and squeeze out some moisture, mix your wet and dry ingredients separately, layer the batter with cinnamon sugar, and swirl it around before baking. It’s a laid-back process that results in a moist, flavorful loaf with a stunning cinnamon swirl. The key is not overmixing to keep it light, and maybe sneaking a peek in the oven early—because let’s be honest, that smell will have everyone in the kitchen before you even finish baking!
Ingredients
For the Main Batter:
– 2 cups all-purpose flour (I always use unbleached for extra flavor)
– 1 teaspoon baking powder
– ½ teaspoon baking soda
– ¼ teaspoon salt
– ½ teaspoon ground cinnamon
– 1 cup granulated sugar
– ½ cup unsalted butter, melted (olive oil works in a pinch!)
– 2 large eggs (room temperature helps with even mixing)
– 1 teaspoon vanilla extract
– 1 cup grated zucchini (remove excess moisture by squeezing it with a clean towel)
For the Filling:
– ⅓ cup packed brown sugar
– 1 tablespoon ground cinnamon
– 1 tablespoon melted butter (for the swirl pattern)
For the Glaze (optional):
– ½ cup powdered sugar
– 1-2 teaspoons milk or cream
– Drop of vanilla or a pinch of cinnamon for extra flavor
Step-by-Step Instructions
Step 1: Preheat & Prep Pan
Set your oven to 350°F (175°C). Grease a 9×5-inch loaf pan with butter or non-stick spray and line it with parchment paper if you like a super clean release. This step is key so your bread comes out perfect without sticking—trust me, I’ve learned this the hard way!
Step 2: Mix Dry Ingredients
In a bowl, whisk together the flour, baking powder, baking soda, salt, and cinnamon. This ensures even distribution of the leavening agents and spices. This little step makes a big difference in how light and fluffy your bread will turn out.
Step 3: Mix Wet Ingredients
In a separate large bowl, combine the melted butter, sugar, eggs, and vanilla. Whisk until smooth and slightly frothy. If your eggs are cold, it might take a minute longer to blend everything well. I’ve tested with almond milk, and honestly, it made the bread even creamier, but traditionally I stick with cow’s milk or no milk at all.
Step 4: Combine
Add the dry ingredients to the wet ones in batches, gently folding with a spatula. Do not overmix—just fold until everything is combined and the batter is smooth. Overmixing can make the bread dense, and nobody wants that!
Step 5: Prepare Filling
Mix the brown sugar and cinnamon together in a small bowl. Melt the butter and set aside. This mixture turns into that irresistible cinnamon-sugar swirl you see in the loaf. Feel free to add a pinch of nutmeg or ginger if you want extra warmth.
Step 6: Layer & Swirl
Pour half of the batter into your prepared pan. Sprinkle half of the cinnamon sugar evenly over, then add the remaining batter on top. Drop spoonfuls of melted butter over the top, then use a knife or skewer to swirl through the batter—don’t overdo it, just enough to create pretty ribbons of cinnamon amidst the batter. Sometimes I do a gentle figure-eight swirl for a nice pattern.
Step 7: Bake
Pop it into your oven at 350°F, and bake for about 50-60 minutes. Start checking around 50 minutes with a toothpick inserted in the center; if it comes out clean, you’re good to go. If the top is browning too fast but the middle isn’t baked through, tent with foil and keep baking. Every oven is different, so use your nose and the toothpick as your guides.
Step 8: Cool & Glaze
Let the bread cool in the pan for about 15 minutes, then transfer to a wire rack. If you’re glazing, mix powdered sugar with milk and vanilla until smooth, then drizzle over just-warmed bread. The glaze adds a nice touch of sweetness, but it’s totally optional—it’s just so pretty!
Step 9: Slice & Serve
Once completely cooled, slice with a serrated knife to reveal the beautiful cinnamon swirl. I like serving it slightly warm with a pat of butter or a smear of cream cheese. Perfect with a cup of coffee or tea, or just on its own when cravings hit. This bread is even better the next day—if it lasts that long!
What to Serve It With
Oh, so many perfect pairings! For breakfast, serve a warm slice with a dollop of fresh yogurt and a splash of honey—my kids love this combo. It’s also incredible toasted with some almond butter for a mid-morning boost. On weekends, I like to set it out with a nice pot of tea or coffee, maybe add some fresh berries on the side for a vibrant touch. When I want something a bit more indulgent, I drizzle it with a maple glaze or top with a little cream cheese frosting—my secret weapon for special mornings or lazy Sunday brunches. This bread is a crowd-pleaser not just with family but also with friends who always ask for the recipe. The aroma itself will have everyone sneaking a taste before it’s even out of the oven! I’ve even frozen slices for those busy mornings when you need a quick pick-me-up—trust me, it reheats beautifully in the toaster or microwave.
Top Tips for Perfecting Your Zucchini Cinnamon Swirl Bread
Every time I make this, I learn something new—I guess that’s part of the fun! First off, always squeeze out excess moisture from the grated zucchini—this keeps the bread from becoming wet or dense. I tested it with and without, and the dry zucchini makes all the difference. When mixing your batter, my biggest tip is to fold gently—no aggressive stirring! Overmixing is the enemy of fluffy bread. As for the swirl pattern, don’t over-twist the batter—just a few gentle strokes with a knife will do; you want beautiful ribbons, not a muddled mess. Personal touches, like adding a pinch of nutmeg or swapping the cinnamon for cardamom, give it your own signature flavor. If you want a denser, richer bread, substitute part of the oil with sour cream or yogurt—you’ll love the extra moisture. And don’t forget: keep an eye on your oven temp. I always rotate my loaf halfway through baking because some ovens cook unevenly. When it comes to glazing, I prefer a thicker glaze for dramatic drizzles, but a thinner one works better if you want it to seep into every crack. These small tweaks have made a huge difference in my baking adventures—you’ll figure out what works best for your kitchen!
Storing and Reheating Tips
This bread is surprisingly forgiving when it comes to storage. If you plan to enjoy it within a day or two, keep it at room temperature wrapped in foil or in an airtight container—just don’t leave it out too long, especially in warm weather, or it might get dry. For longer storage, pop slices into a resealable bag or airtight container and refrigerate for up to a week. When reheating, I toss slices in the toaster for a few seconds or microwave for about 20 seconds—just enough to warm the center without drying it out. If you want to keep it for even longer, freeze the slices individually—just wrap tightly with plastic wrap and store in a freezer bag for up to 3 months. Thaw at room temperature or pop directly into the toaster. As for the glaze, it’s best applied right after cooling, but you can add a fresh drizzle as needed since it keeps well refrigerated for a couple of days. Once stored properly, this bread stays moist and delicious, and I love having a slice or two ready to go for those busy mornings or surprise guests.
Frequently Asked Questions
Final Thoughts
This zucchini cinnamon swirl bread holds a special place in my heart—and at my kitchen table. It’s one of those recipes I keep in my back pocket, ready to bring a little warmth and happiness to any day. The combination of moist zucchini and spicy cinnamon is just a match made in heaven, and the swirl makes each slice feel like a little work of art. I love how forgiving it is—over the years, I’ve tweaked a few things, added my own little twists, and always, it turns out delicious. Whether you’re making it for breakfast, a cozy weekend brunch, or just because you need a treat that feels like home, I think you’ll find this recipe pretty addicting. I hope you give it a try and enjoy every bite as much as my family and I do. And hey, don’t forget to share your photos and variations—I’d love to hear how yours turns out! Happy baking, friends!
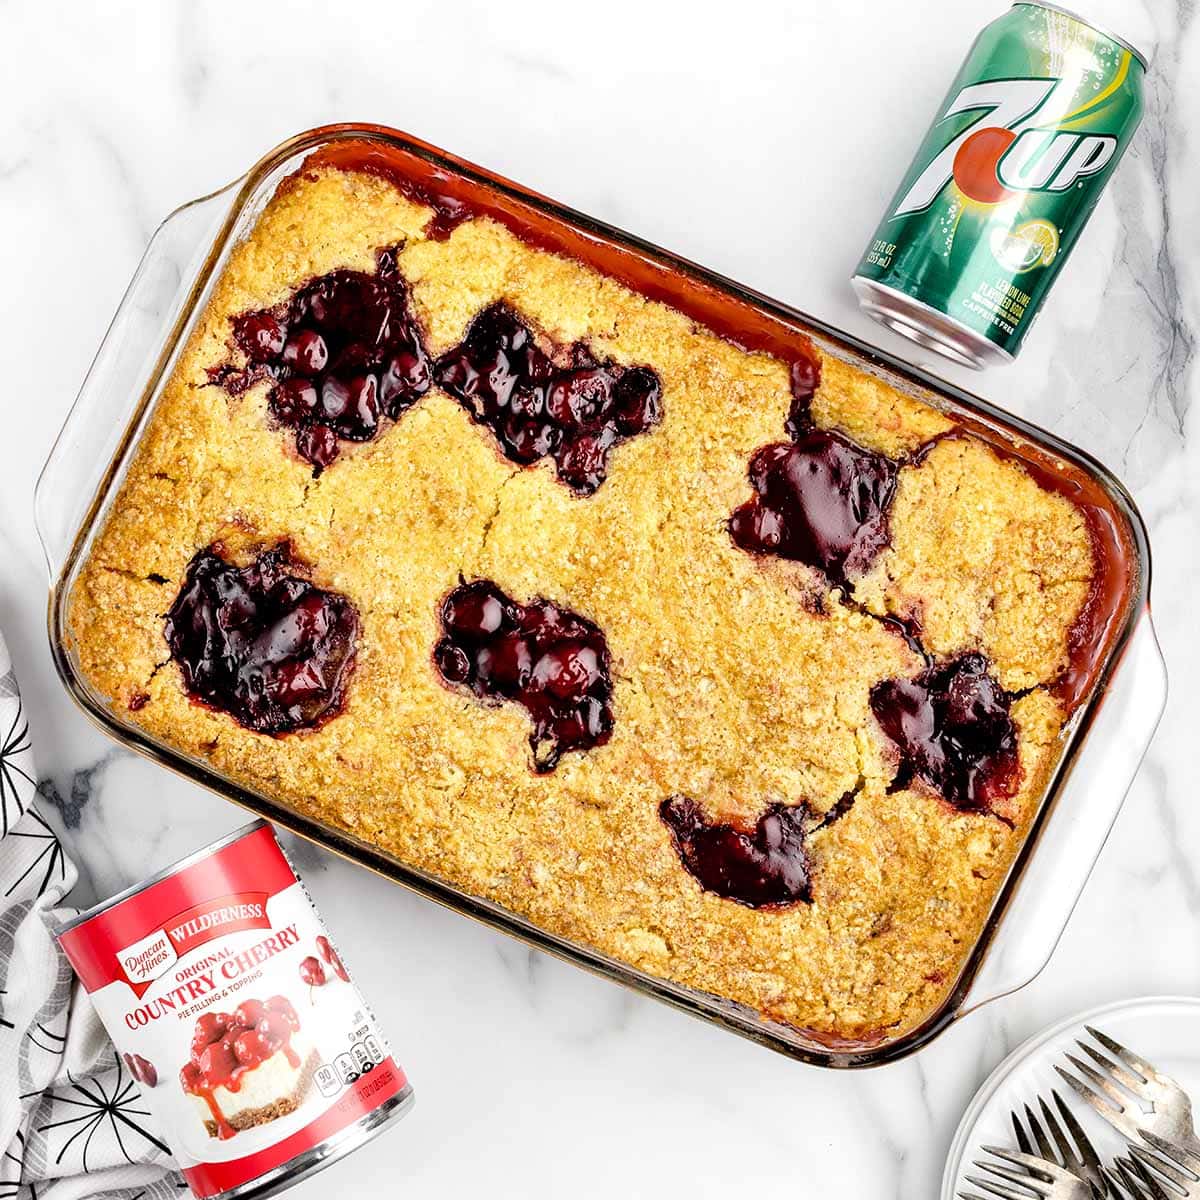
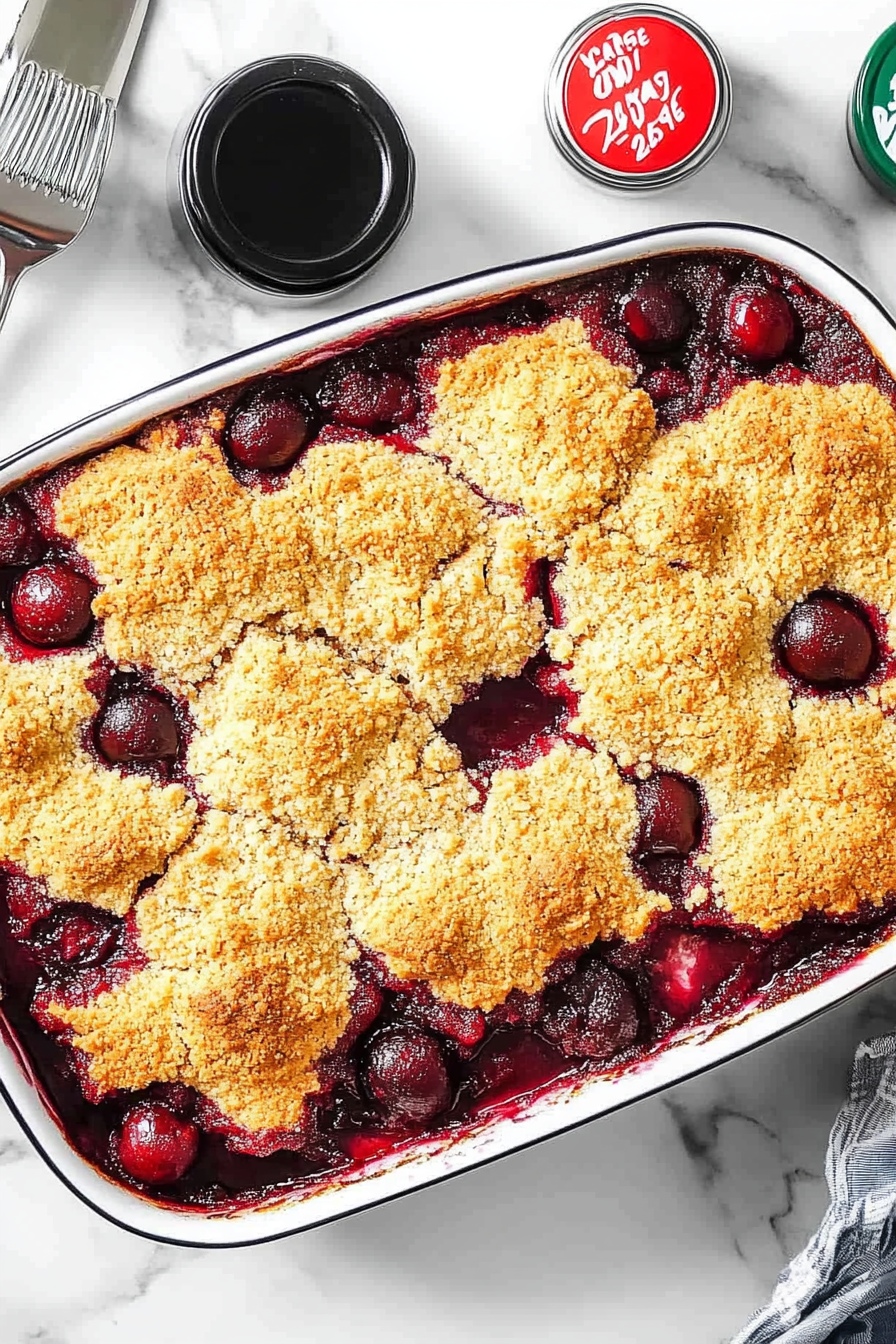
cherry cobbler
Ingredients
Method
- Preheat the oven to 350°F. Generously spray a 9x13 baking dish with baker’s spray.
- Evenly spread 2 cans of cherry pie filling in the bottom of the prepared baking dish.
- Sprinkle the dry yellow cake mix evenly over the cherry pie filling.
- Slowly pour the 7UP soda over the cake mix layer. Use a spoon to gently smooth the top layer without stirring.
- Spoon 5-6 dollops of remaining cherry filling on top. Bake for 1 hour to 1 hour 10 minutes until golden brown.
- Remove from oven and brush melted butter over the top if desired. Let cool before serving with vanilla ice cream.