Amazing Levain-Style Chocolate Chip Cookies
There’s something about baking coffee cake that feels like a warm hug—especially on those chilly mornings when the smell of cinnamon and freshly baked sweetness drifts through the house. I remember my grandma’s kitchen bustling with the aroma of cinnamon and butter, and how the first slice would disappear almost instantly. That nostalgia hits me every time I make this zucchini coffee cake—because, yes, zucchini! This surprisingly moist and tender cake is my go-to when I want something sweet but don’t want to spend hours in the kitchen. It’s honestly become a family favorite, and I always do this when I need a little comfort or want to impress brunch guests without any fuss. Plus, it’s one of those recipes that makes you feel clever—hiding zucchini in a dessert! Trust me on this one: the secret ingredient adds moisture, and no one needs to know. It’s perfect for lazy Saturdays, weekday mornings, or whenever a little slice of happiness is needed. Best part? It disappears faster than I can say “delicious,” so I always double the batch.
What is Zucchini Coffee Cake?
Think of zucchini coffee cake as a cozy, crumbly source of comfort wrapped in a simple cake form. It’s essentially a moist, tender cake dotted with sweet zucchini shreds, topped with a crunchy streusel, and finished with a sweet glaze. The name “coffee cake” typically hints at a breakfast or brunch treat meant to be enjoyed with a hot cup of coffee or tea—although, honestly, I’ve snuck a slice post-dinner more than once. The magic here is the zucchini—it keeps the cake super moist and almost melt-in-your-mouth, but it doesn’t make it heavy or dense. Its roots are in traditional coffee cake recipes, but I’ve played around with flavors and extra cinnamon, so it feels like a personal, slightly indulgent twist. It’s a perfect harmony of sweetness, warmth, and that satisfying crumbly topping that’s the real star when you dig in. Think of it as a cross between your favorite spice loaf and a caramelized streusel muffin—only layered into a loaf that makes every breakfast feel special.
Why you’ll love this recipe?
Honestly, what I love most about this zucchini coffee cake is how foolproof it is. I’ve made this countless times, and it never fails—trust me, I’ve tested all kinds of tweaks and it still comes out perfect every single time. The flavor? Oh, it’s just right—neither too sweet nor bland. The warm cinnamon and nutty hints of zucchini make every bite feel like a cozy morning. Plus, it’s insanely easy to whip up. No fancy equipment needed—just a mixing bowl, a spoon, and your oven. This one’s a lifesaver on busy nights when I want something sweet that’s quick, budget-friendly, and hits that ‘comfort zone’ spot. I also love how versatile it is—sometimes I throw in a handful of walnuts or swap out some brown sugar for coconut, and it still sings. And because zucchini is super budget-friendly, this recipe won’t break the bank. You can even make it ahead, and it still tastes fresh and moist the next day, making it perfect for weekend brunch or an unexpected guest visit. My kids ask for this all the time, and I always tell them it’s practically a secret family treat, even if it’s just a sneaky way to get vegetables into their morning. This cake isn’t just a dessert; it’s a warm, nourishing slice of home and happiness.
How do I make Zucchini Coffee Cake?
Quick Overview
This coffee cake is honestly one of the simplest baked goods you’ll ever make. You start by whisking together your dry ingredients, then mix up a wet mixture—think oil, eggs, vanilla, and grated zucchini—that gets folded into the dry. While that’s mixing, I make a crumbly streusel topping with butter, flour, and sugar, sprinkled generously on top. You layer the batter in a loaf pan, sprinkle on the streusel, and bake. The result? A beautifully golden, just-sweet-enough cake that’s irresistible with a cup of coffee or tea. And if you’re feeling fancy, a drizzle of quick glaze makes it look as appealing as it tastes. The best part? It’s almost impossible to overmix—so it’s forgiving even if you’re not a pro baker. I promise, once you try this, it’ll become a staple happening in your kitchen too.
Ingredients
For the Main Batter:
– 2 cups all-purpose flour (I like to use unbleached for extra flavor)
– 1 cup brown sugar (for richer, caramel notes)
– 1 teaspoon baking powder
– 1/2 teaspoon baking soda
– 1 teaspoon cinnamon
– 1/4 teaspoon salt
– 1/2 cup vegetable oil or melted butter
– 2 large eggs
– 1 teaspoon vanilla extract
– 1 1/2 cups grated zucchini (be sure to squeeze out excess moisture—trust me on this one!)
For the Filling (Optional):
– 1/2 cup chopped nuts or chocolate chips (if you want a richer, more indulgent cake)
– 1 teaspoon cinnamon (for extra swirl)**
For the Glaze:
– 1/2 cup powdered sugar
– 1-2 tablespoons milk (or cream for richness)
– 1/4 teaspoon vanilla extract (or a splash of lemon juice for a tangy kick)
Step-by-Step Instructions
Step 1: Preheat & Prep Pan
Set your oven to 350°F (175°C). Grease a 9×5-inch loaf pan or line it with parchment paper—trust me, buttered paper makes everything easier! I always do this first because waiting until the batter’s ready and then realizing my pan isn’t prepared is a no-go. Once preheated, set the pan aside while you mix up the batter.
Step 2: Mix Dry Ingredients
In a large bowl, whisk together the flour, brown sugar, baking powder, baking soda, cinnamon, and salt. I like to sift the dry ingredients—just a quick sifting to ensure everything’s evenly distributed and free of lumps. This step, while simple, makes sure your cake rises beautifully without any clumps or weird pockets.
Step 3: Mix Wet Ingredients
In a separate bowl, combine the oil, eggs, and vanilla. Whisk until really smooth—this is where I always add a quick splash of milk if I want a slightly creamier cake, but it’s totally optional. Fold in the grated zucchini, making sure it’s evenly dispersed. I squeeze out as much moisture as I can from the zucchini first—moisture is good, but excess water can make the batter spread too thin or turn watery.
Step 4: Combine
Add the wet mixture to the dry ingredients. Fold gently, just until there’s no streak of flour left—overmixing will make your cake dense, and nobody wants that! It should be thick but scoopable, with a little batter still streaked with zucchini.
Step 5: Prepare Filling
If you’re using nuts or chocolate chips, fold them into the batter now. I love using walnuts for texture and flavor—my kids call it “cookie dough” when I stash in chocolate chips, and it’s always a hit. Sometimes I leave the filling plain for a more traditional look, especially if I’m keeping it simple for a quick breakfast.
Step 6: Layer & Swirl
Pour half your batter into the loaf pan, sprinkle on half of your cinnamon-spiced nuts or chocolate chips if using, then add the remaining batter on top. Use a butter knife or skewer to gently swirl the batter—this creates a pretty marble effect that makes this cake extra special.
Step 7: Bake
Pop it in your preheated oven and bake for 50-60 minutes. Check for doneness by inserting a toothpick into the center—if it comes out clean, you’re good. Every oven is different, so start checking at around 50 minutes. The top should be golden and a little crumbly, with a scent of cinnamon filling your kitchen. I’ve learned that a little extra baking time won’t hurt—just keep an eye on it so it doesn’t overbrown.
Step 8: Cool & Glaze
Let the cake cool in the pan for about 15 minutes, then transfer it to a wire rack. Once cooled to room temperature, whisk up your glaze and drizzle it generously across the top—this just adds that finishing touch of sweetness and looks so pretty. If you’re in a rush, I sometimes skip the glaze and sprinkle a dusting of powdered sugar instead for a quick finish. Trust me, the glaze makes a huge difference—it’s almost like a secret sauce!
Step 9: Slice & Serve
Slice with a serrated bread knife for clean, even pieces. Best enjoyed slightly warm or at room temperature, but honestly, it tastes just as good the next day—and keeps wonderfully in an airtight container. I like serving it with a splash of milk or a hot cup of coffee, especially on a lazy weekend morning when everyone’s still in pajamas. Seriously, this is my family’s comfort food and my secret weapon for making mornings feel extra special.
What to Serve It With
This zucchini coffee cake is pretty versatile—here are some of my favorite ways to serve it:
- For breakfast: A strong cup of freshly brewed coffee and a dollop of Greek yogurt or a smear of cream cheese—yum! It’s great with a little butter too if you prefer things rich.
- For brunch: Serve it alongside fresh fruit, like sliced strawberries or a handful of blueberries, and maybe a mimosa or fresh juice for a fancy touch.
- As dessert: Warm slices topped with a scoop of vanilla ice cream or whipped cream? Yes, please! It’s even better when drizzled with caramel sauce or a sprinkle of chopped nuts.
- For cozy snacks: Cut small squares with a cup of tea, or pack a slice in the kids’ lunchbox for a midday sweet treat—my kids actually ask for this all the time!
This cake quickly became a staple in my house, especially because it’s so adaptable. My mother-in-law loves it with a little lemon zest in the glaze, while my nephew prefers it with chocolate chips hidden inside. It’s a no-pressure, comfort-food classic that makes any morning feel just a little brighter.
Top Tips for Perfecting Your Zucchini Coffee Cake
Speaking from experience, I’ve learned a few tricks along the way that can help you nail this every time:
- Zucchini prep: Always squeeze out excess water — I use a clean kitchen towel or cheesecloth to wring it out. Too much moisture can make the batter runny, and the cake won’t bake evenly. Fresh, firm zucchini will give you the best flavor and texture.
- Mixing advice: Don’t overmix once you combine the wet and dry ingredients. It’s tempting to keep stirring, but overmixing develops gluten and can turn your cake dense. Fold gently instead—your batter should be thick and just combined.
- Swirl customization: For a prettier marbled effect, add a few dollops of batter to the pan, sprinkle your filling, then add more batter on top before swirling. Use a toothpick or skewer to create a gentle swirl pattern—trust me, it makes a pretty presentation!
- Ingredient swaps: Want to make this vegan? Use applesauce instead of eggs and plant-based oil—still delicious. Looking to reduce sugar? Swap half the brown sugar with coconut sugar or honey. It’ll change the flavor slightly, but it’s still fantastic.
- Baking tips: Oven temperature varies, so keep an eye on it past the 50-minute mark. The toothpick test is your best friend here. If it comes out with moist crumbs, give it five more minutes and check again.
- Glaze variations: Feeling fancy? Add a splash of lemon juice or a pinch of cinnamon to the glaze. Or, for a decadent twist, swirl in some cream cheese frosting once the cake cools completely. I’ve tried both, and they’re both delicious options.
Honestly, I’ve made this so many times I can do it in my sleep—well, almost. The key is not overmixing, squeezing out the zucchini well, and embracing the imperfect swirl. Trust me, that rustic look is part of the charm, and it tastes just as amazing whether it’s pretty enough for a special occasion or just a quick treat on a busy day.
Storing and Reheating Tips
This cake keeps surprisingly well—moisture stays locked in, and the flavors deepen overnight. Here’s how I store mine:
- Room temperature: If you plan to eat it within a day or two, keep it covered loosely with foil or a clean towel. It’s safe to leave out for about 24 hours—just keep it out of direct sunlight or humid spots.
- Refrigerator: For longer storage, wrap well in plastic wrap or store in an airtight container. It’ll stay fresh for about 4-5 days. Before eating, I like to warm slices for 10-15 seconds in the microwave; it makes it feel freshly baked again.
- Freezer: Wrap tightly in plastic wrap and foil, then freeze for up to 3 months. Thaw overnight in the fridge or at room temperature. I’ve even frozen slices individually—perfect for a quick sweet fix any time.
- Glaze timing: Keep the glaze separate if you’re planning to store the cake. Add it just before serving to preserve its glossy, fresh look.
Honestly, this cake is so forgiving, and I love having leftovers that taste even better the next day—like a little reminder of Sunday mornings no matter what day it is.
Frequently Asked Questions
Final Thoughts
This zucchini coffee cake isn’t just a recipe; it’s a little slice of my cozy life. Every time I make it, I remember lazy Sunday mornings, my kids begging for “just one more slice,” and how a simple ingredient like zucchini can transform a humble cake into a moist, flavorful masterpiece. It’s endlessly forgiving, adaptable, and, most importantly, loved by everyone who takes a bite. Whether you’re a seasoned baker or just trying your hand at something new, this one’s a winner in my book. I hope you’ll try it, play around with flavors, and make it your own. And please, come back and tell me how you liked it or what tweaks you tried—because sharing these little joys is what food is all about. Happy baking!
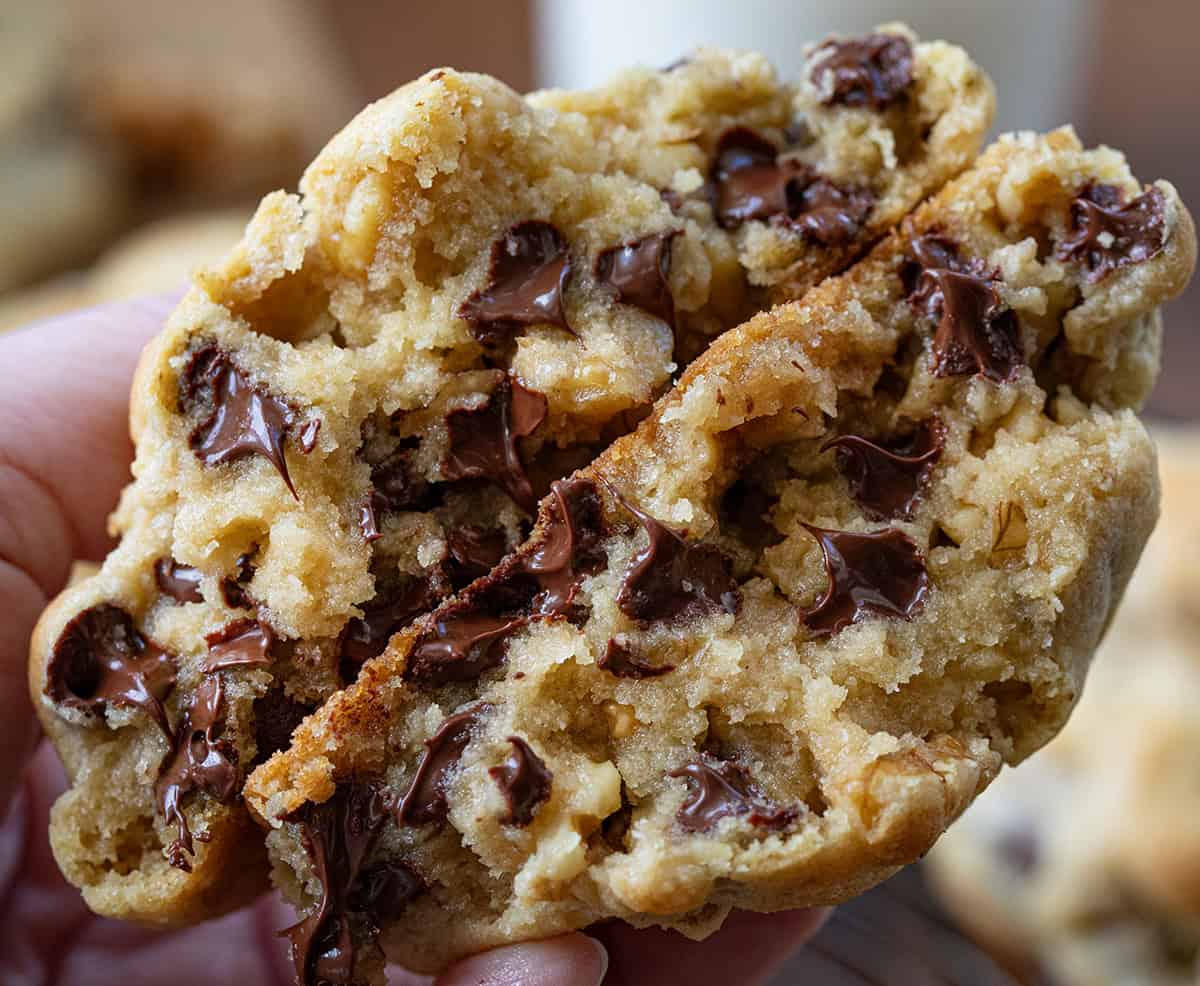
chocolate chip cookies
Ingredients
Method
- Preheat oven to 350°F and line baking sheets with parchment paper.
- In a large bowl, cream together the butter, brown sugar, and granulated sugar until light and fluffy.
- Add eggs one at a time, mixing well after each addition.
- In a separate bowl, whisk together flours, cornstarch, baking soda, and salt.
- Gradually add dry ingredients to wet ingredients, mixing until just combined.
- Stir in chocolate chips and walnuts until evenly distributed.
- Scoop dough onto prepared baking sheets, about 2 inches apart.
- Bake for 12 minutes or until edges are golden brown.
- Allow to cool on baking sheet for 5 minutes, then transfer to a wire rack to cool completely.