Autumn Spice Cheesecake with Chocolate Crust
There’s something about the smell of banana bread baking that immediately feels like home to me. I remember my grandma’s cozy kitchen, where she’d always have a loaf cooling on the sill, the air thick with warmth and cinnamon. Over the years, I’ve tinkered with the classic banana bread recipe, adding my own twist—like zucchini, which makes the bread moist and a little sneaky with those extra veggies. Honestly, I’ve made this countless times, and it never fails to disappear in minutes at my house. My kids ask for this all the time, especially when I toss in ripe bananas that are past their prime. This zucchini banana bread is practically foolproof—it’s incredibly flavorful, simple to whip up, and I swear, it’s the perfect way to use up those overripe bananas hiding in your fruit bowl. Trust me on this one — if you love banana bread but want an extra veggie boost, this recipe is a total game-changer. Plus, the smell alone brings everyone to the kitchen—mixing cozy comfort with being a little sneaky and healthy. Ready to get baking with me? Grab some bananas and zucchini, and let’s do this!
What is Zucchini Banana Bread?
Think of zucchini banana bread as that warm, comforting slice of home-meets-kitchen wizardry. It’s essentially a moist, tender quick bread that combines the sweet, rich flavor of bananas with the subtle, fresh taste of zucchini. The name might sound a little funny—banana bread with a vegetable twist—but once you taste it, you’ll understand why it’s one of my favorites. This bread is inspired by traditional banana bread, which is already a beloved treat, but the zucchini adds an extra layer of moisture and a tiny bit of nutrition—something I appreciate in my baking. It’s a quick-throw-together recipe that’s perfect whether you’re baking for family, brunch, or just craving a snack that’s both sweet and wholesome. Think of it as an upgraded classic that’s just different enough to impress your friends, but easy enough that you’ll want to make it weekly. And yes, you can totally call it secretly healthy, which I do when I need a little guilt-free indulgence.
Why you’ll love this recipe?
What I love most about this zucchini banana bread is how effortlessly cozy it feels. The aroma alone is reasons enough to get your oven going. It’s sweet but not overpoweringly so—just enough to satisfy that craving for something delectable without going overboard. The flavor combination of ripe bananas and zucchini creates a surprisingly rich, almost nutty undertone, and the best part? It’s ridiculously moist without feeling greasy or heavy. This one’s a lifesaver on busy nights when I need a quick dessert or breakfast, and it’s always a hit at family gatherings. I’ve tested this recipe with different kinds of zucchinis—courgettes, even sneaky small ones from the garden—and they all work beautifully. Budget-wise, it’s fantastic because you probably already have most of the ingredients in your pantry and fridge. Plus, you can customize it in a thousand ways: add nuts, chocolate chips, or even swap the sugar for honey or maple syrup to tweak the sweetness. Honestly, what I love most about this is that it’s versatile, forgiving, and just plain flavorful—perfect for anyone who loves a good bread that’s got a little bit of everything.
How do you make Zucchini Banana Bread?
Quick Overview
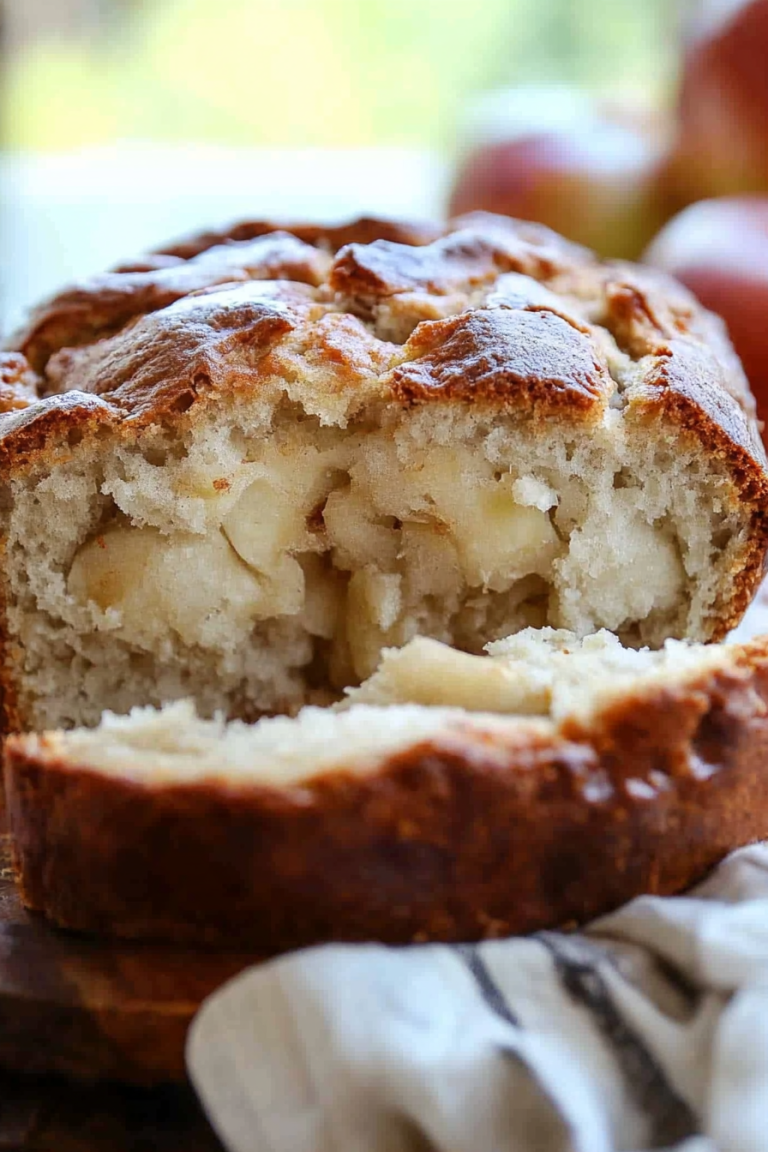
This zucchini banana bread comes together in just a few simple steps. We start with blending ripe bananas until smooth, then combining dry ingredients while simultaneously mixing the wet—no overcomplicating here! Next, fold in the grated zucchini, pour the batter into a loaf pan, and bake until golden and fragrant. The magic is in the moisture—zucchini keeps this bread tender and moist longer than typical banana bread, making slices stay fresh for days. I love that this recipe doesn’t require fancy ingredients or complicated techniques—just a big mixing bowl, a whisk, and some patience while it bakes. Honestly, the hardest part is waiting for it to cool, because the smell alone will make you want to skip the wait and cut a warm slice right away!
Ingredients
For the Main Batter:
– 3 ripe bananas (the browner, the better—trust me)
– 1/2 cup vegetable oil or melted butter
– 3/4 cup granulated sugar (or honey for a natural touch)
– 2 large eggs
– 1 teaspoon vanilla extract
– 1 1/2 cups all-purpose flour (whole wheat works well too)
– 1 teaspoon baking soda
– 1/2 teaspoon baking powder
– 1/2 teaspoon salt
– 1 teaspoon cinnamon (optional but recommended for coziness)
For the Filling:
– 1 medium zucchini, grated and squeezed dry
– Extra mix-ins like chopped walnuts, chocolate chips, or shredded coconut (optional but delicious)
For the Glaze:
– 1/2 cup powdered sugar
– 1-2 teaspoons milk or lemon juice
– A dash of vanilla or citrus zest for extra flavor (optional)
Step-by-Step Instructions
Step 1: Preheat & Prep Pan
Set your oven to 350°F (175°C). Grease a standard loaf pan with butter or non-stick spray, and lightly dust with flour if you like, so the bread comes out easily. I always do this when I bake—prepping the pan early just makes the whole process smoother. Line it with parchment paper if you want, but that’s totally optional if your pan is non-stick. Get it ready and set aside while you make the batter.
Step 2: Mix Dry Ingredients
In a small bowl, whisk together the flour, baking soda, baking powder, salt, and cinnamon if you’re using it. This step ensures everything gets evenly distributed and helps the bread rise nicely. I’ve learned that overmixing after adding wet ingredients can make the bread dense, so give this a good whisk but don’t go crazy.
Step 3: Mix Wet Ingredients
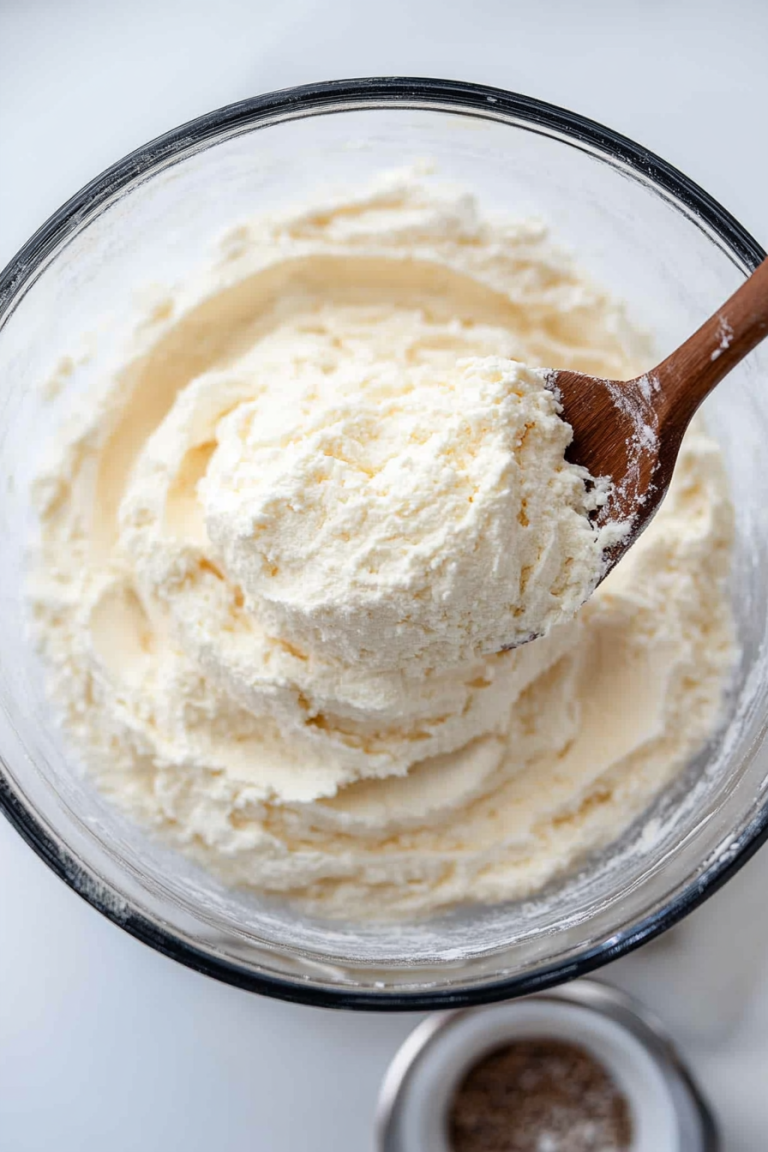
In a larger bowl, mash the bananas really well—use a fork or a potato masher. I’ve tested both, and mashing with a fork feels more nostalgic. Add the oil, sugar, eggs, and vanilla, and whisk until silky smooth. The bananas should be well incorporated, and the mixture’s slightly thick and fragrant. If your bananas are super ripe, the mixture will be sweet enough, but I sometimes add an extra teaspoon of sugar here if I want it just a tad sweeter.
Step 4: Combine
Pour the dry ingredients into the wet, but do it gradually. Use a spatula or a gentle whisk, folding everything together just until it’s combined—no overmixing! It’s okay if a few lumps remain, that’s what keeps the bread tender. Now, fold in the grated zucchini, mixing gently so it’s evenly distributed. The zucchini kind of disappears into the batter, but it leaves behind that really moist texture.
Step 5: Prepare Filling
If you’re adding extras like nuts or chocolate chips, gently fold them into the batter now. I love adding chocolate chips—makes this a real treat for my kids. If you’re feeling fancy, sprinkle some on top too—they look so pretty when they melt slightly during baking.
Step 6: Layer & Swirl
Pour the batter into your prepared loaf pan. If you want to get fancy, swirl in a spoonful of Nutella or extra banana slices for a beautiful effect. Use a knife to gently swirl the top for a marbled look. It’s a little extra step, but it makes the final bread look so pretty and adds a hint of combined flavors.
Step 7: Bake
Pop it into the oven and bake for about 50-60 minutes. I start checking around 50 minutes by inserting a toothpick—if it comes out clean, it’s done. Every oven is different, so if it’s browning too fast, tent with foil. The smell when it’s nearing doneness? Pure heaven.
Step 8: Cool & Glaze
Once baked, let the bread cool in the pan for about 10 minutes, then transfer to a wire rack. I know it’s tempting to cut into it immediately, but patience here helps keep it neat. When cool enough, drizzle with your glazed mixture if you’re going all out. That sweet glaze adds a pretty finish and a little extra flavor punch, but it’s totally optional.
Step 9: Slice & Serve
Use a serrated knife for clean cuts. Serve slices warm or at room temperature. I love a slice with a little butter or a dollop of mascarpone on the side. It’s just as good for breakfast, afternoon tea, or a cozy snack. Trust me, once you do it, it’ll become your go-to weekend treat.
What to Serve It With
This zucchini banana bread is so versatile that I often serve it in different ways, depending on the occasion. For a relaxed breakfast, I like setting out a platter with fresh fruit and a pot of herbal tea, and everyone grabs a slice still warm from the oven. My kids love spreading a bit of peanut butter or honey on theirs—so good. A slice with a steaming cup of coffee is perfect for a weekend morning, especially when it’s cold outside and the house smells like baking magic.
For brunch, I like to layer slices with ricotta or cream cheese, topped with fresh berries or a drizzle of honey. It’s like elevating comfort food into something special. As a dessert, I sometimes serve it with a scoop of vanilla ice cream or a dusting of powdered sugar—and trust me, it’s divine. When I’m feeling really casual, I’ll toast a slice and spread it with butter or jam for a cozy snack.
Honestly, I find this bread to be a crowd-pleaser, even among picky eaters. Plus, it uses up those leftover bananas and zucchini that sit in your fridge, making it a win-win for busy moms (and dads) like me. Whenever I bake this, I get a little nostalgic—thinking about all the happy mornings and impromptu gatherings that have been made special by just a simple loaf of bread. It’s more than just a recipe; it’s a little piece of comfort that’s quick to whip up but feels like a warm hug in every bite.
Top Tips for Perfecting Your Zucchini Banana Bread
After many batches, I’ve picked up a few tricks that make this recipe even better. Here are some of my top tips:
Zucchini Prep: Make sure to squeeze out as much moisture as possible after grating the zucchini. If it’s too wet, your bread can turn out dense or soggy. I’ve learned that wrapping the grated zucchini in a clean tea towel and squeezing gently is the easiest way to do it—and it prevents watery batter.
Mixing Advice: Overmixing is the enemy here. I always mix the dry ingredients just until combined before gently folding in the wet. This keeps the bread tender and airy. If you overmix, it can turn out dense, so don’t rush this step.
Swirl Customization: Want a pretty marbled look? Drop spoonfuls of peanut butter, Nutella, or extra mashed banana on top and swirl with a toothpick. It makes each slice look like a little work of art—and adds flavor, too.
Ingredient Swaps: For a healthier twist, try swapping half the flour for whole wheat or oat flour. I’ve tested it, and it still turns out beautifully—just slightly denser, which I actually love. Want to reduce sugar? Maple syrup or honey work nicely, but reduce the liquid slightly to compensate.
Baking Tips: If your bread browns too quickly, tent it with foil and lower the oven temperature slightly. Also, don’t open the oven door too often—baking is delicate! And always check for doneness with a toothpick; I’ve learned that patience makes for perfect slices.
Glaze Variations: Feel like switching it up? Add lemon zest to the glaze for zing, or sprinkle chopped nuts on top before baking for crunch. I’ve even mixed a splash of bourbon or rum into the glaze for a little adult twist. Experiment, have fun!
Honestly, after a few tries, I found the perfect balance of moistness and sweetness—becoming a little obsessed, really. But what I love most is that this recipe is forgiving; if I forget an ingredient or overmix, it’s still delicious. It’s a reminder that good baking is about loving the process—mess-ups included—and enjoying the delicious results.
Storing and Reheating Tips
This bread stays fresh for a couple of days if stored properly. I usually wrap individual slices in plastic wrap or keep it in an airtight container. At room temperature, it stays soft and moist for about 2 days—just make sure to keep it away from direct sunlight or heat, or it might turn a little dry. If you want to keep it longer, refrigerate it for up to a week, wrapped well in plastic or stored in an airtight container. For longer storage, I freeze slices—wrap each slice tightly in foil or freezer paper, then pop them into a zip-top bag. Thaw at room temp or quickly in the microwave for an easy snack.
If you glazed the bread, wait until you’re ready to serve to add the glaze—otherwise, it can get soggy if stored overnight. Reheat slices in the toaster or oven for a few minutes until warm and fragrant. That smell of warm banana and zucchini just hits differently when heated up, trust me!
Frequently Asked Questions
Final Thoughts
This zucchini banana bread isn’t just another quick bread — it’s a little piece of kitchen happiness. It’s moist, flavorful, forgiving, and makes your house smell like a bakery. Every time I bake it, I get reminders of lazy Sunday mornings, my kids’ giggles, and the simple joy of sharing something homemade. If you’re craving that familiar comfort with a tiny healthy twist, give this one a try. It’s easy enough for a weekday treat but special enough to serve at weekend brunch or family get-togethers. The best part? You might find yourself sneaking a second slice because it tastes even better the next day after the flavors meld. I hope you love this as much as I do. Don’t forget to leave a comment or share your own twist—I love hearing how others make it shine. Happy baking, my friend! And I can’t wait to hear how yours turns out!

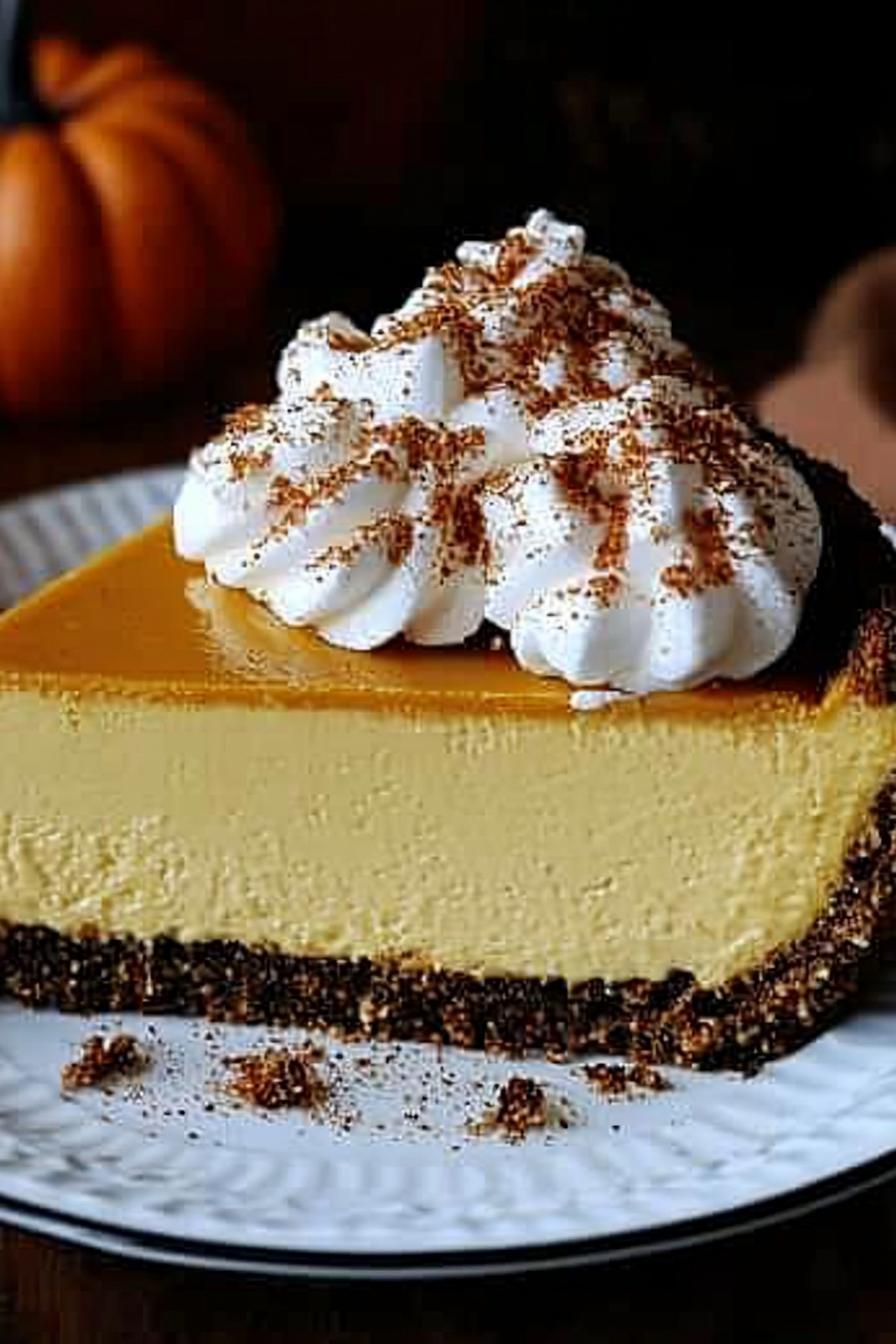
pumpkin cheesecake
Ingredients
Method
- Combine the chocolate cracker crumbs with melted butter to make the crust; press into a 9-inch springform pan.
- In a stand mixer, beat the cream cheese, sugar, and vanilla until smooth.
- Add pumpkin, eggs, and pumpkin pie spice to the mixture; beat until creamy.
- Pour the filling into the prepared crust.
- Bake at 350°F for 60 to 70 minutes until set.
- Allow the cheesecake to cool and then chill in the refrigerator.
- Before serving, top with whipped cream and drizzle with caramel sauce.