Speedy Sausage Cabbage Potato Skillet
There’s something about a slice of cake that feels like a warm hug, right? I remember when I first tried a zucchini cake after someone handed me a thick, somehow light loaf at a potluck. I was skeptical — zucchini in a cake? But oh my goodness, the moment I took a bite, I was hooked. The moistness, the subtle sweetness, the tiny bursts of vegetable goodness — it’s a sneaky, delicious way to get some greens in without anyone blinking an eye. And truthfully, it’s become my kids’ favorite too. They ask for this all the time, especially when I’m craving something sweet but don’t want to bake an entire batch of cupcakes. Trust me on this one: once you get the hang of it, it’s a go-to for busy weeknights, quick snacking, or a family brunch. It’s incredible how something so simple can pack such flavor and warmth. Plus, it’s almost impossible to mess up, which makes it my kind of recipe. Can’t wait to share all my tips and tricks with you — you’re gonna love this!
What is Zucchini Bliss Cake?
Think of zucchini bliss cake as the lovechild of your favorite moist banana bread and a classic spice cake, wrapped into a gorgeous, tender loaf. It’s essentially a sweet, fluffy cake that sneaks in freshly grated zucchini—kind of like a quiet hero, giving moisture and a bit of nutrition. The name? Well, “bliss” because it’s just that satisfying — kind of like biting into a cozy slice of comfort food. It’s a quick bread, which means no fuss, no rollercoaster of complicated techniques; just good ingredients mixed and baked in one pan. The beauty of this cake lies in its versatility: you can dress it up with cream cheese frosting, drizzle it with a sweet glaze, or just enjoy it plain with a pat of butter. I’ve tested this with different flavor tweaks, from adding walnuts to sprinkling cinnamon—every version is always a hit. It’s the kind of recipe that feels fancy but really isn’t complicated at all. Plus, the way that zucchini keeps it marvelously moist and tender makes every bite a delight.
Why you’ll love this recipe?
What I love most about this zucchini bliss cake is how it checks all the boxes for a perfect treat. First, the flavor—oh, wow. It’s sweet but not overly sugary, with a hint of vanilla and a whisper of cinnamon, which makes every bite feel like a warm hug. The zucchini adds a subtle earthy note that balances nicely against the sweetness—no overpowering vegetable taste, promise! The texture? It’s out of this world—moist, tender, and so light that a slice disappears in minutes at my house. And speaking of easy, this recipe is a lifesaver on busy nights. I always do this when I want something homemade but don’t want to spend hours in the kitchen. Plus, the ingredients are simple, usually staples I already have in my pantry—flour, sugar, eggs, and zucchini. Its versatility is another thing I adore; you can adapt it for breakfast, dessert, or even a cozy snack. I’ve made this endless times, and I never get bored. It’s perfect for playdates, family dinners, or just to satisfy that hidden sweet tooth at midnight. And trust me, once you try it, it’s gonna become your go-to too!
How do I make Zucchini Bliss Cake?
Quick Overview
This cake comes together in just a few simple steps. You start by grating fresh zucchini—don’t forget to squeeze out some excess moisture, or it’ll be a soggy mess! Mix your dry ingredients in one bowl, then your wet ingredients in another. Slowly combine them, but don’t overmix—nobody likes a dense cake. Fold in the grated zucchini and your favorite mix-ins if you want. Pour the batter into a prepared loaf pan, swirl in some cinnamon or nuts if you’re feeling fancy, then bake until golden and a toothpick comes out clean. The smell alone will draw everyone to the kitchen. Once baked, cool it a bit, then glaze it or eat it as is. It’s so straightforward—you’ll be surprised how bakery-worthy this simple loaf looks and tastes.
Ingredients
For the Main Batter:
– 2 cups all-purpose flour (I prefer unbleached for depth of flavor)
– 1½ teaspoons baking powder
– ½ teaspoon baking soda
– 1 teaspoon ground cinnamon
– ¼ teaspoon salt
– ½ cup granulated sugar
– ⅓ cup light brown sugar (adds a nice richness)
– ½ cup vegetable oil or melted butter
– 3 large eggs (trust me on real eggs—makes all the difference)
– 1 teaspoon pure vanilla extract
– 1 cup freshly grated zucchini (squeeze out excess moisture with a clean towel; super important!)
For the Filling:
– Optional: ½ cup chopped walnuts or pecans
– Optional: ¼ cup dried cranberries or chocolate chips for bursts of flavor
For the Glaze:
– ½ cup powdered sugar
– 1-2 teaspoons milk or cream
– A splash of vanilla or lemon juice for zest
Step-by-Step Instructions
Step 1: Preheat & Prep Pan
Set your oven to 350°F (175°C), and line a loaf pan with parchment or lightly grease it. I love using parchment; it keeps cleanup easy and makes removing the cake a breeze. Just make sure the pan is ready to go, so you’re not scrambling last minute.
Step 2: Mix Dry Ingredients
In a large bowl, whisk together the flour, baking powder, baking soda, cinnamon, and salt. Doing this first ensures your leavening agents are evenly distributed, so every slice bakes up beautifully fluffy. Trust me, uneven mixing leaves you with pockets of baking soda that taste bitter. That’s a mistake I’ve made, so now I whisk like it’s my job.
Step 3: Mix Wet Ingredients
In a separate bowl, whisk together the sugars, oil, eggs, and vanilla. They should look smooth and slightly frothy—this is your flavor foundation. I always do this step with a hand whisk; it adds a little bit of arm workout and helps blend everything thoroughly. I’ve tested this with almond milk too, and honestly, it makes it even creamier—so feel free to experiment!
Step 4: Combine
Pour the wet mixture into the dry ingredients gently. Fold everything together just until no streaks of flour remain—don’t overmix. A few lumps are perfectly fine; they’ll bake out. Overmixing can lead to dense, heavy bread, and that’s the last thing you want. I learned this from countless trials, and now I just fold with a spatula until it’s just combined.
Step 5: Prepare Filling
If you’re adding nuts or dried fruits, toss these in with the batter now. It’s fun to add a handful of chopped walnuts for crunch or cranberries for tartness. My kids love the little chocolate chips hidden inside too—that’s a sneaky way to make it more dessert-like!
Step 6: Layer & Swirl
Pour the batter into your prepared pan, then sprinkle or swirl in extra cinnamon or chocolate chips. You can also make a simple marbling effect by dropping spoonfuls of cinnamon-swirl mixture and swirling it with a toothpick for a pretty, artisanal look. Don’t worry if it’s a bit messy—that’s part of the charm!
Step 7: Bake
Place in the center of your oven and bake for 50-60 minutes. I start checking around 50 minutes; a toothpick inserted in the center should come out clean. Every oven varies a little, so trust your nose and the toothpick test. The top should be golden and slightly cracked—classic for a loaf like this.
Step 8: Cool & Glaze
Once out of the oven, let it cool in the pan for about 15 minutes. Then transfer to a wire rack. If you’re glazing, wait until it’s just slightly warm — hot cake plus glaze can cause melting or slipping. Mix powdered sugar with a splash of milk and vanilla, then drizzle it over in a messy, beautiful pattern. Or, sprinkle with some coarse sugar or chopped nuts for extra crunch.
Step 9: Slice & Serve
Slice with a serrated bread knife—resulting in even slices with beautiful crumb. Serve warm with butter or at room temperature for a more traditional vibe. Honestly, it’s good plain too, especially when it’s still a little warm from the oven. And if leftovers happen, I stash slices in an airtight container; they stay moist for days but disappear faster than I can say “more, please.”
What to Serve It With
This cake is incredibly versatile. For breakfast, I love pairing it with a strong cup of coffee or a glass of cold milk. The kids adore it with a smear of cream cheese or a dollop of yogurt—kind of like a sweet, veggie-packed banana bread. On brunch days, I turn it into a centerpiece, sliced thick and served alongside scrambled eggs and fresh fruit. It also makes a wonderful dessert, especially with a drizzle of honey or a scoop of vanilla ice cream. If I’m feeling extra indulgent, I sprinkle powdered sugar over the top and add a few fresh berries. When I want to keep it simple for a quick snack, a warm slice with a little butter or nut butter is pure comfort. Over the years, I’ve experimented with adding citrus zest, swapping brown sugar for honey, or even tossing in some shredded coconut—each variation brings its own personality to the table.
Top Tips for Perfecting Your Zucchini Bliss Cake
After many attempts and a lot of taste-testing, I’ve picked up some tricks that make this recipe even better. First, always squeeze out excess moisture from your zucchini—this is a game-changer. Wet zucchini can make your batter too runny and cause the cake to sink or get soggy. I do this by grating, then placing the shredded zucchini in a clean dish towel and wringing out the water—trust me, it’s worth the extra step. Second, don’t overmix your batter. I’ve ruined many loaves by overworking it—keep it gentle, folding just until combined. For the swirl and toppings, I suggest making a cinnamon sugar mixture beforehand—you can swirl or sprinkle it for that beautiful marbled effect. Ingredient swaps? Absolutely! I’ve tried whole wheat flour—adds a nutty flavor but slows the rise slightly—and coconut oil, which adds a delightful aroma. If you’re trying to cut back on sugar, reduce the brown sugar to ¼ cup or substitute with a natural sweetener, but keep in mind it might slightly affect texture and moisture. When baking, oven positioning matters—middle rack is best to avoid uneven cooking, and always do the toothpick test. A clean toothpick means it’s done. Lastly, customizing your glaze gives it a special touch—add lemon zest or a splash of vanilla for more flavor. Every tweak’s a lesson learned, and I encourage you to experiment to find your perfect version!
Storing and Reheating Tips
This cake keeps surprisingly well, especially if you store it right. If you’re enjoying it within a day or two, just cover it with a clean towel or place in an airtight container at room temperature. It’ll stay moist and tender for about 2-3 days if kept snug. If you want to keep it longer, pop slices into the refrigerator—just make sure they’re wrapped tightly or stored in a sealed container to prevent drying out. For freezing, wrap slices individually in plastic wrap, then place in a freezer-safe bag; they’ll last up to 3 months. Thaw at room temperature or warm in the microwave for about 20 seconds if you’re craving that fresh-baked feeling. I’ve found that glaze is best added just before serving—if you store it with the glaze on, it can soak into the cake and get overly sticky. Instead, keep the glaze separate and drizzle fresh when ready to serve. Trust me, a little prep pays off, and every time I reheat a slice, it tastes just as cozy and delicious as the first day. Just remember to rewarm gently—piece by piece in the microwave, covered lightly, to avoid drying out. This cake works beautifully for make-ahead mornings or last-minute treats!
Frequently Asked Questions
Final Thoughts
I honestly can’t stop recommending this zucchini bliss cake. It’s become a staple in my household for good reason—moist, flavorful, totally adaptable, and incredibly forgiving. Whether you’re looking for a quick breakfast, a sweet snack, or an impressive-but-easy dessert, it fits the bill. Every time I make this, I feel a warm sense of satisfaction, and the best part? My family devours it in minutes. Over the years, I’ve tested dozens of tweaks—adding cardamom, swapping sugar for applesauce—every little change just makes it more personal and tasty. Once you master the basic recipe, your options are endless. I love hearing how you personalize yours—tag me in photos or drop a comment below. Happy baking! I can’t wait to hear how yours turns out—trust me, you’re going to fall in love with this one!

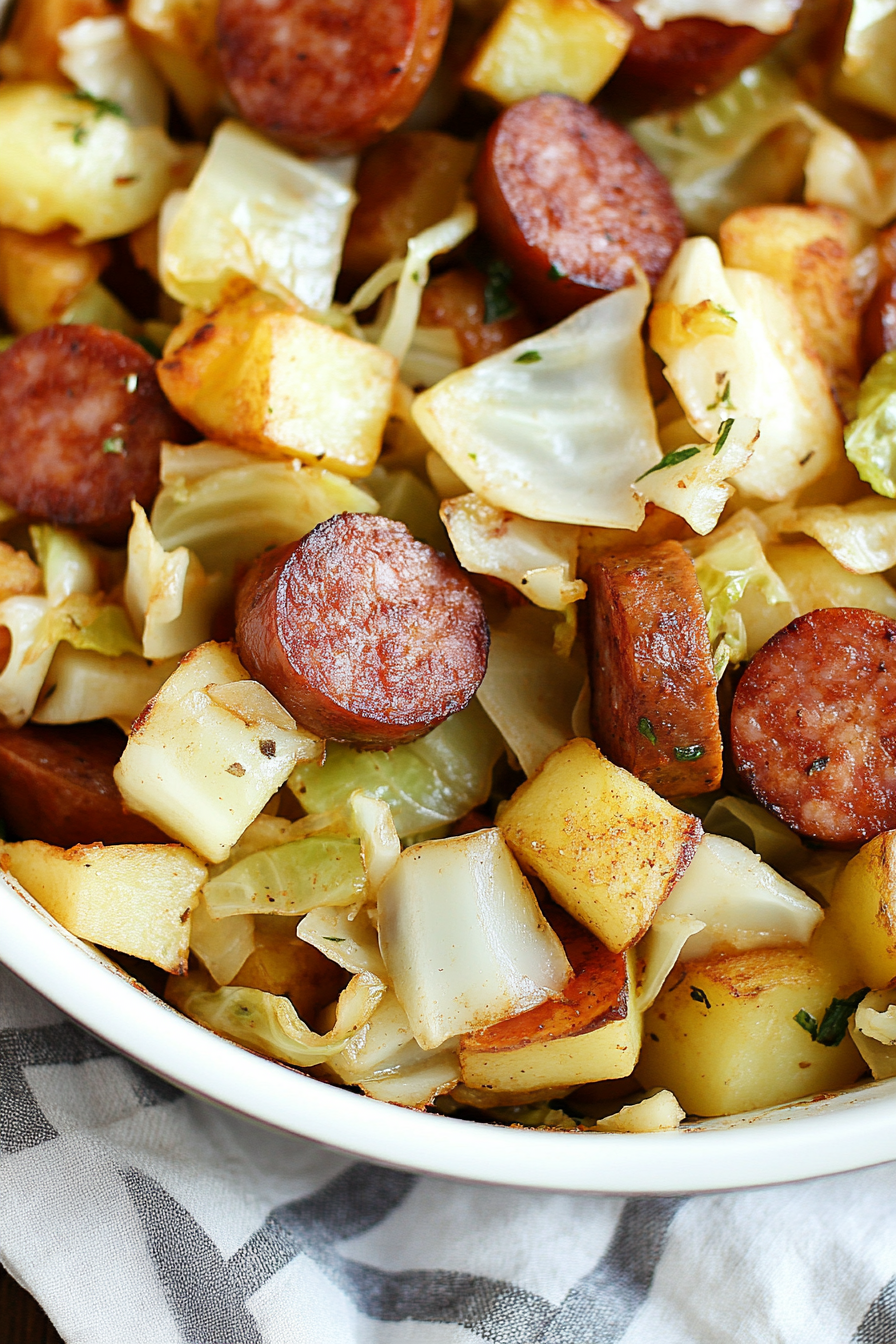
kielbasa cabbage potato skillet
Ingredients
Method
- Peel and chop the potatoes into 0.5-inch pieces, place in a bowl, sprinkle with 0.5 teaspoon salt and 0.25 teaspoon pepper. Microwave for 4 minutes, stir, then microwave another 2-4 minutes until fork-tender.
- Heat oil in a large skillet over medium-high heat. Add chopped onion and sauté until lightly browned. Add minced garlic and sliced kielbasa, cook for 3 minutes, stirring frequently.
- Add cooked potatoes to the skillet, toss to combine, and cook for 2-3 minutes until lightly browned.
- Shred the green cabbage and add to the skillet. Sprinkle with 0.25 teaspoon salt and 0.25 teaspoon pepper. Add 2 tablespoons water, cover, and cook for 2 minutes until cabbage is bright green and barely wilted.