Easy Filipino Chicken Stew Recipe
Have you ever had that moment in the kitchen when something smells so divine while baking that everyone rushes into the room, noses sniffing the air with anticipation? That’s exactly how I feel every time I make my favorite zucchini swirl cake. It’s a recipe I’ve been making for years, and somehow, it never gets old. It’s kind of like that cozy blanket you cling to when life feels chaotic — familiar, comforting, and just plain delicious. My kids ask for this all the time; it’s become our weekend treat and a sweet way to sneak some veggies into their diet without them even noticing. Trust me on this one: this isn’t your average cake. It’s a symphony of moist, tender goodness with bursts of sweet cinnamon and a luscious, buttery swirl. And the best part? It’s incredibly easy to whip up, even when I’m low on time but craving something sweet. I always do this when I want to impress friends or just spoil my family — it’s a true “go-to” that feels like a special secret in my kitchen.
What is Zucchini Swirl Cake?
Think of zucchini swirl cake as a delightful twist on classic zucchini bread, but in cake form. It’s essentially a moist, tender cake layered with a sweet cinnamon filling that swirls beautifully when baked. The name “swirl” comes from how you layer and marble the cinnamon mixture into the batter, creating gorgeous marbled patterns with each slice. This cake has humble beginnings—it started as a way to use up those extra zucchinis from my garden, but honestly, it’s become a family favorite that’s turned into so much more. It’s bread-like in texture but feels like a dessert, thanks to that sweet, cinnamon-spiced ribbon running through it. Think of it as a comforting, homey treat that’s perfect for breakfast, brunch, or afternoon tea. It’s a recipe I’ve personalized over the years—adding a touch of vanilla, testing with almond milk, and even swapping out the sugar for honey—and believe me, it always turns out fantastic. It’s that kind of recipe that makes you feel like a culinary magician — simple ingredients coming together in the most beautiful way.
Why you’ll love this recipe?
What I love most about this zucchini swirl cake is how effortlessly cozy it makes my house feel. The smell alone—warm cinnamon, nutty zucchini, and just a hint of vanilla—can turn any ordinary afternoon into a special moment. The texture? Oh, it’s just heaven—moist, yet crumbly enough to melt in your mouth. And honestly, it’s a real lifesaver on busy nights because I usually have all the ingredients in my pantry or fridge already. No fancy tools required, just a whisk and a spatula, and you’re set. Plus, it’s budget-friendly because zucchinis are so inexpensive—they come fresh from my garden or the local market for mere cents. What I also adore is how versatile it is—serve it warm with a drizzle of honey, or chilled for a more decadent dessert. My friends always ask for the recipe, and I love that it’s cozy enough for family weekends but fancy enough to impress guests. I mean, it’s like a big, warm hug in cake form—perfect for those moments when you want something a little nostalgic but totally satisfying.
And then there’s the swirl. Desperately pretty, it’s almost too good to eat—you want to admire that marbling. But don’t worry, once you get the knack for layering and swirling, you’ll be doing it in your sleep! It’s honestly become my signature baking trick. This recipe’s a keeper because it hits every note: luscious flavor, simple process, affordability, and just enough elegance to make you feel like a true baking queen (or king!). Whether it’s a family brunch or a sneaky midnight treat, it always hits the spot. Plus, I’ve experimented with adding walnuts or perhaps a splash of lemon zest for a bright twist, and honestly? Delicious every single time. It’s like a little blank canvas that you can make your own.
How do I make Zucchini Swirl Cake?
Quick Overview
This cake is as easy as mixing your dry ingredients, blending the wet, and then folding everything together. The real magic is in swirling the cinnamon sugar filling into the batter before baking — trust me, it’s like the art of dessert. Once baked, you get this beautiful marbled effect, and the whole house will fill with that irresistible cinnamon aroma. No complicated techniques, no fancy equipment. Just straightforward baking that always turns out moist and flavorful. It’s perfect for when you want something homemade without the fuss but still makes you feel like a baking hero. Plus, it freezes well, so you can bake a loaf for now and have a slice later when that craving hits!
Ingredients
For the Main Batter:
– 2 cups all-purpose flour (or a mix of gluten-free flour if you prefer)
– 1¼ cups granulated sugar (or honey for natural sweetness)
– 1 teaspoon baking powder
– ½ teaspoon baking soda
– ½ teaspoon salt
– 1 teaspoon ground cinnamon
– ½ cup vegetable oil (can substitute melted coconut oil for a richer flavor)
– 2 large eggs
– 1 teaspoon vanilla extract
– 1 cup grated zucchini (squeeze out excess moisture with a paper towel)
– ½ cup milk (I love almond milk — makes it extra creamy!)
For the Filling:
– ½ cup brown sugar
– 1 tablespoon ground cinnamon
– 2 tablespoons softened butter (or coconut oil)
– Optional: ½ cup chopped walnuts or pecans for added texture
For the Glaze:
– ½ cup powdered sugar
– 1-2 teaspoons milk or lemon juice
– A sprinkle of cinnamon (optional)
Step-by-Step Instructions
Step 1: Preheat & Prep Pan
Set your oven to 350°F (175°C) and grease a loaf pan or line it with parchment paper. I like to give mine a light coating of butter or non-stick spray, then dust it with a little flour—really helps with getting clean slices later. While the oven preheats, grate your zucchini—you want about 1 cup. Then, squeeze out as much of the excess moisture as you can; this keeps the cake from turning into a soggy mess.
Step 2: Mix Dry Ingredients
In a large bowl, whisk together the flour, sugar, baking powder, baking soda, salt, and cinnamon. I always do this first so everything is evenly distributed; it makes the batter so much smoother later on. The aroma of cinnamon when these dry ingredients hit the air? Heavenly.
Step 3: Mix Wet Ingredients
In a separate bowl, whisk the eggs, oil, vanilla, and milk until well combined. Then, fold in the grated zucchini. I’ve tested this with almond milk, and it actually made it even creamier. It’s a little trick I picked up from experimenting — it’s subtle, but the flavor just gets next-level.
Step 4: Combine
Pour the wet mixture into the dry ingredients and fold gently — don’t overmix! You want that muffin-like crumb, not a dense batter. Overmixing can make the cake tough, so just fold until you don’t see streaks of flour anymore. It should be thick but pourable.
Step 5: Prepare Filling
In a small bowl, mix the brown sugar and cinnamon, then add the softened butter to create a crumbly, but slightly sticky, cinnamon mixture. If you like crunch, toss in some chopped nuts now. I tested with and without, and honestly, the nuts add such a nice layer of texture.
Step 6: Layer & Swirl
Pour half the batter into your prepared pan, then sprinkle half the cinnamon sugar mixture evenly over it. Repeat with the remaining batter and cinnamon. Using a butter knife or skewer, swirl through the batter to create beautiful marbled patterns—don’t overdo it, just a few gentle swirls will do. When baked, this creates those gorgeous ribbons of cinnamon that look almost too pretty to cut.
Step 7: Bake
Pop it into the oven and bake for about 45-50 minutes, or until a toothpick inserted in the center comes out clean. Ovens vary, so if it starts to brown too quickly, tent it with foil. The smell of cinnamon and zucchini baking is pure comfort—almost like waking up to fresh bread.
Step 8: Cool & Glaze
Allow the cake to cool in the pan for 15 minutes, then transfer to a wire rack. Once cooled slightly, whisk together your glaze ingredients and drizzle it over the top. I love to keep the glaze a little runny—it soaks into the crumb and adds a sweet shine. For extra pizzazz, sprinkle a little cinnamon on top.
Step 9: Slice & Serve
Use a sharp serrated knife to cut neat slices. This cake is best enjoyed warm or at room temperature, preferably with a cup of coffee or tea. My kids ask for seconds, and I usually double the recipe because it disappears in minutes at my house. Serve with a dollop of whipped cream or a scoop of vanilla ice cream for an extra treat. Trust me, you’ll be coming back to this one again and again!
What to Serve It With
This zucchini swirl cake is so versatile that it fits any occasion. For breakfast, serve warm with a splash of cream or a drizzle of honey — it’s like a grown-up muffin. When I make brunch, I love pairing it with fresh berries and a big pot of coffee; the cinnamon and zucchini keep it light enough for a lazy weekend. As a dessert, it’s a hit with a scoop of vanilla ice cream or a dusting of powdered sugar. And it’s perfect for cozy snacks with friends, paired with a cup of tea or mulled cider. I’ve even packed slices in lunchboxes — it’s the kind of treat that makes ordinary days feel special. This cake reminds me of childhood afternoons sitting at the kitchen table, savoring something sweet while chatting with my family. It’s simple, nostalgic, and oh-so-good—definitely a recipe I want to pass down someday.
Top Tips for Perfecting Your Zucchini Swirl Cake
Over the years, I’ve learned a few tricks to make this cake even better. First, always squeeze out your zucchini really well. Moisture is the enemy here; too much water and the batter could turn into a soggy mess. Use a clean kitchen towel or cheesecloth to wring it out, and don’t skip this step. Second, to prevent overmixing, gently fold the wet and dry ingredients together. It’s tempting to stir vigorously, but the secret is in patience — gentle folds give you that tender crumb we’re after.
For swirling, I’ve found that a pick or skewer works better than a knife because it creates a more defined marbled look. When layering, don’t just dump everything in; take your time to spread and swirl. If you want the center to be more cinnamony, sprinkle more filling in the middle layers. Also, feel free to experiment with spices—cardamom, nutmeg, or a splash of orange zest can elevate the flavor beautifully. Baking tips? Always check your oven’s calibration. I once baked this at 355°F, and it turned out perfect — so don’t be afraid to tweak the temperature slightly if yours runs hot or cold.
When it comes to the glaze, I tested pouring it on while the cake was hot versus cooled. Honestly, slightly warm or room-temp cake works best because the glaze soaks in just enough for that glossy, irresistible look. If you’re feeling fancy, try adding a splash of liqueur—Grand Marnier or Amaretto can give it a nice adult twist. This recipe has become a weekly staple in my house, and I’m always tweaking little things to make it even better. The key is to keep it simple and remember: it’s all about loving the process and enjoying every bite.
Storing and Reheating Tips
This cake stays fresh for a couple of days if stored properly. I usually wrap slices tightly in plastic wrap or place them in an airtight container. If you’re planning to enjoy it later, the fridge is the best place — keeps everything tasting fresh and the flavors intact. I recommend letting it come back to room temperature or warming it for a few seconds in the microwave (just 10-15 seconds — don’t overdo it!) before serving. Freezing is also a great option; wrap well in plastic wrap, then foil, and it’ll keep for about a month. Just thaw overnight in the fridge and reheat gently if needed.
As for the glaze, I find that it’s best added right before serving — if you refrigerate it with the glaze on, it might lose some of its shine and sweetness. So, if you make the glaze in advance, store it separately and just drizzle when you’re ready to serve. Trust me, this cake is forgiving, and with these little tips, you’ll get consistently fantastic results every time.
Frequently Asked Questions
Final Thoughts
This zucchini swirl cake is one of those recipes that feels like a warm hug in every bite. It’s simple enough for a weekday treat, yet special enough to serve at weekend brunch or a casual get-together. What I love most is how versatile it is—adding walnuts, lemon zest, or even a splash of orange juice can totally change the flavor profile. Over the years, I’ve tested and adapted this recipe endlessly, and each time, it brings a smile to my face. The way the cinnamon ribbon swirls through the moist cake is almost too pretty to cut, but oh-so-satisfying to eat. If you’re looking for a recipe that combines comfort, flavor, and a little bit of baking magic, give this a try. And don’t forget to let me know how yours turns out—sharing these moments of baking joy is what makes it all worthwhile. Happy baking, my friend!
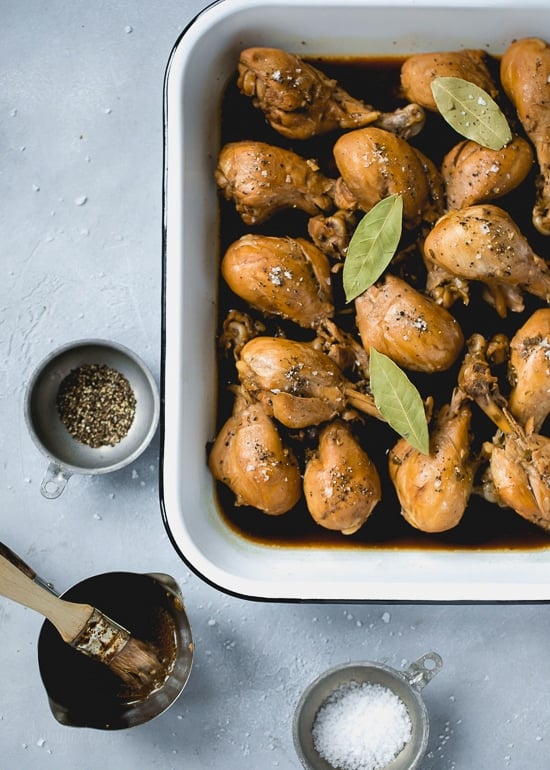
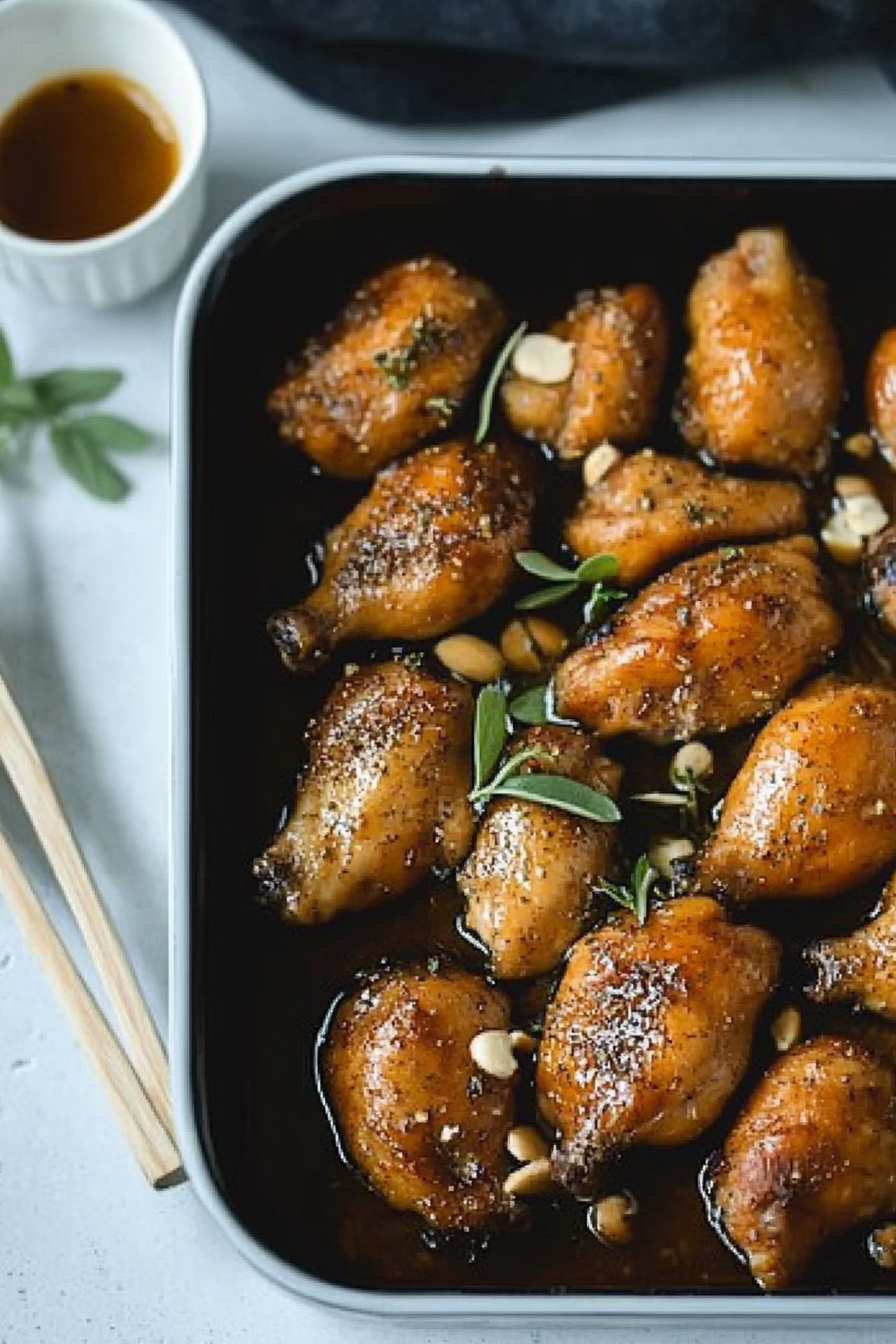
Filipino chicken
Ingredients
Method
- Marinate chicken in vinegar, soy sauce, garlic, jalapeño, and pepper for at least an hour.
- Put chicken, water, bay leaves, and marinade into a skillet and cook on medium-low heat until tender, about 45 minutes.
- Remove lid and cook for an additional 15 minutes to reduce the sauce.
- Discard bay leaves and serve hot over rice.