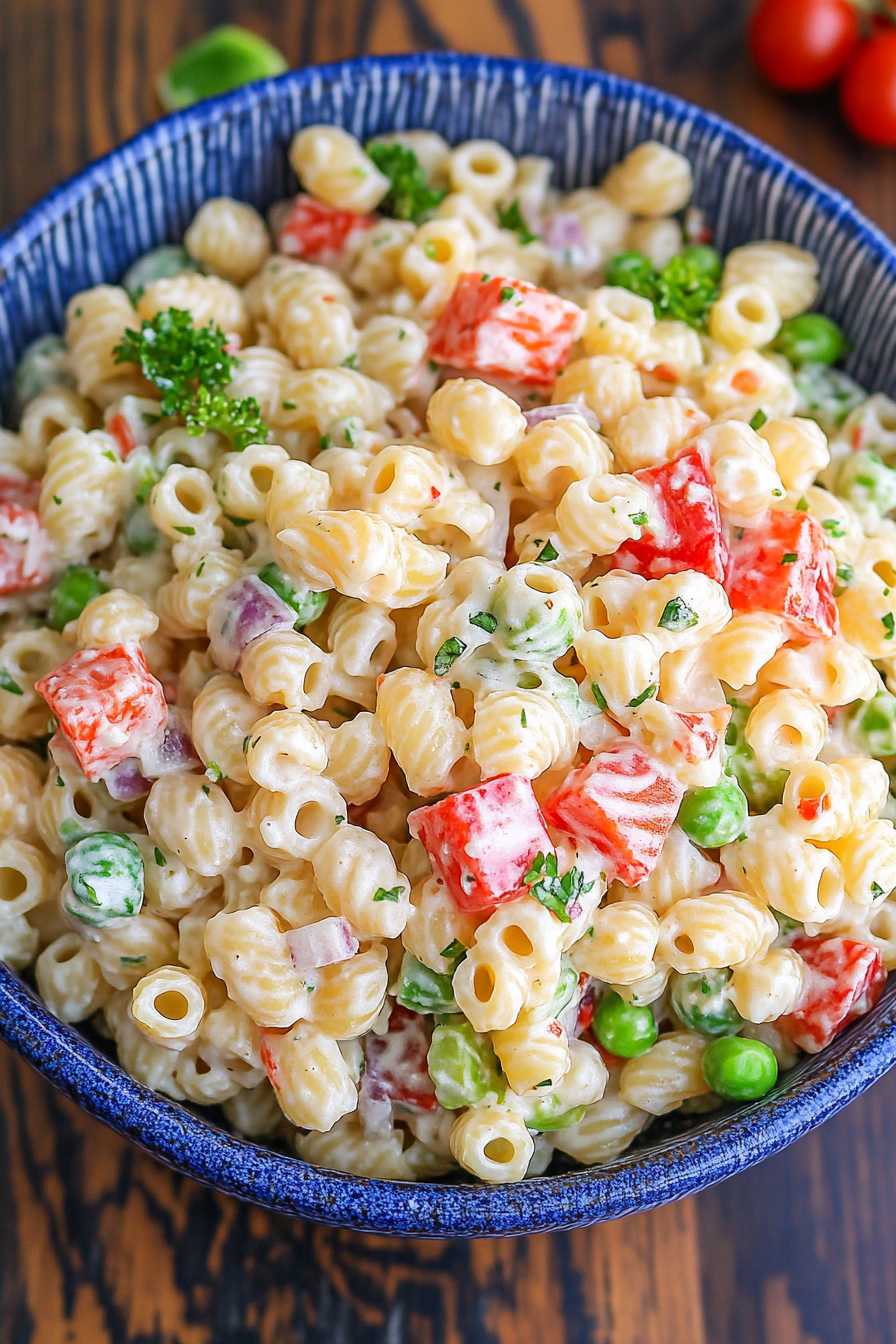
Luscious Summer Pasta Salad Recipe
There’s just something magical about the smell of freshly baked banana bread wafting through the house — it’s like a warm hug from the inside out. But I gotta admit, sometimes I get bored of the same-old traditional recipes. So, I started experimenting with zucchini, and let me tell you — it’s become my secret weapon for adding a boost of moisture and a sneaky veggie boost that my kids actually ask for. This zucchini banana bread is a total game-changer on busy mornings, lazy weekend brunches, and even late-night snack attacks when I don’t want to turn the oven into a bakery. It’s incredibly simple to whip up, uses ingredients I usually already have, and the best part — it tastes like a cozy slice of heaven. Trust me, once you make this, it’s gonna be a staple in your home too. Come on, grab a coffee — I’ll walk you through my favorite cozy recipe that’s just bursting with flavor and heart. It’s kind of like my homemade hug in every slice.
What is Zucchini Banana Bread?
Think of zucchini banana bread as a delightful mash-up between comfort food and sneaky health food. It’s essentially a moist, tender loaf that combines the sweetness of ripe bananas with the subtle, fresh flavor of zucchini — all baked together to perfection. The name might sound a little fancy, but it’s honestly one of the easiest recipes to make at home, and it’s a great way to use up overripe bananas and those extra zucchinis from your garden or farmers market. The best part? The zucchini disappears into the batter, leaving behind this incredible moistness that’s so satisfying — it’s basically like bread’s answer to a velvet cushion. I love to think of it as a little bit healthy, a little bit indulgent, and totally customizable depending on what’s in your pantry. It’s a cozy, wholesome treat that I’ve been baking for years, and every time I do, it reminds me of lazy Sunday mornings and my grandma’s kitchen.
Why you’ll love this recipe?
There are so many reasons why this zucchini banana bread has become a household favorite around here. First off, the flavor — oh, the flavor! The sweet bananas meld with a hint of vanilla and the earthy, fresh essence of zucchini, creating a loaf that’s sweet, savory, and just perfectly balanced. I always do this when I need a pick-me-up; it’s like a slice of comfort wrapped in a single bite. What I love about this is how ridiculously easy it is to make. No fancy equipment, no complicated techniques — just a mixing bowl andPlus, it’s budget-friendly, folks. The ingredients are simple pantry staples like flour, sugar, bananas, and zucchini. No special fancy flours or additives needed, making it perfect for last-minute baking when the fridge is a little sparse. Another reason I keep making this? Versatility. Want to add nuts? Chocolate chips? Dried fruit? Do it! It’s a forgiving recipe that welcomes your personal twist, and honestly, each variation is a new adventure. Whenever I bake this, I know my family will ask for seconds — and I’ll probably sneak in an extra zucchini slice myself. It’s that good.
How do you make Zucchini Banana Bread?
Quick Overview
This zucchini banana bread starts with mashing those overripe bananas until they’re soft and sweet, then mixing together a simple batter with grated zucchini, flour, sugar, and a few flavor boosters like vanilla and cinnamon. The batter comes together fast — no need for fancy gadgets, just a mixing spoon and a bowl. You’ll fold in your favorite add-ins if you like, then pour it into a loaf pan and bake until golden and fragrant. What’s really nice? The zucchini keeps it super moist and adds a slightly earthy note that balances the sweetness perfectly. This is just the kind of recipe that you can throw together in under an hour and feel good about feeding your family something both comforting and a little healthier. Plus, the smell alone will be enough to make everyone come running.
Ingredients
For the Main Batter:
– 3 ripe bananas (mashed well, I always go for the super ripe ones — they’re the sweetest!)
– 1 cup grated zucchini (squeeze out some excess moisture, trust me on this)
– 1/2 cup vegetable or melted coconut oil
– 3/4 cup sugar (brown or granulated, depending on your mood)
– 2 large eggs (fresh and room temperature if possible)
– 1 1/2 cups all-purpose flour (I like to use unbleached for more flavor)
– 1 teaspoon baking soda
– 1 teaspoon baking powder
– 1 teaspoon cinnamon (because everything’s better with cinnamon)
– Pinch of salt
For the Filling:
– Optional: chocolate chips, nuts, or dried fruit (whatever makes your heart happy)
For the Glaze:
– Powdered sugar mixed with a splash of milk or lemon juice for a quick glaze
– Or a simple dusting of cinnamon-sugar for that extra cozy touch
Step-by-Step Instructions
Step 1: Preheat & Prep Pan
I always start by preheating my oven to 350°F (175°C). Grease a standard loaf pan with butter or line it with parchment paper — makes for easy cleanup and perfect slices. Once your oven is ready, set your pan aside and grab your ingredients.
Step 2: Mix Dry Ingredients
In a large bowl, whisk together the flour, baking soda, baking powder, cinnamon, and salt. I find that giving these a quick dry mix helps prevent clumps and ensures everything bakes evenly. The smell of those spices alone makes the house feel homey.
Step 3: Mix Wet Ingredients
In a separate bowl, mash the bananas really well — I do this with a fork or potato masher until smooth. Then, stir in the oil, sugar, eggs, and vanilla if you’re using it. I like to add a splash of almond or vanilla extract — it adds this lovely depth. The wet mixture should be smooth, a little gooey, and smelling amazing.
Step 4: Combine
Pour the wet ingredients into the dry and gently fold together — no overmixing! Overmixing can make the bread dense, and nobody wants that. Just fold until everything is just combined. You should see a few streaks of flour here and there; that’s fine.
Step 5: Prepare Filling
If you’re adding chocolate chips or nuts, fold them in now. I love a handful of semi-sweet chocolate chips in my bread; it’s like instant happiness. You can also sprinkle extra on top before baking for a pretty finish.
Step 6: Layer & Swirl
Pour half of the batter into the loaf pan. Then spread your filling of choice on top — maybe some chunks of banana or a sprinkle of cinnamon sugar. Add the remaining batter on top, and if you’re feeling fancy, use a knife or skewer to swirl the batter gently — creating gorgeous marbled effects or hidden pockets of flavor.
Step 7: Bake
Pop it in the oven and bake for about 50-60 minutes. The house will fill with that sweet, cinnamon-y aroma that I swear can distract everyone in the neighborhood! Check doneness with a toothpick — mine usually comes out with just a few moist crumbs, not wet batter.
Step 8: Cool & Glaze
Remove from the oven and let it cool in the pan for about 15 minutes. Then transfer to a wire rack to cool completely. I love to drizzle a simple glaze or dust with powdered sugar once it’s cooled — makes it look pretty and adds a little extra sweetness.
Step 9: Slice & Serve
The best part! Slice with a serrated knife, and trust me, it’s just as cozy to warm a slice in the microwave for a few seconds before serving. It goes beautifully with a cup of coffee or tea, and it’s even better the next day (if it lasts that long!).
What to Serve It With
This zucchini banana bread is versatile enough to be your breakfast side, a brunch centerpiece, or a family dessert. When I serve it for breakfast, I love pairing it with a hot cup of coffee or a dollop of Greek yogurt on the side. It’s also great toasted — the edges get just a little crispy, which is my guilty pleasure. For brunch, consider adding a smear of cream cheese or a drizzle of honey to elevate the simple loaf. My kids love it with a glass of cold milk or a splash of almond milk too — it’s kind of like my go-to comfort food, and every bite brings back memories of lazy Sunday mornings. If I want to turn it into a real treat, I’ll serve a warm slice with a scoop of vanilla ice cream or a dusting of powdered sugar for that perfect finishing touch. And because it’s so forgiving, I often freeze slices for quick snacks during the week — that way, I always have a little piece of home at the ready.
Top Tips for Perfecting Your Zucchini Banana Bread
After making this zillion times, I’ve picked up a few tricks that make the bread turn out just right every time. First, always drain or squeeze out excess moisture from your zucchini — nobody wants a soggy loaf. I use a clean kitchen towel or cheese cloth to squeeze out the water — it’s quick and keeps the bread from being too wet. When mixing, I start with the wet ingredients and add the dry gradually; this prevents overmixing and keeps the texture light. For swirling that beautiful marble effect, use a toothpick or skewer to create gentle patterns on the surface — it’s like decorating your loaf with love. If you like a little crunch, stir in chopped nuts or chocolate chips — just fold them in carefully at the end. I tested this with all kinds of substitutions: coconut sugar instead of white, oat flour for a gluten-free version (more dense but still tasty), and even a splash of orange juice to brighten the flavor. Oven temperatures can vary, so start checking around the 50-minute mark. And as for glazes, a simple powdered sugar glaze adds sweetness without fuss, but I’ve also experimented with lemon glaze or even bourbon-spiked icing for grown-up parties. The key? Keep experimenting till it’s perfect for your family.
Storing and Reheating Tips
This bread stays delicious for days, especially if stored properly. I always let it cool completely before wrapping it tightly in plastic wrap or popping it into an airtight container. At room temperature, it’ll last about 2-3 days, and I recommend keeping it in a bread box or on the counter away from direct sunlight. If you want to keep it longer, refrigerate it for up to a week — just make sure it’s well covered to prevent drying out. For weeknight snacks, I like to warm slices in the microwave for about 10-15 seconds — that makes the center soft and cozy again, like fresh out of the oven. Want to stash it away for longer? Freeze slices individually wrapped in plastic or parchment paper, then thaw at room temp or pop straight into the microwave. I tested several storage methods, and frankly, this bread is pretty resilient. The glaze or toppings should be added just before serving to keep the texture at its best. Trust me, this is a loaf that gets better with age, as the flavors meld and deepen.
Frequently Asked Questions
Final Thoughts
Honestly, I can’t tell you how much this zucchini banana bread has become my go-to treat. It’s not just about the taste — it’s about those little moments in the kitchen, the smell of bananas and cinnamon filling the air, and the joy of sneaking a warm slice straight from the oven. Over the years, I’ve tweaked this recipe, added my favorite mix-ins, and learned how to make it perfectly every time. It’s a dish that feels special without any fuss, and I love that it balances comfort with a tiny bit of healthy sneaky goodness. I hope you try it and love it as much as my family does. Remember, baking’s all about experimenting — so don’t be afraid to put your own spin on it. And hey, I’d love to hear your own variations or tips — drop a comment below and let’s share the love of good, honest baking. Happy baking!
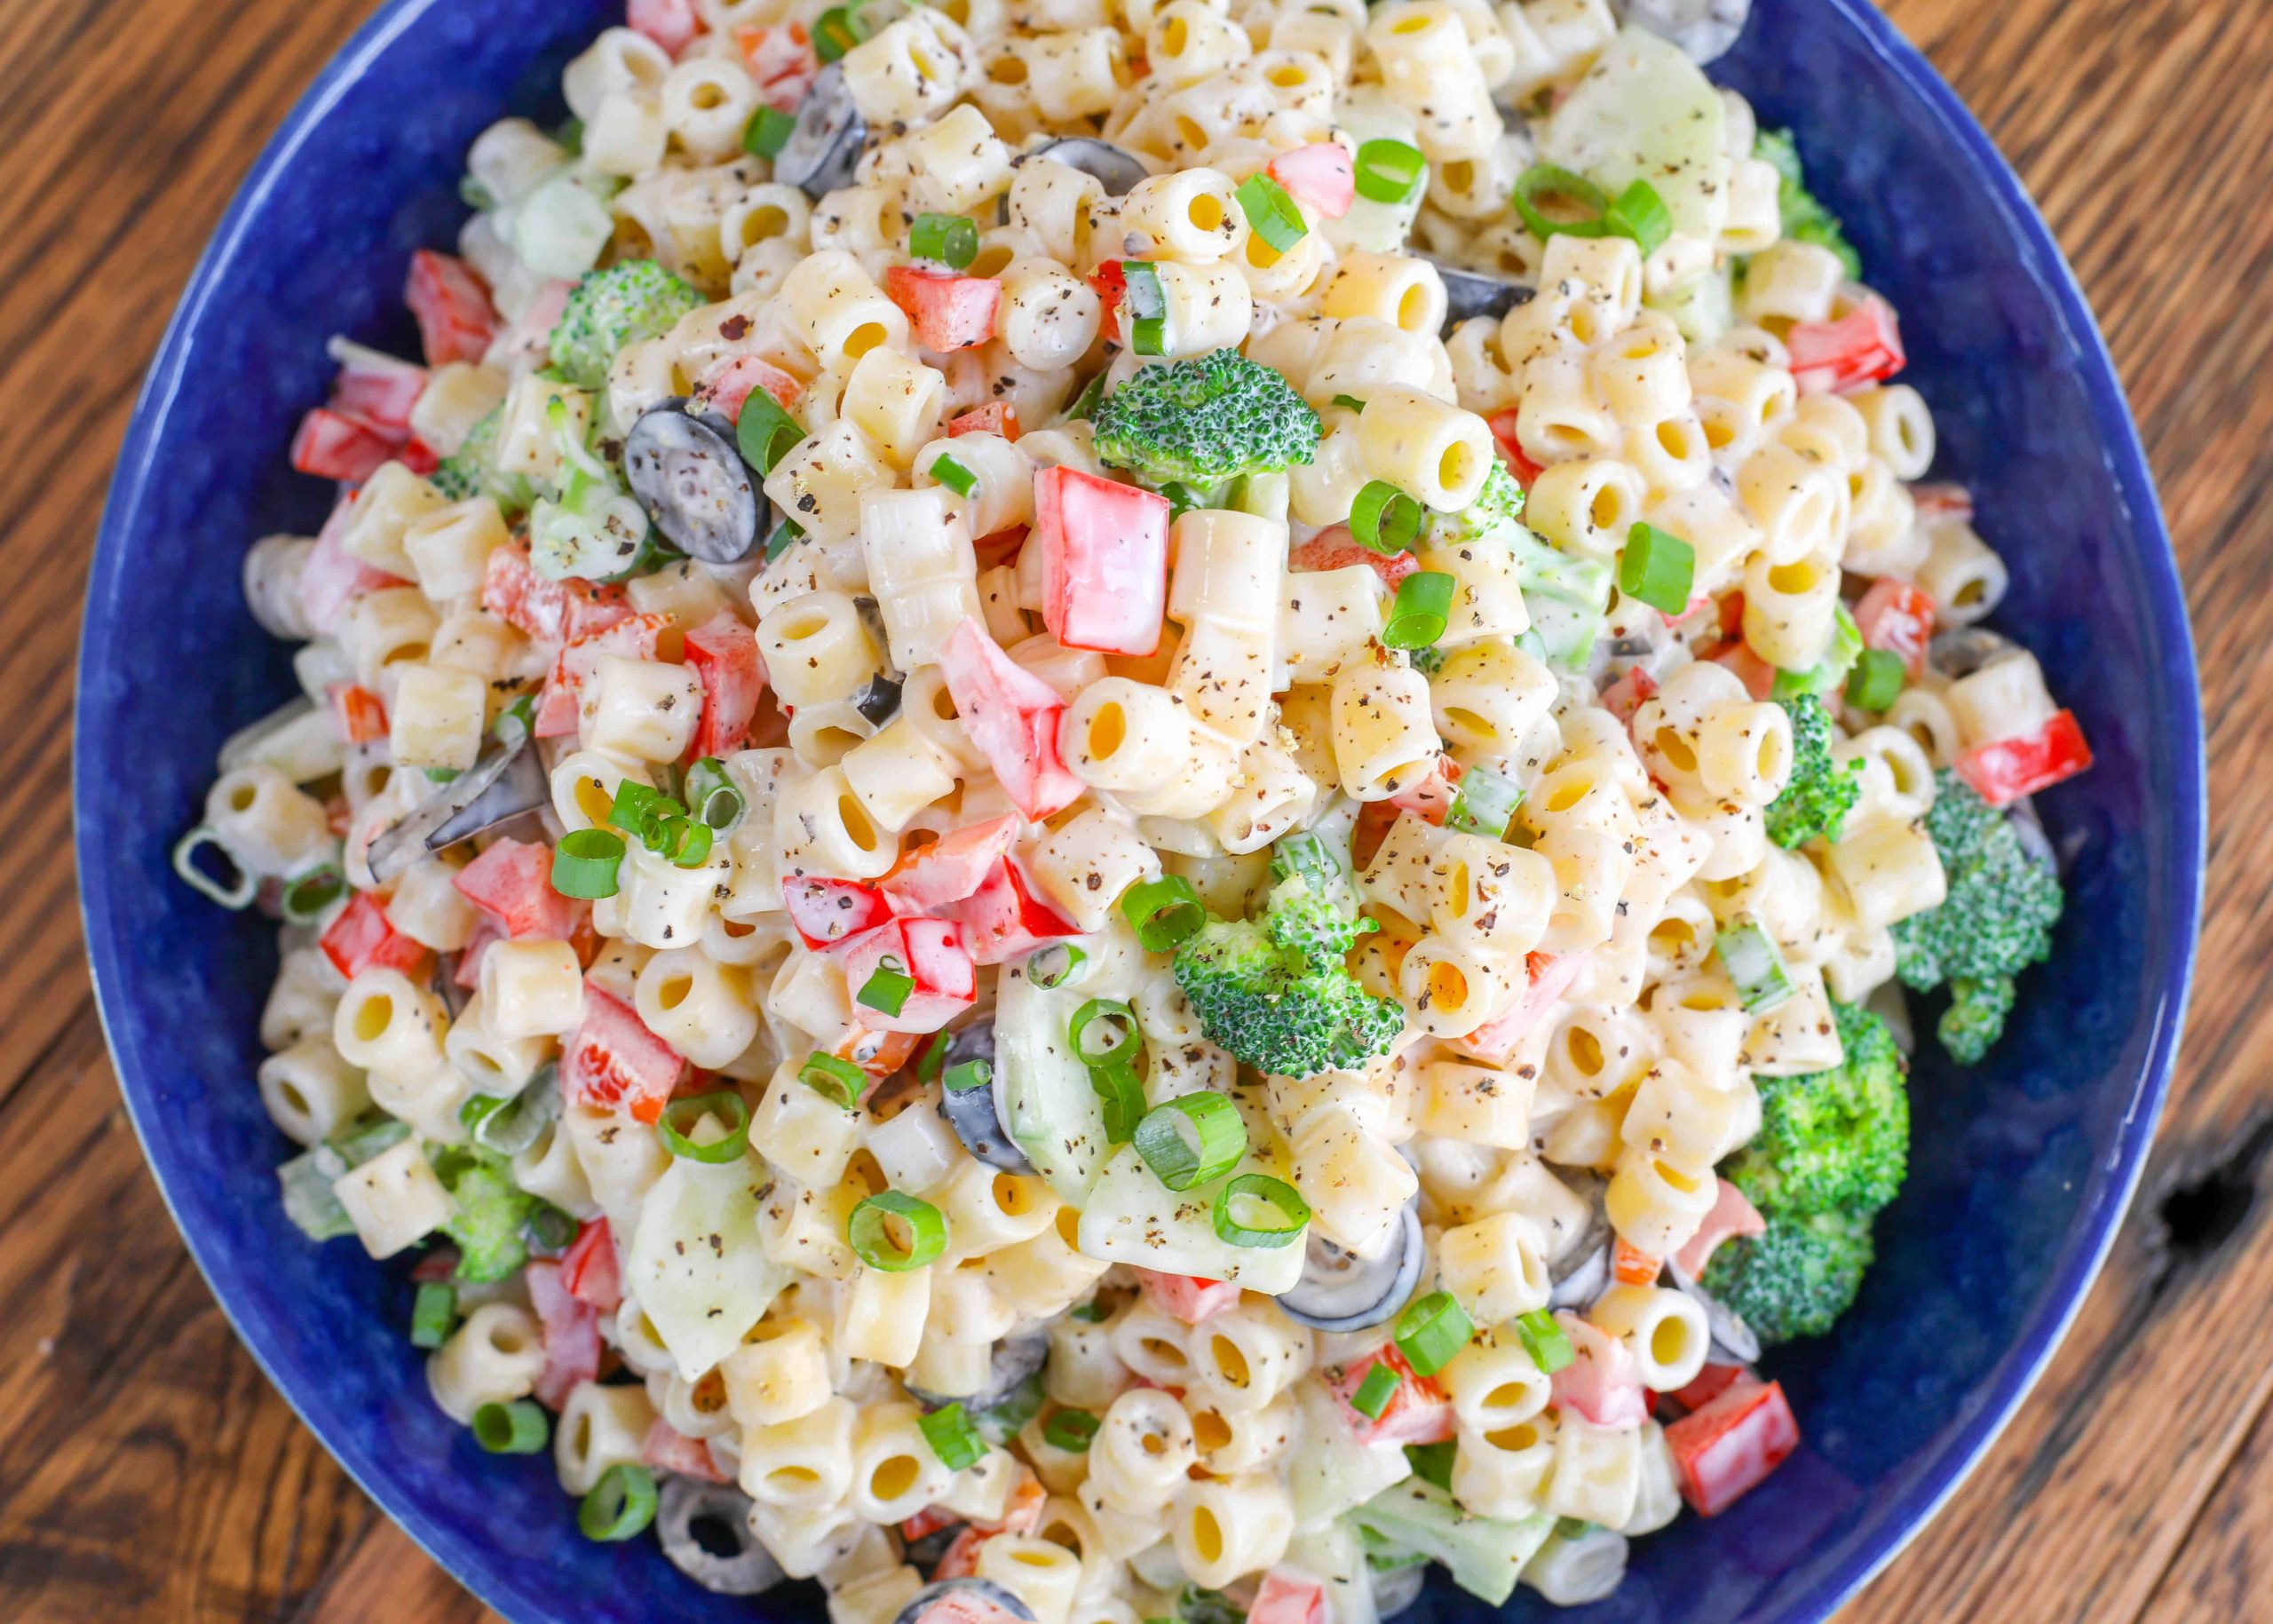
summer pasta salad
Ingredients
Method
- Cook the pasta according to the package instructions, adding salt to the water. Add broccoli in the last 30 seconds, then drain and rinse with cold water.
- Mix mayonnaise, vinegar, salt, pepper, and sugar in a large bowl. Add cooked pasta and broccoli, stir to coat.
- Add cucumber, red pepper, olives, and green onion. Mix well. Cover and refrigerate until ready to serve, stir before serving.