Savory Cornbread Waffles How to Make Them
There’s just something about waking up to the smell of freshly baked coffee cake that feels like a warm hug, right? I remember the first time I made this zucchini swirl coffee cake—my kids asked for seconds before I even had a chance to get my morning coffee. It’s funny how something so simple can bring so much joy. I always do this when I want something cozy but don’t want to spend hours fussing in the kitchen. This one’s a lifesaver on busy nights or lazy weekends, trust me. Between the moist tender crumbs, the slightly sweet zucchini swirled throughout, and that dreamy glaze on top, it’s honestly become a family favorite. It’s perfect for breakfast, a casual brunch, or even as an indulgent treat for a late-night sweet tooth. Plus, I promise, once you make this a couple of times, the process feels like second nature—like baking a loaf, but prettier. And honestly, my secret? I tested this with almond milk, and it made the batter even creamier and more tender—I highly recommend it if you’re looking to add a little extra richness. This is my love letter to the cozy, sweet, slightly veggie-packed cake I can’t get enough of. You’re gonna love it, I promise!
What is Zucchini Swirl Coffee Cake?
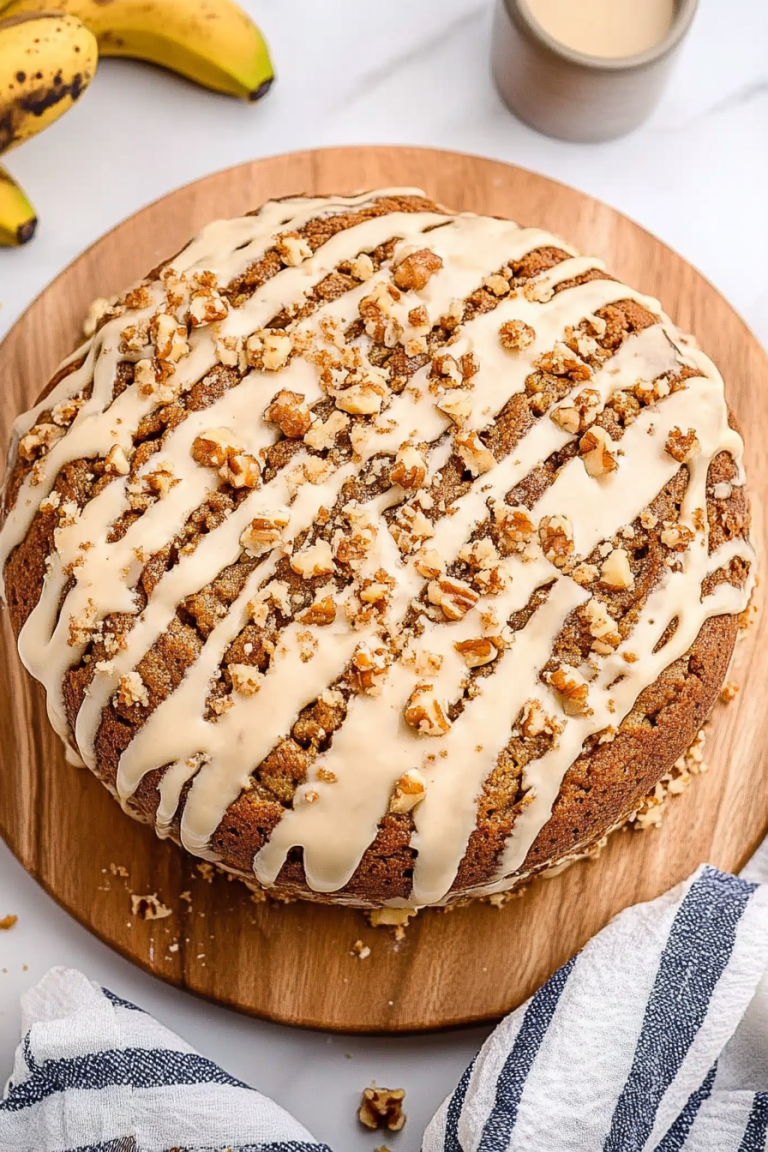
Think of this as the lovechild of a classic coffee cake and a sneaky veggie. It’s essentially a tender, crumbly cake with a generous swirl of sweet, grated zucchini running through the center. The name “zucchini swirl coffee cake” might sound fancy, but it’s honestly one of the easiest cakes you’ll ever make. The zucchini keeps things moist and surprises everyone when they take their first bite—no one expects that veggie to be so perfectly tucked into a sweet, cinnamon-laced batter. It’s kind of like sneaking greens into your kid’s smoothies, but way more delicious. The idea actually comes from my grandma’s garden—she’d always sneak zucchini into her muffins and bread, and I’ve just adapted that idea into this lovely morning or brunch cake. Think of it as a little bit healthy, a whole lot tasty, and totally comforting. Plus, it’s versatile enough to serve at breakfast, a casual tea, or even as a snack—anytime you need a little cozy magic in your day.
Why you’ll love this recipe?
What I love most about this zucchini swirl coffee cake is how it manages to taste indulgent while feeling pretty wholesome. The cinnamon-spiced batter paired with the moist zucchini swirl makes every bite melt in your mouth. And the best part? It’s remarkably simple to make. You don’t need fancy equipment or special skills—just your mixing bowls, a spoon, and the patience to wait while it bakes. Plus, it’s budget-friendly. Most of the ingredients are pantry staples, and those zucchinis—well, if you have a garden or even just a few extra squashes from the market, this is a perfect way to use them up without feeling guilty. The versatility is another reason why I keep making this over and over. My family loves to enjoy it warm with a drizzle of glaze on top, but it’s equally delicious cold or reheated. And, honestly, what I really love is how this cake can adapt to your mood. Want it more decadent? Double the glaze. Need it a little healthier? Swap in coconut sugar or applesauce in the batter. It’s like this recipe grew up with me—flexible, comforting, and always reliable.
How do I make Zucchini Swirl Coffee Cake?
Quick Overview
This cake comes together in just a few straightforward steps. First, you grate and squeeze out excess moisture from zucchini—this trick keeps the cake from getting soggy. Then, you mix up a cinnamon-spiced batter while preparing the zucchini filling. The key is layering: pour half the batter into your pan, add the zucchini swirl, top with the rest of the batter, and gently swirl it all together. After baking until golden and a toothpick comes out clean, you drizzle on a simple glaze for a sweet, shiny finish. Honestly, once you get the hang of layering and swirling, this feels like a zen activity—therapeutic and fun. The result? A moist, tender cake that’s gorgeous to look at and even better to eat.
Ingredients
For the Main Batter:
– 2 cups all-purpose flour (I always use organic; it just feels softer)
– 1 cup granulated sugar (you can swap half for coconut sugar if you want a richer flavor)
– 1 teaspoon baking powder
– ½ teaspoon baking soda
– ½ teaspoon salt
– 1 teaspoon ground cinnamon (more if you’re feeling extra cozy)
– ½ cup unsalted butter, melted (or coconut oil for a dairy-free twist)
– 1 cup buttermilk or almond milk (almond milk works great and is a little lighter)
– 2 large eggs
– 1 teaspoon vanilla extract
For the Filling:
– 2 medium zucchinis, grated (I prefer using a box grater; easy and quick)
– 2 tablespoons granulated sugar
– ½ teaspoon ground cinnamon
– Pinch of nutmeg (if you like a bit of warmth)
For the Glaze:
– 1 cup powdered sugar
– 2-3 tablespoons milk (dairy or almond)
– ½ teaspoon vanilla extract
– Optional: a sprinkle of cinnamon or lemon zest for extra flavor
Step-by-Step Instructions
Step 1: Preheat & Prep Pan
Set your oven to 350°F (175°C). Grease a 9-inch round or square baking pan with butter or spray. If you want, line it with parchment for easier removal. This straightforward step ensures your cake comes out nice and clean—no sticking drama here!
Step 2: Mix Dry Ingredients
In a large bowl, whisk together the flour, sugar, baking powder, baking soda, salt, and cinnamon. This step helps distribute the leavening agents evenly and makes sure every bite is perfectly balanced. The aroma of cinnamon at this stage always makes my kitchen feel festive!
Step 3: Mix Wet Ingredients
In another bowl, beat the eggs, then add melted butter, vanilla, and buttermilk (or almond milk). Whisk until smooth. I always test the temperature of the milk so it’s not too cold—warm it slightly if you’re using almond milk; it helps everything incorporate better. Trust me, it makes a difference in the batter’s tenderness.
Step 4: Combine
Pour the wet mixture into the dry ingredients and stir gently until just combined. Be careful not to overmix—this keeps your cake soft and airy. A few lumps are okay! Overmixing can lead to a dense, rubbery cake, and nobody wants that. I learned this the hard way in my early baking days.
Step 5: Prepare Filling
In a small bowl, toss the grated zucchini with sugar, cinnamon, and nutmeg. I always squeeze out excess moisture from the zucchini by wrapping it in a clean dish towel—this trick keeps the swirl from turning into a watery mess. It’s worth taking an extra minute to do this step!
Step 6: Layer & Swirl
Pour half the batter into your prepared pan, then spread the zucchini mixture over the top. Cover with the remaining batter. Use a knife or skewer to swirl gently through the layers, creating lovely marbled patterns. Don’t go overboard—just a gentle swirl to incorporate the zucchini beautifully without blending everything completely. The visual effect is almost as charming as the taste!
Step 7: Bake
Pop the cake into your preheated oven and bake for about 40-45 minutes. Keep an eye on it—your house will start smelling amazing around the 30-minute mark! Insert a toothpick in the center—if it comes out clean, you’re good to go. Every oven is different, so don’t be shy about checking for doneness.
Step 8: Cool & Glaze
Let the cake cool in the pan for about 15 minutes, then transfer it to a wire rack. Mix up your glaze—powdered sugar, vanilla, and milk—until smooth. When the cake is just warm (not hot!), drizzle the glaze over it. If you wait until it’s completely cooled, the glaze might crack a little—so I usually glaze it warm and let it set for a few minutes.
Step 9: Slice & Serve
Use a sharp serrated knife for clean slices. I love serving this with a cup of freshly brewed coffee or a glass of cold milk. It looks so pretty with a little extra cinnamon sprinkled on top—my kids love to help decorate with tiny cinnamon dustings. Honestly, I think it’s at its best served warm, but leftovers are secretly just as good the next day. Reheat slices gently in the microwave—don’t go full blast; just enough to warm through and release that comforting aroma again.
What to Serve It With
This cake is super versatile—my favorite way is as a cozy breakfast alongside our morning coffee, especially when the kids are running late but I still want something homemade. It’s also pretty special as a brunch or tea-party centerpiece—pair it with a pot of Earl Grey or chai latte. My family loves it as an after-dinner treat, especially when I add a few extra dollops of glaze or even some whipped cream on the side. And on those lazy Sunday afternoons, I keep a slice handy with a cup of tea while lounging on the porch. I’ve even whipped up a lemon glaze instead of vanilla to give it a citrus burst—seriously, the possibilities are endless. Plus, I always stash some in the freezer—just in case I get unexpected guests or those late-night cravings. This cake isn’t just a recipe; it’s a little slice of family comfort, perfect for any occasion, any time of day.
Top Tips for Perfecting Your Zucchini Swirl Coffee Cake
Over the years, I’ve learned a few tricks for making this cake even better:
- Zucchini Prep: Always squeeze out excess moisture after grating. This keeps the cake fluffy and prevents sogginess. Trust me, a well-drained zucchini is the magic behind perfectly moist layers.
- Mixing Advice: Avoid overmixing the batter once you’ve combined wet and dry ingredients. The texture will be light and tender like a bakery cake, not dense or rubbery. Gently folding is the key.
- Swirl Customization: When layering, don’t overmix the zucchini into the batter—just a gentle swirl at the end makes for a prettier marbled effect that highlights the zucchini bits hidden inside.
- Ingredient Swaps: Want to make it gluten-free? Use almond or rice flour, but reduce the amount slightly since they are lighter. For a vegan version, replace eggs with flax eggs and use coconut oil instead of butter. The texture stays nice and moist.
- Baking Tips: If you notice the edges browning too quickly, tent the cake with foil halfway through baking. Every oven bakes a little differently. Also, always do the toothpick test—don’t rely solely on timing.
- Glaze Variations: For a richer glaze, add a splash of lemon juice or a pinch of cardamom. You can also sprinkle chopped nuts on top before glazing for crunch.
One thing I’ve learned is to be gentle and patient. Baking is all about small tweaks—sometimes it takes a few tries to get it just how you like, but honestly, every batch tastes better because you’re adjusting it for your taste buds. Remember, the secret ingredient is always love—and a good sprinkle of cinnamon!
Storing and Reheating Tips
This cake holds up surprisingly well. Store leftovers in an airtight container at room temperature for up to 2 days. Just make sure it’s covered; the cake can dry out if exposed to the air too long. If you’re planning to keep it longer, pop it in the fridge—wrapped well, it will stay fresh for about 4 days. Reheat slices gently in the microwave for about 15-20 seconds, or enjoy them cold with a hot cup of coffee. If you’ve glazed it, keep the glaze separate until just before serving if you want it to stay shiny and fresh. To freeze, wrap slices tightly in plastic wrap and then foil—or pop the whole cake into a freezer-safe bag. It’s good for up to 3 months. Thaw overnight in the fridge or at room temperature. For best flavor, reheat gently or serve at room temp. Trust me, the moistness and flavor still shine through even after freezing—this cake really is resilient.
Frequently Asked Questions
Final Thoughts
This zucchini swirl coffee cake has truly become a staple in my kitchen. It’s a celebration of simple ingredients transformed into something a little special—moist, fragrant, and just the right amount of sweet. I love how it feels like a warm hug on busy mornings or lazy weekends; it’s a reminder that baking doesn’t have to be complicated to be meaningful. And the secret, if you want to know, is that those tiny bits of zucchini keep every slice irresistibly moist without overpowering the cake’s delicate crumb. Plus, it’s a sneaky way to get a little vegetable into your day without anyone noticing—seriously, I’ve converted friends who thought they didn’t like zucchini! Feel free to play with flavors—add lemon zest, swap out nuts, or try a splash of orange extract. The most important thing is that you enjoy every bite, knowing it’s made with love. Can’t wait to hear how yours turns out! Drop a comment or share your own twists on this recipe—I always love hearing new ideas. Happy baking and sweet mornings ahead!

cornbread waffles
Ingredients
Method
- Stir together all ingredients in a large bowl.
- Preheat waffle iron and spray with nonstick spray.
- Pour batter onto the waffle maker using about 1/3 cup of batter for a standard size.
- Cook until it stops steaming and waffle is golden brown and pulls away easily.