Warm Spiced Sweet Potato Bread Recipe
You know those mornings when you’re rushing around, the kids are whining about breakfast, and you just want something that’s easy, tasty, and actually makes your house smell like heaven? That’s where these banana chocolate chip muffins come in. I’ve tested countless recipes over the years, and I swear, this one’s a lifesaver on busy nights or lazy Sunday mornings. They’re the kind of muffin that’s secretly good for you but totally indulgent—moist, sweet, with gooey pockets of melted chocolate that disappear in minutes at my house. My kids actually ask for seconds, and honestly, I don’t blame them. I remember the first time I made these in a rush, thinking, “This is just a breakfast muffin,” but by the aroma alone, everyone was gathered in the kitchen in no time. Plus, they’re so simple, I always do this when I’ve got bananas sitting on the counter that are just a tad too ripe. Trust me on this — once you try these, they’ll become a regular in your rotation, too.
What is banana chocolate chip muffin?
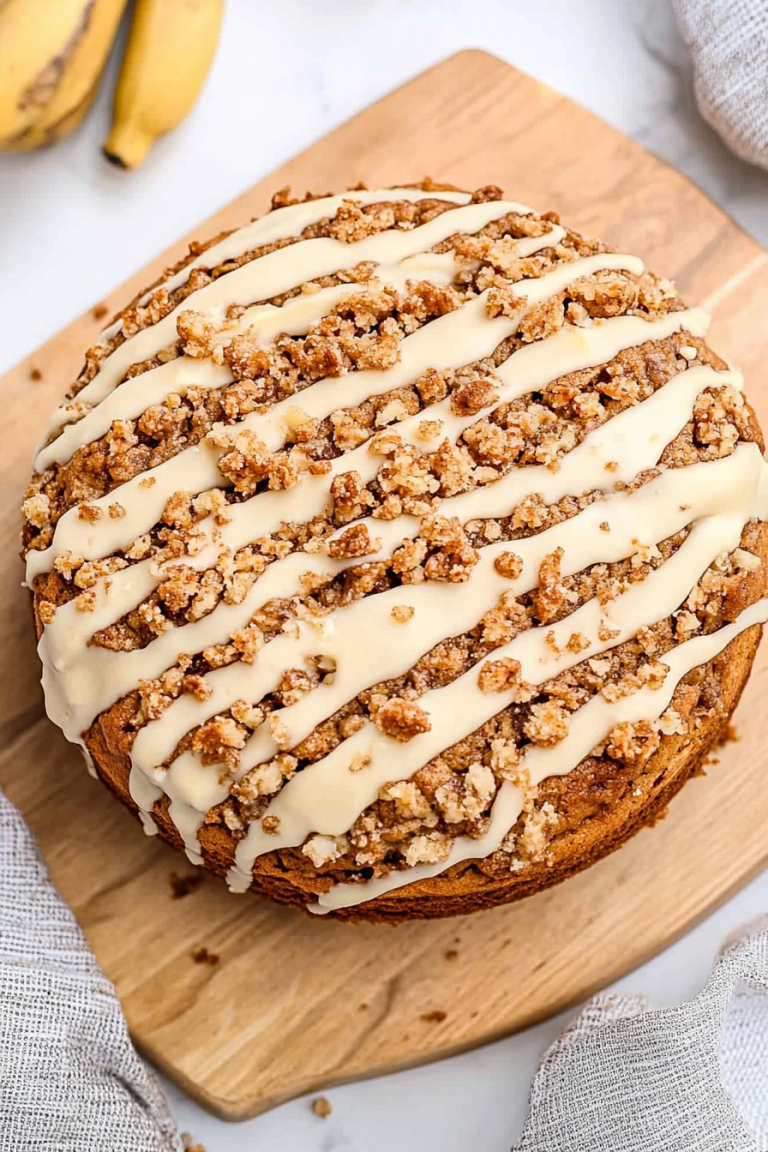
Think of banana chocolate chip muffins as a cozy mash-up of banana bread and your favorite chocolate chip cookies rolled into portable, handheld treats. It’s essentially a quick bread that’s baked in muffin tins—no fancy equipment needed. The “banana” part is what makes these so inherently moist and flavorful; the riper the bananas, the better! The chocolate chips add that perfect little surprise of sweetness with every bite—because, let’s be honest, who doesn’t crave a little chocolate? The name’s simple enough, but it really captures the essence: soft, sweet muffins infused with ripe banana flavor and melty chocolate chunks. These are a bit rustic, a bit charming, and completely addictive—like a warm hug wrapped in crumbly paper. Perfect for breakfast, snack time, or even an after-dinner treat when you want something sweet but still comforting.
Why you’ll love this recipe?
What I love most about these banana chocolate chip muffins is how effortlessly they come together—you barely need to dirty a bunch of bowls or fuss over complicated steps. Just mash, mix, fold, and bake. The smell alone is enough to make everyone stop in their tracks; it’s that warm, inviting aroma of baked bananas mixed with rich chocolate. Plus, they’re so forgiving — I’ve made these with slightly overripe bananas, and they turn out just perfectly moist. These muffins are budget-friendly, too—they use simple pantry staples you probably already have, which makes them a lifeline on busy mornings or when the snacks run low. They’re incredibly versatile, too — I’ve added chopped nuts, shredded coconut, or even a sprinkle of sea salt on top for a little extra flair. My kids ask for these all the time, and I usually stash some away for myself — they’re kind of my secret weekend luxury. Whether you’re craving a quick breakfast or a snack that hits all the right notes of sweet and velvety, these muffins are a total winner.
How do you make Banana Chocolate Chip Muffins?
Quick Overview
This recipe is my go-to because it’s so fuss-free. You basically mash bananas, stir up the batter with a few pantry staples, fold in chocolate chips, and bake. No fancy ingredients or long prep times—just pure comfort food in muffin form. They bake in around 20-25 minutes, giving you fresh, fluffy muffins in less time than it takes to scroll through your social feed. The secret is in the ripeness of the bananas—they should be super soft and brown-spotted, which makes the batter extra flavorful and moist. I’ve tested these multiple times, tweaking the amount of chocolate and adding a pinch of cinnamon once, just to try something different, and honestly, they’re perfect every time. Once out of the oven, I always let them cool just a few minutes to set—careful not to burn your tongue on that melty chocolate—then dig in. These muffins are my kind of comfort food: simple, satisfying, and delicious.
Ingredients
For the Main Batter:
– 3 ripe bananas (the riper, the better! They should be brown and very soft)
– 1/2 cup granulated sugar (or honey/maple syrup if you want a more natural touch)
– 1/4 cup melted butter or oil (I prefer melted butter for richness)
– 2 large eggs (room temperature works best)
– 1 teaspoon vanilla extract (makes everything taste more homey)
– 1 1/2 cups all-purpose flour (or use whole wheat for a heartier spin)
– 1 teaspoon baking soda
– 1/2 teaspoon salt
– 1 teaspoon cinnamon (optional, but adds a cozy flavor)
For the Filling:
– 1 cup chocolate chips (dark, milk, or semi-sweet—go with what you love. I often mix both)
– A handful of chopped nuts or shredded coconut, if you’re feeling fancy
For the Glaze (Optional but delightful):
– 1/2 cup powdered sugar
– 1-2 teaspoons milk or cream
– A splash of vanilla or lemon juice for flavor variation
Step-by-Step Instructions
Step 1: Preheat & Prep Pan
Set your oven to 350°F (175°C). Line a muffin tin with paper liners or simply grease it well with butter or spray. I find that using paper liners makes for easier cleanup and pretty presentation. Also, check your bananas—give them a good mash with a fork or potato masher. The riper, the better. No need for perfection here—some lumps are fine! This is one of those recipes that totally tolerates imperfections.
Step 2: Mix Dry Ingredients
In a medium bowl, whisk together the flour, baking soda, salt, and cinnamon. This step ensures everything is evenly distributed and helps the muffins rise evenly. I’ve learned the hard way that overmixing the dry ingredients separately is key to a fluffy crumb.
Step 3: Mix Wet Ingredients
In a large bowl, mash the bananas until mostly smooth—leave some lumps if you like! Add the sugar, melted butter, eggs, and vanilla. Whisk everything together until it’s smooth, slightly frothy, and smells amazing. I always do this right in the same bowl for simplicity. If your eggs are cold, just a quick whisk will blend everything nicely.
Step 4: Combine
Gradually fold the dry ingredients into the wet mixture. Use a spatula or wooden spoon—be gentle! You want to incorporate everything without overmixing, so the batter remains tender. It’s okay if there are a few streaks of flour—overmixing can lead to dense muffins.
Step 5: Prepare Filling
Gently fold in most of the chocolate chips, saving a handful for sprinkling on top if you like a pretty finish. If you plan to add nuts or coconut, mix them in here. This is the fun part—get your batter chocolatey and rich without overdoing it.
Step 6: Layer & Swirl
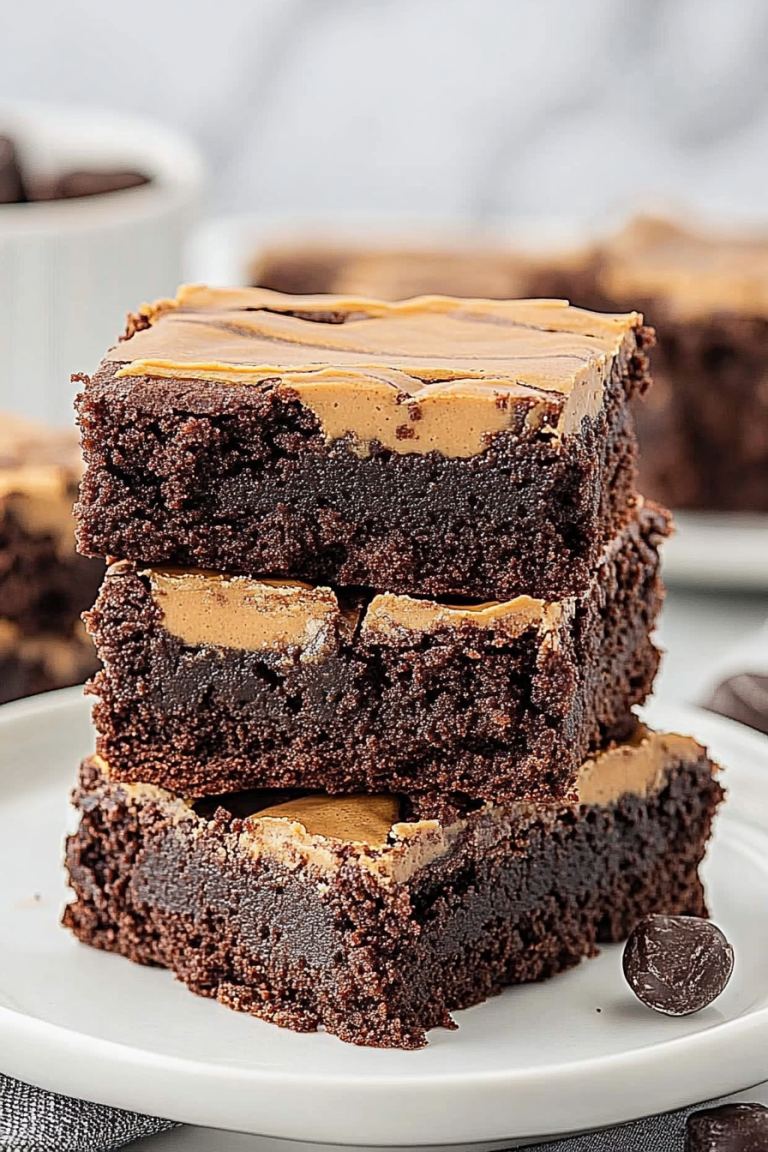
Spoon the batter into your muffin cups—about 3/4 full. For a little flair, sprinkle the reserved chocolate chips on top or swirl some extra melted chocolate into the batter for a marbled look. Trust me, it’s a visual treat and makes them extra indulgent.
Step 7: Bake
Pop them into the oven and bake for about 20-25 minutes. You’ll know they’re done when a toothpick inserted in the center comes out clean or with just a few moist crumbs. If you like a little extra caramelization on top, turn on the broiler for the last minute—just keep a close eye! Every oven varies, so start checking around the 20-minute mark.
Step 8: Cool & Glaze
Once baked, let the muffins cool in the tin for about 5 minutes, then transfer to a wire rack. If you’re glazing, wait until they’re just warm—dipping or drizzling for a shiny, sweet finish. The glaze is optional but totally worth it if you want that extra kiss of sweetness and pretty shine.
Step 9: Slice & Serve
Serve these muffins warm or at room temperature. I like to store them in an airtight container, and they’re absolutely delicious the next day, too. You can even toast them lightly for breakfast or a snack later. For presentation, arrange on a platter with a sprinkle of extra chocolate chips or a dusting of powdered sugar. They disappear fast around here!
What to Serve It With
These banana chocolate chip muffins are quite versatile. For a cozy breakfast, pair them with a steaming cup of coffee or tea. I personally love a dollop of Greek yogurt on the side—that creamy tang balances the sweetness perfectly. They’re also perfect for brunch—serve with fresh berries and a splash of maple syrup for an elevated touch. When I’ve got friends over, I love offering these muffins alongside a fruit salad or a cheese platter—they’re surprisingly adaptable.
As an indulgent dessert, I sometimes warm them slightly and top with a scoop of vanilla ice cream or a drizzle of caramel sauce. If you’re craving something casual, a muffin with a glass of cold milk or hot cocoa always hits the spot. My kids? They ask for these after school, stained with chocolate but happy as clams. Trust me, these muffins turn any moment into a little celebration — sweet, simple, and so satisfying.
Top Tips for Perfecting Your Banana Chocolate Chip Muffins
Years of baking have taught me a few tricks to make these muffins turn out just right every time. First, don’t skip the ripeness of the bananas. The more spotty and mushy, the better—they’re the secret to that rich, fruity flavor. I’ve made this with slightly less ripe bananas, and while it’s still good, it’s just not the same magic. Also, be gentle when mixing the dry and wet ingredients—overmixing is the fastest way to tough muffins. Just fold until combined, and you’ll get a tender crumb.
When adding the chocolate chips, toss a few in a little flour first to prevent them from sinking.bottoms out. For that marbled look, try swirling in some melted chocolate or peanut butter before baking. I’ve tested various swaps—whole wheat flour, coconut sugar, even dairy-free chocolate—and the result is still delicious, though the texture can change slightly. Don’t be afraid to experiment, but remember that banana muffins love simplicity.
For perfect baking, position your oven shelf in the middle, and check for doneness a few minutes early—ovens vary. If your muffins look golden but aren’t quite done, give them a few more minutes. And if they brown too fast, loosely tent with foil. Trust me, after a few batches, you’ll get the hang of how your oven behaves. The glaze adds a pretty finished look and extra sweetness; I’ve sometimes infused it with a touch of lemon or orange zest to brighten things up. Just keep an eye on the texture—thick enough to stick but pourable enough to drizzle smoothly.
From personal experience, I learned to always let the muffins cool completely before glazing or storing—they stay moist and delicious longer that way. And a little sprinkle of sea salt on top of the glaze? Game changer. Honestly, this recipe has become a staple not just because it’s easy, but because every batch reminds me of lazy Sunday mornings with my family, sharing warm muffins fresh out of the oven.
Storing and Reheating Tips
These muffins keep surprisingly well. If you plan to eat them within a day or two, store them in an airtight container at room temperature—cover loosely with a paper towel if you want to keep them from getting too soft. They’re best enjoyed within 24 hours for maximum flavor and moisture, but if you want to keep them longer, pop them into the fridge in an airtight bag or container. They still taste great cold or can be toasted gently to revive that fresh-baked warmth.
For longer storage, I suggest freezing. Wrap each muffin individually in plastic wrap, then place in a zip-top freezer bag. They’ll last about 2-3 months. To reheat, unwrap, and microwave for about 15-20 seconds — or toast in your toaster oven for a crispy edge. If you’ve glazed them, reheat carefully to prevent the glaze from melting completely—just a quick nuke or warm in the oven. The key is to reheat gently to preserve that soft, moist crumb and gooey chocolate.
When it comes to the glaze, I usually wait until the muffins are completely cooled before adding it. If you add glaze while they’re still warm, it melts right in—delicious, but it makes for a mess if you’re storing leftovers. Trust me, a little patience pays off. And if you’re short on time, a dusting of powdered sugar works just as beautifully, giving a light, elegant finish.
Frequently Asked Questions
Final Thoughts
If you’re like me, these banana chocolate chip muffins will quickly find a special place in your home. They’re cozy, forgiving, and practically foolproof—plus, the ingredients are ones I always keep on hand. What makes them extra meaningful is how they turn simple ripened bananas into a little piece of happiness. Once you’ve made a batch or two, I bet you’ll have your own tweaks, like adding a handful of walnuts or drizzling caramel—because that’s the beauty of recipes like these: they’re yours to customize and love. I hope you give this a try and find as much joy in baking them as I do. Just imagine a plate of these, fresh out of the oven, the smell wrapping around you like an old favorite sweater. Happy baking! And I’d love to hear how yours turn out—leave a comment or share your own twists. Let’s keep the baking love going!
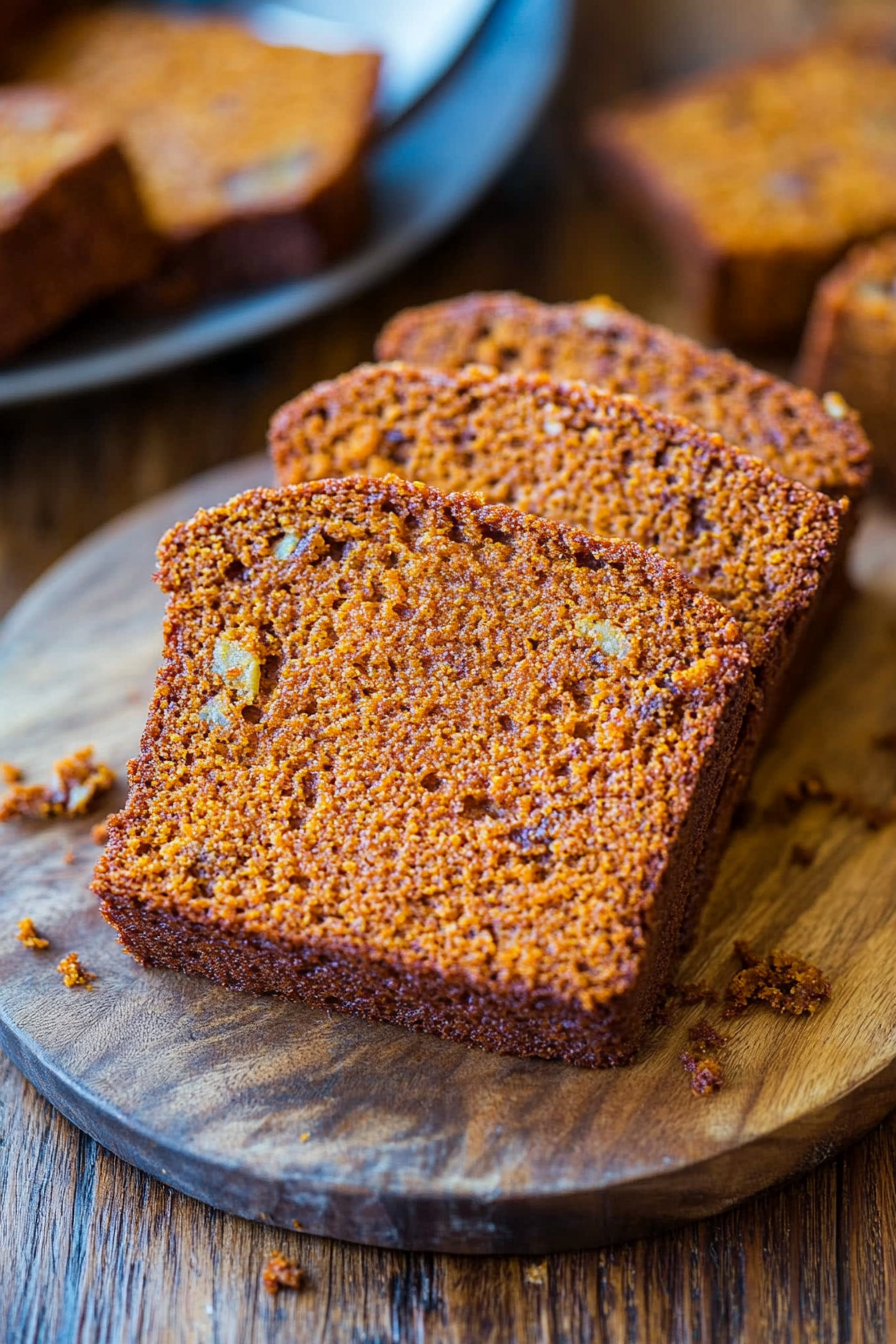
sweet potato bread
Ingredients
Method
- Preheat oven to 350F. Spray a 9x5-inch loaf pan with cooking spray or grease and flour the pan; set aside.
- Peel the sweet potatoes and chop into 1-inch chunks. Microwave with 3 tablespoons water, covered, for 15-17 minutes until very tender; or boil until soft. Mash and let cool.
- In a bowl, whisk together mashed sweet potatoes, eggs, oil, buttermilk, and vanilla until well combined.
- In a large bowl, whisk together the dry ingredients: flour, sugar, brown sugar, baking soda, cinnamon, ginger, nutmeg, allspice, cloves, and salt.
- Pour the wet mixture into the dry ingredients and gently fold until just combined, avoiding over-mixing.
- Pour batter into prepared loaf pan and bake for 60-70 minutes, or until a toothpick inserted in the center comes out clean. Cover with foil during the last 15 minutes if top is browning too fast.
- Allow the bread to cool in the pan for 10 minutes, then transfer to a wire rack to cool completely before slicing.