Tiny Egg Bites How to Make Them Easy
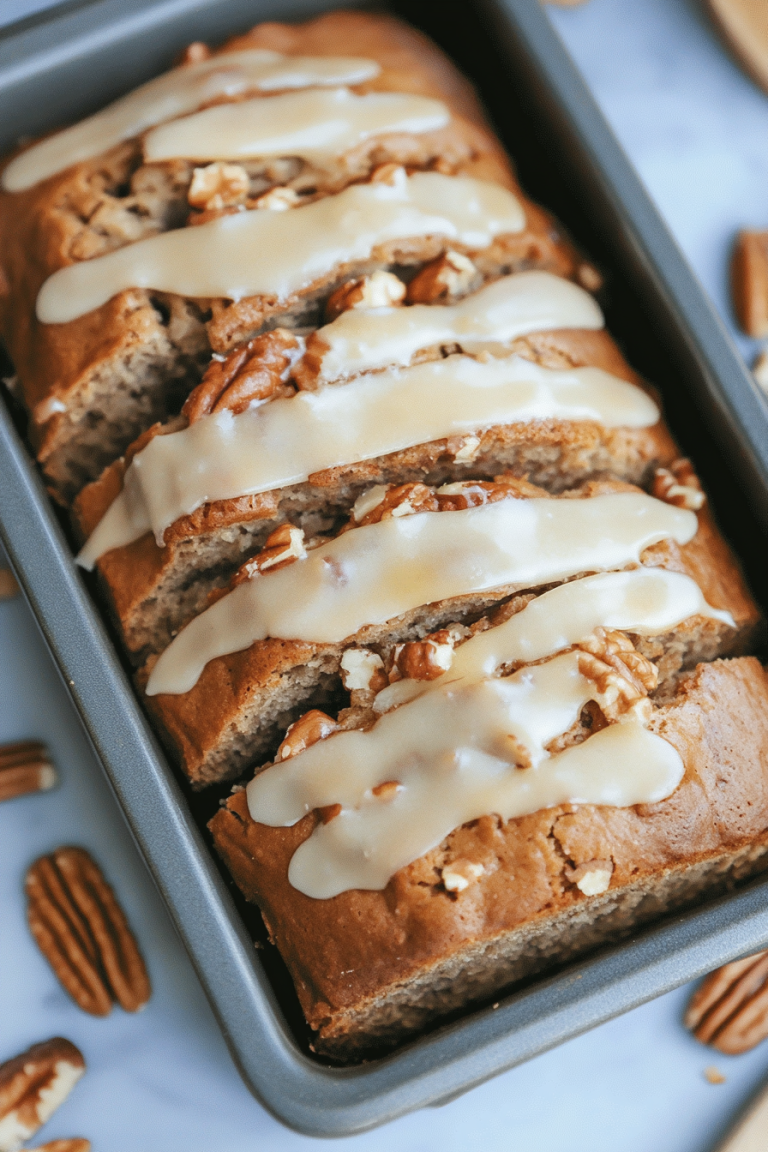
Okay, pull up a chair and let’s chat because I’ve got something really special to share with you today. This isn’t just any recipe; this is *my* Zucchini Bread. It’s the one I whip up when unexpected guests arrive, the one that smells like pure comfort on a chilly afternoon, and honestly, the one my family begs for. I’ve tried a million versions over the years, some too dense, some too dry, but this one? This one hits every single note perfectly. It’s incredibly moist, packed with flavor, and honestly, it’s a lifesaver on busy weeknights when I need a sweet treat without all the fuss of a whole cake. It’s even better than a classic banana bread in my opinion, and that’s saying something!
What is Zucchini bread?
So, what exactly is zucchini bread? Think of it as a super-moist, tender quick bread that just happens to have grated zucchini hidden inside. Don’t let the zucchini scare you! You can’t taste it at all, I promise. What it does is add this incredible, almost unbelievable moistness and a subtle sweetness that makes the whole loaf incredibly tender and flavorful. It’s essentially a blank canvas for deliciousness, allowing spices like cinnamon and nutmeg to really shine, and providing the perfect base for nuts, chocolate chips, or even a swirl of cream cheese. It’s the kind of baked good that feels both comforting and a little bit fancy, all at once. It’s named simply for its star ingredient, but the magic lies in how that ingredient transforms the texture and keeps it from being dry, which can be a pitfall with many quick breads.
Why you’ll love this recipe?
There are so many reasons I keep coming back to this specific zucchini bread recipe, and I just know you’re going to fall in love with it too. First off, the flavor. Oh my goodness, the flavor! It’s perfectly spiced with cinnamon and a hint of nutmeg, and when it’s fresh out of the oven, the aroma alone is enough to make your stomach rumble. It’s so wonderfully fragrant. Then there’s the texture – it’s unbelievably moist. This is thanks to the star ingredient, zucchini, which adds a natural moisture that keeps the bread tender for days. Honestly, I’ve made this when I’ve been in a rush, and it’s surprisingly simple. The ingredients are all pantry staples, which is a huge win for me, especially when I’m trying to keep costs down. And let’s talk about versatility! While I adore it plain or with chocolate chips, you can easily add walnuts or pecans for a little crunch. It’s also fantastic as a base for a simple cream cheese frosting or a drizzle of lemon glaze. I’ve even made it with a touch of espresso powder in the batter, and it was divine! It’s not just good; it’s deeply satisfying. What I love most is that it’s a crowd-pleaser. My kids, who are notoriously picky, devour this. They don’t even know the zucchini is in there, and that’s my little secret!
How do you make Zucchini bread?
Quick Overview
Making this zucchini bread is a breeze! You’ll essentially whisk together your dry ingredients, then your wet ingredients separately, before combining them gently. Fold in your zucchini and any add-ins, pour it into a prepared loaf pan, and bake until golden and a toothpick comes out clean. The whole process takes less than 20 minutes of active time, making it perfect for a quick afternoon baking project or even a weekend morning treat. The key is not to overmix, which keeps it wonderfully tender.
Ingredients
For the Main Batter:
* 2 cups all-purpose flour
* 1 teaspoon baking soda
* ½ teaspoon salt
* 1 teaspoon ground cinnamon
* ¼ teaspoon ground nutmeg (optional, but I love it!)
* ¾ cup granulated sugar
* ½ cup packed brown sugar
* 2 large eggs
* ½ cup vegetable oil (or melted coconut oil for a subtle hint of flavor)
* ¼ cup milk (any kind works, even almond or oat milk makes it super creamy!)
* 1 teaspoon vanilla extract
* 1 ½ cups grated zucchini (about 2 medium zucchinis – make sure to squeeze out excess moisture!)
* ½ cup chocolate chips or chopped nuts (optional, but highly recommended!)
For the Filling:
*(This is for a marbled effect, totally optional but so pretty!)*
* ¼ cup granulated sugar
* 1 teaspoon ground cinnamon
* 2 tablespoons melted butter
For the Glaze:
*(Optional, but gives it that bakery touch!)*
* 1 cup powdered sugar
* 2-3 tablespoons milk or lemon juice (for a tart kick)
* ½ teaspoon vanilla extract
Step-by-Step Instructions
Step 1: Preheat & Prep Pan
First things first, get your oven preheating to 350°F (175°C). While that’s heating up, grab a standard 9×5 inch loaf pan. I like to grease it really well with butter or cooking spray, and then dust it lightly with flour. This ensures your beautiful loaf pops right out without sticking. If you’re feeling fancy, you can also line it with parchment paper, leaving a little overhang on the sides to help you lift it out later – I’ve learned that trick makes life so much easier!
Step 2: Mix Dry Ingredients
In a large bowl, whisk together the flour, baking soda, salt, cinnamon, and nutmeg (if you’re using it). Give it a good whisk until everything is evenly distributed. This is important because it makes sure your leavening agents and spices are spread throughout the batter, so you don’t get little pockets of just baking soda or an uneven spice distribution. I usually give it a good 30 seconds of whisking to make sure it’s all blended beautifully.
Step 3: Mix Wet Ingredients
In a separate medium bowl, whisk together the granulated sugar, brown sugar, eggs, vegetable oil, milk, and vanilla extract. You want to whisk this until it’s smooth and well combined. The brown sugar adds a lovely depth of flavor and extra moisture, so don’t skip it if you can help it! Make sure the eggs are fully incorporated; you don’t want any streaks of yolk.
Step 4: Combine
Now, pour the wet ingredients into the bowl with the dry ingredients. Gently fold them together with a spatula or wooden spoon until just combined. Please, please, *please* don’t overmix! A few streaks of flour are totally fine. Overmixing develops the gluten in the flour too much, which can lead to a tough, dense bread. We want tender and moist, remember?
Step 5: Prepare Filling
(This step is for the marbled effect!) In a small bowl, mix together the ¼ cup sugar, 1 teaspoon cinnamon, and 2 tablespoons melted butter. Stir until it forms a thick, paste-like consistency. This is going to give you those gorgeous swirls of spiced goodness.
Step 6: Layer & Swirl
Now for the fun part! Add the grated zucchini and any optional add-ins like chocolate chips or nuts to the batter. Gently fold them in. Pour about half of the batter into your prepared loaf pan. Then, dollop spoonfuls of the cinnamon-sugar mixture over the batter. Now, pour the remaining batter on top. You can gently swirl the filling into the batter using a knife or skewer. Don’t go crazy trying to get perfect patterns; a few gentle swirls are all you need to create those beautiful ribbons of flavor. I usually just run a butter knife in a zig-zag motion a couple of times. It looks pretty!
Step 7: Bake
Pop that pan into your preheated oven. Bake for 50-65 minutes. Now, ovens can be a little finicky, so start checking around the 50-minute mark. The best way to tell if it’s done is to insert a toothpick or a thin knife into the center of the loaf. If it comes out clean (or with just a few moist crumbs attached, but no wet batter), it’s ready! If it’s still gooey, give it another 5-10 minutes and check again. If the top is browning too quickly, you can loosely tent it with aluminum foil.
Step 8: Cool & Glaze
Once it’s baked, take the loaf pan out of the oven and let it cool in the pan for about 10-15 minutes. This allows it to set up properly. Then, carefully invert the pan onto a wire rack to release the loaf. Let it cool completely before glazing. If you’re adding a glaze, whisk together the powdered sugar, 2 tablespoons of milk or lemon juice, and vanilla extract until smooth. Add more liquid, a teaspoon at a time, if it’s too thick, or more powdered sugar if it’s too thin. Drizzle it over the cooled loaf. Let the glaze set for a bit before slicing. Honestly, the smell of this cooling is almost as good as the taste!
Step 9: Slice & Serve
Once the glaze has set (or if you skipped the glaze), it’s time to slice! Use a serrated knife for clean cuts. Serve at room temperature. It’s absolutely delicious on its own, or with a smear of butter. It’s perfect for a snack, breakfast, or even dessert. Enjoy every single bite!
What to Serve It With
This zucchini bread is so versatile, it’s a welcome addition to almost any meal or occasion! For a simple yet satisfying breakfast, I love serving a warm slice with a good cup of coffee. It’s also fantastic alongside a bowl of fresh fruit. If you’re planning a brunch, it fits right in on a buffet table. I like to serve it sliced with a small bowl of whipped cream or a dollop of crème fraîche for an extra touch of elegance. As a dessert, it’s surprisingly decadent, especially when served slightly warm with a scoop of vanilla bean ice cream or a drizzle of chocolate sauce. For those cozy afternoon or late-night cravings, it’s perfect with a glass of cold milk or a soothing cup of herbal tea. My family also loves it toasted and slathered with cream cheese – it’s a weekend treat we all look forward to. It’s really a recipe that adapts to your needs, whether you’re looking for something quick and easy or a little something special.
Top Tips for Perfecting Your Zucchini Bread
After making this zucchini bread countless times, I’ve picked up a few tricks that really make a difference. For the zucchini itself, grating it finely is key. I usually use the medium holes on a box grater. And the most crucial step? Squeeze out as much moisture as you possibly can! I like to place the grated zucchini in a clean kitchen towel or cheesecloth and wring it out over the sink. This prevents your bread from becoming too dense or gummy. When it comes to mixing, remember the golden rule: don’t overmix! Once the wet and dry ingredients are *just* combined, stop. A few small lumps are better than a tough loaf. If you’re going for the marbled effect, don’t go overboard with the swirling. A few gentle passes with a knife are enough to create beautiful ribbons without overworking the batter. For ingredient swaps, I’ve found that you can substitute half of the all-purpose flour with whole wheat flour for a slightly heartier texture, but don’t go for a full substitution as it can make the bread dense. Using half oil and half unsweetened applesauce works in a pinch if you’re trying to reduce fat, but it will slightly alter the texture, making it a touch less rich. When it comes to baking, always trust the toothpick test. Every oven is different, so a timer is just a guideline. If the top is browning too quickly, a loose tent of aluminum foil is your best friend. For the glaze, the consistency is key. Too thin and it’ll run off, too thick and it’ll be hard to spread. Start with the smaller amount of liquid and add more gradually until you get that perfect drizzling consistency. I’ve also experimented with adding a pinch of cardamom to the batter, which gives it a lovely floral note that pairs beautifully with cinnamon.
Storing and Reheating Tips
One of the best things about this zucchini bread is how well it keeps! If you’ve got any leftovers (which is rare in my house!), you can store it at room temperature for up to 3 days. Just make sure it’s completely cooled before wrapping it tightly in plastic wrap or placing it in an airtight container. This helps keep it moist. If you think you’ll need it for longer than 3 days, or if your kitchen is particularly warm, I recommend storing it in the refrigerator. It will stay fresh for about a week that way. When you’re ready to enjoy a slice from the fridge, you can just eat it cold, or I personally love to give it a quick 10-15 second zap in the microwave to warm it up slightly – it brings back that freshly baked warmth and tenderness. For longer-term storage, this zucchini bread freezes beautifully! Once it’s completely cooled, wrap the entire loaf or individual slices tightly in plastic wrap, then in aluminum foil, or place them in a freezer-safe bag. It should keep well for up to 3 months. To thaw, simply unwrap it and let it sit at room temperature for a few hours, or warm it gently in the oven or microwave. If you’ve glazed your loaf, I usually recommend glazing it *after* it’s been thawed and warmed, just so the glaze stays fresh and doesn’t get weird in the freezer. But honestly, even a day-old slice is still pretty darn amazing!
Frequently Asked Questions
Final Thoughts
This zucchini bread really is a labor of love, not in terms of difficulty, but in the sheer joy it brings. It’s the perfect example of how a few simple ingredients can come together to create something truly magical. It’s incredibly forgiving, always turns out delicious, and brings a sense of warmth and comfort to my kitchen that’s hard to beat. If you love moist, flavorful quick breads, or you’re just looking for a way to use up that garden zucchini, this recipe is an absolute must-try. It’s become a staple in my baking rotation, and I have a feeling it will in yours too. If you try it, please, please let me know how it turns out! I’d love to hear about your variations or any special touches you add. Happy baking, my friends!

Mini Egg Frittatas
Ingredients
Method
- Preheat oven to 350°F. Spray a non-stick or silicone muffin tin with nonstick cooking spray.
- Whisk together 6 eggs and 6 egg whites in a large bowl. Add in 1 cup chopped bell peppers, 1/2 cup onion, 1 cup spinach, 1 cup cooked breakfast sausage and 1 teaspoon salt and 1/2 teaspoon pepper. Stir to combine.
- Pour the egg mixture into each muffin tip cup, leaving about 1/4″ from the top.
- Cook for 23 to 30 minutes, or until the egg has puffed and comes clean with a toothpick. Run a knife around the edges to pop them out. Enjoy while hot.