Sweet Treats with Five Candy Bars
Honestly, I still remember the first time I tasted zucchini bread — I was a little kid, sneaking a slice from my mom’s baking tray, and I was hooked. It’s funny how something so humble, like zucchini, can turn into such a moist, sweet, and downright addictive treat. This recipe? It’s become a staple in my kitchen. I make it whenever I want a comforting snack or a quick breakfast that feels special. It’s basically like eating a slice of cake, but packed with veggies, so I feel a little less guilty indulging at 8 a.m. or midnight. Trust me on this — it’s a crowd-pleaser, especially when you swap out ingredients here and there to make it your own. Plus, it’s incredibly easy. You mix the batter, layer in some filling, swirl it around, and bake. No fancy equipment, no complicated steps. Just pure, cozy, homemade goodness. My kids ask for this all the time — and honestly, I do too.
What is Zucchini Loaf?
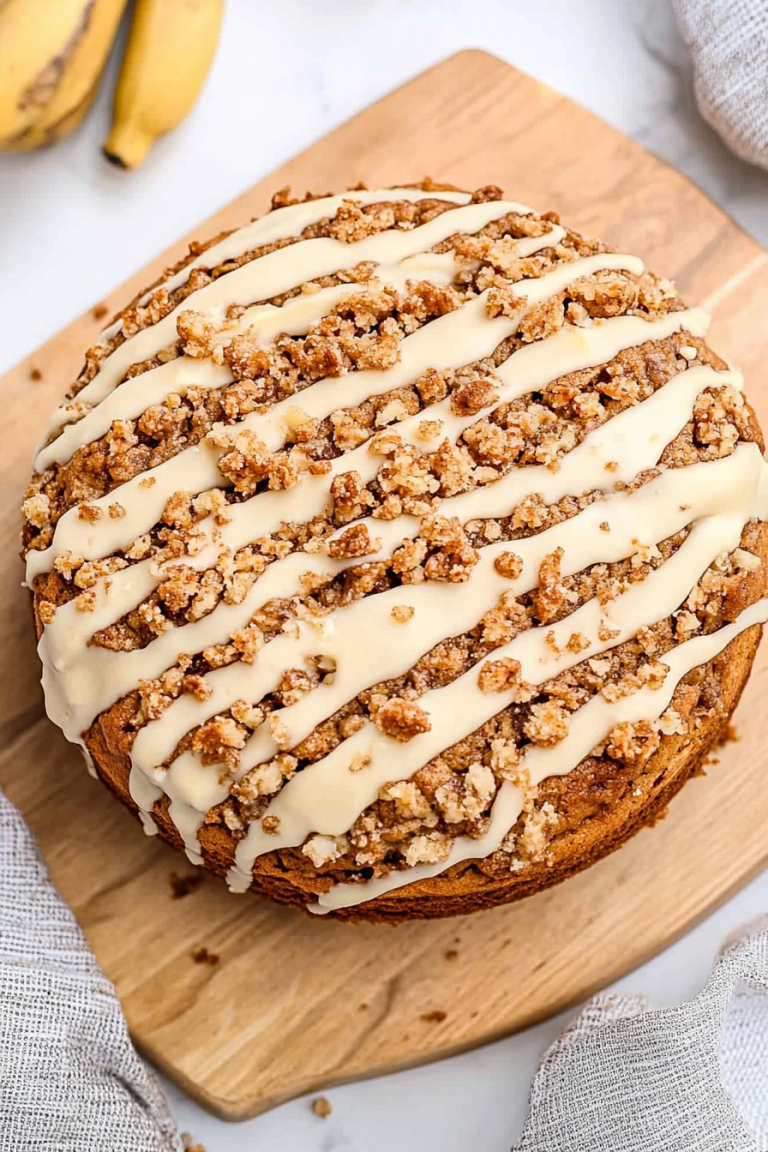
Think of zucchini loaf as a twist on traditional quick bread — it’s basically a little loaf cake made with grated zucchini, which keeps it amazingly moist and gives it a subtle veggie sweetness. The name is pretty straightforward: “zucchini” for the star ingredient, and “loaf” because it’s baked in a loaf pan, perfect for slicing. It’s essentially a fun, kid-friendly way to sneak some greens into dessert or breakfast. This dish has roots in classic baking, but I like to think of it as a blank canvas—you can add nuts, chocolate chips, or even dried fruit. It’s a good way to use up those extra zucchinis from your garden or the store. Think of it as a cozy, sweet hug that also packs a nutritional punch. And don’t worry — it’s not overly healthy-tasting. It’s soft, sweet, and totally crave-worthy. Plus, the smell alone will bring everyone into the kitchen.
Why you’ll love this recipe?
What I love most about this zucchini loaf is how it combines that comforting, bakery-style flavor with the ease of a quick weeknight bake. The flavor? Oh, it’s just perfect — a warm, cinnamon-spiced sweetness with hints of vanilla, balanced beautifully by the subtle earthiness of the zucchini. And then there’s the texture: moist, slightly dense but tender enough to melt in your mouth. It’s a texture that keeps you going back for seconds. The best part? It’s super budget-friendly. You probably have most of the ingredients already in your pantry—flour, sugar, eggs, maybe a zucchini or two—and that makes it a lifesaver on busy nights. Versatility? Definitely. I’ve made this with chocolate chips, with apples, even with a handful of chopped walnuts for extra crunch. And the glaze? It’s just that perfect finishing touch — sweet, shiny, and tempting. This isn’t just a snack; it’s a genuine little moment of happiness that my whole family adores.
How do I make Zucchini Loaf?
Quick Overview
This zucchini loaf is a simple mix-and-bake situation. The batter comes together in minutes — just whisking dry and wet ingredients separately, then merging them gently. The secret to the moistness? Grated zucchini and a bit of oil. I love layering in a rustic filling, like a cinnamon-sugar mix, before swirling the batter — it adds an extra punch of sweetness and texture. Baking takes about an hour, but don’t worry — it’s pretty forgiving. I always do this when I want a cozy treat without too much fuss. The smell alone makes the whole house smell like a bakery, which is reason enough to try it. Plus, once cooled, it slices beautifully, and you can enjoy it for days — or freeze some slices for later. It’s a one-bowl wonder that never fails to make everyone smile.
Ingredients
For the Main Batter:
- 2 cups grated zucchini (about 2 small zucchinis)
- 1 1/2 cups all-purpose flour (can swap for whole wheat if you want)
- 1 cup granulated sugar (or honey for a natural touch)
- 1/2 cup vegetable oil (or melted coconut oil for added flavor)
- 3 large eggs
- 1 teaspoon vanilla extract
- 1 teaspoon baking powder
- 1/2 teaspoon baking soda
- 1/2 teaspoon ground cinnamon (trust me on this!)
- 1/4 teaspoon salt
For the Filling:
- 3 tablespoons brown sugar
- 1 teaspoon cinnamon
- A handful of chopped nuts or chocolate chips (optional)
For the Glaze:
- 1/2 cup powdered sugar
- 1-2 teaspoons milk or lemon juice
- Extra cinnamon or vanilla for flavoring (optional)
Step-by-Step Instructions
Step 1: Preheat & Prep Pan
Set your oven to 350°F (175°C). Grease a standard loaf pan with butter or non-stick spray and line it with parchment paper if you’d like the easiest release. This step keeps things tidy and helps you get perfect slices later. I usually do this while I grate the zucchinis—so everything’s ready for when the batter’s mixed.
Step 2: Mix Dry Ingredients
In a big bowl, whisk together the flour, sugar, baking powder, baking soda, cinnamon, and salt. This ensures everything is evenly distributed, so your loaf rises nicely and has that lovely spice flavor in every bite.
Step 3: Mix Wet Ingredients
In a separate bowl, beat the eggs, then stir in the oil, vanilla, and grated zucchini. I always squeeze out some excess moisture from the zucchini with a paper towel — too much water can make the batter a bit gloppy. When it all looks shiny and combined, you’re ready to combine everything.
Step 4: Combine
Gently fold the wet mixture into dry ingredients, just until combined. Don’t overmix — a few lumps are fine and keep the texture nice and tender. Overmixing can make the loaf denser, and nobody wants a heavy slice!
Step 5: Prepare Filling
Mix the brown sugar and cinnamon in a small bowl. If you’re adding nuts or chocolate chips, fold those in now too. Think of this as a surprise layer within the loaf—delicious!
Step 6: Layer & Swirl
Pour half of the batter into the prepared pan. Sprinkle the filling evenly over this layer. Then dollop the rest of the batter on top, and use a butter knife or skewer to swirl the filling through the batter. It creates a beautiful marbled effect when baked, and honestly, it’s my favorite part — kind of like art in the kitchen!
Step 7: Bake
Bake for about 55-60 minutes. The top should be golden, and a toothpick inserted in the center should come out clean. If it’s browning too fast, tent it with foil — no one wants a burnt top! Every oven’s a little different, so check around the 50-minute mark.
Step 8: Cool & Glaze
Let the loaf cool in the pan for about 15 minutes, then transfer to a wire rack. While it’s still a little warm, drizzle on your glaze—powdered sugar mixed with milk or lemon juice. For an extra flavor kick, add a pinch of cinnamon or vanilla to the glaze. The warmth helps it spread into all those crevices, making each slice shiny and tempting.
Step 9: Slice & Serve
Once completely cooled, slice with a serrated knife. The loaf holds together beautifully when cooled — no crumbling! Serve by itself, with a dollop of whipped cream, or a hot cup of coffee. My favorite way? A big slice with butter melting on top. Yum!
What to Serve It With
This zucchini loaf is versatile enough to shine in all sorts of moments. For breakfast, I love it with a strong coffee — the nutty aroma and sweet spice make mornings extra cozy. When I serve it at brunch, I’ll add fresh berries and a drizzle of extra glaze, making it look fancy but still approachable. It’s just as delicious as a dessert — warm, with a scoop of vanilla ice cream or a dusting of powdered sugar. Sometimes, I’ll just slice a piece and wrap it up for a quick snack during hectic afternoons or late-night cravings. This has been my go-to for family gatherings, and I’ve even brought it to potlucks, where it disappeared in minutes. You can toast leftover slices, smear on some butter, or even turn chunks into bread pudding. Honestly, I might be a little obsessed with how many ways you can enjoy it.
Top Tips for Perfecting Your Zucchini Loaf
After making this a bunch of times, I’ve picked up a few tricks:
- Zucchini Prep: Always squeeze out excess moisture after grating to prevent a soggy loaf. I use a clean kitchen towel or paper towels for this — saves a lot of headaches.
- Mixing Advice: Don’t overstir once you combine wet and dry ingredients. Lumps are fine; overmixing makes it heavy and dense.
- Swirl Customization: For a bolder look, try layering different fillings or adding food coloring to the batter for a fun visual twist.
- Ingredient Swaps: Whole wheat flour adds extra fiber if you want a healthier version. Or swap sugar for maple syrup for a richer flavor. Keep ratios roughly the same—just reduce liquid slightly if necessary.
- Baking Tips: Oven temperatures vary; start checking at 50 minutes. Use a toothpick to test doneness—if it’s chocolate cake moist, it’s not ready. Should come out clean!
- Glaze Variations: Mix in a little lemon zest or cinnamon in the glaze for extra aroma. consistency should be pourable but not runny.
This recipe is a labor of love I’ve tweaked over the years — and honestly, each batch gets a little better. My biggest lesson? Patience. Letting it cool fully before slicing makes all the difference in keeping those beautiful marbled layers intact. Trust me, it’s worth the wait!
Storing and Reheating Tips
This loaf keeps wonderfully at room temperature for about 2 days, wrapped tightly in foil or stored in an airtight container. After that, I pop slices into the refrigerator — it stays moist and fresh for up to 5 days. If you want to keep it longer, the freezer is your friend. Wrap slices individually in plastic wrap, then foil, and freeze for up to 3 months. Thaw at room temperature or pop a slice in the microwave for about 20 seconds for an instant warm treat. Just remember, if you glazed it, add the glaze again after reheating — it soaks in less well after freezing, but it still tastes fabulous. I learned this the hard way after one frozen loaf, and now I always add the glaze fresh if I’m serving leftovers.
Frequently Asked Questions
Final Thoughts
This zucchini loaf has become one of those recipes I turn to when I want something cozy, sweet, and a little nostalgic. It’s a perfect example of how simple ingredients can come together to create something a little magical. Every time I bake it, I’m reminded of those Sunday mornings in my childhood, the smell of cinnamon wafting through the house, and the joy of sharing homemade treats with loved ones. The best part? It’s flexible, forgiving, and incredibly satisfying. Whether you’re making it as a breakfast, snack, or dessert, I promise—it won’t disappoint. Plus, it’s a sneaky way to get some veggies into your family’s diet without any fuss. I hope you love this as much as we do. Happy baking—and I can’t wait to hear how yours turns out! Drop a comment or share your own tweaks—I love hearing your stories.
candy bars
Ingredients
Method
- Line a baking sheet with parchment paper.
- Lay 35 of the pretzels on the prepared baking sheet.
- Add the peanut butter and powdered sugar to a small mixing bowl. Stir to combine until smooth.
- Spread about 1 teaspoon of the peanut butter mixture on each pretzel. Freeze for 10 minutes.
- Combine caramels and heavy cream. Microwave in 30-second intervals, stirring until melted and smooth. Cool slightly.
- Remove pretzels from the freezer. Spoon ½ teaspoon caramel onto each pretzel, then top with remaining pretzels. Freeze for 10 minutes.
- Melt chocolate chips and vegetable oil in the microwave, stirring every 30 seconds until smooth.
- Dip each pretzel sandwich into melted chocolate, using a fork to coat evenly. Place on a prepared baking sheet and refrigerate until set.