Sweet Birthday Cookies How to Bake Them
Oh, where do I even begin with this chocolate zucchini bread? It’s more than just a recipe; it’s a hug in loaf form. I remember the first time I made this, it was a chaotic Tuesday evening. The kids were buzzing with post-school energy, the dog was demanding attention, and I just needed something comforting, something that smelled like home. I’d seen so many zucchini bread recipes, but none of them really sung to me until I stumbled upon this gem. It’s not just *any* chocolate zucchini bread; it’s the one that makes my kids ask for seconds (and thirds, if I let them!), the one that’s disappeared in minutes at potlucks, and the one I pull out when I’m craving something intensely satisfying without having to spend hours in the kitchen. Honestly, if you think zucchini bread is just for autumn or just “healthy,” prepare to have your mind – and your taste buds – completely changed. This is moist, decadent, and utterly addictive, with a secret ingredient that takes it from good to absolutely unforgettable.
What is chocolate Zucchini bread?
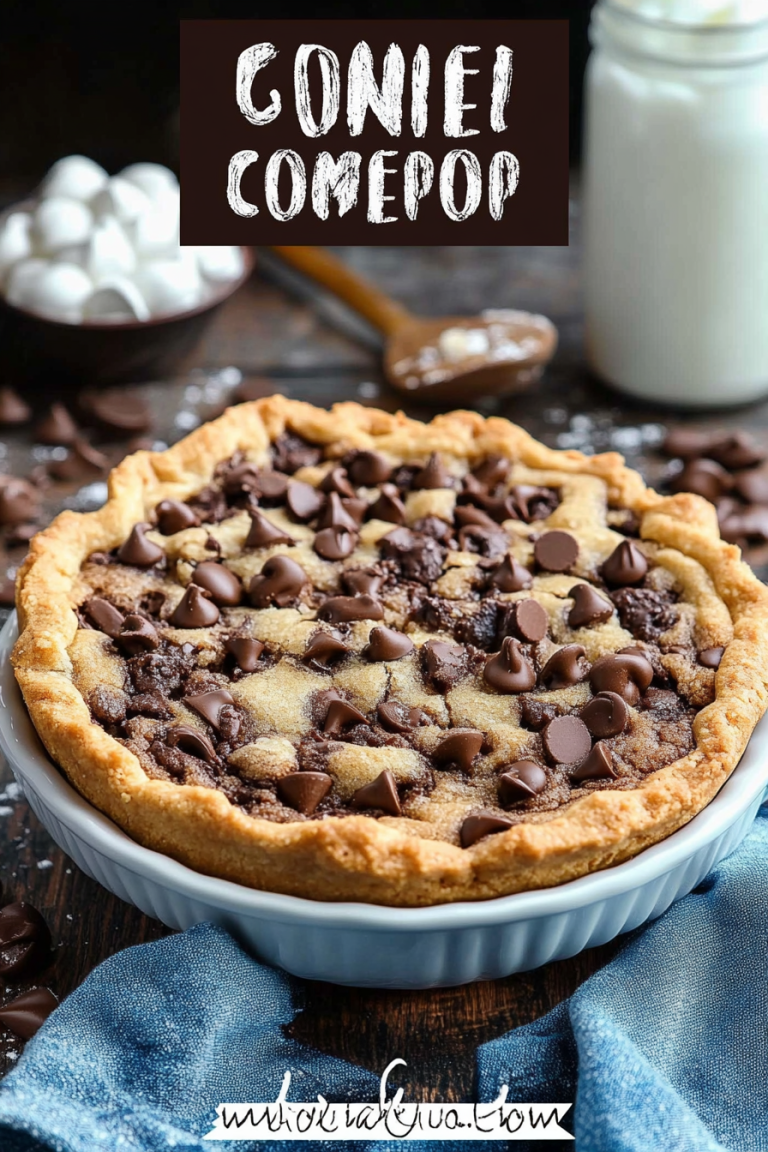
So, what exactly *is* this magical concoction? Think of it as your classic, beloved zucchini bread, but with a serious upgrade: rich, dark chocolate. It’s not just a few chocolate chips thrown in; it’s a deep, fudgy flavor that complements the earthy sweetness of the zucchini perfectly. The zucchini itself isn’t something you’ll taste as a distinct vegetable, I promise! Instead, it works its quiet magic, adding an incredible moisture and tenderness to the crumb. It’s a bit like a chocolate cake met a moist muffin and decided to elope. The name itself, “Chocolate Zucchini Bread,” tells you exactly what you’re getting: a delightful fusion of moist goodness and chocolatey bliss. It’s essentially a guilt-free indulgence, or at least, that’s how I like to think about it when I’m sneaking a slice (or two)!
Why you’ll love this recipe?
What are the reasons why I love this chocolate zucchini bread?flavor is out of this world. It’s deeply chocolatey, not too sweet, and has this wonderfully tender crumb that’s just… perfect. The zucchini really does its job here, making it impossibly moist without any greasiness. Then there’s the simplicity. Seriously, this is a lifesaver on busy weeknights or lazy weekend mornings. You probably have most of the ingredients in your pantry right now, and the mixing process is straightforward. I’ve had friends who are total beginners in the kitchen make this, and they rave about how easy it was and how impressed everyone was with the result. It’s also surprisingly cost-efficient. Zucchini is often super affordable, especially when it’s in season, and the other ingredients are pantry staples. You get a truly gourmet-tasting treat without breaking the bank. And let’s talk about versatility! This isn’t a one-trick pony. It’s fantastic on its own, but it’s also wonderful served warm with a dollop of whipped cream or a scoop of vanilla ice cream for an instant dessert. I’ve even sliced it cold and had it with my morning coffee – pure bliss! What I love most about this recipe, though, is how it makes everyone happy. It’s kid-approved, adult-loved, and it always feels like a special treat, even though it’s ridiculously easy to whip up. It’s a more forgiving and frankly, more exciting, alternative to a standard chocolate cake or brownies when you’re craving something rich and comforting.
How do I make Zucchini bread?
Quick Overview
This recipe is all about simple steps for maximum flavor and texture. You’ll whisk together your dry ingredients, then your wet ingredients, combine them, fold in some glorious chocolate, and bake until it’s beautifully puffed and fragrant. The zucchini disappears into the batter, doing its moisture-magic without being noticeable. It’s genuinely a mix-and-bake situation that requires minimal fuss and delivers maximum reward. The result is a moist, tender, and deeply chocolatey loaf that’s perfect for any time of day.
Ingredients
For the Main Batter:
You’ll need about 2 cups of grated zucchini – don’t worry about peeling it, that’s extra fiber and it blends right in! Make sure to squeeze out as much excess water as you can; this is crucial for texture. Grab about 2 1/2 cups of all-purpose flour, 3/4 cup of unsweetened cocoa powder (use a good quality one, it makes a difference!), 1 1/2 teaspoons of baking soda, 1/2 teaspoon of baking powder, and 1 teaspoon of salt. For the wet stuff, have 1 1/2 cups of granulated sugar, 1/2 cup of packed brown sugar (this adds a lovely depth of flavor), 2 large eggs, 1 cup of buttermilk (but I’ve totally used regular milk with a tablespoon of lemon juice or vinegar left to sit for 5 minutes in a pinch, it works just as well!), 1/2 cup of vegetable oil (or melted coconut oil for a slightly different vibe), and 1 teaspoon of vanilla extract.
For the Chocolatey Goodness:
This is where the magic happens! I use about 1 cup of semi-sweet chocolate chips, but feel free to use a mix of dark and milk chocolate chips, or even some chopped chocolate bar. It’s really about getting that rich chocolate flavor throughout the bread.
For the Optional (but highly recommended!) Glaze:
If you’re feeling fancy, a simple glaze elevates this to dessert status. You’ll need about 1 cup of powdered sugar, 2-3 tablespoons of milk (again, buttermilk is great here too, or even a dairy-free alternative), and a splash of vanilla extract. You can also swirl in a tablespoon of cocoa powder into the glaze for a double chocolate hit!
Step-by-Step Instructions
Step 1: Preheat & Prep Pan
First things first, get your oven preheating to 350 degrees Fahrenheit (175 degrees Celsius). While that’s heating up, grease and flour a standard 9×5 inch loaf pan. You can also line it with parchment paper, leaving some overhang on the sides, which makes lifting the finished loaf out so much easier. I always grease and flour even if I’m using parchment, just to be extra sure nothing sticks. Trust me, no one wants a loaf that’s fused to the pan!
Step 2: Mix Dry Ingredients
In a large bowl, whisk together the flour, cocoa powder, baking soda, baking powder, and salt. Give it a good whisk to make sure everything is evenly distributed. This step is super important because it prevents pockets of leavening agents or salt in your finished bread. You want that nice, consistent texture and rise.
Step 3: Mix Wet Ingredients
In a separate medium bowl, whisk together the granulated sugar, brown sugar, eggs, buttermilk, oil, and vanilla extract until everything is well combined and smooth. Make sure the eggs are fully incorporated – no one likes a streaky surprise!
Step 4: Combine
Now, pour the wet ingredients into the bowl with the dry ingredients. Using a spatula or wooden spoon, gently mix until *just* combined. It’s really important not to overmix here! A few streaks of flour are totally okay. Overmixing develops the gluten too much, which can make your bread tough instead of tender. We want tender, people!
Step 5: Prepare Filling
Gently fold in the grated and squeezed zucchini and the chocolate chips (or chopped chocolate). Again, mix until they’re just evenly distributed throughout the batter. The batter will be thick; that’s exactly what you want!
Step 6: Layer & Swirl
Pour the batter into your prepared loaf pan and spread it out evenly with your spatula. If you’re adding any extra chocolate swirls or toppings, now’s the time to do it. I like to sprinkle a few extra chocolate chips on top.
Step 7: Bake
Bake for 50-65 minutes, or until a wooden skewer or toothpick inserted into the center comes out clean (or with just a few moist crumbs attached, not wet batter). The baking time can vary depending on your oven and how moist your zucchini was, so keep an eye on it. If it starts to look too brown on top before it’s cooked through, you can loosely tent it with aluminum foil.
Step 8: Cool & Glaze
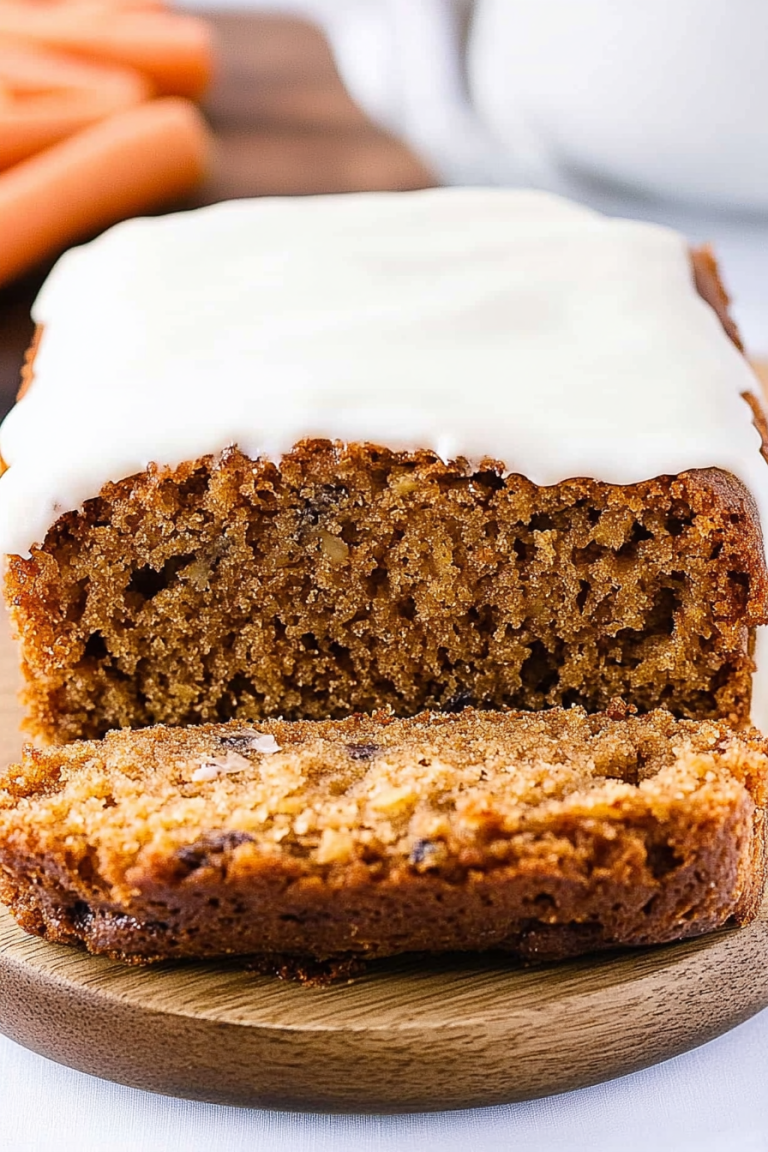
Let the bread cool in the pan on a wire rack for about 10-15 minutes. This helps it set up nicely. Then, carefully remove the loaf from the pan and let it cool completely on the wire rack before glazing. For the glaze, whisk together the powdered sugar, milk, and vanilla until smooth and pourable. Add more milk a teaspoon at a time if it’s too thick, or more powdered sugar if it’s too thin. Drizzle it over the cooled bread.
Step 9: Slice & Serve
Once the glaze has set a bit, slice it up with a serrated knife for clean cuts. This bread is fantastic warm or at room temperature. Enjoy!
What to Serve It With
This chocolate zucchini bread is incredibly versatile, which is another reason I adore it. For a simple, comforting Breakfast, I love serving a thick slice warm, maybe with a tiny pat of butter. It pairs beautifully with a hot cup of coffee or a glass of cold milk – pure, simple goodness that’ll get your day started right. If you’re planning a more elaborate Brunch spread, this bread is a showstopper. I’ll often slice it and arrange it on a platter, maybe with some fresh berries or a dollop of Greek yogurt on the side for a touch of freshness. It’s a welcome sweet note that complements savory dishes like scrambled eggs or bacon. For an indulgent Dessert, this bread truly shines. Serve it warm, maybe with a scoop of good quality vanilla bean ice cream or a rich chocolate ganache drizzled over the top. It’s decadent enough for guests but easy enough for a weeknight treat. And when you’re just looking for a Cozy Snack to get you through a tough afternoon or a late-night craving, this bread is your answer. It’s perfect with a mug of hot chocolate or herbal tea. My personal family tradition is to have a slice (or two!) with a tall glass of cold milk while watching a movie on a rainy Saturday afternoon. It’s pure comfort.
Top Tips for Perfecting Your Chocolate Zucchini Bread
After making this countless times, I’ve picked up a few tricks that I think really make a difference, and I want to share them with you! When it comes to Zucchini Prep, the key is getting as much moisture out as possible. Grating the zucchini using the large holes of a box grater is best. Once grated, I put it in a fine-mesh sieve and gently press down with a spoon, or better yet, squeeze it in a clean kitchen towel or cheesecloth. This step might seem tedious, but it’s vital for preventing a gummy or soggy loaf. Fresh zucchini is always best, so try to use it soon after buying. For Mixing Advice, remember my earlier note about not overmixing! Seriously, this is probably the most common mistake people make with quick breads. Mix just until the wet and dry ingredients are *barely* combined. Lumps are okay! Overmixing leads to a tough, dense texture, and we want it light and tender. When it comes to Swirl Customization, I love adding extra chocolate chips or even a swirl of peanut butter or Nutella into the batter before baking. To create a swirl, spoon about half the batter into the pan, dollop spoonfuls of your chosen swirl ingredient on top, then add the remaining batter and use a knife or skewer to gently swirl it through. Don’t over-swirl, or you’ll muddy the flavors. For Ingredient Swaps, I’ve found that you can substitute the vegetable oil with melted coconut oil or even unsalted butter, but oil generally yields a moister crumb. If you don’t have buttermilk, as I mentioned, 1 cup of milk with 1 tablespoon of lemon juice or white vinegar, left to sit for 5-10 minutes, is a perfect substitute. For Baking Tips, always know your oven! Ovens can vary, so the 50-65 minute range is a guideline. Start checking around the 50-minute mark. A clean skewer is your best friend here. If the top is browning too quickly, loosely tent the pan with foil. For Glaze Variations, if you want a thicker glaze, use less liquid. For a thinner glaze that drips more, add a tiny bit more liquid. You can also add a pinch of espresso powder to the glaze to enhance the chocolate flavor even more, or a touch of orange zest for a citrusy twist!
Storing and Reheating Tips
Keeping this delicious bread fresh is thankfully quite simple. For Room Temperature Storage, once the bread has cooled completely (and the glaze has set if you used it!), wrap it tightly in plastic wrap or store it in an airtight container. It will stay wonderfully moist and delicious for about 3-4 days. I often find myself reaching for a slice each day, and it’s still amazing. If you need to store it longer, Refrigerator Storage is your best bet. Wrap it well in plastic wrap, and then an additional layer of foil or pop it into an airtight container. It should keep well in the fridge for up to a week. The texture might firm up slightly, but it’s still very good. For Freezer Instructions, this bread freezes beautifully, which is a lifesaver when zucchini is abundant or when you want a treat on hand! Once completely cooled, wrap the loaf very tightly in plastic wrap, then in aluminum foil, or place it in a freezer-safe bag. It will keep well in the freezer for up to 3 months. To thaw, simply unwrap it and let it come to room temperature on the counter for a few hours, or if you’re impatient like me, you can pop it in a warm oven for a few minutes. Regarding Glaze Timing Advice, I always recommend glazing the bread *after* it’s completely cooled and *before* storing or freezing. If you’re planning to freeze it glazed, make sure the glaze is fully set first. If you freeze an unglazed loaf, you can glaze it after thawing. It’s just a little bit easier to handle and decorate when it’s not frozen!
Frequently Asked Questions
Final Thoughts
There you have it – my go-to, absolutely beloved chocolate zucchini bread recipe. It’s proof that you can have incredibly delicious, moist, and decadent baked goods without a ton of fuss. This recipe embodies everything I love about home baking: comfort, warmth, and the joy of sharing something special with the people you care about. It’s the kind of treat that makes ordinary days feel a little brighter and special occasions even more memorable. I truly hope you give this a try. If you love this recipe, you might also enjoy my classic blueberry muffins or my super-moist banana bread – they share that same ‘easy and delicious’ philosophy! I can’t wait to hear how your chocolate zucchini bread turns out! Please leave a comment below and let me know what you think, or share any of your own favorite tips and variations. Happy baking, friends!
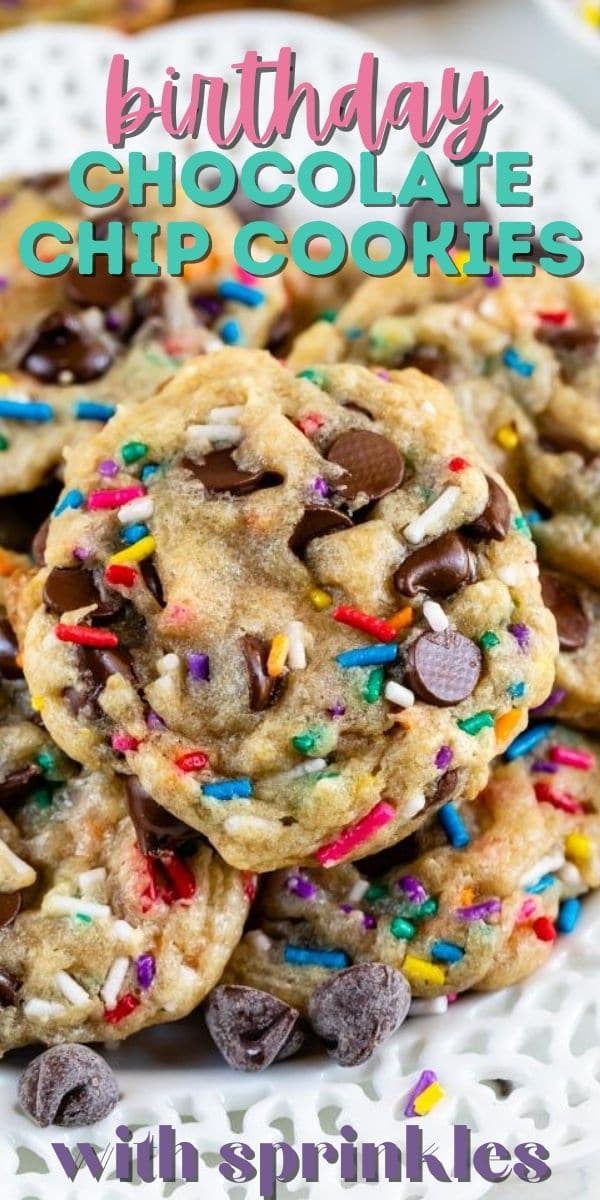
Chocolate Chip Birthday Cookies
Ingredients
Method
- Note: This dough requires chilling.
- Place melted butter in the bowl of a stand mixer fitted with the paddle attachment (or a large bowl if using a hand mixer). Add granulated and brown sugars and mix on low speed until the mixture is smooth. Mix in egg and vanilla extract and mix on medium speed until combined.
- Mix in baking soda and salt, then slowly mix in flour and mix just until the batter is smooth and comes together. Be sure to scrape the sides of the bowl during mixing. Slowly mix in chocolate chips and sprinkles.
- Line a cookie sheet with a silicone baking mat or parchment paper. Scoop 2 tablespoon balls of dough onto the cookie sheet. Spacing doesn’t matter because you will be chilling the dough. Cover with plastic wrap and chill for at least 2 hours.
- Preheat oven to 350°F. Line a second cookie sheet with parchment paper or a silicone baking mat.
- Remove the chilled cookie dough balls from the refrigerator and space them 2-inches apart on the cookie sheets. Bake (2 tablespoon sized cookies) for 11-15 minutes, or until the edges are a light golden and the tops are no longer glossy. Let cool on the cookie sheets at least 10 minutes before removing.