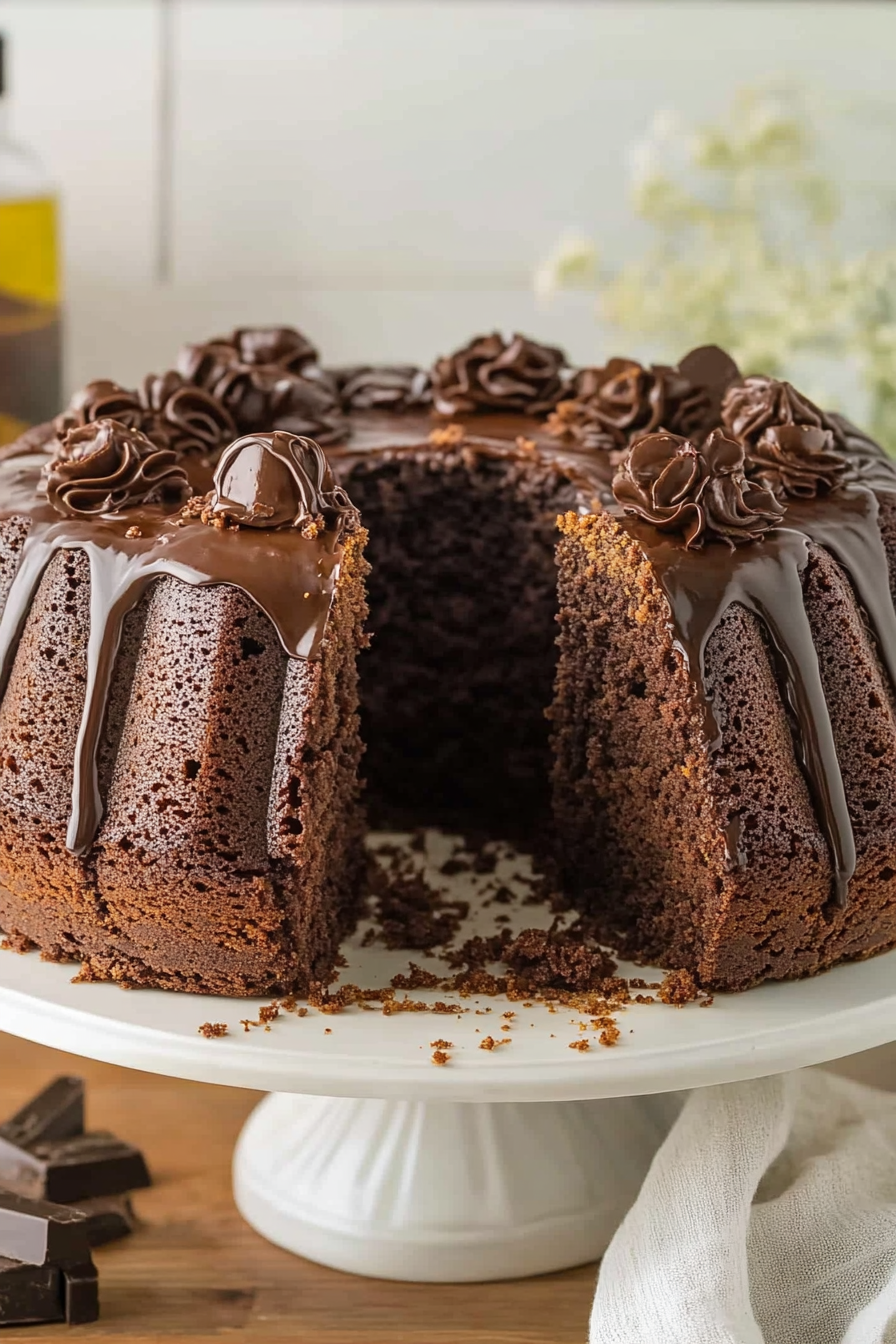
Rich Chocolate Rum Cake Recipe
Let me take you back for a second. I remember the first time I made these zucchini brownies — how I hesitated, thinking it sounded too good to be true. Could those tender, summer zucchinis really turn into something indulgent and chocolatey? But oh boy, was I surprised! They’re honestly one of my favorite go-to treats when I want something sweet, fudgy, and just a little bit healthy. My kids ask for these all the time — and I swear, they don’t even realize there’s zucchini sneaked inside. This recipe is my secret weapon on busy nights when I want to bake something special without spending hours in the kitchen. The smell alone brings everyone to the table, and I love how versatile it is — perfect for a quick snack, a family dessert, or something to wow guests at brunch. Trust me, once you make these, they’ll become a staple. I always do this when I need a little comforting sweetness — and I’ve yet to meet someone who doesn’t get hooked!
What is Zucchini Brownies?
Think of zucchini brownies as a mashup of fudgy, chocolatey heaven with a sneaky veggie twist. It’s essentially a rich brownie batter infused with shredded zucchini — yes, zucchini! The name is pretty straightforward: it’s a brownie that’s jazzed up with zucchini. The idea behind it is simple: use a healthy vegetable to add moisture, fiber, and a subtle flavor that complements the cocoa without overpowering it. These brownies are all about balance — moist, tender, and packed with chocolatey goodness. The best part? When baked, they develop a glossy, crackly top, just like those fancy bakery brownies. It’s almost like a magic trick to make something so indulgent and wholesome at the same time. I love that it’s a wonderful way to get veggies into the kids (or even myself when I crave something sweet but want to keep it a little healthier). Think of it as the chocolate lover’s secret weapon — rich, satisfying, and secretly good for you.
Why you’ll love this recipe?
Honestly, what I love most about these zucchini brownies is how unexpectedly delicious they are. No one ever guesses that a vegetable is involved — they’re just super fudgy and flavorful. The flavor profile is a perfect balance of deep chocolate and a hint of sweetness, with the zucchini really shining through in the moist texture. Luckily, this one’s a lifesaver on busy nights; I whip these up in under 30 minutes, and I’m always impressed by how foolproof they are. Plus, they don’t break the bank — just simple pantry staples you probably already have. The versatility? Endless. My favorite way to serve them is warm with a dollop of whipped cream or a dusting of powdered sugar, but they’re just as good plain or with a drizzle of caramel. I also love that you can customize the mix-ins — chopped nuts, chocolate chips, or even a sprinkle of sea salt. It’s comfort food with a little healthy twist — what’s not to love?
How do I make Zucchini Brownies?
Quick Overview
This recipe is all about keeping things simple but delivering big flavor. You start by shredding your zucchini (no need to peel!), then mixing together the dry ingredients in one bowl and the wet in another. Fold everything together gently, add your favorite mix-ins if you like, and pour into a baking pan. The magic happens in the oven — you get a fudgy, dense brownie with a crackly top that’s slightly crisp. Once it’s cooled a bit, you slice, serve, and enjoy. It’s honestly one of those recipes that feels like a warm hug in edible form. And the best part? You can make it ahead and reheat whenever that chocolate craving hits. It’s a foolproof recipe I’ve practically memorized at this point — trust me, it’s a game-changer!
Ingredients
For the Main Batter:
- 1 ½ cups shredded zucchini (about 1 medium zucchini, shredded and drained)
- ½ cup all-purpose flour (you can try almond flour for a nutty twist)
- ¼ cup unsweetened cocoa powder (preferably Dutch-processed for depth)
- 1 cup granulated sugar (or maple syrup if you prefer a natural sweetener)
- ½ teaspoon baking powder
- ¼ teaspoon salt
- 2 large eggs
- ½ cup melted unsalted butter or neutral oil (like avocado oil)
- 1 teaspoon vanilla extract
For the Filling:
- Optional: chocolate chips, chopped nuts, or dried fruits (just fold in before baking)
For the Glaze:
- ½ cup powdered sugar
- 2 tablespoons milk or cream
- Optional: a splash of vanilla or a teaspoon of cocoa powder for extra richness
Step-by-Step Instructions
Step 1: Preheat & Prep Pan
Set your oven to 350°F (175°C) and line an 8×8-inch square baking pan with parchment paper or lightly grease it. I always do this first — it makes sliding the brownies out so much easier, especially when they’re fresh and fudgy.
Step 2: Mix Dry Ingredients
In a large bowl, whisk together the flour, cocoa powder, baking powder, and salt. This ensures the dry ingredients are evenly distributed and prevents clumps in your batter. Trust me, this step makes a difference in how fluffy and uniform your brownies turn out.
Step 3: Mix Wet Ingredients
In another bowl, beat the eggs, then stir in the melted butter (or oil), sugar, and vanilla. I like to do this with a whisk — it’s quick and helps everything blend smoothly. The aroma of vanilla combined with the cocoa is *heavenly*. Be sure your melted butter is not too hot or it might scramble the eggs.
Step 4: Combine
Pour the wet mixture into the dry ingredients. Gently fold everything together — don’t overmix, just until the batter is combined. Overmixing can lead to dense brownies rather than fudgy ones. If you’re adding chocolate chips or nuts, fold them in now.
Step 5: Prepare Filling (if using)
If you’re adding extra goodies, fold them into the batter now. Think chopped walnuts, mini chocolate chips, or even some dried cranberries for a touch of tartness. This is totally optional but adds a fun layer of flavor and texture.
Step 6: Layer & Swirl
Pour the batter into your prepared pan. For those who like a marbled effect, you can swirl in some caramel or peanut butter on top before baking. Or, if you want a neat, even top, just spread it out evenly. Either way, the batter will be thick but pourable, so take your time spreading it smooth.
Step 7: Bake
Bake in the preheated oven for 20-25 minutes. Keep an eye on it — the edges should start to pull away slightly from the pan, and a toothpick inserted in the center should come out with moist crumbs. That’s how you know they’re fudgy but not underdone. Every oven is different, so check early if you’re unsure.
Step 8: Cool & Glaze
Allow the brownies to cool in the pan for about 10 minutes, then transfer to a wire rack to cool completely. Once cooled, mix your glaze ingredients and drizzle over the top. This glaze adds a glossy finish and a touch of extra sweetness — but plain brownies are just as divine.
Step 9: Slice & Serve
Use a sharp serrated knife to cut into squares. I like to wipe the knife clean between cuts for tidy edges. Serve them slightly warm or at room temperature — both work beautifully. And trust me, a little dollop of whipped cream or a scoop of vanilla ice cream takes these to the next level.
What to Serve It With
These zucchini brownies are pretty versatile, so I love serving them in different ways depending on the occasion:
- For Breakfast: Pair them with a cup of strong coffee or a latte — the bitter and sweet combo is *heaven*. I’ve even crumbled a piece over Greek yogurt with fresh berries for a nourishing morning boost.
- For Brunch: Serve warm with a side of fresh fruit and a splash of whipped cream or mascarpone — it makes a delightful dessert for brunch guests.
- As Dessert: Nothing beats a warm brownie with a scoop of vanilla or caramel ice cream, drizzled with caramel or chocolate sauce. My family loves this for special occasions!
- For Cozy Snacks: Cut into smaller squares and serve with hot cocoa or milk — perfect for lazy Sunday afternoons or after-school treats.
This recipe became a household favorite because it’s both satisfying and sneaky healthy — I even pack a few into lunchboxes sometimes. It’s so comforting, yet light enough to indulge guilt-free. I’ve experimented with adding spices or switching out the flour, and it’s always a winner. Nothing beats the smell of warm brownies wafting through the house, believe me.
Top Tips for Perfecting Your Zucchini Brownies
After making these dozens of times, I’ve picked up a few tricks to make them even better:
- Zucchini Prep: I always shred zucchini and let it sit in a sieve with a sprinkle of salt for 10 minutes to draw out extra moisture. Then, I pat it dry with a paper towel — moist zucchini is the enemy here as it can make the brownies soggy.
- Mixing Advice: Be gentle when folding the ingredients. Overmixing leads to dense brownies. Just fold until everything is combined; a few lumps are okay.
- Swirl Customization: For visual interest, I sometimes swirl in melted peanut butter or caramel right before baking. Keep a toothpick handy to create a marbled effect — looks pretty and tastes amazing!
- Ingredient Swaps: Tried using dark chocolate chunks instead of chips, and it took the brownies to a whole new level. For a dairy-free version, coconut oil works beautifully — just swap out the butter.
- Baking Tips: Ovens vary, so start checking around 20 minutes. The brownies should be fudgy but not wet in the center. If it feels jiggly, give them a few more minutes and test again.
- Glaze Variations: I like mixing in a bit of espresso powder or a splash of bourbon into the glaze to elevate the flavor. But plain powdered sugar with a squeeze of lemon is fresh and simple.
Honestly, I’ve learned that the little tweaks make all the difference. Patience and gentle handling are your friends here. And don’t be discouraged if your first batch isn’t perfect — every oven and ingredient batch is different, so take notes and adjust next time. The real secret? A pinch of love. It’s the ingredient no recipe can measure, but it’s what makes these brownies taste like they came from a cozy family kitchen, not a bakery.
Storing and Reheating Tips
This one’s a common question, and trust me — these brownies stay pretty fabulous even days later. Store them in an airtight container at room temperature for up to 2 days, covered with a clean towel or plastic wrap to maintain that moist, fudgy center. If you need to keep them fresh longer, pop them in the fridge — they’re good for about a week. Just gently reheat a square in the microwave for about 15 seconds if you want that warm, gooey feeling again. For freezing, wrap individual pieces tightly with plastic wrap, then place in a zip-top bag — they’ll keep for up to 3 months. Thaw at room temp or warm gently in the microwave. I like to add the glaze after reheating because it sets nicely on a slightly cooled brownie, but you can also add it before freezing — just expect a slightly different texture.
Whichever way you choose, these brownies are forgiving and resilient. They’re a trusty treat to have on hand when a chocolate craving strikes or when you need a quick dessert for unexpected guests. Plus, they taste just as good cold or at room temp, making them wonderfully flexible!
Frequently Asked Questions
Final Thoughts
If you haven’t tried zucchini brownies yet, what are you waiting for? They’re a shining example of how baking can be both fun and secretly wholesome. The combination of rich chocolate and sneaky zucchini makes every bite feel indulgent without the guilt. Plus, they’re perfect for all kinds of occasions — from cozy nights in to family dinners and even party desserts. I’ve made these countless times, tweaking ingredients and techniques, and I never get tired of how reliably delicious they are. My hope is that you’ll love this recipe as much as I do, and maybe even make it your own with your favorite add-ins or flavor tweaks. Happy baking, and I’d love to hear how your batch turns out — drop a comment or share your photos! You’re about to become the hero in your own kitchen.
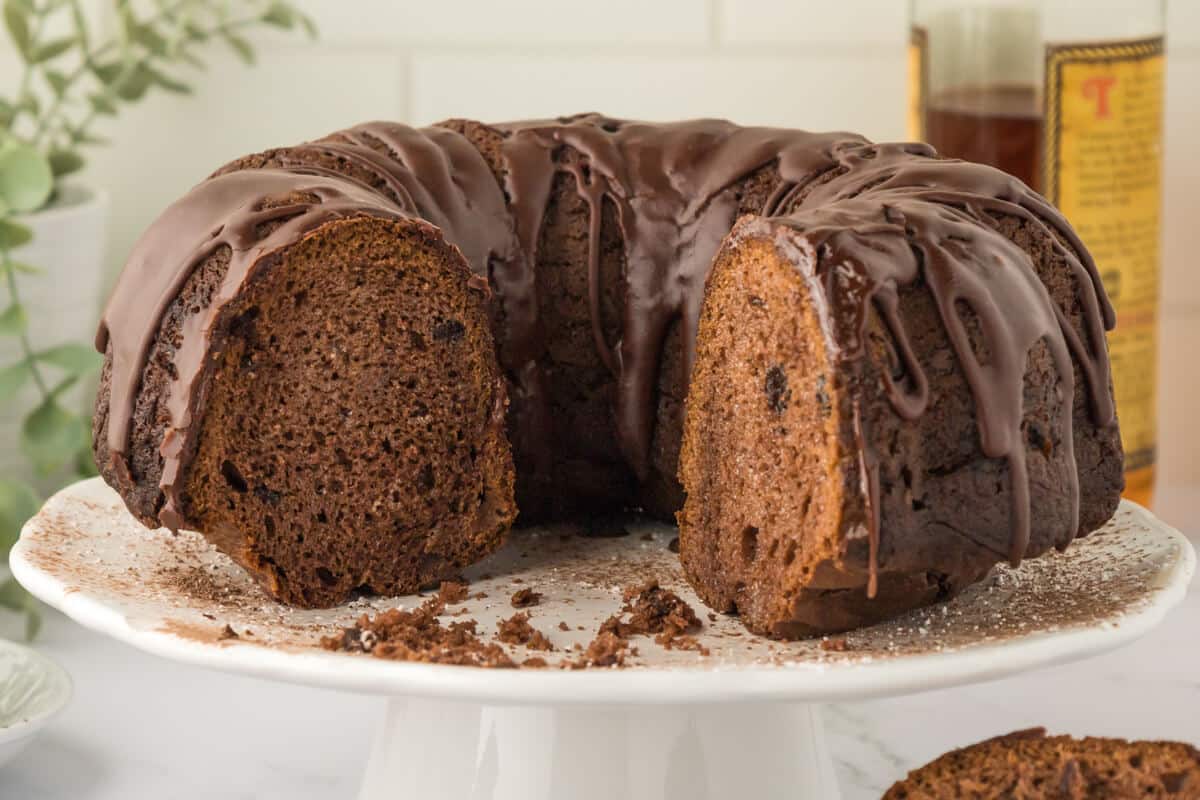
Chocolate Rum Cake
Ingredients
Method
- Preheat the oven to 350°F. Grease a 10-inch bundt pan well.
- Combine cake mix, pudding, vanilla, sour cream, eggs, vegetable oil, and 4.5 tbsp rum in a mixing bowl.
- Beat with an electric mixer for 5 minutes. The batter will be stiff.
- Fold in chocolate chips with a spoon or spatula.
- Pour batter into the prepared bundt pan.
- Bake for 1 hour, or until a toothpick comes out clean. Cool in the pan for 30 minutes before removing from the pan. Invert onto a platter, plate, or cooling rack and continue to cool completely before frosting.
- Using a whisk or a fork, in a medium bowl, mix powdered sugar, cocoa powder, and 2 tbsp rum.
- Slowly add warm water until you get a drizzly consistency. It should be a very slow drizzle. If it is too thin, all the drizzle will end up on the plate and not on the top of the cake.
- In a small saucepan, combine cocoa powder, sugar, and water.
- Whisk over medium heat and bring to a simmer. Continue stirring for 3 minutes.
- Remove from heat and stir in vanilla extract and 1 tsp rum. The sauce will thicken slightly as it cools.