How to Make Delicious Santa Fe Peppers
Have you ever had that moment late at night when you’re craving something sweet but don’t want to turn on the oven and wait an hour for a full cake? Yeah, me too. One evening, I remembered my grandma’s old coffee cake—rich, moist, with that beautiful swirl of cinnamon and sugar—except I wanted to make it a little healthier and more family-friendly. That’s when I started experimenting with zucchini. Honestly, I was a bit skeptical at first—zucchini in a cake? Sounds strange, right? But I promise, this is one of those recipes that surprises you every time. The zucchini adds moisture without diluting the flavor, and it’s like getting a secret veggie boost in every bite. My kids ask for this all the time, especially when school’s back in session, and my neighbors always ask for the recipe. It’s incredibly easy to make, and the smell alone will pull everyone into the kitchen—trust me on this one. And the best part? It’s a crowd-pleaser that’s perfect for breakfast, brunch, or just that sneaky 10 pm treat. Ready to see how I whip this up? Let’s go!
What is Zucchini Swirl Coffee Cake?
This zucchini swirl coffee cake is basically a cozy, homey dessert or breakfast treat, layered with a cinnamon-sugar swirl that’s reminiscent of those beautiful bakery loaves. Think of it as a tender, buttery cake with a gorgeous marbled ribbon swirling through the middle. The name might make you wonder—zucchini in a cake? But I swear, the zucchini plays a supporting role, adding moisture and a subtle earthy note that balances out the warm cinnamon and sweet sugar. It’s essentially a cross between a classic coffee cake and a zucchini bread, but with a beautiful swirl that makes it feel a little fancier. The texture is soft, slightly dense but still light enough to slice easily, and because it’s loaded with zucchini, it stays moist for days—if it lasts that long! This dish is super forgiving too, so even if you’re a beginner baker, you’ll feel right at home. The magic is in that swirl—pretty, delicious, and totally addictive.
Why you’ll love this recipe?
What I love most about this zucchini swirl coffee cake is how it hits all the right notes—flavor, texture, and simplicity—without a ton of fuss. First off, the flavor profile is just delightful. The cinnamon-sugar swirl gives it that cozy, nostalgic bakery vibe, while the zucchini adds a subtle earthiness that keeps it from being overly sweet or heavy. It’s like a little hug in every slice. Plus, it’s incredibly easy to make. I always do this when I need something quick and satisfying—no complicated frosting or layering, just a simple batter with a gorgeous marbled effect. Budget-wise, it’s super friendly—most ingredients are pantry staples anyway. And versatility—oh, you can swap the nuts in the swirl, add blueberries, or even sprinkle some streusel on top for extra crunch. I’ve tested this with almond milk instead of regular milk, and it just made it even creamier. Honestly, once I made it with shredded carrots instead of zucchini, and it was a revelation—all good! Whether you’re serving it for breakfast or dessert, it’s a hit that can adapt to any mood or occasion. What I love most, though, is how this one’s a real crowd-pleaser. My kids ask for it when friends come over and always devour the leftovers. It’s one of those recipes that never fails to bring smiles around my table.
How do I make Zucchini Swirl Coffee Cake?
Quick Overview
This cake is surprisingly straightforward. You make a simple batter, prepare a cinnamon-sugar filling, then layer and swirl it all together before baking. The trick is in not overmixing the batter—it keeps the cake tender—and swirling the filling just enough to create beautiful ribbons without blending everything into one uniform color. Once it’s baked, a quick glaze or dusting of powdered sugar makes it look store-bought but tastes homemade and warm. No fancy equipment needed—just a whisk, a mixing bowl, and a good oven. It’s perfect for busy mornings or last-minute guests because it comes together in about an hour from start to finish. Plus, the zucchini keeps everything moist and flavorful, making this a keeper recipe for sure.
Ingredients
For the Main Batter:
– 2 cups all-purpose flour (or a mix of whole wheat and AP for more health benefits)
– 1 cup granulated sugar
– 1 teaspoon baking powder
– ½ teaspoon baking soda
– ½ teaspoon salt
– 1 teaspoon ground cinnamon
– ½ cup vegetable oil (or melted butter)
– 2 large eggs
– 1 cup buttermilk (or plain yogurt/almond milk for dairy-free substitution)
– 1 teaspoon vanilla extract
– 1 cup shredded zucchini (squeeze out excess moisture, I always do this with a paper towel)
For the Filling:
– ½ cup packed brown sugar
– 1 tablespoon ground cinnamon
– 2 tablespoons softened butter (for spreading the swirl)
– Optional: ¼ cup chopped nuts or mini chocolate chips for variation
For the Glaze:
– 1 cup powdered sugar
– 1-2 tablespoons milk (or lemon juice for zing)
– ½ teaspoon vanilla (if using milk)
Step-by-Step Instructions
Step 1: Preheat & Prep Pan
First things first, turn your oven on to 350°F (175°C) and grease a 9-inch round or square baking pan. I like lining mine with parchment paper—makes life easier when you’re trying to lift out a hot cake without crumbling it. Set it aside while you gather your ingredients. I always get everything out beforehand; it makes the process so much smoother.
Step 2: Mix Dry Ingredients
In a large bowl, whisk together the flour, sugar, baking powder, baking soda, salt, and cinnamon. These are your base, so do this step well—sifting can help avoid lumps. I’ve learned that good dry ingredients make all the difference in the final texture, so don’t skip this step. It’s easy but crucial for an even crumb.
Step 3: Mix Wet Ingredients
In another bowl, beat the eggs, then add the oil, buttermilk, and vanilla. Whisk until combined—you want everything to be smooth and slightly frothy. This is where I’ve tested switching out buttermilk for almond milk and, honestly, it makes the batter even creamier. Little tricks like that are lifesavers when you’re short on supplies!
Step 4: Combine
Pour the wet mixture into the dry ingredients and gently fold with a spatula or wooden spoon until just combined. Be careful not to overmix—this is the secret to a tender cake. A few lumps are okay; they’ll bake out. Overmixing tends to make the cake dense, which I learned after messing it up a couple of times early on.
Step 5: Prepare Filling
In a small bowl, combine brown sugar and cinnamon. Mix in the softened butter until crumbly but spreadable. If you like nuts or mini chocolate chips, fold those in now. This filling gives the cake its signature swirl, so don’t skimp on the cinnamon—trust me, it makes all the difference.
Step 6: Layer & Swirl
Pour half the batter into your prepared pan, spreading evenly. Dollop spoonfuls of the cinnamon-sugar mixture over the batter, then add the rest of the batter on top. Using a toothpick or skewer, swirl gently through the layers to create those beautiful ribbons. I love swirling in a figure-eight pattern—it’s a small detail but makes it look totally professional without any extra work.
Step 7: Bake
Pop it into the oven and bake for 40-45 minutes. Check for doneness by inserting a toothpick in the center—it should come out clean or with just a few moist crumbs. Ovens vary, so keep an eye on it after 40 minutes. I’ve had it baked perfectly in 42 minutes, but sometimes I need an extra five minutes. The smell alone will make your whole house smell like a bakery.
Step 8: Cool & Glaze
Let the cake cool in the pan for about 15 minutes before transferring to a wire rack. Once cooled slightly, drizzle your prepared glaze over the top or dust with powdered sugar if you prefer a lighter finish. I like a good thick glaze that soaks in just a bit—the perfect sweet touch that makes everyone ask for seconds.
Step 9: Slice & Serve
Use a sharp serrated knife to cut even slices—this helps preserve the swirl pattern and prevents crumbling. Best served warm with a cup of coffee or a glass of milk. Honestly, I’ve also had it cold from the fridge—I think it’s just as good, if not better, after a day or two. The flavors deepen overnight, and the moistness stays just right. This looks pretty on a cake stand or a plate with a few fresh berries, and it’s just a simple joy to slice into slices that are as beautiful as they are delicious.
What to Serve It With
This zucchini swirl coffee cake is a chameleon—fabulous for breakfast, brunch, or even as a casual dessert. For breakfast, pair it with a hot cup of coffee or a mug of chai tea—something cozy to start the day. I love serving thick slices with a pat of butter or a dollop of Greek yogurt for added creaminess. If you’re brunching, try it alongside fresh fruit or a crispy bacon side; it balances the sweetness with that salty crunch. As a dessert, I think a scoop of vanilla ice cream or a drizzle of caramel sauce takes it to the next level. And if you’re feeling extra indulgent, a dusting of cinnamon sugar or chopped nuts on top before baking creates a crunchy crumble that’s irresistible. My family loves it with a big glass of cold milk or even a cup of hot cocoa on chilly days. It’s also wonderful to pack for picnics or take as a sweet treat to share with friends—it holds up well, and the flavors get even better the next day. Honestly, this cake is easy enough for a weekday snack but special enough for weekend gatherings. It’s that rare recipe that can do it all, and every time I make it, it feels like a little celebration.
Top Tips for Perfecting Your Zucchini Swirl Coffee Cake
After making this recipe countless times, I’ve picked up a few tricks that guarantee a beautiful, tasty result every time. First, make sure to squeeze out as much moisture as possible from your zucchini—this prevents the batter from becoming too wet and dense. I always do this by shredding and then pressing out excess water with a clean towel or paper towels—that way, your cake stays light and moist without excess moisture making it heavy. When mixing the batter, keep the wet and dry ingredients just until combined—overmixing leads to tunnels and a dense crumb, which no one wants. For the swirl, I love creating a marbled effect with a toothpick or skewer, going in a random pattern—no need for perfection here, just a natural, rustic look. Feel free to swap out ingredients—blueberry swirls are a hit too, and I’ve tested adding a tablespoon of lemon zest for a fresh zing. When baking, position the rack in the middle to ensure even heat, and always do the toothpick test. For the glaze, adding a splash of lemon juice or maple syrup can customize the flavor—trust me, it’s worth experimenting a little. Lastly, invest in a good serrated knife—it makes slicing so much easier and cleaner, especially when the cake is still warm. I’ve learned the hard way, but now I cut carefully and find lovely, even slices every time. My biggest lesson? Sometimes, the simplest tweaks—like squeezing zucchini or swirling with a gentle hand—are what make all the difference. I’ve made this numerous times just to get it perfect, and honestly, it’s a recipe I’ll keep coming back to because it’s so forgiving and wildly delicious.
Storing and Reheating Tips
This cake actually gets better with a little rest. If you’re not planning to serve it immediately, store leftovers in an airtight container at room temperature for up to 2 days—just keep it covered to prevent drying out. For longer storage, pop it in the fridge for up to 4 days. I recommend wrapping it tightly or placing it in a sealed container—I’ve found that this keeps the moistness just right and prevents it from absorbing fridge odors. If you want to freeze it, cut into slices first, wrap each piece tightly with plastic wrap, then bag it up. It should keep well for up to 3 months. When you’re ready to enjoy, reheat gently in the microwave or oven—I usually zap a slice for about 20 seconds in the microwave; it’s just enough to warm through without drying out. If you add the glaze after reheating, do it just before serving to keep that shiny, fresh look. Trust me, a warm slice with melted glaze is pretty irresistible. And if you’re serving it cold, no reheating needed—just slice and enjoy. Keep it covered, and it’ll stay moist and delicious. The key is not to leave it out uncovered for too long, especially in humid weather, or it may get a little gummy. My trick: always warm the slices before serving if you want that freshly-baked feel. This cake is quite forgiving, so even if you forget for a day or two, it’ll still taste fantastic.
Frequently Asked Questions
Final Thoughts
If there’s one recipe I’d recommend trying over and over, it’s this zucchini swirl coffee cake. It’s like a little piece of comfort that you can whip up in no time, and the flavor always wins hearts—my kids love when I bake this, and friends leave with an extra slice tucked in their bag. The cinnamon-sugar swirl looks so pretty and makes each slice feel special, but it’s simple enough that anyone can master it. Plus, the zucchini keeps everything moist and tender, so even days later, it’s still just as good. I think what makes this recipe truly human—what makes it stand out—is the love and memories baked into every bite. It reminds me of lazy weekend mornings when the house smells like cinnamon and happiness. I hope you give it a try and add your own twist—maybe a handful of chocolate chips or a splash of lemon zest? Either way, I can’t wait to hear how yours turns out! Happy baking, friends!
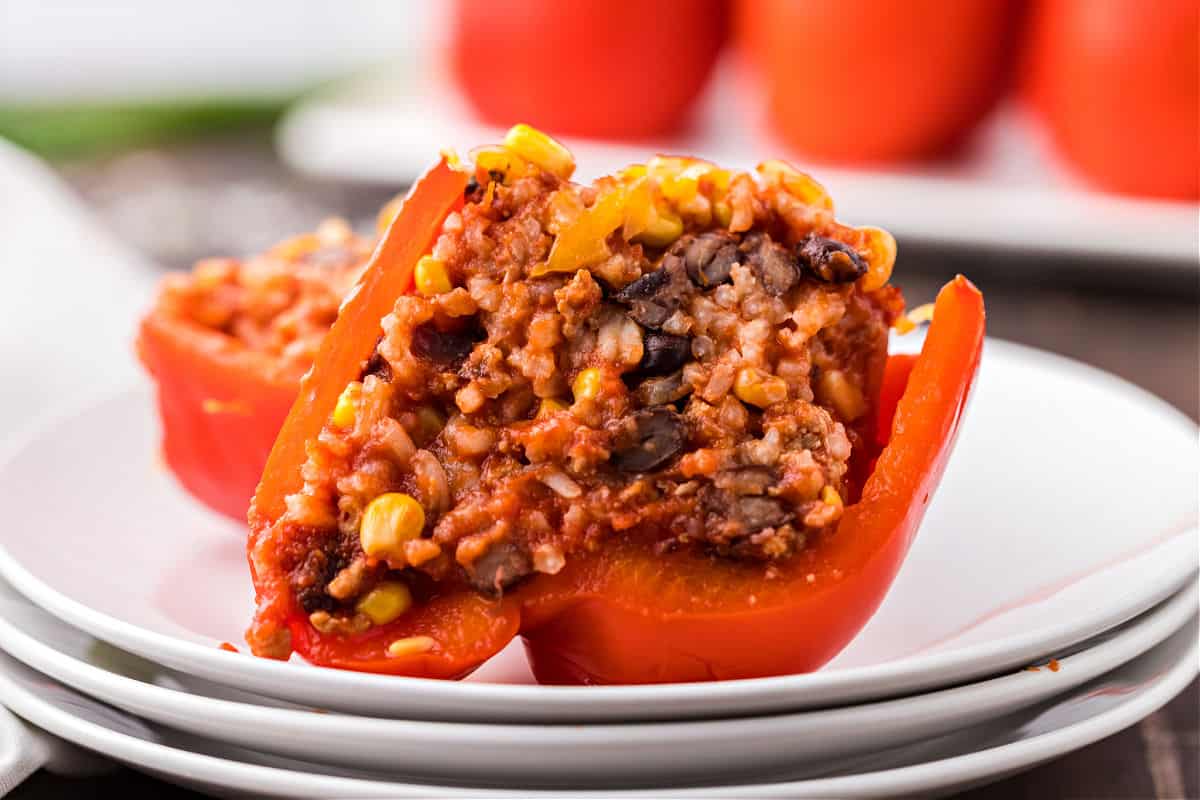
Santa Fe Stuffed Peppers
Ingredients
Method
- Wash red peppers and slice the tops off each pepper. Remove the seeds. Stand each pepper up next to each other in a large baking dish (13x9).
- In a large skillet, brown ground turkey until fully cooked. Drain. Return to skillet. Add cumin, salt, tomatoes, black bean and sweet corn. Simmer about 15 minutes.
- Meanwhile, cook Jasmine rice according to package.
- Add cooked rice to skillet, combining completely. Remove from heat. Fill each red pepper with turkey mixture. Cover dish with foil and bake in a 350 degree oven for about 40-45 minutes. Remove foil and top with cheese. Bake an additional 5 minutes, until cheese is melted. Remove from oven and sprinkle with green onion pieces.
- Serve and enjoy!