How to Bake Delicious Orchard Bread
Honestly, I don’t remember exactly when I first tried zucchini in cake. I know it sounds a little weird at first—like, sneaking veggies into dessert? But let me tell you, this zucchini swirl cake is one of those recipes that sneakily steals hearts and disappears in minutes at my house. The smell alone—warm cinnamon, sweet sugar, and that earthy hint of zucchini—always brings everyone to the kitchen, even before it’s out of the oven. It’s my go-to when I want something slightly indulgent but still kinda wholesome. Plus, it’s incredibly forgiving, perfect for busy weeknights or when unexpected guests pop in. My kids ask for this all the time; they think it’s some kind of magic! And trust me on this—once you get the hang of the swirling pattern, you’ll be hooked. It’s one of those recipes that feels fancy enough for a brunch but easy enough for a lazy weekend treat. If you’ve got a bunch of zucchinis sitting around, as most of us do during summer, this one’s a lifesaver on busy nights or when you want to jazz up a simple snack. So, grab your zucchinis and let’s get baking—you’re gonna love it!
What is Zucchini Swirl Cake?
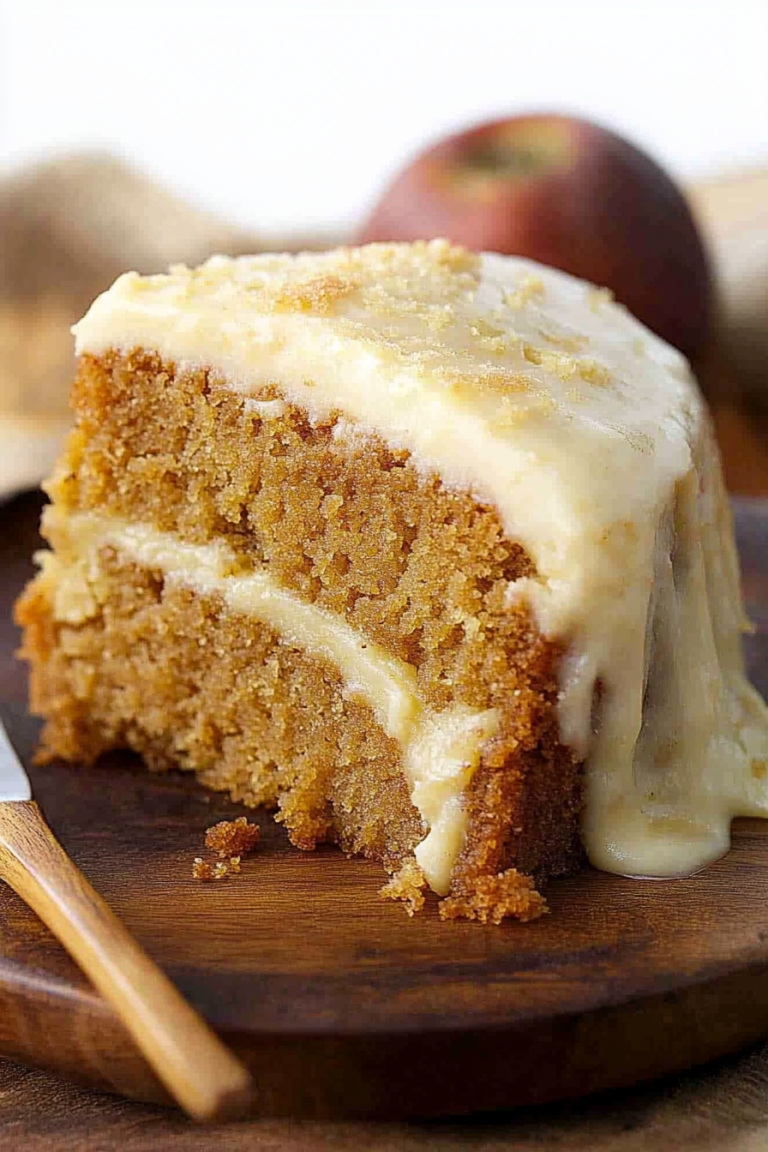
Think of it as a cozy, rustic cake with a bit of a surprise—hidden bits of zucchini folded into a tender, sweet batter. It’s essentially a cross between a quick bread and a layered dessert, with a cinnamon-spiced swirl running through the middle and on top. The name “swirl cake” comes from that marbled or braided appearance you get when you carefully layer and swirl the filling into the batter before baking. If you’re familiar with carrot cake or banana bread, it’s kind of like those but with zucchini, which adds moisture and a subtle earthy flavor. The best part? Once it’s baked, it’s moist, flavorful, and beautifully textured. It’s a forgiving recipe, so don’t worry if you’re not a pro—anyone can make this, and it’s perfect for breakfast, coffee dates, or just because you’re craving that sweet, spicy aroma filling your kitchen. I love how versatile it is—dress it up with nuts or keep it simple with just the glaze. It’s a real crowd-pleaser and—shhh—it’s secretly healthy too! (Well, almost.)
Why you’ll love this recipe?
Honestly, what I love most about this zucchini swirl cake is how unexpectedly delicious it is—everyone who tries it always asks for seconds, even those who aren’t into veggies. The flavor combination of cinnamon, vanilla, and just a touch of honey makes it taste like a warm hug. The moistness from the zucchini keeps it tender and makes each bite melt-in-your-mouth good. Plus, it’s so simple to throw together—no fancy equipment needed, just a whisk and a spatula. I’ve made this with my kids helping, and it’s always a fun mess in the kitchen. It’s also budget-friendly because zucchini is cheap and plentiful during summer. The versatility is a bonus—you can serve it as breakfast with a dollop of Greek yogurt, as an afternoon snack with tea, or dressed up as dessert with a drizzle of glaze or dollop of whipped cream. What I love most about this is how it feels like a cozy kitchen secret—something you whip up when you want a little comforting sweetness that’s also sneakily nutritious. The best part? It’s been tested countless times (seriously, I’ve lost track) and never fails to impress. My friends always tell me it tastes like a fancy bakery find—trust me on that!
How do I make Zucchini Swirl Cake?
Quick Overview
This zucchini swirl cake comes together in just about an hour, start to finish. The batter is straightforward—mix dry ingredients, beat wet ingredients, combine gently, then layer with a cinnamon-sugar filling and swirl before baking. The trick here is not overmixing; that keeps the cake light and fluffy. The zucchini gets grated, then moisture squeezed out (trust me, it makes a huge difference!), before folding into the batter. The swirl is just a simple cinnamon-sugar mixture that you spoon and swirl into the batter, creating that gorgeous marbled effect. Once baked and cooled slightly, I love to drizzle it with a simple glaze, but honestly, it’s perfect just as it is—sweet, moist, with a hint of spice. This is the kind of cake that makes your kitchen smell divine, and it’s so forgiving—you can add nuts or dried fruit if you want. Easy, cozy, and totally addictive!
Ingredients
For the Main Batter:
– 2 cups all-purpose flour (or gluten-free blend, see tips!)
– 1 cup granulated sugar
– 1 teaspoon baking powder
– ½ teaspoon baking soda
– ½ teaspoon salt
– 1 teaspoon ground cinnamon
– ½ teaspoon ground nutmeg (optional but lovely)
– ½ cup plain Greek yogurt or sour cream
– ½ cup vegetable oil or melted butter
– 3 large eggs
– 1 teaspoon vanilla extract
– 1 cup finely grated zucchini (squeezed dry)
For the Filling:
– ¼ cup brown sugar
– 1 teaspoon ground cinnamon
– 2 tablespoons melted butter or coconut oil
– ½ cup chopped nuts or shredded coconut (optional but adds nice texture)
For the Glaze:
– 1 cup powdered sugar
– 1-2 tablespoons milk or lemon juice
– A splash of vanilla extract (for extra flavor)
Step-by-Step Instructions
Step 1: Preheat & Prep Pan
Set your oven to 350°F (175°C). Lightly grease a 9-inch loaf or bundt pan, or line it with parchment paper—this makes for easy removal. I always do this before starting, so I’m not scrambling at the last minute. A quick spray with non-stick spray and a dusting of flour or sugar works perfectly. Keep your ingredients ready to go—mise en place is the secret!
Step 2: Mix Dry Ingredients
In a large bowl, whisk together the flour, sugar, baking powder, baking soda, salt, cinnamon, and nutmeg. Mixing the dry ingredients well ensures everything is evenly distributed—trust me, this little step makes your cake rise evenly and tastes balanced.
Step 3: Mix Wet Ingredients
In a separate bowl, beat the eggs lightly. Add the Greek yogurt, oil, vanilla, and grated zucchini. Stir until smooth. I like to squeeze out as much moisture as I can from the zucchini—this keeps the batter from getting soggy and helps the cake stay moist and light. I’ve tested this with almond milk too, and honestly, it made it even creamier! So feel free to experiment.
Step 4: Combine
Pour the wet mixture into the dry ingredients. Gently fold everything together just until combined. Avoid overmixing—this is what makes the cake fluffy rather than dense. A few streaks of flour are okay; I promise, it all blends beautifully during baking.
Step 5: Prepare Filling
Mix the brown sugar, cinnamon, and melted butter into a crumbly, fragrant mixture. If you’re adding nuts or coconut, toss those in now. This filling is what creates that irresistible swirl—and the smell is absolutely divine. I love sprinkling a handful of chopped walnuts on each layer for extra crunch.
Step 6: Layer & Swirl
Pour about half of the batter into your prepared pan. Spread evenly. Sprinkle the cinnamon-sugar filling over the batter, then dollop the rest of the batter on top. Using a skewer or knife, gently swirl through the batter, creating a marbled effect. I like to do a few zigzags—makes a pretty pattern when sliced!
Step 7: Bake
Pop it in the oven and bake for 45-50 minutes. Check doneness with a toothpick—they say it’s done when the toothpick comes out clean, but I also look for a golden top and a lovely aroma. Oven times can vary, so start checking around 45 minutes. If your cake gets too brown on top but isn’t done inside, cover loosely with foil and continue baking.
Step 8: Cool & Glaze
Let the cake cool in the pan for about 15 minutes, then transfer to a wire rack to cool completely. Once cooled slightly, drizzle with the glaze—mix powdered sugar with milk or lemon juice until it’s a pourable consistency. I usually do this while the cake is still warm—then it seeps into the cracks and makes everything so pretty and shiny. If you prefer less sweetness, skip the glaze and dust with powdered sugar instead.
Step 9: Slice & Serve
Slice with a serrated knife for clean cuts, and serve warm or at room temperature. I love a slice with a cup of coffee or a drizzle of honey. It’s also great as a brunch centerpiece or even packed in lunchboxes (if they’re big enough!). This cake holds surprisingly well for a few days, covered tightly, and the flavors only deepen overnight.
What to Serve It With
This zucchini swirl cake is so versatile that I serve it different ways depending on the occasion. For breakfast, a warm slice with a dollop of Greek yogurt and fresh berries is heaven—serves as a quick energizer. During brunch, I love it with a pot of herbal tea or strong coffee alongside some cream cheese spread or jam. As a dessert, a simple dusting of powdered sugar or a drizzle of honey makes it feel fancy enough for guests. My kids love it as a snack; they’re convinced it’s a “special treat,” even though I sneak zucchini into it! During cozy weekends, I’ll toast a slice and smear it with almond butter or cream cheese for an afternoon pick-me-up. It’s that kind of recipe that adapts to you—perfect for lazy mornings or a quick dessert fix after dinner. What I really adore about this cake is how it’s always a hit—I mean, you could serve it to a crowd or just hide a piece for yourself (I won’t tell!). And, of course, I love experimenting with toppings—fresh fruit, chopped nuts, or even a splash of espresso in the glaze. It’s basically my go-to for turning simple ingredients into a little slice of comfort.
Top Tips for Perfecting Your Zucchini Swirl Cake
Over the years, I’ve learned a few tricks to make this cake even better—and I’m happy to share! First, always squeeze out the excess moisture from the zucchini; soggy batter is no fun and makes the cake dense. I’ve tested this with grated carrots, too, and it works perfectly. When mixing the wet ingredients, be gentle—overmixing leads to tough cakes, which nobody wants. I’ve found that folding in the batter just until combined preserves that tender crumb. For the swirl, I like to use a skewer or a chopstick to create gentle zigzags—this gives a beautiful marbled effect without mixing everything into a muddy mess. Speaking of swaps, if you don’t have Greek yogurt, sour cream or even applesauce works well as a substitute—just keep an eye on the batter’s consistency. When baking, always check early; every oven is a little different, and you want that perfect golden top. I also love to add a teaspoon of vanilla in the batter—it enhances all the warm spices and makes everything smell divine. If you want a richer glaze, mix in a touch of cream cheese or melted white chocolate—trust me, it takes this cake to the next level. Oh, and don’t be afraid to experiment—sometimes I toss in a handful of chocolate chips or dried cranberries just for fun. These little tweaks have made me love this recipe even more, and honestly, I could eat a slice right now just describing it!
Storing and Reheating Tips
This cake keeps well for several days, which makes it a fantastic make-ahead option. If you’re planning to eat it within a day or two, storing it covered at room temperature works perfectly—just make sure it’s in a bread box or airtight container to keep it soft and fresh. For longer storage, wrap it tightly in plastic wrap or store in an airtight container in the fridge—this actually keeps it moist and helps the flavors meld. It’s best to consume within 3-4 days in the fridge, but I’ve also frozen slices for quick snacks later. To freeze, wrap each piece in plastic wrap, then slip into a freezer bag—these defrost nicely in the microwave or at room temperature. Just beware: if you add the glaze, wait until you’re about to serve it, so it doesn’t soggy or melt during storage. When reheating, a quick 15-20 seconds in the microwave restores that freshly baked warmth. Honestly, a slice straight from the fridge is still good—just let it sit at room temperature for a few minutes for maximum yum. The smell might tempt you every time—trust me, this cake is a keeper!
Frequently Asked Questions
Final Thoughts
There’s something so heartwarming about this zucchini swirl cake. Every time I make it, I’m reminded of lazy weekend mornings in my childhood home, the smell wafting through the kitchen—comforting and inviting. It’s a little humble, yet somehow feels special with that beautiful cinnamon swirl peeking through. My family always asks if I’ll make it again soon, and honestly, I never mind—this recipe has become a staple in my baking rotation. It’s proof that you don’t need fancy ingredients or complicated techniques to create something truly memorable. Just a handful of pantry staples, a zucchini or two, and a dash of love—that’s all it takes. I hope you give it a try and fall in love with it as much as I have. Don’t forget to leave a comment with your tips or variations—I always love hearing how others make it their own. Happy baking, friends! And remember: a slice of homemade happiness is always just a bake away.
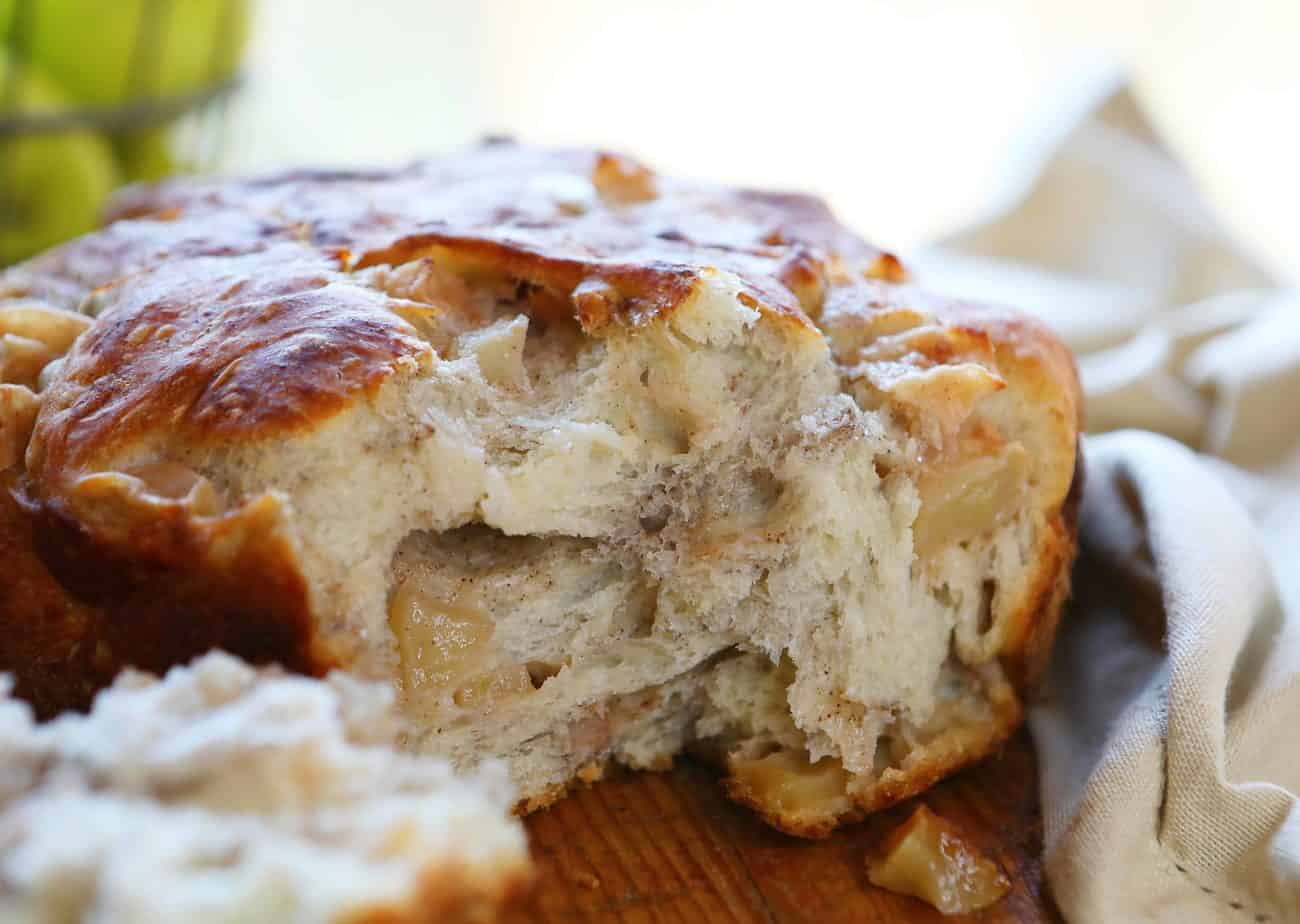
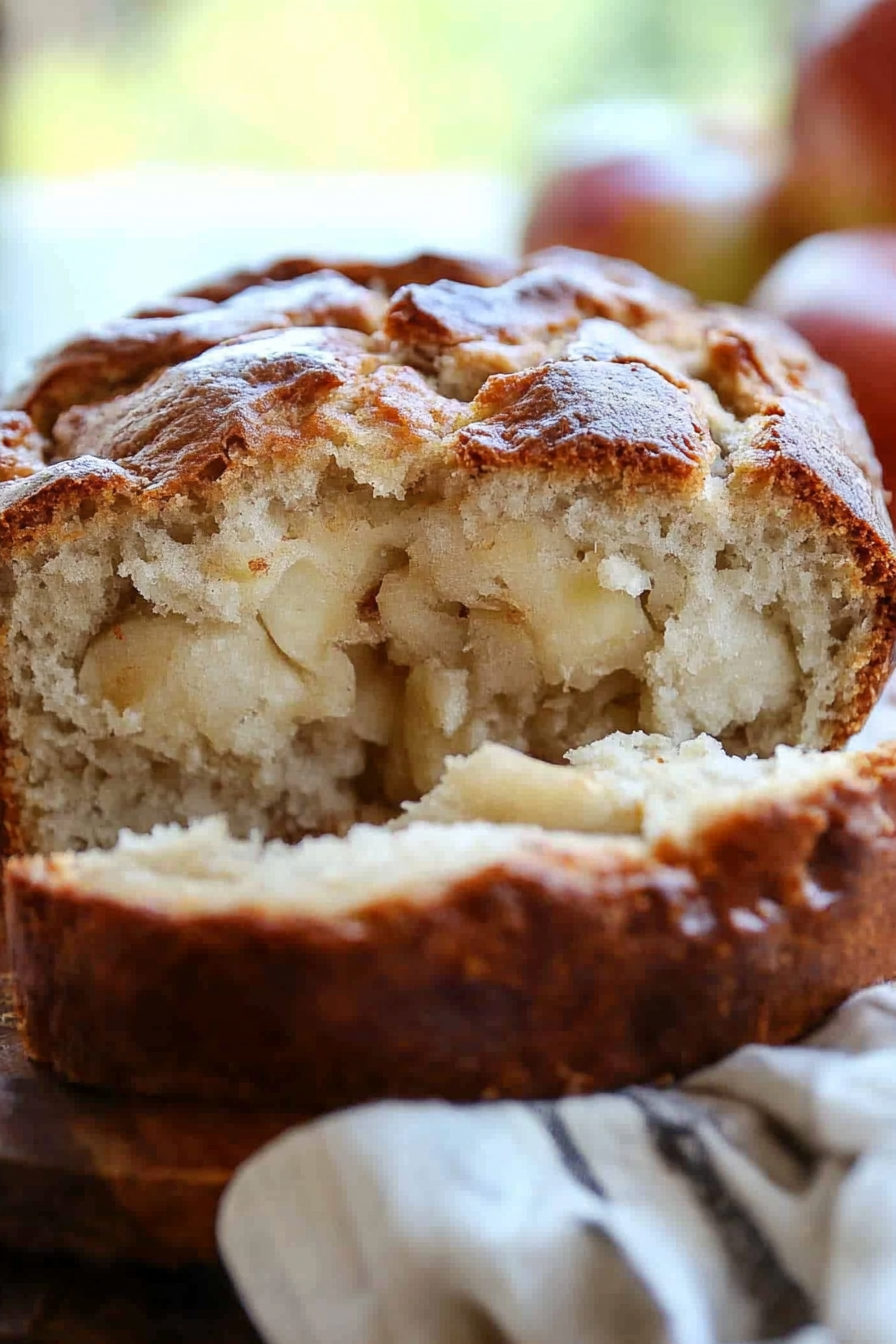
apple bread
Ingredients
Method
- In a large bowl, combine flour, salt, yeast, and water. Mix until a sticky dough forms. Cover with plastic wrap and let rest at room temperature for 8 hours or overnight.
- Peel, core, and dice the apples. Mix apples with sugar and cinnamon until coated.
- Add the apples to the dough, knead gently to incorporate, and place into a greased 5-quart French oven. Cover and let rise for about 2 hours until puffy.
- Preheat the oven with the French oven inside to 425°F. Bake the bread covered for 40-45 minutes. Remove lid and bake for another 10-15 minutes until golden brown. Cool on a rack.
- Mix melted butter, brown sugar, and maple syrup until well blended. Spread on slices before serving.