How to Bake a Nutty Butter Cake
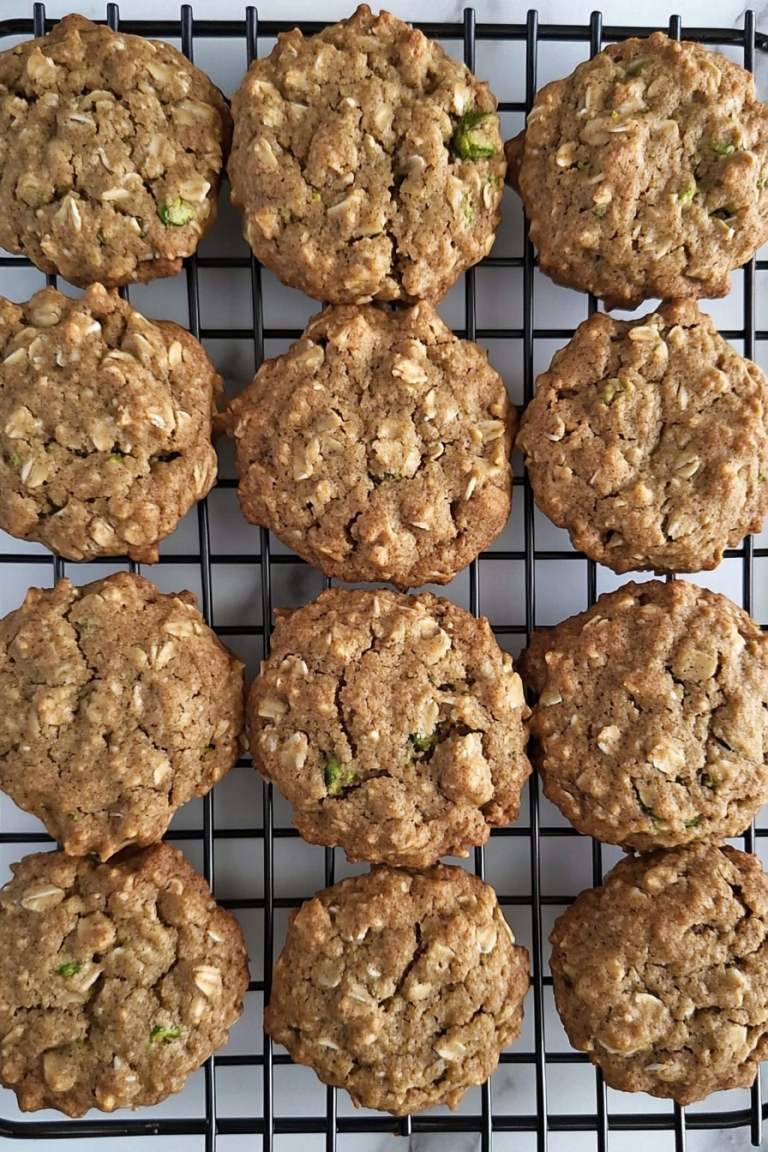
Okay, so I have to tell you about this zucchini bread. It’s not just *any* zucchini bread. This is the kind of bread that makes your kitchen smell like pure comfort, the kind that’s perfect with a steaming mug of coffee on a lazy Sunday morning, or even better, a sneaky slice after dinner when you need something sweet but don’t want to deal with baking a whole cake. I’ve tried so many zucchini bread recipes over the years, and honestly, some of them are… well, let’s just say they can be a little bland or dry. But *this* one? It’s the real deal. It’s incredibly moist, packed with flavor, and has this perfect balance of sweetness that just makes you want another slice. My kids, who can be notoriously picky, actually gobble this up without even realizing it’s full of good-for-them zucchini. It’s one of those recipes that I’ve tweaked just a tiny bit over time, and now it’s my absolute go-to. If you’re looking for a truly spectacular zucchini bread recipe, you’ve found it. It’s a lifesaver on busy nights, and it’s pretty much guaranteed to disappear fast at any gathering.
What is Zucchini bread?
So, what exactly *is* zucchini bread? At its heart, it’s a quick bread, meaning it uses a leavening agent like baking soda or baking powder instead of yeast, so you don’t have to wait for it to rise. Think of it like a cake, but a little denser and often less sweet, perfect for breakfast or a snack. The star ingredient, of course, is zucchini! Now, I know what you might be thinking: “Zucchini? In *bread*?” And yeah, it sounds a bit unusual, right? But trust me, it’s pure magic. When zucchini is grated and baked into batter, it adds an incredible amount of moisture without making the bread soggy, and you absolutely cannot taste the zucchini itself. It just makes everything tender and delicious. The name “zucchini bread” is pretty straightforward – it’s bread made with zucchini! It’s not really a loaf you’d slather with butter like a yeast bread; it’s more of a sweet, moist treat that’s often enhanced with warming spices like cinnamon and sometimes nuts or chocolate chips. It’s essentially a baker’s clever way of sneaking in a vegetable!
Why you’ll love this recipe?
There are so many reasons why this zucchini bread recipe has become my absolute favorite, and I’m pretty sure you’re going to feel the same way. First off, the flavor is just out of this world. It’s got this wonderful warm spice from the cinnamon, a hint of vanilla, and that perfect touch of sweetness that doesn’t overpower everything else. It’s never dry, which is a major win in my book. The zucchini just works wonders, keeping every bite incredibly moist and tender. You’d never guess there’s a whole vegetable in there! And speaking of moisture, I’ve actually tested this with almond milk instead of regular milk, and it actually made it even creamier, which I never thought was possible. It’s also surprisingly simple to whip up. Even on those nights when you’re rushing to get dinner on the table, you can easily find time to mix up the batter for this. The ingredients are all pretty standard pantry staples, so you don’t need to make a special trip to the store. Plus, it’s incredibly budget-friendly. You’re using up zucchini, which is usually quite affordable, and the other ingredients are everyday items. What I love most about this is its versatility. You can leave it plain and simple, or you can jazz it up with chocolate chips (my personal favorite for a decadent treat!) or some crunchy walnuts or pecans. It’s perfect for a cozy breakfast, a delightful brunch offering, or even as a satisfying dessert. Honestly, it’s a recipe that just works, no matter how you slice it. It’s a testament to how simple ingredients can come together to create something truly special.
How do you make Zucchini bread?
Quick Overview
Making this zucchini bread is remarkably straightforward. You’ll start by whisking together your dry ingredients, then combine your wet ingredients separately. The magic happens when you gently fold the wet into the dry, and then finally, stir in your grated zucchini and any add-ins like chocolate chips. Pour the batter into your prepared pan, bake until a toothpick comes out clean, and then let it cool slightly before glazing. It’s a process that takes minimal effort for maximum deliciousness, and it’s so forgiving, even if you’re new to baking!
Ingredients
For the Main Batter:
You’ll need 2 cups of all-purpose flour. I always opt for unbleached flour for a slightly better texture, but any all-purpose will do. Make sure it’s measured correctly – spooned into the cup and leveled off, not scooped directly from the bag, or you might end up with a dense loaf. Then, we’ve got 1 teaspoon of baking soda and ½ teaspoon of salt. These guys are crucial for the lift and flavor balance. And for that warm, cozy hug of flavor, 1 ½ teaspoons of ground cinnamon. If you’re feeling adventurous, a pinch of nutmeg or allspice is also lovely, but cinnamon is the star here for me. For sweetness, we’re using 1 ½ cups of granulated sugar. Now, I know that sounds like a lot, but remember, this is a sweet bread! You can reduce it slightly, but I’d start with this and see what you think. Lastly, ½ cup of unsalted butter, softened. Softened means it’s not melted, but you can easily press your finger into it. It’s important for incorporating evenly into the batter.
For the Filling:
Here’s where we get our moisture and that subtle zucchini goodness! You’ll need 2 cups of grated zucchini. Make sure to squeeze out as much excess moisture as you possibly can. I’ll tell you more about how to do that in the tips section, but it’s really important. You’ll also need 2 large eggs, lightly beaten. These bind everything together and add richness. Then, ½ cup of milk – I’ve used whole milk for richness, but skim works too, and like I mentioned, almond milk made it surprisingly creamy! And finally, 1 teaspoon of vanilla extract. Use good quality vanilla; it really does make a difference in the final flavor. If you love chocolate, you can also stir in ½ cup of chocolate chips – semi-sweet or dark are my favorites!
For the Glaze:
This glaze is so simple but elevates the whole experience. You’ll need 1 cup of powdered sugar. Make sure it’s sifted if it looks lumpy, for a smooth consistency. Then, about 2-3 tablespoons of milk or a dairy-free alternative. Start with 2 tablespoons and add more, a teaspoon at a time, until you reach your desired drizzling consistency. You want it thick enough to coat but thin enough to drizzle. A ½ teaspoon of vanilla extract here adds another layer of flavor. If you’re feeling fancy, a tiny pinch of salt can really make the sweet flavors pop.
Step-by-Step Instructions
Step 1: Preheat & Prep Pan
First things first, get your oven preheated to 350 degrees Fahrenheit (175 degrees Celsius). This is the perfect temperature for baking quick breads evenly. While the oven heats up, grab a standard 9×5 inch loaf pan. You want to grease it really well with butter or non-stick cooking spray, and then give it a light dusting of flour. You can also line the bottom with parchment paper, leaving a little overhang on the sides. This makes lifting the bread out of the pan so much easier. A well-greased and floured pan prevents any sticking, which is the last thing you want when your beautiful loaf is ready.
Step 2: Mix Dry Ingredients
In a large bowl, whisk together your 2 cups of all-purpose flour, 1 teaspoon of baking soda, ½ teaspoon of salt, and 1 ½ teaspoons of ground cinnamon. Whisking these together well ensures that the leavening agents and spices are evenly distributed throughout the batter. You don’t want any pockets of baking soda or cinnamon! This step also helps aerate the flour a bit, contributing to a lighter texture.
Step 3: Mix Wet Ingredients
In a separate medium bowl, cream together your ½ cup of softened unsalted butter and 1 ½ cups of granulated sugar. Beat them with a whisk or electric mixer until light and fluffy. This process incorporates air, which helps make the bread tender. Then, beat in your 2 large eggs, one at a time, making sure each is fully incorporated before adding the next. Stir in your ½ cup of milk and 1 teaspoon of vanilla extract until everything is well combined.
Step 4: Combine
Now, it’s time to bring the wet and dry ingredients together. Make a little well in the center of your dry ingredients and pour the wet ingredients into it. Using a spatula or wooden spoon, gently fold the wet ingredients into the dry ingredients until *just* combined. It’s super important not to overmix here! A few streaks of flour are okay; they’ll disappear as you add the zucchini. Overmixing can develop the gluten too much, leading to a tough, rubbery bread, and nobody wants that. We’re going for tender and moist!
Step 5: Prepare Filling
Okay, if you haven’t already, now’s the time to grate your 2 cups of zucchini and, crucially, squeeze out as much moisture as possible. You can do this by wrapping it in a clean kitchen towel or cheesecloth and wringing it out vigorously over the sink. Then, gently fold this grated zucchini into your batter. If you’re adding ½ cup of chocolate chips or nuts, stir those in now too. Make sure they’re evenly distributed.
Step 6: Layer & Swirl
Pour the batter into your prepared loaf pan, spreading it evenly with your spatula. At this point, you can add a swirl if you like! A common way is to mix a tablespoon of cinnamon and a tablespoon of sugar in a small bowl, then sprinkle it over the top of the batter and use a knife or skewer to gently swirl it in. This creates lovely pockets of cinnamon-sugar goodness and a pretty pattern.
Step 7: Bake
Pop the pan into your preheated oven. Bake for about 55-70 minutes. The exact time will depend on your oven, so start checking around the 55-minute mark. You’ll know it’s done when a wooden skewer or toothpick inserted into the center comes out clean, with no wet batter attached. If the top starts to brown too quickly before the center is cooked, you can loosely tent it with aluminum foil for the remainder of the baking time.
Step 8: Cool & Glaze
Once baked, remove the loaf pan from the oven and let it cool in the pan for about 10-15 minutes. This allows the bread to set up properly. Then, carefully invert the pan to remove the loaf onto a wire rack to cool completely. You want it mostly cool before glazing, but still a little warm is fine too. For the glaze, whisk together 1 cup of powdered sugar, 2 tablespoons of milk, and ½ teaspoon of vanilla extract. Add more milk, a teaspoon at a time, until it’s a nice drizzling consistency. Drizzle it generously over the cooled loaf. Let the glaze set for a bit before slicing!
Step 9: Slice & Serve
Once the glaze has set (or if you skipped the glaze!), use a sharp serrated knife to slice the bread. Slicing when it’s slightly warm is heavenly, but it’s also delicious at room temperature. Enjoy! It’s perfect as is, or with a little smear of butter if you’re feeling extra decadent.
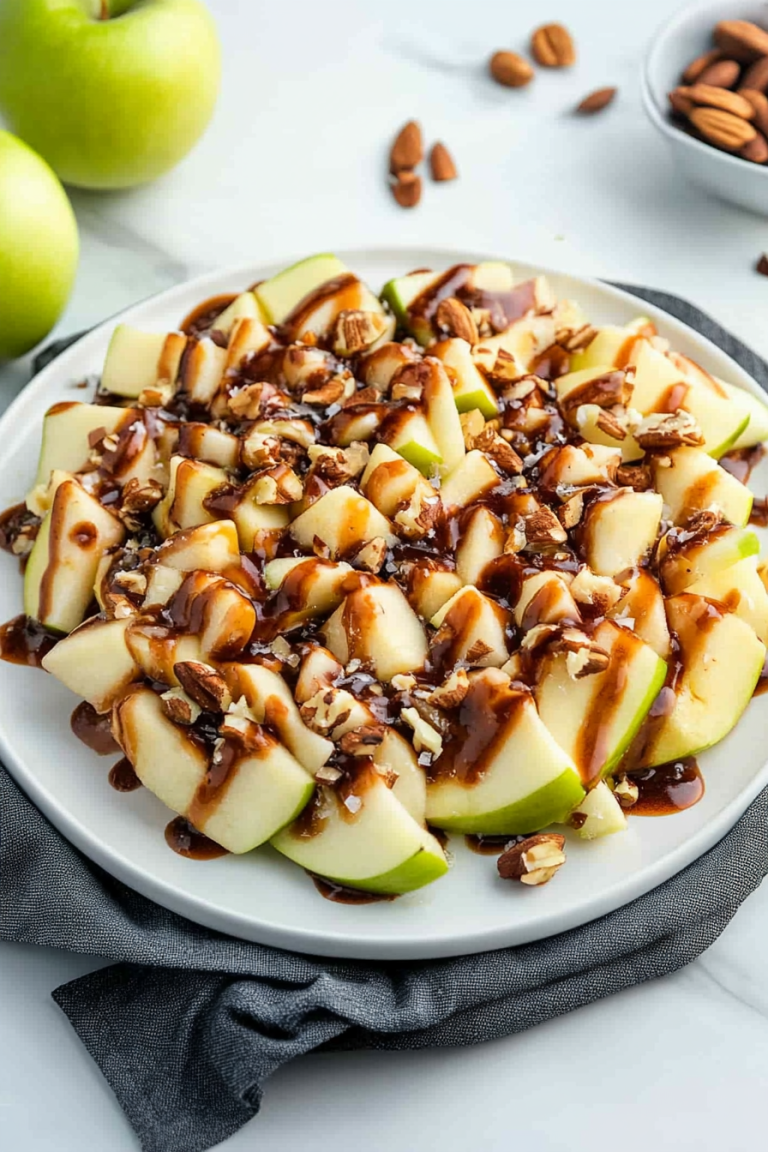
What to Serve It With
This zucchini bread is so versatile, it fits into almost any meal or occasion! For a cozy start to your day, I love it with a strong cup of black coffee or a creamy latte. It’s simple, satisfying, and the warmth of the bread is just so comforting. For a slightly more elegant brunch spread, it’s lovely served on a pretty platter alongside some fresh fruit salad and maybe a yogurt parfait. It adds a touch of homemade sweetness that everyone appreciates. As a dessert, it’s fantastic on its own, but if you want to go all out, a small dollop of whipped cream or a scoop of vanilla bean ice cream is absolutely divine, especially when the bread is still a little warm. And for those casual, cozy snack times? It’s the ultimate comfort food. I often just grab a slice (or two!) while I’m catching up on emails or watching a movie. It’s wonderful paired with a glass of milk, or even a cup of herbal tea. My family tradition is to always have a slice with our afternoon tea, especially on rainy days. It’s just one of those treats that feels like a warm hug.
Top Tips for Perfecting Your Zucchini Bread
I’ve made this recipe more times than I can count, and through those trials and errors, I’ve picked up a few tricks that I think will really help you achieve zucchini bread perfection. First, and I cannot stress this enough, is the zucchini prep. You absolutely *must* squeeze out as much moisture as possible from the grated zucchini. If you skip this step, your bread can end up gummy or even soggy. I usually grate the zucchini, toss it with a tiny pinch of salt (which helps draw out moisture), let it sit for 5-10 minutes, then wrap it in a clean tea towel or cheesecloth and wring it out like you’re trying to get every last drop of water out. It seems like a lot of effort, but trust me, it makes all the difference. When it comes to mixing, remember my advice: don’t overmix! As soon as you don’t see any dry flour streaks, stop. A few small lumps are better than a tough loaf. For that beautiful swirl, I like to mix my cinnamon and sugar topping in a little bowl first. Then, I sprinkle it evenly over the batter in the pan and use a knife or a skewer to gently swirl it down, creating those lovely ribbons of flavor without overworking the batter. If you want to experiment with ingredient swaps, I’ve found that using whole wheat pastry flour instead of all-purpose flour works well, though it might make it a bit denser. You can also substitute half the granulated sugar with brown sugar for a deeper, caramel-like flavor. When it comes to baking, every oven is a little different. If your oven tends to run hot, consider reducing the temperature by about 10-15 degrees and checking for doneness a bit earlier. Always use the toothpick test as your final guide. For the glaze, the consistency is key. If it’s too thick, it will be hard to drizzle and will just sit in big globs. If it’s too thin, it will just run off the bread. Start with the recommended amount of milk and add more *very* gradually until you get that perfect, pourable-but-not-runny texture. I’ve also found that a little pinch of salt in the glaze really balances the sweetness and makes all the flavors pop!
Storing and Reheating Tips
One of the best things about this zucchini bread is how well it keeps! If you’re going to eat it within a couple of days, simply wrap the cooled loaf tightly in plastic wrap or store it in an airtight container at room temperature. It stays wonderfully moist for about 2-3 days this way. If you think you’ll need it to last longer, your refrigerator is your best friend. Wrap it very well, either in plastic wrap followed by a layer of foil, or in a good quality airtight container. It’ll stay fresh and delicious in the fridge for up to a week, though I usually find it disappears before then! For longer storage, freezing is an absolute lifesaver. Once the loaf is completely cooled, wrap it tightly in plastic wrap, then in a layer of aluminum foil, and finally place it in a freezer-safe bag or container. It should keep perfectly in the freezer for up to 3 months. When you’re ready to enjoy it, you can thaw it overnight in the refrigerator, or if you’re impatient (like me!), you can unwrap it and heat individual slices gently in a toaster oven or microwave for a few seconds until warmed through. Just a little tip: if you plan to freeze it, it’s often best to add the glaze *after* thawing and reheating, or just dust it with powdered sugar for a simpler finish, as the glaze can sometimes get a bit sticky when frozen and thawed.
Frequently Asked Questions
Final Thoughts
So there you have it, my friends! This zucchini bread recipe is more than just a way to use up garden zucchini; it’s a little slice of pure joy. It’s the kind of recipe that reminds you why baking from scratch is so rewarding – the incredible aroma filling your home, the satisfaction of creating something delicious with your own hands, and of course, that first perfect bite. I truly believe this recipe strikes the perfect balance between wholesome goodness and decadent treat. It’s so forgiving, so versatile, and honestly, just downright delicious. If you’re a fan of quick breads, or if you’re looking for a fantastic way to use up any extra zucchini you might have, I really hope you’ll give this a try. For those of you who love this recipe and are looking for more comforting baked goods, you might also enjoy my recipe for [Link to another relevant recipe, e.g., “Moist Banana Bread”] or my [Link to another relevant recipe, e.g., “Classic Apple Crumble”]. I can’t wait to hear what you think! Let me know in the comments below how your zucchini bread turns out, and if you tried any fun variations. Happy baking!
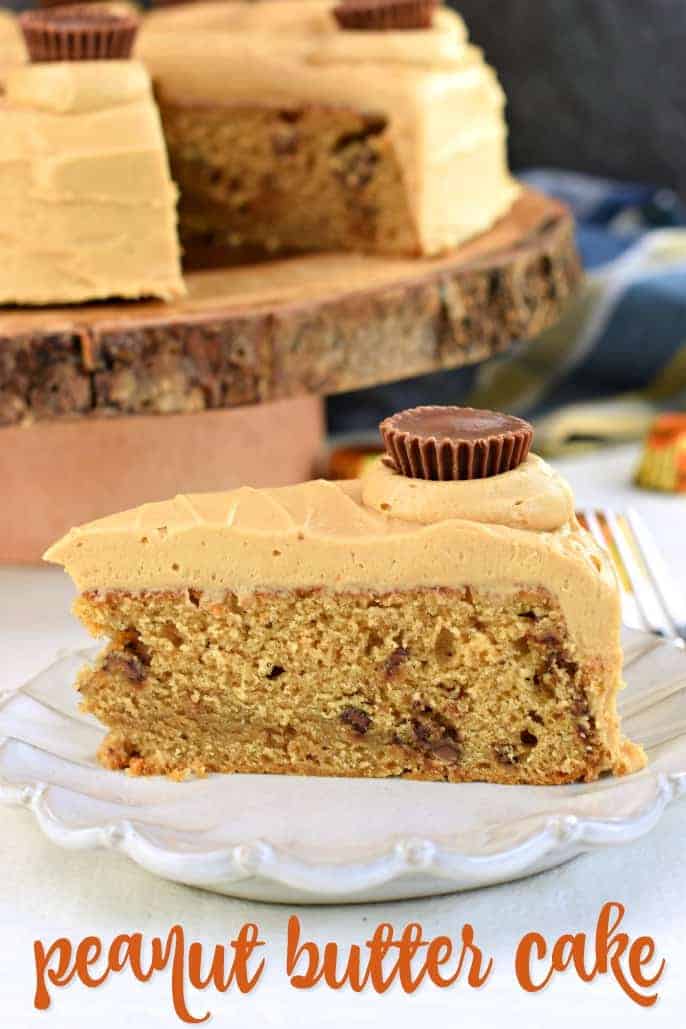
Reese's Peanut Butter Cake
Ingredients
Method
- Preheat oven to 350°F. Grease one 9" cake pan and line the bottom with parchment paper.
- Toss chopped peanut butter cups with 1 Tbsp of flour, set aside.
- In a mixing bowl, cream butter, peanut butter, and sugar until light and fluffy. Beat in eggs, 1 at a time.
- In a separate bowl, sift together the flour, baking soda, and salt. At low speed, add the flour mixture alternately with the buttermilk.
- Add the chopped peanut butter cups to the batter. With a spatula, mix until combined.
- Spoon batter into the prepared pan and spread evenly. Bake cake for 33-35 minutes or until a toothpick inserted in the middle comes out clean. Cool cake for 5 minutes. Turn out onto a rack, peel off parchment. Cool cake completely before frosting.
- To make the frosting, in a mixing bowl add the butter, peanut butter, and 1/3 cup heavy cream. Stir at low speed until combined. Slowly add the powdered sugar, 1/2 cup at a time, mixing well after each addition. When all the sugar is added, increase the speed and mix for 2 more minutes. If needed, slowly add a few more drops of heavy cream.
- Frost the cake completely. Decorate with peanut butter cups.
- Keep cake covered. Serve at room temperature.