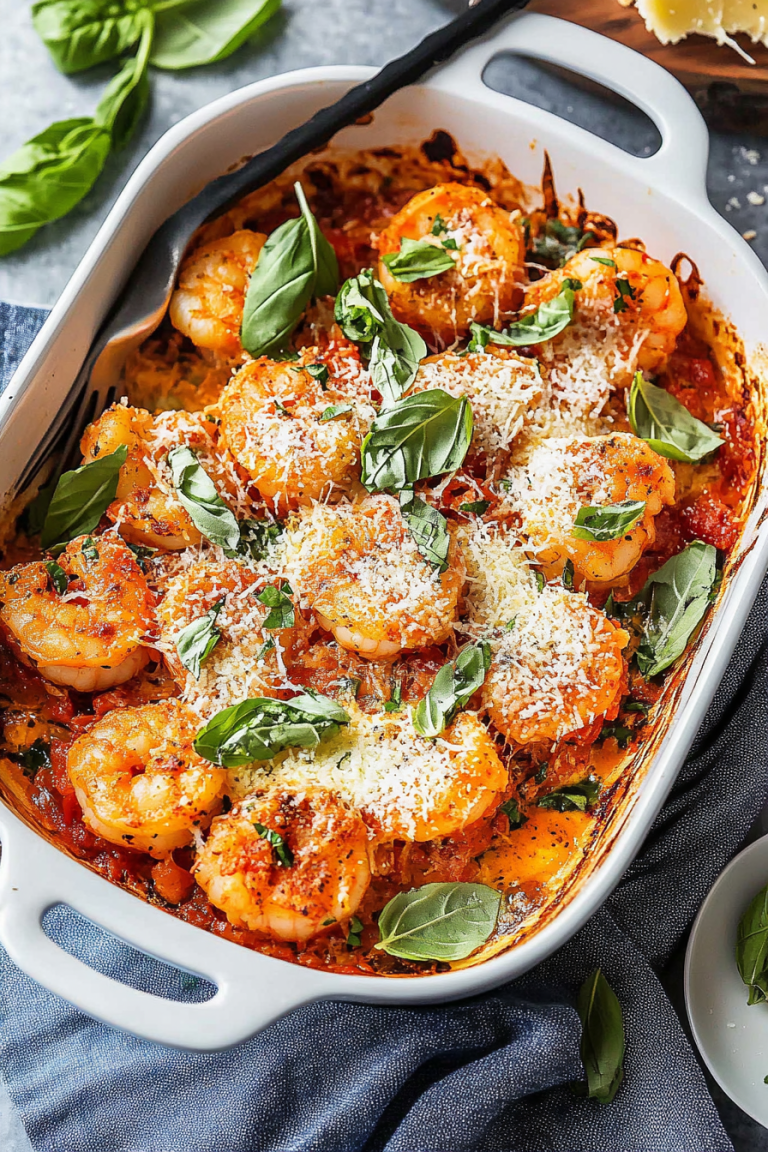
Easy Zucchini Chicken Rollatini Recipe
There’s something about these zucchini crumble bars that makes me smile every time I bake them. Maybe it’s because they remind me of those lazy summer afternoons when zucchinis are finally abundant at the farmer’s market, or perhaps because my kids go wild for that sweet crumble topping. I always do this when I want something sweet but don’t want to fuss over a complicated dessert — this recipe is honestly a lifesaver on busy nights. The smell alone when they’re baking is enough to draw everyone to the kitchen, even if they’re supposed to be doing homework or watching TV. And the best part? Once they’re cooled, they’re perfect for packing into lunchboxes or serving as a cozy afternoon treat with a cup of tea. Trust me, once you try this, you’ll find yourself coming back to it again and again — it’s like a little slice of childhood and summer love all rolled into one. This recipe’s become a family favorite, and I can’t wait to share it with you! And yes, you can even sneak in a handful of chopped nuts or swap the zucchini for carrots — I’ve tested it with both, and it’s incredible either way.
What is a Zucchini Crumble Bar?
Think of zucchini crumble bars as the lovechild of a comforting fruit crumble and a dense, moist blondie. They’re essentially a layered dessert—starting with a buttery, slightly crumbly base, then a sweet, tender zucchini filling, topped with an irresistible crunchy crumble. The name might throw you off at first, because zucchini isn’t usually what you think of for baking sweets. But trust me, it’s all about the magic of texture and moisture. Plus, when baked into bars, the zucchini adds a subtle flavor and keeps everything wonderfully moist, which is why it’s become my go-to recipe when I want something sweet that also feels a little wholesome. The name “zucchini crumble bars” doesn’t do it justice — it’s more like a cozy snack, a dessert, and a secret vegetable hit all rolled into one. It’s perfect for those days when you want to sneak some greens into dessert, or simply when you crave that lush, buttery crumble topping with a tender, slightly caramelized interior.
Why you’ll love this recipe?
What I love most about these zucchini crumble bars is how adaptable they are—you can tweak the sweetness, add extra nuts, or even toss in a handful of chocolate chips if you’re feeling rebellious. These bars are also super budget-friendly because they use simple pantry ingredients like oats, flour, butter, and that tiny bit of zucchini that’s probably hiding in your fridge. The flavor profile is irresistible — a cozy balance of vanilla, warm cinnamon, and the gentle earthiness of zucchini — all topped with crunchy crumble that’s nicely browned and just sweet enough. Plus, they’re **super easy to make**, which is a huge bonus when you’re short on time or energy. I’ve tested this with almond flour, and honestly, it made the crumble even a little nuttier and more flavorful. This one’s a lifesaver on busy nights because you can prepare it in advance, bake it, and forget about it until you’re ready to serve. The kids ask for this all the time, and my friends have started calling it “the secretly healthy dessert” — which is basically a badge of honor in my book! It’s also incredibly forgiving; I’ve burned a batch or two in my early days, so don’t worry if your timing’s a little off — it’s hard to go wrong with this one.
How do you make Zucchini Crumble Bars?
Quick Overview
This recipe is straightforward and forgiving. You’ll start by creating a buttery base, then make the zucchini filling while the oven preheats. Layer everything up, sprinkle on the crunchy topping, and bake until everything is golden and bubbly. The most special part? How effortlessly these bars come together—no fancy equipment or hours of prep. Once baked, let them cool for a bit, add a drizzle of glaze if you like, and then slice into squares. While it sounds fancy, it’s really all about simple ingredients coming together in perfect harmony. My secret? Don’t skip the cooling part — it makes slicing easier and helps the flavors meld beautifully. And trust me, your house will smell amazing during the bake—like cinnamon, butter, and home all rolled into one. This recipe works just as well for last-minute guests as it does for a cozy weekend treat with the fam.
Ingredients
For the Main Batter:
– 1 1/2 cups (180g) all-purpose flour or almond flour for a nuttier twist
– 1 cup (80g) rolled oats
– 1/2 cup (100g) granulated sugar — or brown sugar for a richer flavor
– 1 teaspoon baking powder
– 1/2 teaspoon salt
– 1 teaspoon ground cinnamon (because who doesn’t love that warm aroma?)
– 1/2 cup (113g) unsalted butter, cold and cubed (I always use unsalted, but salted works if you adjust the salt)
For the Filling:
– 2 cups shredded zucchini (squeeze out excess moisture to prevent sogginess)
– 1/2 cup granulated sugar
– 1 large egg
– 1 teaspoon vanilla extract
– 1 teaspoon ground cinnamon (more cinnamon, more cozy!)
– 1/4 teaspoon nutmeg (optional but highly recommended — just a hint)
For the Glaze:
– 1/2 cup powdered sugar
– 1-2 teaspoons milk or lemon juice
– Optional: a splash of vanilla or a sprinkle of cinnamon for extra flavor
Step-by-Step Instructions
Step 1: Preheat & Prep Pan
Set your oven to 350°F (175°C). Line a 9×9-inch square pan with parchment paper or lightly grease it. This helps with easy removal later and keeps the bars from sticking. If you’re in a hurry, don’t worry — this step is quick, and the parchment paper is a total game-changer for clean slices and easy cleanup.
Step 2: Mix Dry Ingredients
In a large bowl, whisk together the flour, oats, sugar, baking powder, salt, and cinnamon. I always do this first to make sure everything’s evenly distributed. It’s like laying a foundation — if the dry ingredients are well mixed, your batter and crumble will turn out perfect. After mixing, toss in the cold, cubed butter and use a pastry cutter or your fingers to work it into the dry mixture until it looks like coarse crumbs. Don’t overmix — the goal is to have small pea-sized pieces of butter coated in flour. That’s what gives the crumble topping its beautiful, crunchy texture.
Step 3: Mix Wet Ingredients
In another bowl, whisk the egg, vanilla, sugar, cinnamon, and nutmeg. I tested this with almond milk instead of regular milk, and it actually made the filling extra creamy — so feel free to swap! When you have a smooth mixture, gently fold in the shredded zucchini. Make sure to squeeze out as much moisture as possible; a wet zucchini can make the filling runny and mess with the texture. I usually wrap the zucchini in a clean towel and squeeze over the sink—trust me, this tiny step makes a big difference.
Step 4: Combine
Add the wet mixture to the dry ingredients and stir just until combined. Don’t overmix at this stage — a few lumps are A-OK. Overmixing can make the batter tough, and that’s what you definitely don’t want. It should be thick but moist — almost like a soft cookie dough. Then, transfer about two-thirds of the crumb mixture into your prepared pan, pressing down gently to form an even layer.
Step 5: Prepare Filling
Spread the zucchini mixture over the crust layer. The filling should be soft and slightly shiny from the sugar and eggs, but not too wet. If it’s overly watery, sprinkle a little more grated zucchini or a tiny dash of flour and mix again. Personal tip: I love adding a pinch of lemon zest to the filling for a hint of brightness—it’s a sneaky little trick that lifts the whole dessert.
Step 6: Layer & Swirl
Sprinkle the remaining crumble on top, spreading it evenly. For a prettier look, I sometimes press a few extra crumbs into the filling for a denser, more textured topping. If you’re feeling adventurous, use a skewer or chopstick to swirl some of the topping into the filling—this creates a lovely marbled effect that’s as beautiful as it is tasty.
Step 7: Bake
Bake for 35-40 minutes, or until the top is golden brown and the filling is set—the edges might bubble slightly, which is perfect. Keep an eye on it towards the end; if it’s browning too fast, tent it with foil. My oven runs hot, so I usually check at 30 minutes and go from there. Insert a toothpick in the center—if it comes out clean, you’re good. Don’t forget, the bars will firm up as they cool, so resist the temptation to cut into them immediately.
Step 8: Cool & Glaze
Let the bars cool completely in the pan on a wire rack—this takes about 20-30 minutes. This step is key to getting clean slices. Once cooled, whisk together the powdered sugar with your choice of milk or lemon juice until smooth. Drizzle or spread over the bars—this glaze adds just a touch of sweetness and a hint of elegance. If you prefer a less sweet finish, dust them with powdered sugar instead—easy, and still gorgeous.
Step 9: Slice & Serve
Use a sharp knife to cut into squares. Wipe the blade clean between slices for neat edges. Serve them on a pretty plate, maybe with a dollop of whipped cream or a scoop of vanilla ice cream. These bars are equally lovely warm or at room temperature. And once you’ve had a bite, I promise you’ll be hooked. They disappear quickly in my house—my kids call them “that secret vegetable dessert,” which totally cracks me up. Trust me, once you make these, they’ll become a regular at your baking table too.
What to Serve It With
These zucchini crumble bars are such a versatile treat! For breakfast, pair them with a steaming cup of coffee or tea — the cinnamon aroma is just heavenly. My kids love snacking on these in the afternoon, especially when they’re still warm with a drizzle of honey or a splash of cream. They’re fantastic as a light dessert after dinner, especially served with a scoop of vanilla ice cream or a dollop of Greek yogurt with a drizzle of honey and some fresh berries. On the weekend, I like to serve them at brunch with a side of fresh fruit and maybe a mimosa—they add a cozy, homey touch to any gathering. And let’s be honest, these bars are perfect when you’re craving something sweet at 10 pm but don’t want to turn on the oven for a big cake—these are totally manageable and just enough to satisfy that midnight sweet tooth. Plus, they store well, so I often make them ahead and just grab a square when a quick treat is needed. They’re definitely a welcome addition to any snacking lineup, with that perfect balance of fruit, buttery crumble, and sweetness.
Top Tips for Perfecting Your Zucchini Crumble Bars
Over the years, I’ve learned a few tricks that take this recipe from good to absolutely irresistible. First, when shredding the zucchini, always squeeze out as much moisture as possible—an overly wet filling can make the bars soggy or cause the layers to slide apart. I usually grab a clean dish towel and give the zucchini a good squeeze over the sink; I’ve tested with both shredded zucchini and grated carrots, and both work beautifully, just make sure to drain excess moisture. Also, don’t be tempted to overmix the batter once you add the wet ingredients — a gentle stir keeps the texture tender and crumbly. If you want a more decadent topping, swapped some oats for chopped nuts like walnuts or pecans—delicious! When spreading the crumble later, I like to gently press some crumbs into the filling for a denser topping that stays put, especially if you plan to cut the bars warm. If your oven runs hot, lower the temperature slightly and keep an eye on the baking time to avoid overbaking. When it comes to glazing, I prefer a simple powdered sugar glaze because it adds just enough sweetness without overpowering the subtle zucchini flavor. Experiment with flavors—adding a splash of lemon juice or a pinch of cardamom in the glaze can make it even more special. Trust me, baking these has become a bit of a therapy for me: it’s simple, forgiving, and endlessly customizable. Once you’ve made them a couple of times, you’ll find your own tweaks—maybe more spice, more crunch, or even a swirl of fruit compote in the middle. That’s the beauty of this recipe—it’s personal, comforting, and utterly fail-proof once you get the hang of it.
Storing and Reheating Tips
If you have leftovers—or if you’re baking ahead for parties or picnics—here’s how I keep these bars fresh. At room temperature, they stay good for about 2 days in an airtight container, but I find that covering them tightly with foil or plastic wrap helps keep them moist. If you need to keep them longer, refrigerate for up to 4 days; just make sure they’re in a sealed container. To enjoy again, I like to gently reheat a slice in the microwave for about 15 seconds — just enough to warm it without losing that tender interior. For longer storage, freeze the bars well wrapped in plastic and then aluminum foil for up to a month. Let them thaw at room temperature or warm them slightly before serving. If you’ve added a glaze, best to add it just before serving, as it tends to get a little sticky in the freezer—trust me, I’ve learned this one the hard way! The key is to keep everything as airtight as possible, preserving that fresh-baked taste and texture. I’ve found that these bars taste even more wonderful after resting for a day or two because the flavors meld and intensify—like a good casserole or stew, they get better with a little sitting time.
Frequently Asked Questions
Final Thoughts
Honestly, making these zucchini crumble bars feels like giving myself a big warm hug. They’re simple, forgiving, and absolutely delicious—great for a quick treat or a weekend baking project. I love how the humble zucchini adds moisture without overpowering, and the crunchy crumble topping puts those personal touches on an otherwise straightforward bake. Over the years, I’ve tinkered with this recipe, swapping ingredients and adjusting sweetness, and it just keeps getting better. Whenever I share a batch with friends, they always ask for the recipe, and I happily oblige, knowing it’s one of those desserts that brings comfort, nostalgia, and a little secret vegetable goodness to the table. If you give it a try, I’d love to hear how you personalized it—maybe with chocolate chips, nuts, or a different fruit twist. Happy baking—and as my grandma always said, “Bake with love, and everything tastes better.” Now go ahead, slice into that perfect square, and enjoy a bite of homemade happiness. Can’t wait to hear how yours turns out — leave a comment below or share a pic!
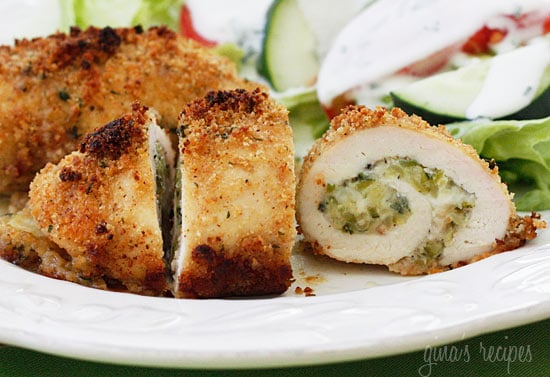
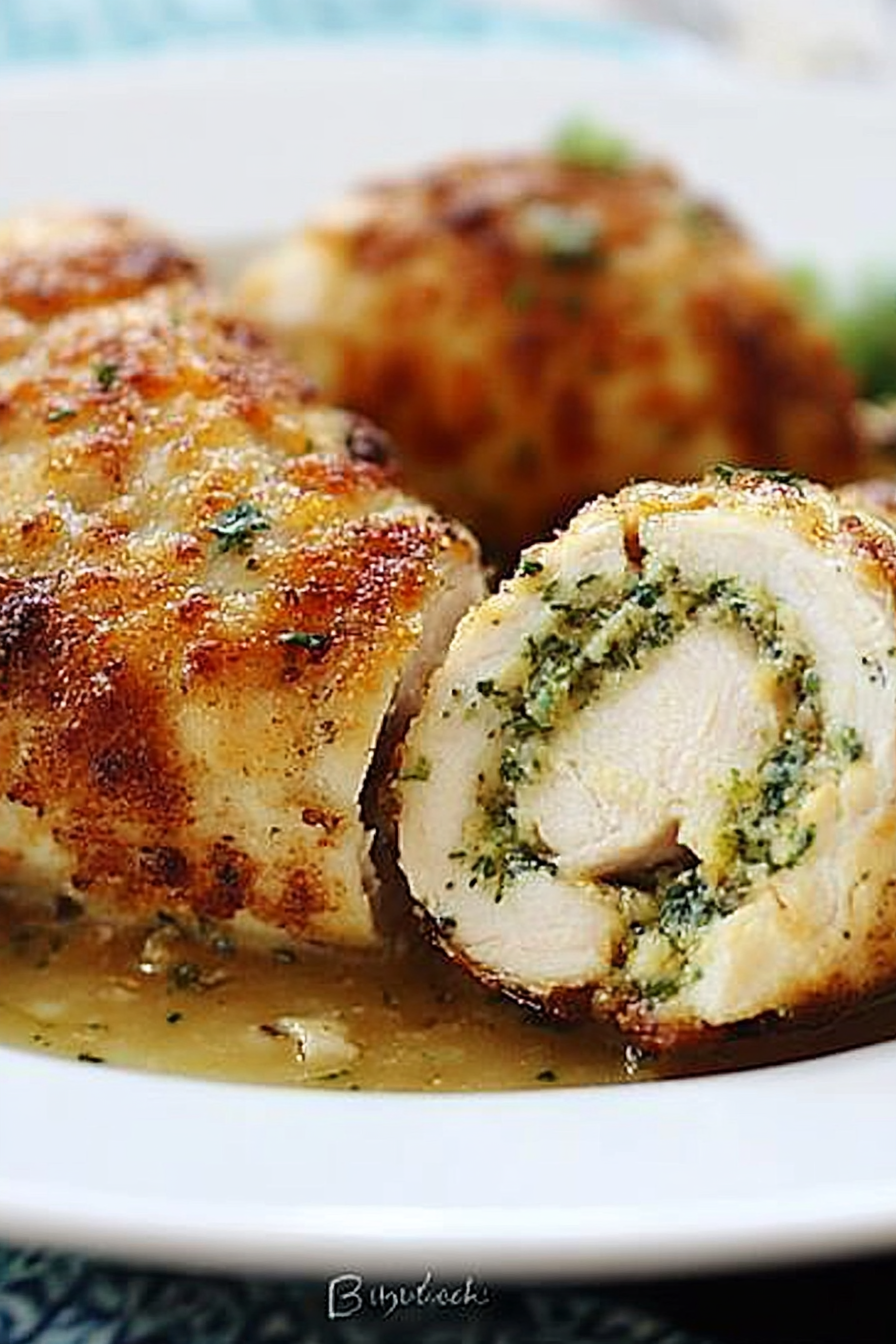
Chicken Rollatini
Ingredients
Method
- Wash and dry chicken cutlets, season with salt and pepper. Preheat oven to 450°F. Lightly spray a baking dish.
- Heat 1 teaspoon of olive oil in a skillet over medium-high heat. Add chopped garlic and sauté 1 minute until fragrant. Add shredded zucchini, 1/4 cup Romano cheese, salt, and pepper. Cook for 3-4 minutes, then let cool. Mix in mozzarella cheese.
- Lay chicken cutlets on a surface; spread 3 tablespoons of zucchini mixture on each. Roll up and keep seam side down.
- Mix breadcrumbs with remaining Romano cheese. In a separate bowl, combine 1 tablespoon olive oil, lemon juice, and pepper. Dip each rollatini into the lemon mixture, then into breadcrumbs.
- Place rolls in baking dish seam side down. Spray with olive oil spray.
- Bake for 25 to 30 minutes. Serve immediately.