Easy Sheet Pan Red Velvet Cake
There’s something about that first whiff of warm cake coming out of the oven that instantly transports me back to childhood afternoons at grandma’s house. It’s comforting, nostalgic, and secretly magical — especially when you’re sneaking a piece before dinner! I remember the first time I made this zucchini chocolate swirl cake; my kids couldn’t get enough. They asked for seconds, thirds, and then begged me to make it again the very next day. That’s when I knew I’d stumbled upon something special. It’s not just a cake — it’s a little bit of family fun, a dash of secretly healthy, and a whole lot of love wrapped into one. Plus, it’s surprisingly easy to whip up on a busy weeknight, which makes it my go-to treat when I want something sweet but don’t want to spend hours in the kitchen. Trust me, this one’s a lifesaver on hectic days, and I promise, the moistness from the zucchini keeps it feeling like a gentle hug with every bite.
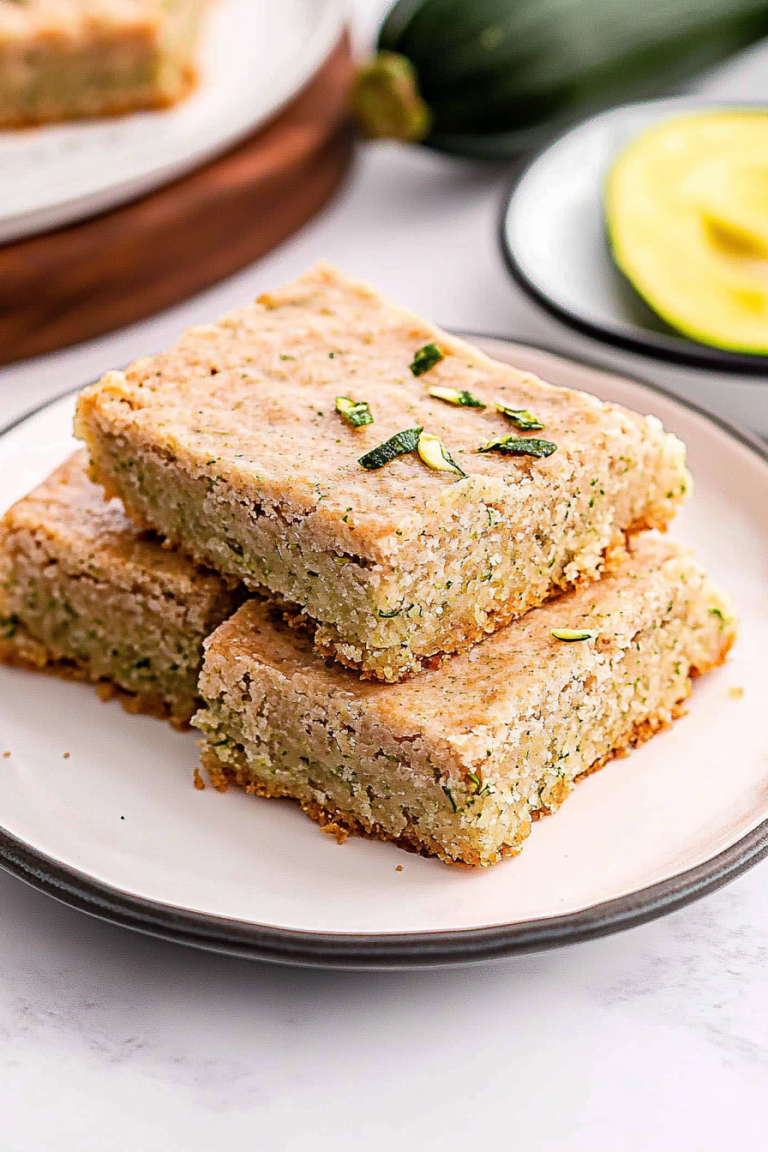
What is Zucchini Chocolate Swirl Cake?
Think of this as the lovechild between a fudgy brownie and a moist, tender cake — with a sneaky vegetable twist. The name might sound fancy, but it’s really just a simple batter infused with shredded zucchini, swirling with rich, velvety chocolate. It’s essentially a chocolate-spiked, zucchini-enhanced cake that’s perfect for snacking, brunch, or even a make-ahead treat. The idea behind it started years ago when I was trying to sneak some extra veggies into the kids’ diet without them even noticing. Turns out, zucchini — when grated and baked, especially with a good splash of cocoa — adds moisture and a subtle sweetness that makes this cake insanely tender. It’s a versatile recipe, too: you can switch up the chocolate intensity or add nuts if you like, but honestly, I love it as-is because it’s perfectly imperfect, just like all the best family recipes.
Why you’ll love this recipe?
What I love most about this zucchini chocolate swirl cake is how it manages to hit all the right notes—tender, moist, and bursting with flavor—without complicated steps or hard-to-find ingredients. The smell alone when it’s baking is enough to make everyone in the house wander toward the kitchen, drawn by that irresistible chocolate aroma. Plus, it’s surprisingly simple; I’ve made this countless times, and it never fails to impress. Budget-wise, it’s kind to your wallet too, using pantry staples like flour, cocoa, and zucchini — which I always have on hand. And because of the zucchini, this cake stays moist for days, making it great for leftovers or to bring to a potluck. It’s versatile as well: I sometimes stir in a handful of chopped walnuts or a sprinkle of sea salt on top for a flavor boost. Honestly, what I love most about this is how effortlessly it delivers comfort with a healthy-ish twist — my kids ask for this all the time, and I happily oblige!
How do I make Zucchini Chocolate Swirl Cake?
Quick Overview
This cake is as straightforward as baking gets—and that’s what makes it so brilliant. You start by grating the zucchini (don’t forget to squeeze out excess moisture — that’s key to avoiding a soggy cake!), then mix your dry ingredients in one bowl while whisks and wet ingredients come together in another. You’ll pour the batter into a lined cake pan, dollop on the chocolate batter in swirls, and then bake until it’s just right — moist in the center, with that beautiful marbled swirl on top. It’s honestly foolproof and perfect for when you want a guaranteed hit that’s also a little bit sneaky healthy.
Ingredients
For the Main Batter:
– 1 ½ cups all-purpose flour (or almond flour for a gluten-free twist)
– ½ cup unsweetened cocoa powder (good quality, the deeper the flavor the better!)
– 1 teaspoon baking powder
– ½ teaspoon baking soda
– ¼ teaspoon salt
– 1 cup sugar (can reduce slightly or swap for honey/maple syrup)
– ½ cup vegetable oil (or melted coconut oil for extra flavor)
– 3 large eggs
– 1 teaspoon vanilla extract
– 1 ½ cups grated zucchini (about 2 small zucchinis), squeezed dry
For the Filling:
– ½ cup semi-sweet chocolate chips or chopped chocolate bars (melted or chopped finely)
– Optional: A splash of espresso or coffee to deepen the chocolate flavor
For the Glaze:
– ½ cup powdered sugar
– 1-2 teaspoons milk or cream
– Cocoa powder or melted chocolate for drizzling (optional, for extra decadence)
Step-by-Step Instructions
Step 1: Preheat & Prep Pan
Preheat your oven to 350°F (175°C). Line a 9-inch round cake pan with parchment paper or grease it well with butter or cooking spray. I like to give the pan a light dusting of cocoa powder instead of flour — it keeps the cake from sticking and adds a little extra chocolatey vibe when you cut into it.
Step 2: Mix Dry Ingredients
In a big bowl, whisk together the flour, cocoa powder, baking powder, baking soda, and salt. This helps distribute everything evenly, which is so important for a nice rise and uniform texture. I’ve learned the hard way that skipping this step can lead to uneven pockets of baking soda or flour—trust me, it shows in the final crumb!
Step 3: Mix Wet Ingredients
In a separate bowl, beat together the sugar, eggs, oil, and vanilla until smooth and slightly frothy. I always do this first — it makes the batter so much easier to combine later. Then, stir in the grated zucchini until evenly coated. Pro tip: squeeze out as much moisture as you can from zucchini before adding it; this keeps your cake from turning into a watery mess.
Step 4: Combine
Gradually add the wet mixture into the dry ingredients, folding gently until just combined. Be careful not to overmix — that’s what can make the cake dense instead of light and tender. The batter should be thick but spreadable. If it feels too stiff, a splash of milk can loosen it up a bit.
Step 5: Prepare Filling
Melt the chocolate chips either in the microwave in short bursts or over a double boiler. Let it cool just enough so it doesn’t seize when mixed into the batter. If you want a more intense chocolate flavor, stirring in a teaspoon of espresso powder works beautifully—trust me on this one. Set aside.
Step 6: Layer & Swirl
Pour about two-thirds of the batter into your prepared pan and smooth the top. Spoon the melted chocolate over, then cover with the remaining batter. Using a skewer or knife, swirl gently through the batter to create a marbled effect. This is where the magic happens — swirl too hard, and you risk blending the layers completely; too gently, and the pattern stays pretty and striking.
Step 7: Bake
Bake for about 35-40 minutes, or until a toothpick inserted in the center comes out with just a few moist crumbs. I usually start checking at 35 minutes because ovens vary—every oven has its quirks! It’s done when it springs back slightly when touched and the top looks matte but not cracked.
Step 8: Cool & Glaze
Let the cake cool in the pan for about 15 minutes, then transfer to a wire rack. Once completely cooled, drizzle with the simple powdered sugar glaze or melted chocolate, whichever suits your mood. I love adding a little sea salt on top — it really balances the sweetness and enhances the chocolate flavor.
Step 9: Slice & Serve
Use a sharp serrated knife for clean cuts, and make sure to let the cake rest at room temperature before slicing if it’s been chilled. This cake tastes amazing with a dollop of whipped cream or a scoop of vanilla ice cream, but honestly, I can’t resist a warm slice right out of the oven, with that gooey swirl of chocolate showing through.
What to Serve It With
This cake is so versatile, I serve it in countless ways depending on the occasion. For breakfast, it’s perfect with a hot cup of coffee or a glass of cold milk — my kids actually ask for this all the time as a morning treat. Its moist texture and rich chocolate swirl make it feel fancy enough for brunch, especially when paired with fresh berries and a dollop of Greek yogurt. As a dessert, I love serving it warmed with a drizzle of caramel or extra chocolate sauce. It’s also the kind of snack that’s comforting on a chilly afternoon — think cozy pajamas, a good book, and a slice of this cake. I’ve made it for potlucks, picnics, and even as a gift for neighbors, and it always disappears in minutes. The best part? It’s the kind of recipe everyone asks for again and again — nobody ever guesses the secret ingredient is zucchini!
Top Tips for Perfecting Your Zucchini Chocolate Swirl Cake
Over the years, I’ve picked up a few tricks to make sure this cake turns out just right every time. First, I always squeeze out as much moisture as I can from the zucchini — a clean kitchen towel or cheesecloth works wonders here. Moisture is the enemy of fluffy cakes, so don’t skip this step. When mixing, fold gently and avoid overworking the batter; this keeps it tender. The swirl pattern is my favorite part — I like to be artistic and create pretty patterns, but even casual swirls look charming! Feel free to experiment with ingredient swaps, like swapping coconut sugar for white sugar, or adding a handful of chopped nuts or dried fruits into the batter for extra texture. When baking, keep an eye on the cake’s edges; if they start to brown too quickly, tent with foil. A toothpick test at 35 minutes is my go-to to avoid overbaking. For the glaze, I’ve tested everything from simple powdered sugar dustings to thick chocolate ganache — choose what makes you happiest. Oh, and one more thing: I learned this trick after a few tries — always cool the cake completely before glazing for a neat, glossy finish.
Storing and Reheating Tips
This cake keeps beautifully for several days if stored properly. If you’re planning to eat it within a day or two, just cover it tightly with plastic wrap or a cake dome at room temperature — it’ll stay moist and fresh. For longer storage, pop it into the fridge in an airtight container—bring it to room temperature before serving for that freshly baked feel. If you want to freeze it, wrap the whole cake tightly in plastic wrap and foil or store slices in a freezer-safe container. It’s good for up to 3 months that way. To thaw, leave it on the counter for a few hours or microwave individual slices briefly for a quick treat. A quick reheat in the oven at 325°F (160°C) for 10 minutes can revive the moistness if it’s been chilled. Just skip the glaze until you’re ready to serve — it tastes best fresh and glossy. Trust me, I’ve done this a million times — the flavor and texture stay remarkably good, even days later, making it the ultimate make-ahead dessert!
Frequently Asked Questions
Final Thoughts
If you’re looking for a way to make dessert feel a little less indulgent and a lot more cozy, this zucchini chocolate swirl cake is your answer. It’s a recipe I’ve tested and perfected over countless afternoons in my kitchen, and I still get excited every time it comes out of the oven. Its secret lies in that perfect marriage of moist zucchini and rich, melting chocolate — a duo that always wins hearts. Plus, it’s flexible; you can tweak the ingredients to suit your tastes or ingredients on hand. Honestly, I love how this cake manages to taste decadent yet sneaks in a veggie, making it feel like a secret treasure. I hope you try it soon — I can’t wait to hear how yours turns out! And if you have your own twists or tips, drop a comment below. Happy baking, my friend!
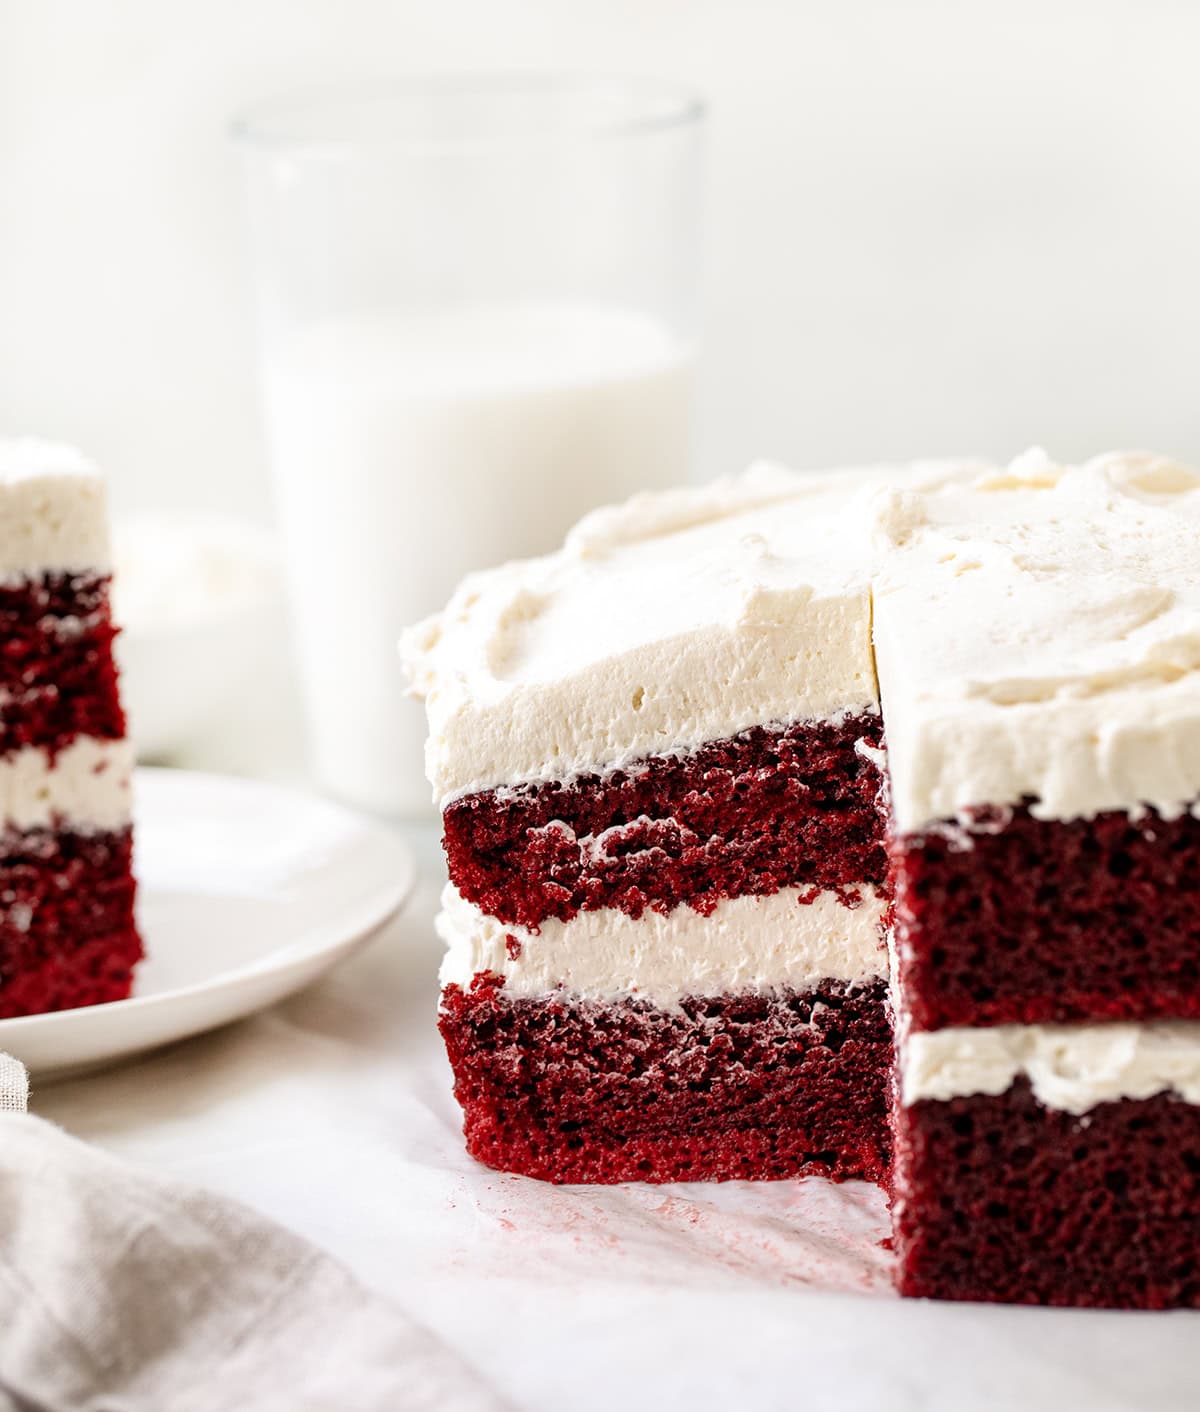
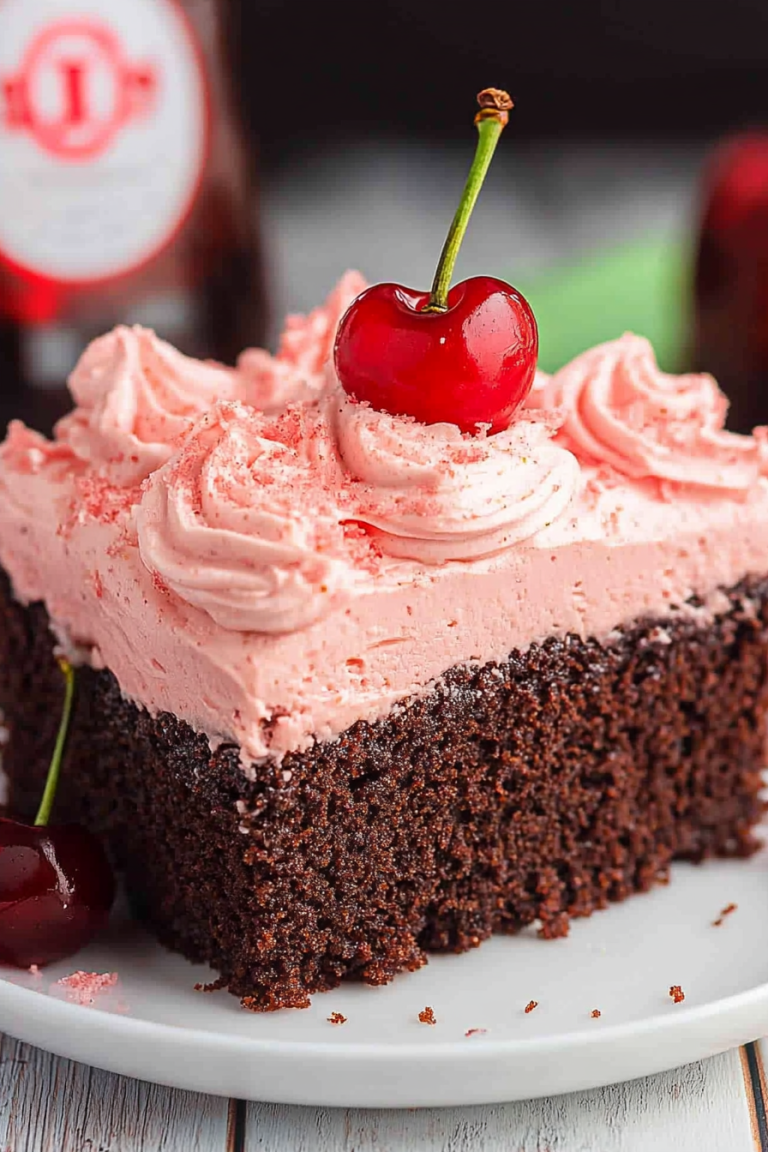
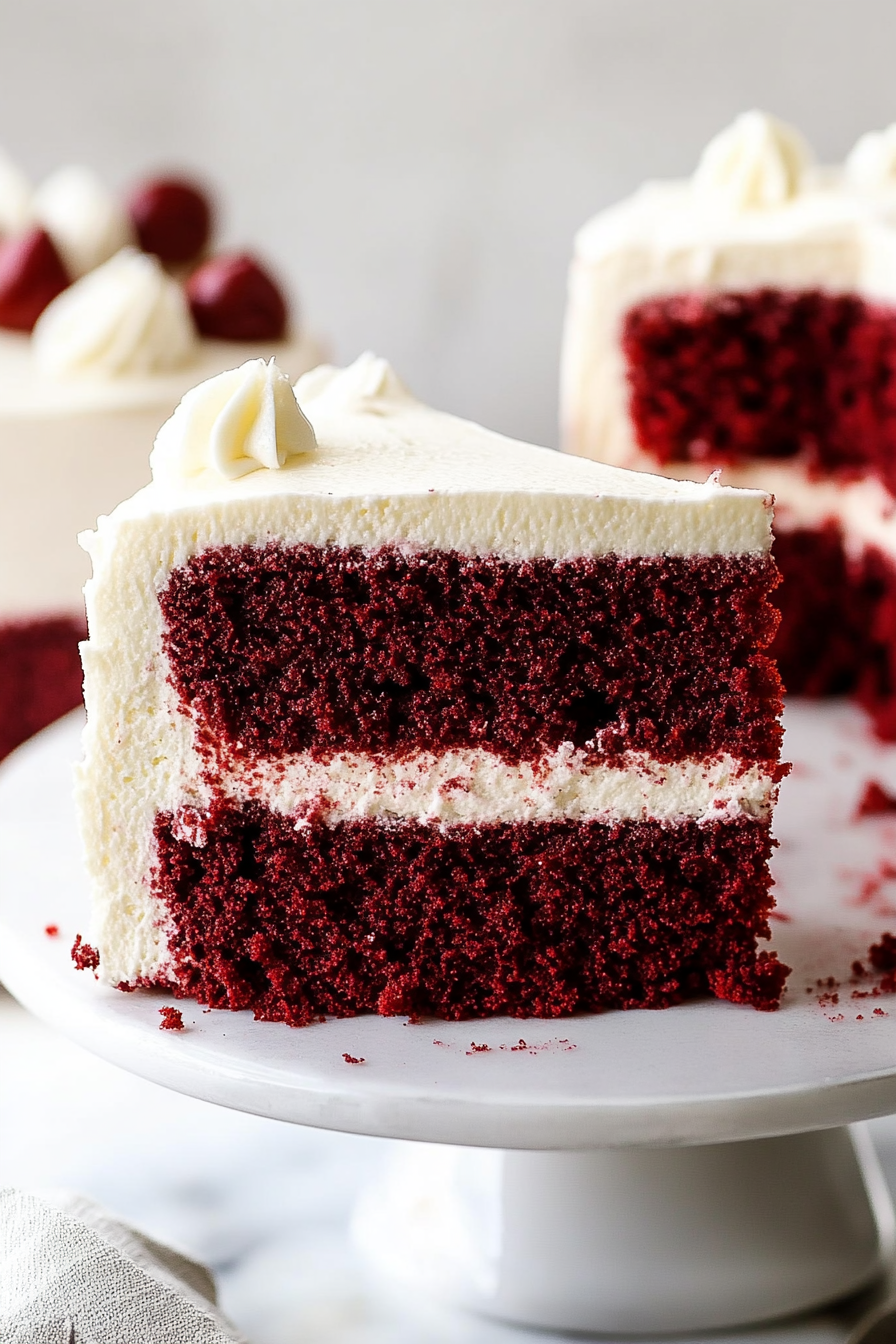
Sheet Pan Red Velvet Cake
Ingredients
Method
- Preheat oven to 325°F. Line a 10x15-inch jelly roll pan (a rimmed baking sheet with 1-inch sides) with parchment paper, making sure the paper comes up the sides. Spray the parchment with nonstick cooking spray and set aside.
- In a large bowl, whisk together the flour, sugar, baking soda, baking powder, cocoa powder, and kosher salt.
- In a medium bowl, whisk together the mayonnaise, eggs, buttermilk, vanilla extract, red gel food coloring, hot water, and vinegar until smooth.
- Slowly add the wet ingredients to the dry ingredients, stirring with a spatula or spoon until just combined and no dry streaks remain. Do not overmix.
- Pour the batter into the prepared pan, smoothing the top. Bake for 35-40 minutes, or until a toothpick inserted in the center comes out with a few moist crumbs, but no wet batter.
- Place the pan on a wire rack and let the cake cool to room temperature.
- Transfer the cooled cake to the freezer for 10–15 minutes until firm, or refrigerate (covered) for at least 1 hour or up to overnight. Chilling the cake makes it easier to move.
- While the cake chills, prepare the ermine frosting. In a medium saucepan over medium heat, whisk together the whole milk and flour. Cook, whisking constantly, for 3–5 minutes until thick and smooth, resembling a very thick pudding and coating the back of a spoon.
- Remove from heat and let cool completely to room temperature.
- In the bowl of a stand mixer fitted with the paddle attachment, cream together the butter and sugar on medium speed until light and fluffy, about 2–3 minutes. Scrape down the sides of the bowl with a rubber spatula.
- Add the cooled milk-flour mixture to the mixer bowl. Beat on medium-high speed until light and fluffy, about 2–3 minutes, scraping down the bowl as needed.
- Switch to the whisk attachment. Add the vanilla extract and whisk on high speed for 7–8 minutes, or until the frosting is smooth and creamy.
- Remove the chilled cake from the freezer or refrigerator. Using the parchment edges, lift the cake from the pan and place it on a work surface.
- Cut the cake in half (widthwise) to make two equal rectangles.
- Carefully place one rectangle onto a serving platter. Spread half of the ermine frosting over the cake layer.
- Top with the second cake rectangle. Spread the remaining frosting over the top.
- Slice and serve immediately.