Easy Movie Night Snack Mix
You know those mornings when you wake up craving something cozy, sweet, and a little bit wholesome? That’s exactly how I felt last weekend when I decided to throw together my favorite zucchini banana bread. Nothing beats the smell of freshly baked bread wafting through the house—except maybe slipping into a slice still warm, with the glaze melting into every crevice. This recipe’s become a staple in my household because it’s not only insanely delicious but also super forgiving, even on my busiest days. I always do this when I need a quick, satisfying treat—my kids ask for it all the time, and honestly, I sneak a slice at 10 p.m. just because I can. Trust me, the secret is the zucchini—moistens it up like a charm—and that bright lemon glaze? It’s a total game-changer. If you love a little sweetness with a hint of freshness, then you’re going to fall hard for this one.
What is Moist Zucchini Banana Bread?
Think of this as the lovechild of banana bread and classic zucchini bread—a comforting, slightly sweet loaf that’s packed with ripe bananas and grated zucchini, giving it an unbeatable moistness. It’s essentially a way to sneak in some vegetable goodness without sacrificing flavor. The name might sound fancy, but this bread is totally fuss-free, and it’s something I always have the ingredients for in my pantry. The cozy aroma alone makes it irresistible, but what keeps me coming back is how versatile it is. You can serve it for breakfast, slice it up for a quick snack, or even enjoy it as a dessert. And the lemon glaze? It adds just the right zing, balancing the richness and making each bite feel special. It’s the kind of recipe you can whip up on a Saturday morning, or even during those busy weekday moments when you need something sweet in a jiffy.
Why you’ll love this recipe?
What I love most about this zucchini banana bread is how incredibly forgiving it is—there’s no need for perfection here, just a bit of patience and a splash of love. The flavor? Pure comfort. The bananas bring that warm, caramelized sweetness, and the zucchini adds moisture that keeps every slice tender without any greasiness. Plus, I’ve tested this with everything from regular all-purpose flour to gluten-free mixes, and it always turns out great. It’s also budget-friendly—you probably already have everything you need in your kitchen. The best part? It’s adaptable. Want to go dairy-free? Just swap out the butter for coconut oil or almond butter. Prefer a less sweet treat? Reduce the sugar a touch, and it’ll still shine. Trust me, the smell alone when this is baking… I swear, it’ll make your whole house feel like a bakery. This one’s a lifesaver on busy nights when you need a little comfort, or when guests stop by unexpectedly. It’s also a huge hit at my kids’ school bake sales—everyone always asks for the recipe.
And speaking of taste—just wait until you try that lemon glaze. It’s tangy, sweet, and perfectly glossy, adding a vibrant punch that lifts the entire loaf. I love spooning it over warm slices and watching it drip down the sides—it’s seriously irresistible. Honestly, I’ve made this countless times and it never fails to bring a smile to my family’s faces. Plus, it’s a great way to use up ripening bananas and any leftover zucchini from dinner—no waste, all flavor. That’s the kind of recipe I keep forever.
How do I make Moist Zucchini Banana Bread?
Quick Overview
This zucchini banana bread is surprisingly simple. It all comes down to mixing moist ingredients with dry, then layering in the grated zucchini and mashed bananas. The batter comes together in one bowl, which makes clean-up a breeze. Once it’s in the oven, you bake until golden and a toothpick comes out clean. The secret is not overmixing—this keeps the bread tender. While it bakes, I usually whip up the quick lemon glaze, which is just powdered sugar and lemon juice stirred together until smooth. When fresh out of the oven, I let it cool just enough so the glaze doesn’t slide off. Then, it’s all about that first slice—trust me, that first bite will make you feel like you’ve been transported back to a cozy kitchen in Grandma’s house.
Ingredients
For the Main Batter:
- 2 ripe bananas, mashed — the riper, the better for sweetness and flavor
- 1 cup grated zucchini (about 1 small zucchini, excess moisture squeezed out)
- 1/2 cup melted unsalted butter or coconut oil — for richness
- 3/4 cup granulated sugar — feel free to reduce a little if you prefer less sweet
- 2 large eggs — at room temperature for better blending
- 1 teaspoon vanilla extract — because vanilla makes everything better
- 1 1/2 cups all-purpose flour (or gluten-free blend)
- 1 teaspoon baking soda
- 1/2 teaspoon salt
For the Filling (optional):
- Chopped walnuts or chocolate chips — I’ve done both, and honestly, both are divine
For the Glaze:
- 1 cup powdered sugar
- 2-3 tablespoons fresh lemon juice — adjust for thickness and tang
- Zest of 1 lemon (optional, for extra zing)
Step-by-Step Instructions
Step 1: Preheat & Prep Pan
Set your oven to 350°F (175°C). Grease a loaf pan with butter or line it with parchment paper—trust me, this makes unmolding much easier. If you want a crusty top, sprinkle a tiny bit of sugar on top before baking, but that’s totally optional. Let’s get that oven hot and ready while we prepare the batter.
Step 2: Mix Dry Ingredients
In a small bowl, whisk together the flour, baking soda, and salt. This step ensures everything’s evenly distributed—no baking surprises. I always do this first, especially if I’m throwing in chocolate chips or nuts later, so they don’t sink to the bottom.
Step 3: Mix Wet Ingredients
In a large bowl, mash the bananas with a fork until smooth. Add the melted butter or oil, sugar, eggs, and vanilla. Whisk together until the mixture looks glossy and well combined. The smell here should be sweet and comforting—like breakfast in a bowl!
Step 4: Combine
Gradually add the dry mixture to the wet ingredients, stirring gently with a spatula. Be careful not to overmix—that’s how you get dense bread. Stir until just combined, then fold in the grated zucchini and any extras like chocolate chips or nuts. The batter will be chunky and moist—that’s exactly what you want!
Step 5: Prepare Filling
If you’re adding chocolate chips or walnuts, fold them into the batter at this stage. I love a handful of chopped walnuts for crunch or a handful of chocolate for pure indulgence. Just make sure not to overstuff—it’s all about balance.
Step 6: Layer & Swirl
Pour half the batter into your prepared pan. If you’re feeling fancy, you can dollop some more mashed banana or swirl in additional zucchinis or fruit preserves. Then add the rest of the batter on top. Use a skewer or knife to gently swirl the batter—create a pretty marbled effect without mixing it too much. This step makes each slice visually interesting and adds a hint of flavor surprise.
Step 7: Bake
Pop it into the oven for about 50-60 minutes, or until the top is golden brown and a toothpick inserted in the center comes out clean. Start checking around the 50-minute mark—ovens vary! If it browns too quickly, tent it with foil. I always set a timer so I don’t forget. When it’s done, let it cool in the pan for 15 minutes before transferring to a wire rack.
Step 8: Cool & Glaze
Once cool enough to handle, transfer the loaf to a plate. Whisk together powdered sugar and lemon juice until smooth. Drizzle generously over the loaf—this glaze is the perfect blend of sweet and tangy, and it makes the bread look oh-so-professional. If you prefer a thicker glaze, add a little more powdered sugar; for thinner, splash in more lemon juice. I like to wait until the bread is just warm for the glaze so it melts in beautifully.
Step 9: Slice & Serve
Slice with a serrated bread knife to get clean, even pieces. Serve slightly warm or at room temperature. This bread tastes amazing on its own, but I love pairing it with a dollop of Greek yogurt or a cup of tea. For a special brunch, add a scattering of fresh berries or whipped cream. It’s pretty enough to serve for company, yet simple enough for a weeknight treat. My kids love it slightly warmed with a pat of butter melted on top. Trust me—this disappears in minutes at my house!
What to Serve It With
This zucchini banana bread really shines in so many settings. For breakfast, I love slicing it and pairing it with a strong cup of coffee or a glass of almond milk. Maybe add some fresh fruit on the side—blueberries or sliced strawberries work beautifully. My kids often ask for this as a weekend brunch alongside scrambled eggs or yogurt parfaits. Since the bread is sweet but not overly sugary, it works perfectly as a snack during the day, especially with a hot cup of tea or fresh lemonade.
It’s also fabulous as a dessert after dinner—just a little dusting of powdered sugar or a dollop of whipped cream turns it into a real treat. In colder months, I sometimes warm a slice in the oven for a few minutes, then drizzle with a little extra glaze or a smear of cream cheese. And if you’re packing lunches, this bread slices beautifully and stays moist for hours. Honestly, it’s one of those recipes that’s just as good on day three, if it lasts that long!
Top Tips for Perfecting Your Moist Zucchini Banana Bread
This recipe is pretty forgiving, but I’ve learned a few tricks over the years to make sure your loaf turns out perfectly every time:
- Zucchini Prep: Always squeeze out excess moisture from the grated zucchini. I do this by wrapping it in a kitchen towel and giving it a good squeeze—this keeps the bread from becoming soggy.
- Mixing Advice: Overmixing is the enemy. Stir just until the ingredients are combined, especially after adding the flour. A light hand keeps the bread tender and fluffy.
- Swirl Customization: When layering and swirling, use a skewer or butter knife to create pretty patterns on top. Not only does it look gorgeous, but it also helps distribute flavors more evenly.
- Ingredient Swaps: Want to make it dairy-free? Coconut oil works beautifully, and swapping out the sugar for a natural sweetener like honey or maple syrup is totally doable. Just keep an eye on the consistency—they may change slightly. I also tested this with almond flour, but adjust the amount because it absorbs more moisture.
- Baking Tips: Position your rack in the middle of the oven and keep an eye on the loaf after 50 minutes. Every oven bakes a little differently. If the top browns too fast, tent with foil. Don’t forget to check with a skewer—it should come out clean in the middle.
- Glaze Variations: For a more decadent finish, add a splash of vanilla to the glaze or top with toasted coconut before serving. You can also swap lemon for orange or lime juice for a different citrus twist.
Honestly, I’ve made this bread so many times, I’ve learned a handful of little tricks that make it perfect every time. The key is patience and a gentle touch. Just do your best not to overmix, and keep an eye on baking time—I promise, the reward is worth it!
Storing and Reheating Tips
This bread stays fresh beautifully for a few days. Here’s how I keep it tasting great:
- At room temperature: Cover the loaf with a clean towel or keep it in an airtight container. It’ll stay moist for about 2-3 days. Avoid plastic wrap directly on the cut surface to prevent condensation.
- In the refrigerator: Wrap slices individually in plastic wrap or place in an airtight container. It’ll last up to a week. To enjoy it warm, just pop a slice in the microwave for about 10 seconds—so cozy!
- In the freezer: Wrap slices tightly in plastic wrap and then foil or store in a heavy-duty freezer bag. It’s good for up to 3 months. Thaw overnight in the fridge or warm in the microwave. The flavor stays just as vibrant after freezing.
If your bread has been in the fridge or freezer, I recommend adding the glaze after reheating—this keeps that shiny, tangy punch alive. I’ve found that the glaze sometimes softens a bit when stored, so just rewhisk it and drizzle fresh before serving next time.
Frequently Asked Questions
Final Thoughts
Honestly, this zucchini banana bread has become one of those recipes I turn to again and again. It’s got that perfect balance of sweet and moist, with just a hint of citrus brightness from the glaze. Plus, it’s adaptable—gluten-free, dairy-free, or loaded with extras—you can make it your own. Every time I bake this, my house fills with that warm, inviting smell and I get excited to share it with family and friends. It’s the kind of recipe that’s as comforting as a hug and as satisfying as a good chat over coffee. If you give it a try, I’d love to hear what variations you come up with or how your family reacts to the first slice. Happy baking—can’t wait to see how yours turns out!

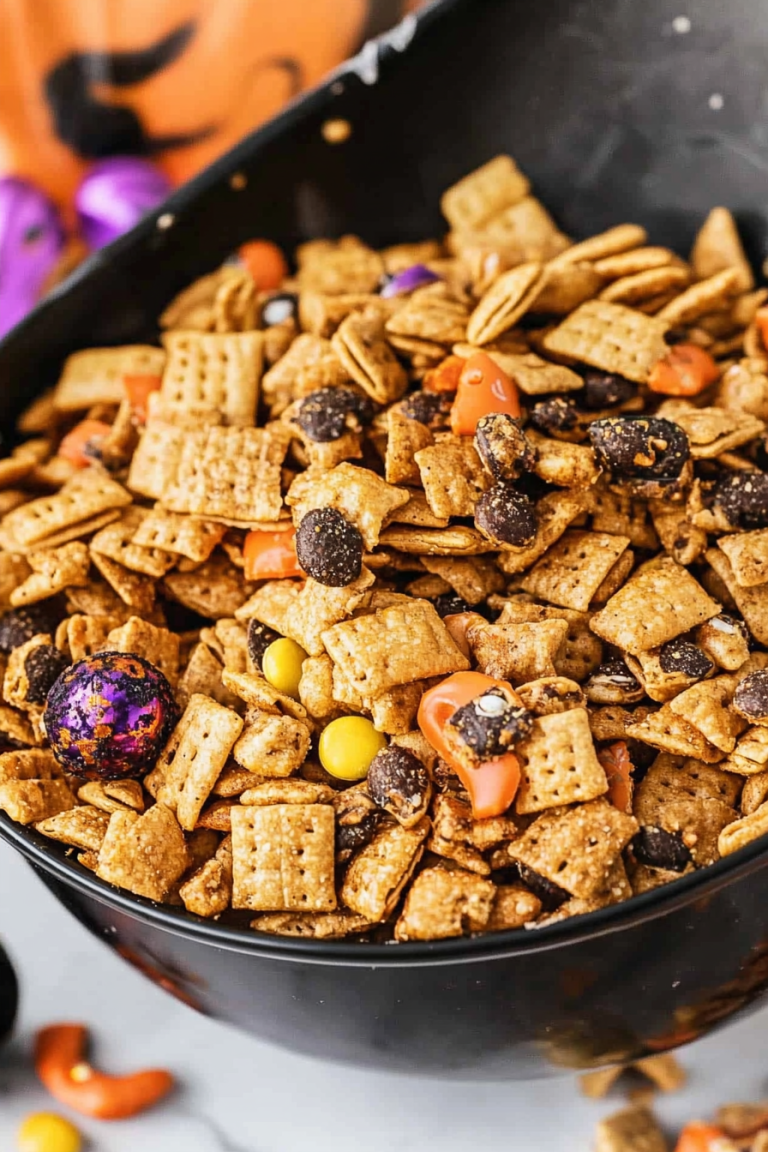
Movie Night Popcorn Snack Mix
Ingredients
Method
- Start by adding the chocolate melting wafers to a microwave safe bowl and microwaving for 45 seconds. Stir, then microwave for another 45 seconds. If the chocolate isn’t fully melted at that point, microwave for 15 second increments, stirring in between each, until it’s fully melted.
- Pour the Chex cereal into a large bowl then add the chocolate to the bowl of cereal and gently stir with a rubber spatula until everything is evenly coated.
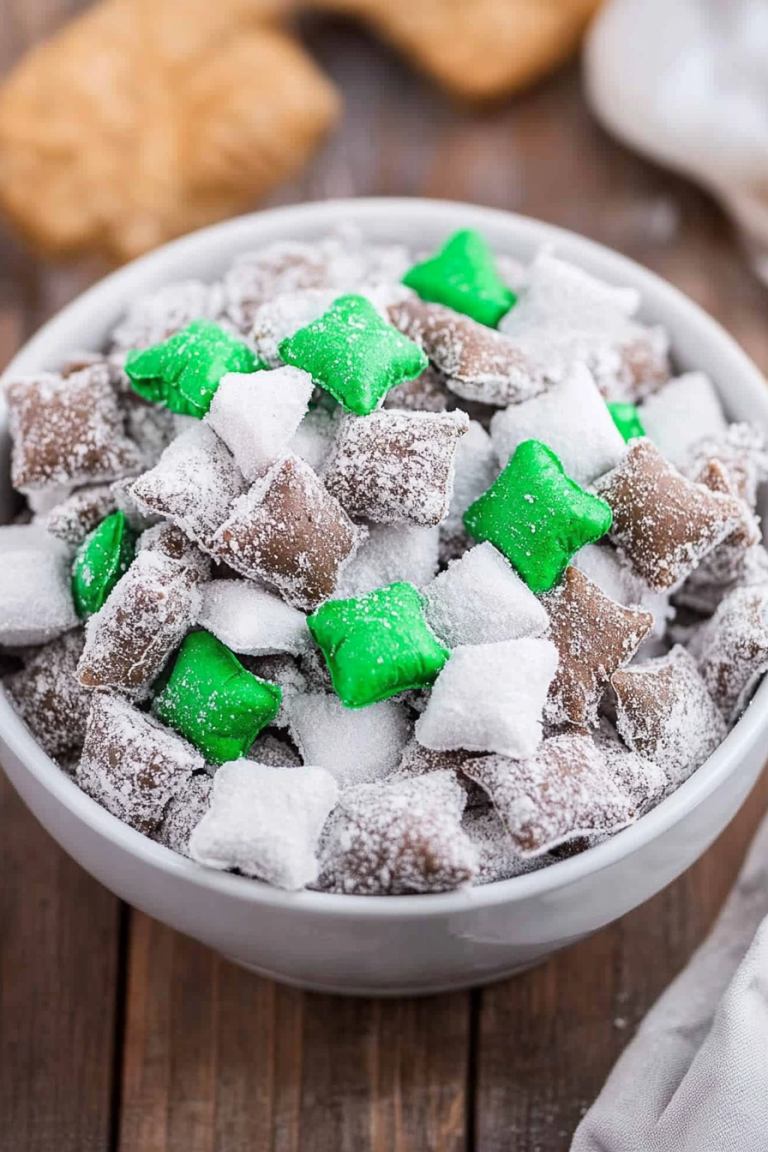
- Sprinkle the powdered pudding mix onto the cereal then toss until all of the cereal is coated completely.
- Let the muddy buddies set for 10-15 minutes to let the chocolate set.
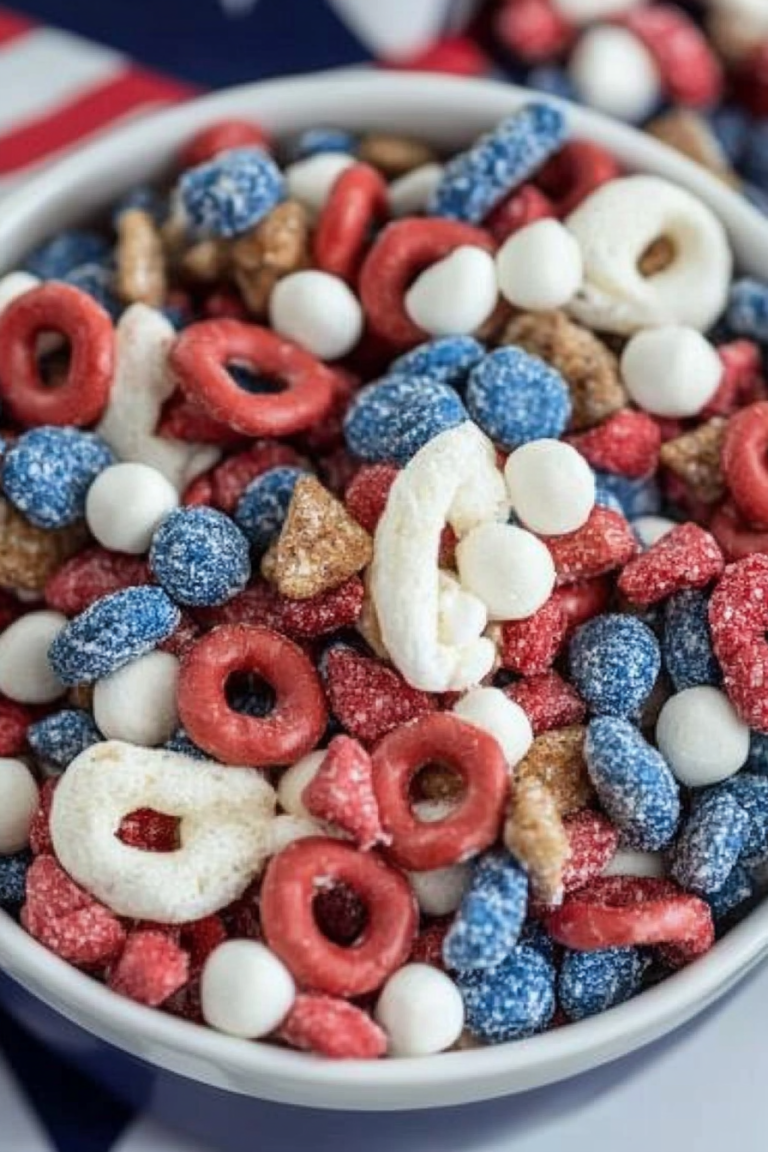
- Once the muddy buddies are dry and set, pour them into a large bowl along with the popcorn, chocolate covered peanuts, and candies. Stir gently to mix everything together.
- Serve immediately and store any leftovers in an airtight container.