Easy Marshmallow Cereal Bars Recipe
Oh, hello there! Come on in, pull up a chair. I’ve been meaning to share this with you for ages. You know how sometimes you stumble upon a recipe that just *works*? Like, it’s not just good, it’s *transformative*? This zucchini bread is that recipe for me. It’s the kind of thing that fills your kitchen with the most incredible, comforting aroma, and it’s so ridiculously easy. Honestly, I used to think zucchini bread was just… fine. A little bit healthy-ish, a little bit sweet. But this one? This is on another level. It’s moist, it’s perfectly spiced, and that sweet little swirl running through it? Pure magic. It’s what I pull out when I need a pick-me-up, when friends drop by unexpectedly, or when the kids are begging for something sweet but I don’t want to spend hours in the kitchen. It’s so good, in fact, that it makes my notoriously picky youngest actually ask for seconds, and that, my friends, is saying something. Forget those dry, bland loaves you might have encountered; this is the real deal. Think of it as the ultimate hug in bread form.
What is Zucchini bread?
At its heart, zucchini bread is exactly what it sounds like – a delicious quick bread made with shredded zucchini. But oh, it’s so much more than that! The zucchini itself is pretty much invisible in the final product, but it’s the secret weapon that keeps the bread incredibly moist and tender. It’s not overly sweet, which I love, making it perfect for breakfast, as a snack, or even as a light dessert. You get this wonderful warmth from the cinnamon and nutmeg, a hint of vanilla, and if you add my little secret swirl, a delightful ribbon of sweetness that takes it from good to downright irresistible. It’s often compared to banana bread, and while they share that comforting, moist texture, I find zucchini bread to be a bit more subtle, letting the spices and that hint of sweetness really shine. It’s the perfect canvas for whatever mood you’re in!
Why you’ll love this recipe?
What is the best zucchini bread recipe?flavor is just out of this world. It’s warm, it’s cozy, and that subtle sweetness from the sugar and brown sugar is perfectly balanced by the spices. It’s not cloyingly sweet, which is a big win in my book. Then there’s the simplicity. I’m talking about a recipe that comes together in about 15 minutes of active time. No fancy techniques, no hard-to-find ingredients. If you can stir things together, you can make this. It’s also surprisingly cost-efficient. Zucchini is often super affordable, especially when it’s in season, and the other ingredients are pantry staples. This loaf costs pennies to make and tastes like it came from a gourmet bakery. And the versatility! This isn’t a one-trick pony. I’ll get to more serving ideas later, but trust me, it’s good as is, or with a dollop of cream cheese, a smear of butter, or even toasted. What I love most about this recipe is how forgiving it is. I’ve tweaked it countless times, and it always turns out perfectly. It’s my go-to when I need something reliable and delicious. Plus, it’s a fantastic way to use up that surplus zucchini from your garden or the farmer’s market. My family devours it, and yours will too!
How do you make Zucchini bread?
Quick Overview
This recipe is all about ease and amazing results. You’ll simply whisk together your dry ingredients, mix your wet ingredients, combine them gently, and then add a delightful swirl of sugary goodness before baking. The zucchini hides away, lending its moisture magic, and the result is a loaf that’s incredibly tender, flavorful, and utterly irresistible. It’s the kind of baking that makes you feel accomplished without breaking a sweat, perfect for those weeknights when you just need a little something sweet.
Ingredients
For the Main Batter:
Here’s what you’ll need to get started. I always try to use fresh, good-quality ingredients for the best flavor. For the flour, all-purpose works beautifully, but I’ve also tested it with a good quality 1-to-1 gluten-free blend, and it came out great! The recipe calls for 2 cups of all-purpose flour, plus 1 teaspoon of baking soda, 1/2 teaspoon of salt, 1 teaspoon of ground cinnamon, and a pinch of ground nutmeg. Don’t skip the spices; they are key to that cozy flavor! The baking soda is crucial for lift, so make sure it’s fresh.
For the Wet Ingredients:
This is where we build the moisture and richness. You’ll need 2 large eggs, lightly beaten. About 3/4 cup of melted unsalted butter (or a good neutral oil like vegetable or canola oil), 1/2 cup of granulated sugar, and 1/2 cup of packed light brown sugar. The brown sugar adds a lovely caramel note. And, of course, the star: 1 1/2 cups of finely grated zucchini. Make sure you squeeze out *most* of the excess moisture from the zucchini – we want the moisture for tenderness, but not so much that it makes the batter watery. I usually use a fine grater and then wrap the grated zucchini in a clean kitchen towel or paper towels and give it a good squeeze. You’ll also need 1 teaspoon of vanilla extract for that classic warm flavor.
For the Filling/Swirl:
This is my little secret for next-level zucchini bread! It’s so simple but makes a huge difference. You’ll need 1/4 cup of packed light brown sugar and 1 teaspoon of ground cinnamon. That’s it! Mixing these together creates a beautiful, slightly crisp, cinnamon-sugar swirl that bakes right into the bread.
Step-by-Step Instructions
Step 1: Preheat & Prep Pan
First things first, let’s get that oven fired up to 350°F (175°C). This ensures it’s nice and hot when your batter is ready. Then, grab a standard 9×5 inch loaf pan. I like to grease it really well with butter or cooking spray, and then lightly dust it with a bit of flour. This guarantees that your beautiful loaf will slide right out without sticking. Seriously, don’t skimp on this step! A little parchment paper lining the bottom, with an overhang, can also be a lifesaver for easy removal.
Step 2: Mix Dry Ingredients
In a large bowl, go ahead and whisk together your flour, baking soda, salt, cinnamon, and nutmeg. Whisking them together ensures that the leavening agent (baking soda) and the spices are evenly distributed throughout the flour. This is super important for an even rise and consistent flavor in every bite. Give it a good whisk until everything looks well combined.
Step 3: Mix Wet Ingredients
In a separate medium bowl, whisk together your lightly beaten eggs, melted butter (or oil), granulated sugar, and packed light brown sugar until everything is smooth and well combined. Stir in the vanilla extract. Then, gently fold in your squeezed-dry grated zucchini. You want it to be incorporated, but don’t overmix at this stage.
Step 4: Combine
Now, pour the wet ingredients into the bowl with the dry ingredients. Using a spatula or a wooden spoon, gently fold everything together until *just* combined. It’s really important not to overmix here! You’ll still see a few streaks of flour, and that’s perfectly okay. Overmixing develops the gluten in the flour too much, which can lead to a tough bread, and we definitely don’t want that. So, go easy on the stirring!
Step 5: Prepare Filling
In a small bowl, mix together the 1/4 cup of packed light brown sugar and 1 teaspoon of cinnamon for the swirl. Just give it a quick stir with a fork until it’s well combined. This is going to be our delicious sweet center.
Step 6: Layer & Swirl
Pour about two-thirds of your batter into the prepared loaf pan and spread it out evenly. Sprinkle about half of your cinnamon-sugar mixture over the top. Then, dollop the remaining batter over that and spread it out. Finally, sprinkle the rest of the cinnamon-sugar mixture over the top. Now for the fun part: take a knife or a skewer and gently swirl it through the batter. You don’t want to mix it completely, just create some lovely ribbons. Try to go down just into the batter, not all the way to the bottom of the pan.
Step 7: Bake
Pop that beautiful loaf into your preheated oven. Bake for about 50-65 minutes. The exact time will vary depending on your oven, so keep an eye on it! You’ll know it’s done when a toothpick inserted into the center comes out clean, or with just a few moist crumbs attached. If the top starts to brown too quickly, you can loosely tent it with aluminum foil during the last 15-20 minutes of baking.
Step 8: Cool & Glaze
Once it’s baked to perfection, carefully remove the loaf pan from the oven. Let the bread cool in the pan for about 10-15 minutes. This allows it to set up a bit. Then, invert the pan onto a wire rack to release the loaf. Let it cool *completely* on the wire rack before slicing. I know, the waiting is the hardest part! If you’re feeling fancy, you can whip up a simple glaze (equal parts powdered sugar and milk/lemon juice, whisked until smooth) and drizzle it over the cooled bread. I sometimes do this, but honestly, it’s fantastic even without it.
Step 9: Slice & Serve
Once it’s cooled, grab your sharpest knife and slice away! The smell alone is enough to make your mouth water. I love serving it slightly warm, but it’s also delicious at room temperature. Enjoy that first incredible bite!
What to Serve It With
This zucchini bread is so wonderfully versatile, it fits into pretty much any meal or occasion. For a simple, hearty breakfast, I love it toasted and slathered with a bit of butter or cream cheese. A hot cup of coffee or a steaming mug of tea is the perfect accompaniment. For a more elaborate brunch spread, I’ll slice it a bit thinner and arrange it on a pretty platter. It pairs beautifully with fresh fruit salads, yogurt parfaits, or even a savory quiche. It adds a touch of sweetness without being overwhelming. As a decadent dessert, it’s delightful served slightly warm with a scoop of vanilla bean ice cream or a dollop of whipped cream. The warmth of the bread and the cool creaminess of the ice cream is just heavenly. And for those moments when you just need a cozy snack, it’s perfect on its own with a glass of milk. My family has a tradition of having a slice with hot chocolate on chilly evenings, and it’s become a cherished ritual. Honestly, it’s so good, it doesn’t really *need* anything else, but these pairings just elevate the experience even more!
Top Tips for Perfecting Your Zucchini Bread
After making this countless times, I’ve picked up a few tricks that really make a difference. When it comes to zucchini prep, don’t skip squeezing out the moisture! It’s the single most important step for avoiding a gummy loaf. Use a fine grater and then a clean kitchen towel or good quality paper towels. Fresh zucchini will yield the best results, but if you’re using zucchini that’s been sitting around, it might have more water. For mixing advice, I cannot stress enough to avoid overmixing! Seriously, stop stirring the moment you don’t see large streaks of dry flour. A few small lumps are fine; they’ll disappear during baking. Overmixing is the enemy of tender quick breads. For swirl customization, you can get creative! Add a pinch of cardamom or a tiny bit of cocoa powder to the cinnamon-sugar mix for a different flavor profile. You can also use a toothpick to create more intricate patterns if you’re feeling artistic. When it comes to ingredient swaps, if you don’t have butter, a neutral oil like canola or vegetable oil works well; use about 3/4 cup. For sweeteners, you can reduce the sugar slightly if you prefer, but it will affect the texture and sweetness. I haven’t experimented extensively with sugar substitutes as I prefer the flavor of real sugar here. For baking tips, always know your oven. If you find your loaves tend to brown too quickly on top, use aluminum foil to tent it. Placing the loaf pan on the middle rack ensures even heat circulation. And for glaze variations, if you want a more prominent glaze, use powdered sugar and just enough liquid to make it drizzleable. A touch of lemon zest in the glaze adds a lovely brightness that cuts through the sweetness. If you’re not a fan of glaze, a simple dusting of powdered sugar just before serving is also lovely and elegant.
Storing and Reheating Tips
This zucchini bread is fantastic at room temperature, but it’s also pretty hardy for storage. For room temperature storage, once the loaf is completely cool, I like to wrap it tightly in plastic wrap or store it in an airtight container. It will stay fresh and moist for about 3-4 days this way. It’s perfect for having a slice ready whenever a craving strikes! If you need to keep it longer, refrigerator storage is your friend. Wrap it well in plastic wrap, then place it in an airtight container. It should stay good in the fridge for up to a week, though the texture can become a bit firmer. When you’re ready to enjoy a slice from the fridge, just let it sit out at room temperature for about 15-20 minutes, or pop it in the toaster for a few seconds. For longer storage, freezer instructions are a lifesaver! Let the loaf cool completely, then wrap it very tightly in plastic wrap, followed by a layer of aluminum foil or a freezer bag. It can be frozen for up to 2-3 months. To thaw, unwrap it and let it come to room temperature on a wire rack. You can also freeze individual slices for quicker thawing and toasting. For glaze timing advice, it’s best to add the glaze *after* the bread has completely cooled, especially if you plan to store it. If you’re freezing it, it’s often best to glaze after thawing to prevent the glaze from becoming sticky or messy in the freezer.
Frequently Asked Questions
Final Thoughts
So there you have it – my absolute favorite zucchini bread recipe. It’s the kind of recipe that brings a smile to my face every time I make it, and seeing my family enjoy it makes it even better. It’s proof that simple ingredients, when treated with a little love, can create something truly magical. It’s moist, it’s flavorful, and that cinnamon swirl is just the cherry on top (or, well, the swirl on the bread!). If you’re looking for a foolproof, utterly delicious quick bread that will impress everyone, this is it. It’s perfect for using up zucchini, for comforting yourself on a chilly day, or just for a simple treat with your morning coffee. If you love this recipe, you might also enjoy my classic banana bread or my incredibly moist lemon poppy seed muffins! I truly hope you give this zucchini bread a try; it’s a recipe I’m so excited to share. I can’t wait to hear how yours turns out in the comments below! Happy baking, everyone!
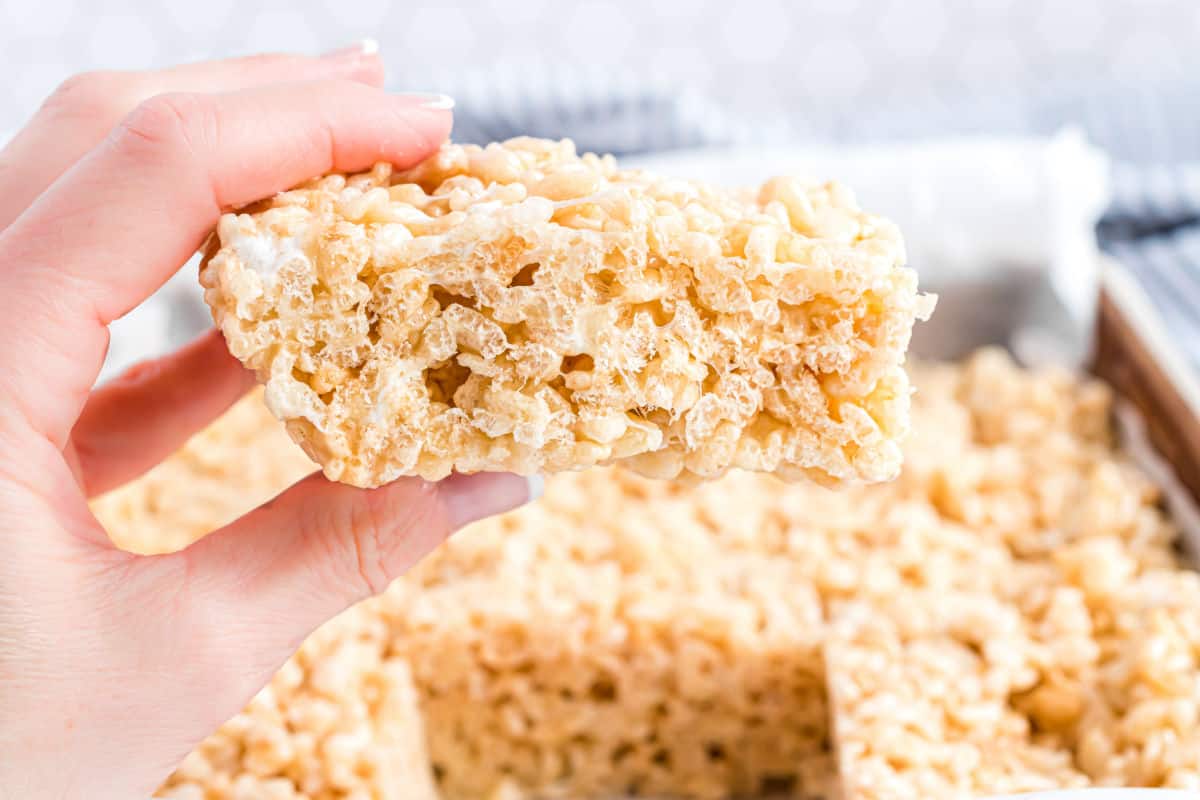
Classic Rice Krispie Treats
Ingredients
Method
- Line a 9x13 inch baking pan with parchment paper or wax paper, leaving an overhang on the sides for easy removal.
- In a large saucepan, melt butter over low heat. Once butter is melted, add marshmallows and stir continuously until completely melted.
- Remove the saucepan from heat. Stir in the vanilla extract.
- Add the Rice Krispies cereal to the marshmallow mixture. Stir gently until the cereal is evenly coated.
- Pour the mixture into the prepared baking pan. Using a buttered spatula or your hands (lightly greased with butter or cooking spray), gently press the mixture into the pan. Do not pack too tightly, as this will make the treats hard.
- Let the treats cool and set for at least 30 minutes to 1 hour.
- Lift the treats out of the pan using the parchment paper overhang. Cut into squares and enjoy!