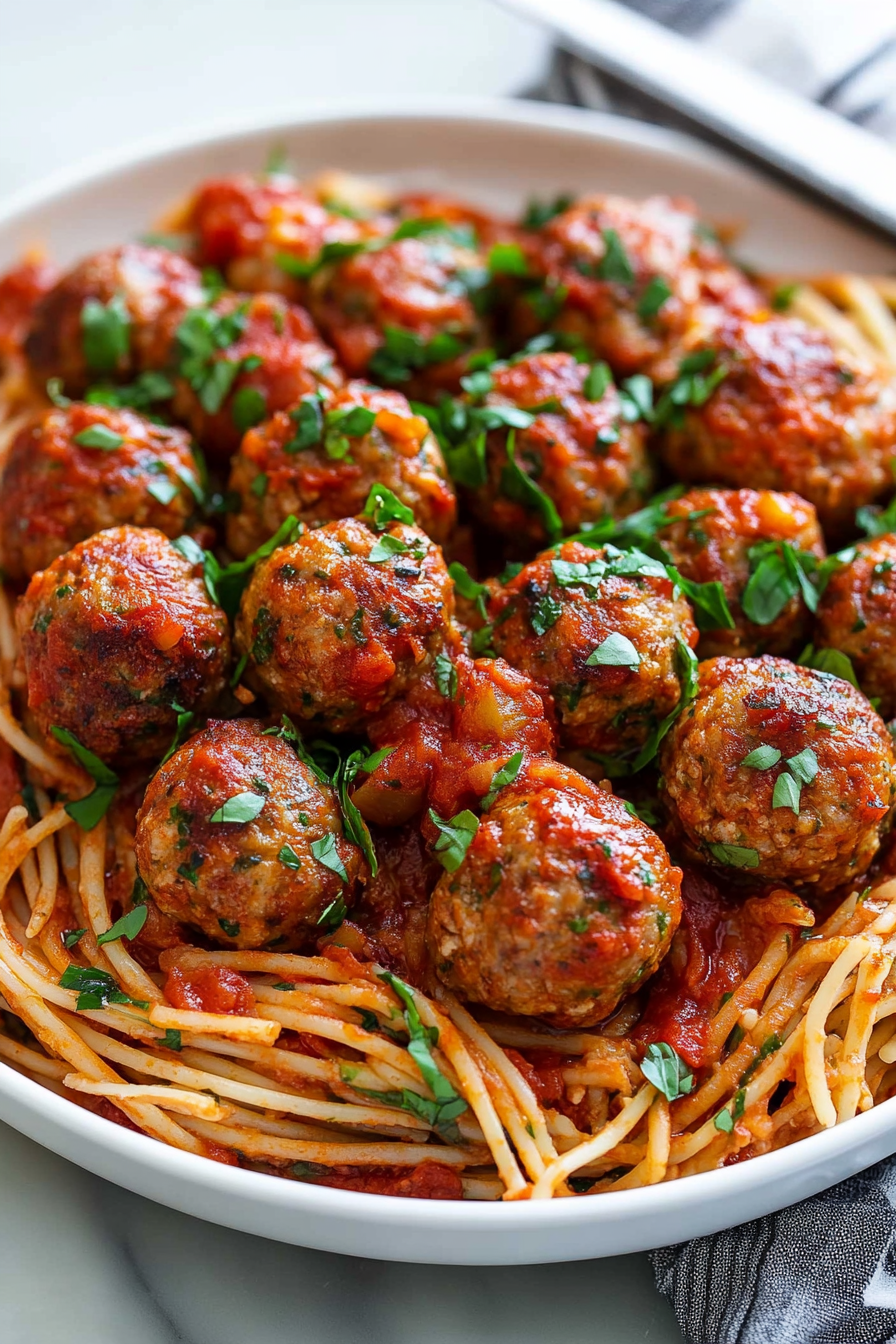
Easy Italian Meatballs – The Best Recipe
There’s something about the smell of baked zucchini and cinnamon wafting through my house that instantly takes me back to childhood summers at my grandma’s farm. I remember her standing in the kitchen, grating fresh zucchinis from the garden with a grin on her face, saying, “This’ll surprise you!” And surprise me, it did — that moist, flavorful cake with just a whisper of sweetness. Over the years, I’ve tested countless versions of this zucchini carrot swirl cake, tweaking spices, swapping ingredients, and fine-tuning it until it’s just right. My kids ask for this all the time, especially when I have a few zucchinis and carrots leftover from the garden. It’s kind of like a little secret—a humble veggie transforms into a showstopper dessert that’s perfect for breakfast, snack, or afternoon tea. Plus, it’s incredibly easy to make, and trust me, once you try it, it’s going to be a staple in your house too. The best part? It disappears in minutes at my house—hope it’s the same with yours!
What is Zucchini Carrot Swirl Cake?
This zucchini carrot swirl cake is basically a cozy, wholesome dessert that’s packed with shredded zucchinis and carrots, but don’t let the veggies fool you—it’s all about the flavor and texture. Think of it as a mash-up of a carrot cake and a zucchini bread, but with a fancy swirl that makes it look almost too pretty to eat. The name ‘swirl’ comes from swirling a cinnamon-spiced batter with a layer of rich, sweet filling—kind of like a marbled cake, but simpler. It’s essentially a one-layer cake that’s moist, tender, and full of warm, comforting spices. I always do this when I want something sweet but don’t want to fuss; it’s quick enough for a weeknight treat, but impressive enough to serve at a dinner party. What I love most about this is that it’s one of those “secret weapon” recipes—veggies sneak in, yet no one’s the wiser. The aroma alone makes everyone gather in the kitchen, waiting for the first slice.
Why you’ll love this recipe?
Honestly, this zucchini carrot swirl cake has become a family favorite for a few reasons. First, the flavor—oh my goodness, that cinnamon-spiced batter combined with the natural sweetness of the carrots and zucchinis is just heavenly. It’s like a hug in cake form. Second, it’s so easy—you mix the batter, layer, swirl, and bake. No fancy equipment, no complicated folding—just simple, rustic goodness. Plus, it’s budget-friendly. I usually have everything I need right in my pantry and fridge—some zucchinis and carrots from the garden, eggs, flour, sugar, and spices. The versatility is a bonus, too. I’ve made this with coconut sugar, added chopped nuts, or even swapped honey for some of the sugar, and it still turns out amazing. It’s perfect if you want a little something sweet with your coffee in the morning, or a cozy dessert after dinner. And because it’s a ‘hidden-veggie’ cake, I can sneak extra nutrition into my kids’ meals without any complaints. (Well, most of the time!) What I love most about this recipe is that it reminds me of home—my grandma’s farm, summer mornings, and the simple joy of sharing good food with loved ones.
How do I make Zucchini Carrot Swirl Cake?
Quick Overview
This cake is a baking hack I love because it’s straightforward but looks so impressive. You start by preheating your oven and lining your pan—nothing fancy. Then, you whisk together your dry ingredients, so everything is evenly distributed. Next, in a separate bowl, you mix your wet ingredients—think eggs, oil, vanilla—then fold everything together before layering some of the batter into your prepared pan. For the filling, I usually go with a cinnamon-sugar mixture that I swirl into the batter, creating beautiful marbled patterns. Once baked, I let it cool slightly before drizzling with a simple glaze—trust me, that shiny finish makes all the difference. The final step is slicing and serving, ideally with a cup of tea or coffee. The whole process takes about 45 minutes, and the best part? The aroma that fills the house makes everyone follow their noses right to the kitchen.
Ingredients
For the Main Batter:
– 2 cups grated zucchini (squeeze out excess moisture)
– 1 cup grated carrots
– 1 ½ cups all-purpose flour (I prefer unbleached for a richer flavor)
– 1 teaspoon baking powder
– ½ teaspoon baking soda
– 1 teaspoon ground cinnamon
– ½ teaspoon nutmeg (if you love that warm spice)
– ¼ teaspoon salt
– ¾ cup granulated sugar or coconut sugar
– ½ cup vegetable oil (can substitute applesauce for a healthier twist)
– 3 large eggs
– 1 teaspoon vanilla extract
For the Filling:
– ¼ cup brown sugar
– 1 teaspoon cinnamon
– 2 tablespoons softened butter or coconut oil (for spreading)
For the Glaze:
– ½ cup powdered sugar
– 1-2 teaspoons milk or plant-based milk
– ½ teaspoon vanilla extract
Step-by-Step Instructions
Step 1: Preheat & Prep Pan
Heat your oven to 350°F (175°C). Line a 9-inch round cake pan with parchment paper or grease it well. I always do this because it prevents sticking and makes cleanup a breeze. If you’re short on time, baking paper is your best friend—it keeps the cake moist and easy to lift out.
Step 2: Mix Dry Ingredients
In a large bowl, whisk together the flour, baking powder, baking soda, cinnamon, nutmeg, and salt. It’s important to mix these well so that the leavening agents and spices are evenly distributed. This little step keeps your cake light and flavorful throughout.
Step 3: Mix Wet Ingredients
In a separate bowl, beat the eggs, then add the sugar, oil, and vanilla. Whisk until smooth and slightly frothy—this helps create a tender crumb. I’ve tested this with almond milk, and it actually made it even creamier, but stick with regular milk for a classic touch if you want.
Step 4: Combine
Pour the wet mixture into the dry ingredients, folding gently with a spatula until just combined. Don’t overmix or your cake might turn out dense—give it a few gentle strokes until you see no streaks of flour. Then, fold in the grated zucchini and carrots, making sure they’re evenly distributed.
Step 5: Prepare Filling
Mix the brown sugar and cinnamon together. I like to soften the butter beforehand so it’s easier to spread—trust me, this is a game-changer for that marbled effect. You can also add nuts or dried fruit if you’re feeling fancy.
Step 6: Layer & Swirl
Pour half of the batter into your pan, spreading evenly. Dot spoonfuls of the cinnamon-sugar mixture across the surface, then pour the rest of the batter on top. Using a knife or skewer, swirl through the batter, creating pretty marbled patterns—try to keep it gentle so the layers stay distinct but look like a piece of art.
Step 7: Bake
Pop it into your preheated oven and bake for about 35-40 minutes. You’ll know it’s done when a toothpick inserted in the center comes out clean. If the top browns too fast, just cover loosely with foil—this cake is forgiving. Every oven is different, so keep an eye on it after 30 minutes.
Step 8: Cool & Glaze
Let the cake cool in the pan for about 15 minutes, then transfer to a wire rack. When it’s just warm, drizzle your glaze over the top. It’ll set nicely as it cools, giving that shiny, tempting finish. I usually make the glaze quickly by mixing powdered sugar, milk, and vanilla, then adjust the thickness until it’s pourable but not runny.
Step 9: Slice & Serve
This cake is best enjoyed slightly warm or at room temperature. Slice with a serrated knife to get clean edges—trust me, patience is key here. Serve with a dollop of whipped cream or a cup of coffee—either way, it’s a cozy, satisfying moment. The swirl pattern will catch everyone’s eye, and the aroma alone will make you feel like a baking hero.
What to Serve It With
This zucchini carrot swirl cake makes a lovely addition to any occasion. For breakfast, pair it with a strong cup of coffee or a chai latte; a simple dollop of Greek yogurt on the side adds a creamy touch. It’s fabulous for brunch, especially if you add a few slices of fresh fruit or a handful of nuts on top. I’ve served it after dinner too—warmed up and topped with a scoop of vanilla ice cream or a drizzle of extra glaze—instant comfort food. Don’t forget, it’s perfect for snacks! My family loves to pack a slice into school lunchboxes or grab it with tea in the late afternoon. The kids especially love the swirl pattern—they think it’s like magic every time they see the pattern emerge. It’s just one of those recipes that feels homemade and special without any fuss.
Top Tips for Perfecting Your Zucchini Carrot Swirl Cake
Every time I make this, I discover little tricks that improve the outcome. Here are some secrets I swear by:
Zucchini Prep: Always squeeze out excess moisture after grating. I keep a clean dish towel nearby and give the shreds a good press—nothing worse than a soggy cake. Fresh zucchini works best; frozen tends to release extra water, so if you’re using frozen, make sure you squeeze really well or reduce the moisture in your batter.
Mixing Advice: Overmixing the batter is the fastest way to dense cake. Fold gently, and don’t worry if the batter looks a little lumpy—those bits of zucchini and carrot add texture and flavor. Just watch for streaks of flour, and stop mixing as soon as they disappear.
Swirl Customization: For prettier patterns, spread the cinnamon-sugar mixture sparingly—but evenly—so that the swirl stands out. You can even add a few drops of food coloring to some of the batter for a fun, colorful twist. Remember, the swirl should look natural—so don’t overdo it.
Ingredient Swaps: I’ve tried coconut oil and even butter—both work well, but I always prefer olive oil for a more subtle, fruity note. You can swap the brown sugar for honey or maple syrup, but keep an eye on the liquid quantities. Nut toppings or dried cranberries also jazz up the flavor profile if you’re feeling adventurous.
Baking Tips: If your oven runs hot, turn the temperature down slightly or bake a little longer. Use a toothpick test frequently—if it comes out sticky, keep baking. The cake is ready when the edges are golden and pulling away slightly from the pan. Also, position your rack in the middle for even heat distribution.
Glaze Variations: For a citrus zing, add some lemon or orange zest to your glaze. Or, sprinkle powdered sugar on top instead for a more delicate, snowy finish. You can also drizzle melted chocolate for an extra decadent treat. The key is to pour while the cake is still warm—so the glaze seeps into every nook and cranny.
This one’s a lifesaver on busy nights because I know I can whip it up in less than an hour, and it’s guaranteed to put smiles on everyone’s faces. Over the years, I’ve learned that imperfect swirl patterns still taste fantastic—and that’s what matters most. Plus, the aroma in my kitchen when it’s baking is worth every second of effort. Just trust your instincts, don’t overthink it, and remember: taste wins every time.
Storing and Reheating Tips
Because I’ve been known to slice into this cake even when it’s still a bit warm, I’ve become pretty good at storing leftovers. Here’s what I do:
Room Temperature: If you’re planning to eat it within a day or two, cover it with a clean tea towel or plastic wrap, and keep it on the counter. It’s best consumed within 24 hours to keep that fresh moisture—after that, it might start to dry out.
Refrigerator Storage: For longer storage, wrap the cake tightly in plastic wrap or keep it in an airtight container. It’ll stay fresh for up to 4 days. Before serving again, I usually warm a slice in the microwave for about 20 seconds—just enough to soften it—but you can also enjoy it cold if you prefer.
Freezer Instructions: Wrap individual slices in plastic wrap, then place in a freezer bag. It’s good for up to 3 months. When you’re ready to eat, thaw at room temperature or warm in the microwave. The flavor and moisture are best preserved this way, and the swirl pattern remains adorable even after freezing.
Glaze Timing: If the cake gets stored for a few days, I usually add fresh glaze just before serving—this keeps it glossy and vibrant. But if you’re short on time, the glaze is great to spread on while the cake is still slightly warm to absorb all that sweet goodness.
Frequently Asked Questions
Final Thoughts
This zucchini carrot swirl cake is one of those recipes I keep coming back to because it’s so beloved in my family. It’s rustic, wholesome, and surprisingly elegant for how simple it is to make. Every bite brings a hint of nostalgia and comfort, and the swirl pattern makes it feel special—like a little bit of magic in the oven. Whether I’m preparing it for a quick weeknight dessert, a breakfast treat, or an unexpected guest visit, it never fails to make everyone smile. The secret is in the combination of fresh veggies and warm spices—an unbeatable duo. I encourage you to give this a try, tweak it to your taste, and most importantly, enjoy the process. Cooking isn’t just about food—it’s about sharing love, creating memories, and making your home smell like happiness. Happy baking! And I can’t wait to hear how yours turns out—leave a comment below or share your variations with me!
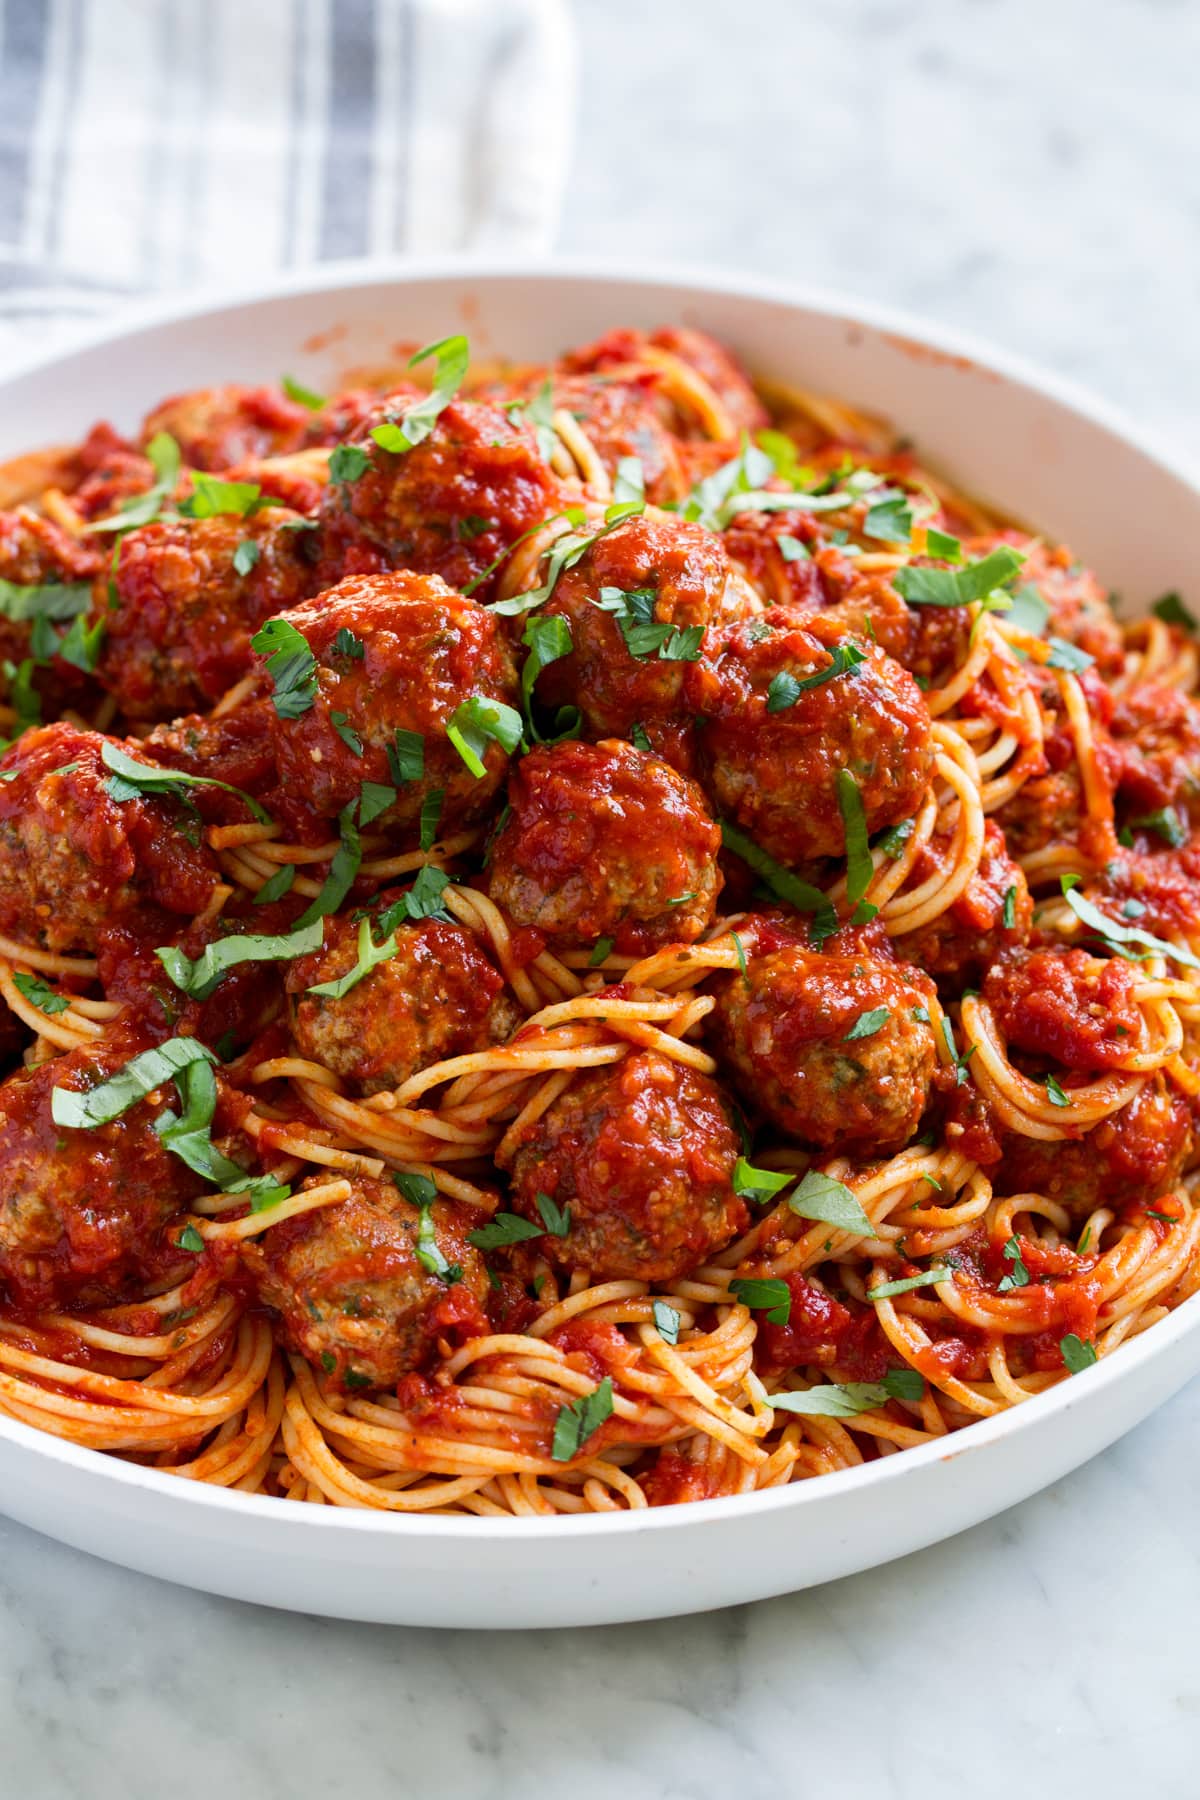
Italian Meatballs
Ingredients
Method
- In a large mixing bowl, stir together the bread crumbs and milk. Add more milk, 1 tablespoon at a time, until the bread crumbs are fully moistened. Let this mixture rest while you prepare the other ingredients, or for at least 5 minutes.
- To the breadcrumb mixture, add the ground beef, ground pork, eggs, minced onion, minced garlic, chopped basil, parsley, oregano, and Parmesan cheese. Season evenly over the top of the ingredients with salt and pepper.
- Gently toss the mixture with your fingertips until all ingredients are evenly incorporated. Be careful not to overmix.
- With greased hands, shape the mixture into even-sized meatballs, about 1 1/4 inches in diameter (approximately 38g each).
- Preheat your oven to 400°F (200°C).
- Lightly spray two dark-coated, non-stick baking sheets with non-stick cooking spray or brush them with olive oil.
- Place the formed meatballs on the prepared baking sheets, fitting about 20 meatballs per sheet, ensuring they are spaced evenly apart. Bake in the upper and lower thirds of the oven for 10 minutes.
- Remove the baking sheets from the oven. If the bottoms are already browned, carefully turn the meatballs (use a thin metal spatula to help scrape them from the baking sheet). Transfer the pans to opposite racks and continue baking until the meatballs are cooked through and register 165°F (74°C) in the center, about 8-12 minutes longer.
- Stir the baked meatballs into warmed marinara sauce. For even more tender meatballs, you can simmer them in the sauce on low heat for an additional 10-20 minutes, tossing gently occasionally.
- Pour 3/4 cup of olive oil into a 12-inch non-stick skillet and heat over medium heat.
- Cook the meatballs in batches (to avoid overcrowding the pan) until golden brown on the bottom, about 4-6 minutes. Turn them to the opposite side and cook until golden brown. Transfer the fried meatballs to paper towels to drain.
- Transfer the fried meatballs to warmed marinara sauce in a large pot, submerging them in the sauce. Cover and simmer over low heat until the meatballs reach an internal temperature of 165°F (74°C), gently tossing occasionally, for about 15-20 minutes.