Easy Crockpot Chicken Tacos Recipe
You know those days? The ones where you just need something warm, sweet, and ridiculously comforting? For me, that’s often a slice of really good zucchini bread. But let’s be honest, sometimes baking a whole loaf feels like a mission. That’s where these zucchini bread swirl muffins come in. They’re like the best hug in muffin form. I swear, the smell alone when these are baking fills the whole house with this cozy, nostalgic aroma that just makes everything feel right. My kids, bless their hearts, gobble these up faster than I can even get them on a plate, and honestly, I can’t blame them. They’re moist, they’re bursting with that classic cinnamon-sugar swirl, and the zucchini? It just melts away, leaving nothing but pure deliciousness and that amazing tender crumb. This recipe is my go-to when I’m craving something a little special but don’t have hours to spend in the kitchen. They’re even better than a traditional loaf, in my humble opinion, because you get that perfect ratio of fluffy muffin to gooey swirl in every single bite. Think of them as a shortcut to pure baking joy!
What are Zucchini Bread Swirl Muffins?
So, what exactly *are* zucchini bread swirl muffins? Imagine your favorite, moist, tender zucchini bread – the kind packed with cinnamon and maybe a hint of nutmeg. Now, take that incredible flavor and texture, but give it a fun, swirled makeover and bake it into perfectly portioned muffins. It’s essentially the essence of zucchini bread concentrated into a grab-and-go treat. The “swirl” part is key here; it’s a simple mixture of butter, flour, sugar, and spices that gets layered into the batter, creating these gorgeous ribbons of pure cinnamon-sugar bliss throughout the muffin. It’s not complicated at all, but it adds this whole other dimension of flavor and visual appeal. They’re less about being a ‘health food’ (though the zucchini does add some goodness!) and more about being a delightful, homey baked good that’s perfect for any time of day. If you’ve ever loved zucchini bread, you’re going to adore these. They’re familiar, yet somehow, a little bit more exciting!
Why you’ll love this recipe?
Honestly, where do I even begin with why you’ll fall head over heels for these muffins? First off, the flavor is just out of this world. You get the subtle, earthy sweetness from the zucchini that keeps everything incredibly moist, then BAM! You hit a pocket of that cinnamon-sugar swirl, and it’s pure magic. It’s like a little surprise party in your mouth with every bite. And speaking of moist, these are unbelievably tender. The zucchini is the secret weapon here; it acts as a natural moisture retainer, making sure these muffins are never dry.
Then there’s the simplicity. I know baking can seem daunting, but this recipe is incredibly forgiving. Even if you’re new to baking, you can totally nail this. It’s one of those ‘lifesaver’ recipes for busy mornings or when you need a quick dessert. Plus, let’s talk about cost! Zucchini is usually pretty inexpensive, especially when it’s in season, and the rest of the ingredients are pantry staples. You get a whole batch of deliciousness without breaking the bank.
And the versatility! I love them as is, but you can totally add in chopped nuts like walnuts or pecans for extra crunch, or even some chocolate chips if you’re feeling decadent. They’re perfect for breakfast, a mid-afternoon snack, or even a simple dessert after dinner. Honestly, what I love most is how they feel like a treat without being overly fussy. They’re comforting, crowd-pleasing, and just bring a smile to everyone’s face. If you’ve ever loved my classic banana bread recipe, you’ll find a similar cozy vibe here, but with that irresistible cinnamon swirl twist.
How do I make Zucchini Bread Swirl Muffins?
Quick Overview
This recipe is all about creating a wonderfully moist muffin base and then swirling in a sweet, spiced cinnamon-sugar mixture for bursts of flavor. You’ll simply combine your dry and wet ingredients separately, then gently fold them together. While that bakes, you’ll whip up a quick, crumbly topping that gets swirled in just before baking. The whole process is straightforward, focusing on simple steps to achieve maximum deliciousness. It’s a foolproof way to get those bakery-quality muffins right in your own kitchen, and the results are consistently amazing!
Ingredients
For the Main Batter:
This is where all the goodness comes from. You want to use fresh, medium-sized zucchini – they have the best moisture content and flavor without being too watery. I usually grate mine on the larger side of the box grater; no need to peel them, the skin adds a nice little color and texture. You’ll need about 2 cups of packed, grated zucchini. For the flour, all-purpose is my go-to. Make sure you spoon it into your measuring cup and level it off, rather than scooping directly from the bag, to avoid too much flour. For the sugars, I use a mix of granulated and brown sugar; the brown sugar adds a lovely depth of flavor and extra moisture. And for the wet ingredients, make sure your eggs are at room temperature – they incorporate much better. A splash of vanilla extract and a little milk (whole milk makes it extra rich, but I’ve tested this with almond milk and it actually made it even creamier!) rounds out the batter.
For the Filling:
This is the star of the swirl! It’s ridiculously simple: softened butter, packed brown sugar (it gives a deeper caramel flavor), and plenty of cinnamon. That’s it! You want the butter to be soft enough to mix easily, but not melted. Some people add a pinch of nutmeg here too, and I won’t lie, it’s a nice touch if you’re feeling fancy. This mixture will be a bit crumbly, which is exactly what you want for that perfect swirl effect.
For the Glaze:
Optional, but highly recommended for that extra touch of sweetness and visual appeal! It’s just powdered sugar, a tiny bit of milk or cream, and a dash of vanilla. The key here is consistency. You want it thick enough to hold its shape but thin enough to drizzle. I usually start with a tablespoon of liquid and add more *just* until it reaches that perfect, pourable consistency. If you accidentally make it too thin, just whisk in a little more powdered sugar.
Step-by-Step Instructions
Step 1: Preheat & Prep Pan
First things first, get that oven preheated to 375°F (190°C). This is a pretty standard muffin temperature, and it helps them get a nice golden-brown top. While the oven is heating up, grab your muffin tin. I like to use silicone liners or grease and flour each cup really well. If you’re using paper liners, I find that greasing the pan *underneath* the liners helps prevent them from sticking too much. Trust me, nobody likes a muffin stuck to its paper!
Step 2: Mix Dry Ingredients
In a medium bowl, whisk together your all-purpose flour, baking soda, baking powder, salt, and cinnamon. Giving these a good whisk beforehand ensures that your leavening agents (baking soda and powder) are evenly distributed. This is super important for getting a nice, even rise on your muffins. No one wants a muffin with a giant air bubble in one spot and a dense patch in another, right? Make sure there are no clumps of baking soda or powder hiding in there.
Step 3: Mix Wet Ingredients
In a separate larger bowl, you’re going to beat together your softened butter and both sugars until they’re light and fluffy. This step incorporates air, which contributes to the muffin’s tender texture. Then, beat in your eggs, one at a time, making sure each is fully incorporated before adding the next. Stir in your vanilla extract and your grated zucchini. Give it a good stir until everything is well combined. Don’t worry if the mixture looks a little lumpy from the zucchini – that’s totally normal.
Step 4: Combine
Now, you’re going to add your dry ingredients to your wet ingredients. The key here is to mix *just* until combined. Overmixing is the enemy of tender muffins! You’ll still see a few streaks of flour, and that’s perfectly fine. Overmixing develops the gluten in the flour, which can make your muffins tough and chewy instead of light and tender. So, be gentle and mix only until you don’t see big pockets of dry flour anymore. It’s better to slightly undermix than to overmix.
Step 5: Prepare Filling
In a small bowl, combine the softened butter, brown sugar, and cinnamon for the swirl. Use a fork or a small spatula to mix it all together until it forms a thick, crumbly paste. This is your flavor bomb! You can taste it (if you dare!) to make sure the cinnamon-sugar ratio is to your liking. I usually find this ratio to be perfect, but you can always add a pinch more cinnamon if you’re a big cinnamon fan like me.
Step 6: Layer & Swirl
Here’s where the magic happens! Fill your prepared muffin cups about two-thirds full with the batter. Then, dollop about a teaspoon of the cinnamon-sugar filling on top of the batter in each cup. Use a toothpick or a skewer to gently swirl the filling into the batter. You don’t need to do anything fancy; just a few gentle passes will create those beautiful ribbons. Be careful not to over-swirl, or you’ll end up with just one homogenous color instead of distinct swirls. I like to make a couple of loops and then call it good. It’s more about the marbling effect than a perfect pattern.
Step 7: Bake
Pop those beautiful muffins into your preheated oven. Bake for about 18-22 minutes, or until a toothpick inserted into the center of a muffin comes out clean. The exact baking time can vary depending on your oven, so keep an eye on them. You’re looking for a nice golden-brown color on top. If you notice the tops browning too quickly, you can loosely tent them with foil for the last few minutes of baking.
Step 8: Cool & Glaze
Once they’re out of the oven, let the muffins cool in the tin for about 5-10 minutes. This helps them set up properly. Then, carefully transfer them to a wire rack to cool completely. If you’re adding the glaze, now’s the time to whisk it up! Once the muffins are completely cool, drizzle the glaze over the tops. I like to do this in a zig-zag pattern. It adds that extra bit of sweetness and makes them look so pretty!
Step 9: Slice & Serve
These are best served fresh, either with or without the glaze. When they’re warm, the swirl is extra gooey and delightful. They’re perfect for a casual breakfast with a cup of coffee, or as a satisfying afternoon pick-me-up. The texture is so lovely – tender, moist, and packed with that cinnamon-sugar goodness. Enjoy every single bite!
What to Serve It With
These zucchini bread swirl muffins are honestly wonderful on their own, but they also play really well with a few other things, depending on the occasion. For a quick and easy breakfast, I just grab one (or two!) with my morning coffee. The cinnamon spice is just the perfect way to start the day. If I’m feeling a bit more ambitious for brunch, I’ll serve these alongside some fresh fruit salad – the vibrant colors of berries and melon look fantastic next to the muffins. A small dollop of Greek yogurt or a drizzle of honey on the side can also elevate them for a slightly more elegant presentation.
As a dessert, these are surprisingly satisfying. They’re sweet enough to feel like a real treat, especially with that cinnamon swirl. I often serve them with a scoop of vanilla bean ice cream – the warm muffin and cold ice cream is a classic combination for a reason! They also pair beautifully with a slightly tart fruit compote, like raspberry or cherry. And for those cozy evenings when you just need a little comfort food, these are perfect. I’ll sometimes have one with a warm glass of milk, or even a small cup of hot chocolate. My kids love them after school with a glass of milk, and honestly, I find myself reaching for one with my afternoon tea more often than I’d like to admit! They’re just so incredibly versatile and always hit the spot.
Top Tips for Perfecting Your Zucchini Bread Swirl Muffins
Over the years, I’ve learned a few little tricks that make these zucchini bread swirl muffins absolutely sing. First, about the zucchini prep: make sure you really squeeze out as much moisture as you can from the grated zucchini. I usually do this in a clean tea towel or cheesecloth after grating. The less water in the batter, the less chance of a gummy muffin and the better the texture will be. Don’t skip this step! It makes a huge difference.
When it comes to mixing the batter, remember that gentle is best. Seriously, I always do this when I’m feeling a bit rushed – just mix until you don’t see dry flour anymore. It’s better to have a few little lumps than to overwork the batter. Overmixing is probably the most common mistake people make with muffins, and it leads to tough baked goods. So, less is more here!
For the swirl, don’t go overboard. A few gentle passes with a toothpick is all you need to create those beautiful patterns. If you swirl too much, you’ll just muddy the colors and lose the distinct ribbons of cinnamon-sugar goodness. Think of it as adding beautiful streaks, not trying to paint a masterpiece.
Ingredient swaps are totally possible! If you don’t have brown sugar for the swirl, you can use granulated sugar, but the flavor won’t be quite as deep. For a healthier twist, I’ve tried using whole wheat flour in combination with all-purpose flour (about half and half), and it works nicely, though the muffins might be a bit denser. You can also add nuts like walnuts or pecans to the batter for extra texture and flavor – about a cup chopped is usually perfect.
Baking is always a bit of an art form. Make sure your oven is properly preheated. I always use the middle rack. If your oven tends to run hot, you might want to reduce the temperature by 10-15 degrees Fahrenheit. To test for doneness, the toothpick test is your best friend. It should come out clean, with maybe a few moist crumbs attached, but no wet batter.
And for the glaze, it’s all about getting that consistency right. If it’s too thick, add a tiny bit more liquid, a teaspoon at a time. If it’s too thin, add a little more powdered sugar. You want it to be drizzly but not watery. This is perfect when you’re craving something sweet at 10pm but don’t want to bake a whole cake; the glaze just takes it to the next level of deliciousness!
Storing and Reheating Tips
One of the best things about these muffins is how well they keep. If you can resist eating them all at once, that is! For room temperature storage, I usually keep them in an airtight container. They’ll stay fresh and delicious for about 2-3 days. Make sure they’re completely cooled before you put them away, otherwise, you might get some condensation, which can make them soggy.
If you need them to last a bit longer, the refrigerator is your friend. They’ll keep well in an airtight container for up to a week. When you take them out of the fridge, they can be a little firm, but don’t worry! They perk right back up. I usually pop them in the microwave for about 15-20 seconds, or just let them sit at room temperature for a bit, and they’re good as new.
And for the ultimate make-ahead solution, these muffins freeze beautifully! Once they’re completely cooled, I wrap each muffin individually in plastic wrap, then pop them all into a freezer-safe bag or container. They’ll stay perfectly good in the freezer for up to 3 months. When you’re ready to enjoy one, just take it out of the freezer and let it thaw at room temperature for an hour or two. You can also pop them in the microwave for a slightly longer burst (about 30-45 seconds) if you want them warm.
Glaze timing advice is important here: if you plan on storing them for more than a day, I often recommend glazing them *after* they’ve thawed or just before serving. If you glaze them and then store them in the fridge or freezer for too long, the glaze can sometimes get a little sticky or absorb moisture. However, if you’re just storing them at room temperature for a day or two, glazing them right after they’ve cooled is totally fine and they look so pretty!
Frequently Asked Questions
Final Thoughts
So there you have it – my absolute favorite zucchini bread swirl muffins. These aren’t just muffins; they’re little bites of pure comfort that bring joy to my kitchen and my family. They’re proof that sometimes, the most delicious treats come from the simplest ingredients and a little bit of love. They’re surprisingly easy, incredibly moist, and that cinnamon-sugar swirl? It’s just the cherry on top, or rather, the swirl in the muffin! If you’re looking for a recipe that’s both satisfying and a little bit special, I truly hope you give these a try.
If you love these, you might also enjoy my classic zucchini bread recipe, or perhaps my banana nut muffins for another cozy baking option. I can’t wait to hear what you think of these! Please, leave a comment below and let me know how yours turned out, or if you have any fun variations you tried. Sharing our baking adventures is what it’s all about, right? Happy baking, everyone!
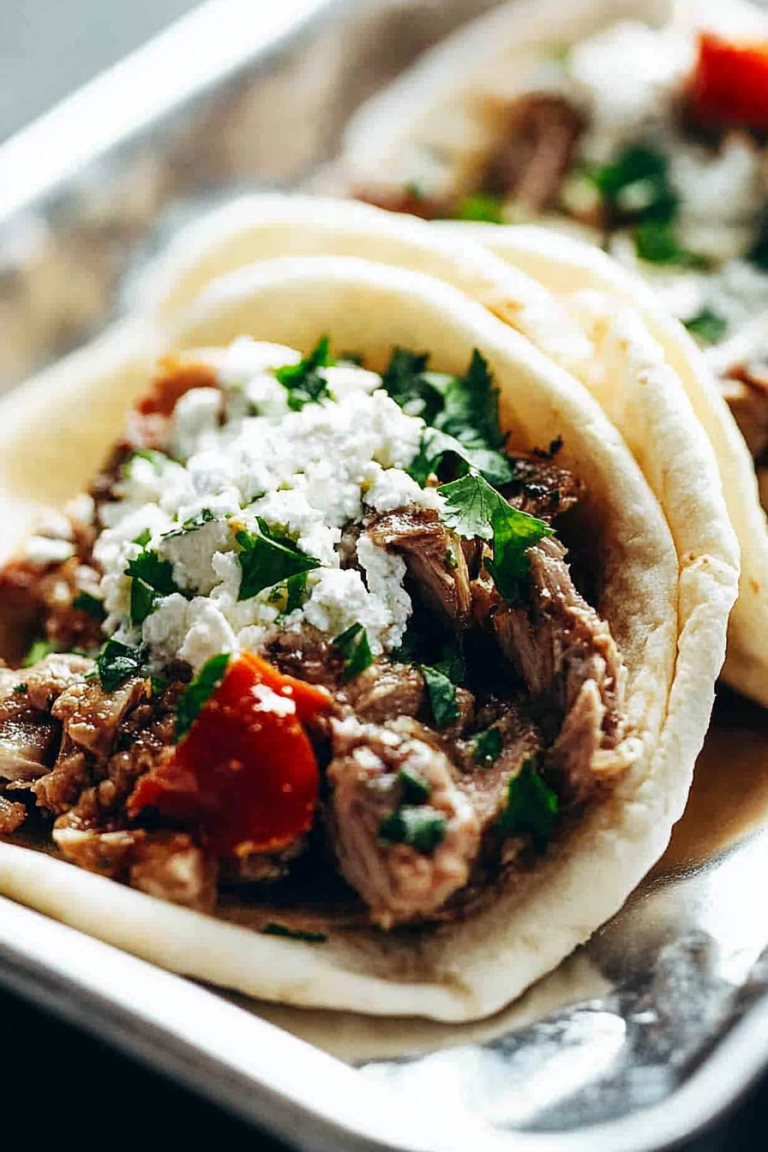
Slow Cooker Chicken Tacos
Ingredients
Method
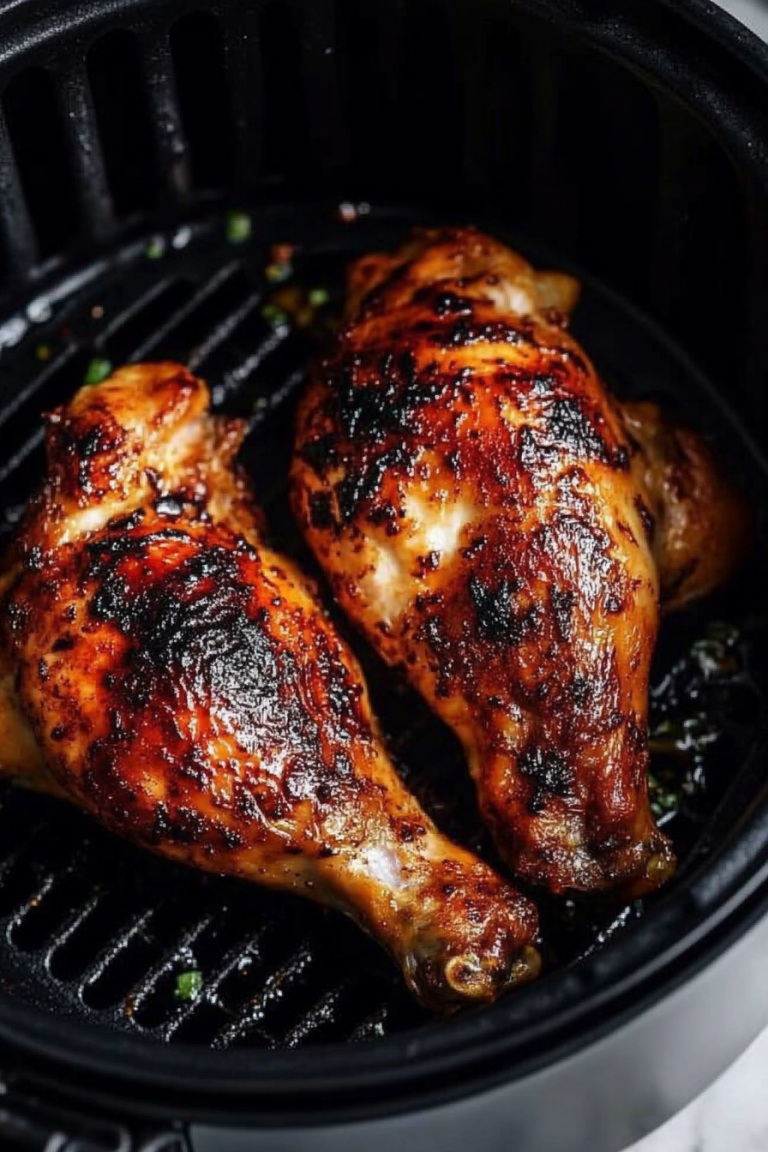
- Season the chicken with adobo (or salt), then place in the crock pot and top with garlic powder and cumin.
- Top chicken with salsa (no water needed).
- Cover and cook LOW for 4 to 6 hours, until chicken shreds easily.
- When cooked, drain excess liquid from the pot keeping as much as the tomato sauce as possible and shred with two forks. Cover and keep warm until ready to eat.
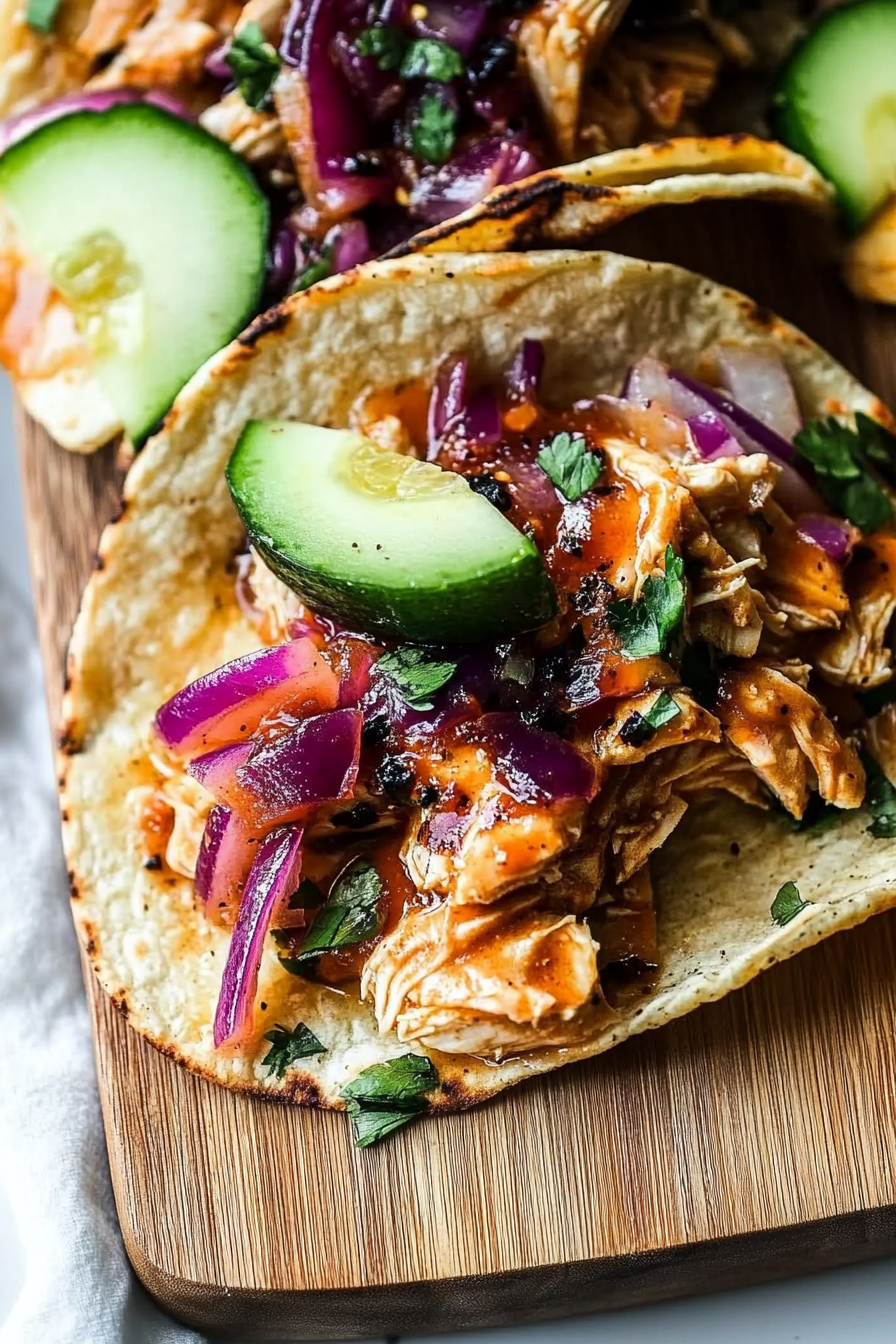
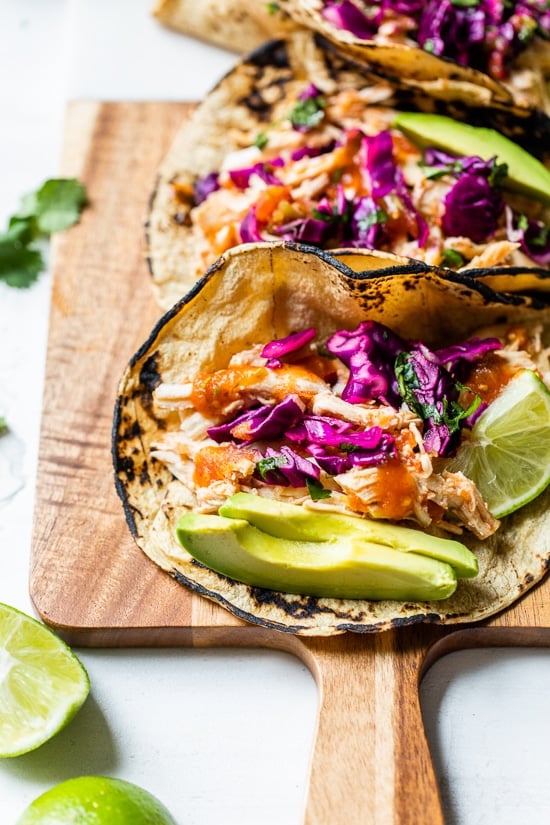
- Make the slaw: combine cabbage, lime juice, cilantro and salt in a bowl and toss.
- Heat the tortillas about 30 seconds on each side over the flame of your stove until slightly charred, transfer to a plate with a towel on top to keep warm and repeat with the remaining tortillas.
- To serve, place 3 tortillas on each plate, top with chicken, slaw, sliced avocado and serve with lime wedges.