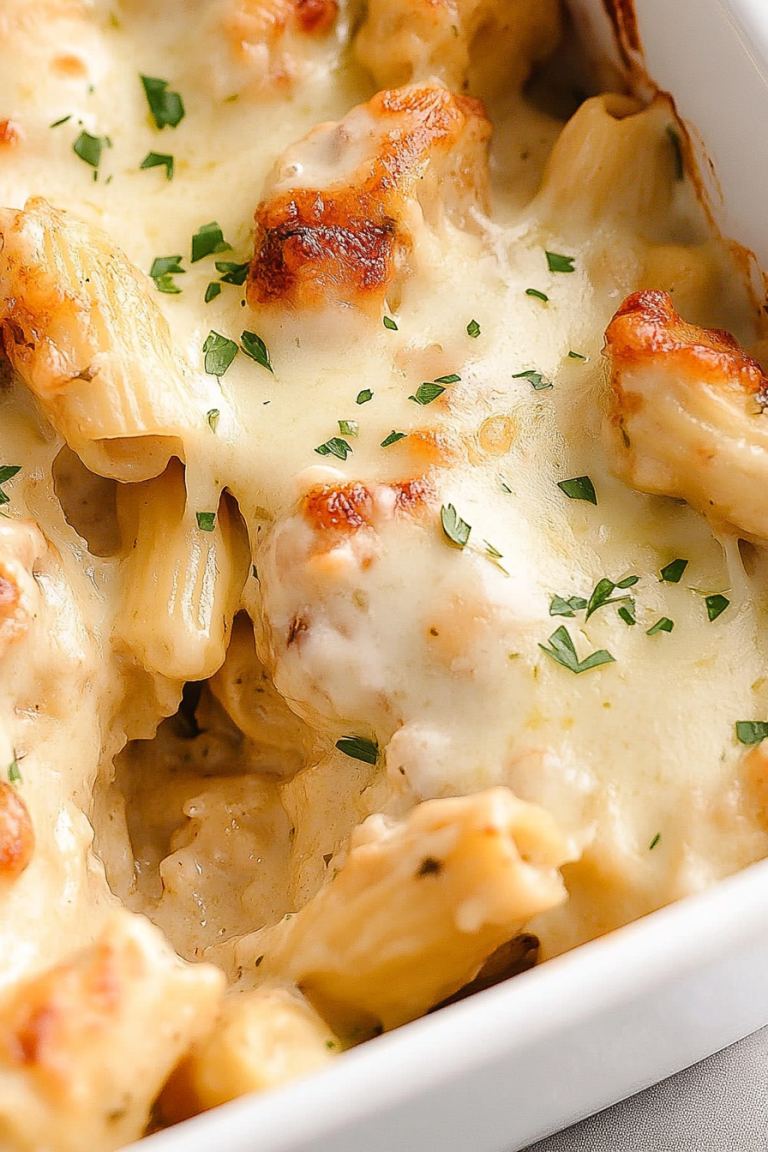
Easy Cheesy Broccoli Chicken Dinner
There’s something about summer zucchinis that awakens my childhood memories—running barefoot in the garden, plucking fresh produce, and sneaking bites before dinner. I’ve always loved the versatility of zucchini, especially when it’s used in a way that feels indulgent but still light. These zucchini crumble bars? Oh, they’re a game changer. Think of them as a cross between a spicy, moist cake and a crumbly, buttery streusel topped with a shiny glaze. Trust me, I’ve tested this recipe dozens of times, and my family—especially my kids—ask for it all the time. It’s perfect when you want something sweet but don’t want to fuss with complicated baking. I always do this when I have leftover zucchinis from the garden, or even when I just crave a treat that’s a little different from the usual lined-up cookies. The smell alone when they bake will bring everyone to the kitchen, and I swear, these disappear in minutes at my house!
What is a Zucchini Crumble Bar?
Think of zucchini crumble bars as a delightful mashup of fresh garden bounty and cozy dessert. They’re essentially moist zucchini-spiced cake layered beneath a crunchy, buttery crumble topping, all finished with a sweet glaze—kind of like a coffee cake with a healthy twist. It’s a recipe that’s roots are deep in family traditions, inspired by childhood favorites and my own experiments with vegetable-based sweets. The name might sound a little strange, but once you taste one, you’ll realize it’s all about celebrating the humble zucchini in a completely unexpected way. These bars are a wonderful way to sneak nutritious veggies into a treat, making them perfect for breakfast, brunch, or a quick snack. The best part? They’re surprisingly simple to whip up, even on busy weeknights when the kids are begging for dessert but I don’t want to turn on the oven for hours.
Why you’ll love this recipe?
What I love most about these zucchini crumble bars is how they balance flavor and texture so perfectly. The zucchini keeps the cake incredibly moist—so moist, in fact, that you might forget there’s a vegetable hidden inside! The warm spices like cinnamon and nutmeg give it that cozy, fall-inspired aroma, but the fresh zest of lemon really lifts the flavor to something special. Plus, the crumble topping is my go-to for adding that irresistible crunch—you know, that last bite you keep reaching back for? They’re so easy to make that even if you’re not a seasoned baker, you’ll feel like a pro. And budget-wise, the ingredients are super common: flour, sugar, zucchini, butter. No fancy or obscure stuff here. I’ve also played around with substitutions, and honestly, it turns out just as delicious—like using coconut oil instead of butter for a slightly different flavor or trying honey instead of sugar. What I love most about this is how flexible it is—you can adapt it to what you have on hand, and it always comes out perfect.
This recipe has become a staple in my house because my kids ask for it on repeat. Their favorite part? The gooey glaze on top—they say it’s “like magic.” It’s one of those comfort treats that feels fancy enough for weekend brunch but easy enough for a quick snack after school. Besides, I’ve made it with various toppings like chopped nuts or even a drizzle of melted chocolate, and it’s always a hit. And I promise, once you make this, it’ll be the recipe you turn to when zucchinis are taking over your garden!
How do you make Zucchini Crumble Bars?
Quick Overview
This recipe is a straightforward layering affair. First, you prepare a simple batter with grated zucchini, spices, and a few regular pantry staples. You pour or spread that into a baking dish, then sprinkle a buttery crumble mixture over the top. Bake until golden and juicy, then finish with a glossy glaze that ties everything together. It’s kind of like assembling a quick, beautiful tart—minus the fuss! The process is forgiving, and the aroma alone makes it totally worth it. The best part? These bars are ready in less than an hour from start to finish, making them perfect for both impulsive dessert emergencies and planned weekend treats.
Ingredients
For the Main Batter:
– 2 cups grated zucchini (about 2 small zucchinis)
– 1 ½ cups all-purpose flour
– ¾ cup granulated sugar
– ½ teaspoon baking powder
– ½ teaspoon baking soda
– 1 teaspoon ground cinnamon
– ½ teaspoon ground nutmeg
– Zest of 1 lemon
– 2 large eggs
– ½ cup melted unsalted butter (or coconut oil for a dairy-free version)
– 1 teaspoon vanilla extract
For the Filling:
– ½ cup brown sugar
– 1 tablespoon all-purpose flour
– 1 teaspoon cinnamon
– Optional: chopped nuts or raisins for added texture and flavor
For the Glaze:
– 1 cup powdered sugar
– 2-3 tablespoons milk or lemon juice
– A dash of vanilla (optional)
Step-by-Step Instructions
Step 1: Preheat & Prep Pan
Set your oven to 350°F (175°C). Grease a 9×9-inch baking dish with butter or line it with parchment paper—trust me, this makes clean-up so much easier! While the oven heats up, grate the zucchinis and sprinkle them with a pinch of salt, then set aside for about 10 minutes. This helps draw out excess moisture, so your bars stay nice and firm rather than soggy.
Step 2: Mix Dry Ingredients
In a large bowl, whisk together the flour, sugar, baking powder, baking soda, cinnamon, nutmeg, and lemon zest. This dry mix is your flavor base. I always do this first to make sure everything’s well combined, so no clumps sneak in later.
Step 3: Mix Wet Ingredients
In a separate bowl, beat the eggs, then add the melted butter (or coconut oil), vanilla, and the drained zucchini. Mix until smooth. The zucchini might look a little wetter than you expect, but that’s perfect—it keeps the final texture super moist and tender.
Step 4: Combine
Pour the wet ingredients into the dry and gently fold until just combined. Don’t overmix here—that’s a trick I used to learn the hard way. Overmixing can make the cake dense, so fold just until the streaks disappear. At this point, check the batter—if it feels too thick, a splash of milk will loosen it up.
Step 5: Prepare Filling
In a small bowl, mix the brown sugar, flour, and cinnamon. If you want to add nuts or raisins, fold them into this sweet mixture. This layer adds contrast and some delightful bites of crunch.
Step 6: Layer & Swirl
Spread half of the batter evenly into your prepared pan. Sprinkle the filling evenly over, then dollop the remaining batter on top. Using a toothpick or a butter knife, swirl gently through the batter to create a marbled effect—this gives the bars that beautiful, rustic look and adds flavor depth.
Step 7: Bake
Pop the dish into your preheated oven and bake for about 30-35 minutes. You’ll know they’re ready when the top is golden brown, and a toothpick inserted in the center comes out clean. Remember, your oven might run a little hot or cold, so start checking at the 30-minute mark.
Step 8: Cool & Glaze
Let the bars cool in the pan for at least 15 minutes—this helps them set. Meanwhile, mix your powdered sugar with milk or lemon juice to make a smooth, pourable glaze. Once cooled, drizzle generously over the top. The glaze sets within a few minutes, adding that shiny, irresistible finish.
Step 9: Slice & Serve
Use a sharp knife to cut into squares or rectangles. For cleaner cuts, wipe the blade between slices. Serve them warm with a cup of coffee or tea, or straight from the fridge if you prefer a firmer texture. These bars are lovely on their own but also taste amazing with a dollop of whipped cream or a scoop of vanilla ice cream if you’re feeling fancy.
What to Serve It With
Honestly, these bars are such a versatile treat they don’t need much fuss. I love serving them warm with a splash of extra lemon glaze—something about the tang balances the sweetness perfectly. For breakfast, pair them with a strong brew of coffee or tea, maybe add a dollop of Greek yogurt on the side. They’re also fantastic as a brunch dessert, stacked high on a pretty platter with fresh berries and a dusting of powdered sugar. At family dinners, I often plate slices with a tiny scoop of vanilla ice cream or a drizzle of chocolate syrup for a little extra indulgence. And on cozy weekend mornings, my kids grab a bar, a glass of milk, and settle in with a good book. The flavors get even better the next day—trust me, I’ve snacked on leftovers straight from the fridge!
Top Tips for Perfecting Your Zucchini Crumble Bars
After baking these countless times, I’ve gathered some tips that make all the difference:
- Zucchini Prep: Always drain the grated zucchini thoroughly—use a clean kitchen towel or cheesecloth and squeeze out as much moisture as possible. This prevents sogginess and keeps your bars firm.
- Mixing Advice: Fold, don’t stir! Overmixing the batter will give you a dense, rubbery crumb. Gentle folding helps keep the light, tender crumb we’re aiming for.
- Swirl Customization: Feel free to get creative—use a skewer or chopstick to swirl in different patterns, or sprinkle a few extra nuts or chocolate chips on top before baking for a fun twist.
- Ingredient Swaps: I’ve tested these with coconut oil, almond flour, and even honey. They all work well but can alter the texture slightly. For instance, using almond flour results in a denser bar, so tweak accordingly.
- Baking Tips: Always check your bars a few minutes before the timer—baking times can vary based on your oven’s quirks. Keep an eye out for a golden top and a toothpick that comes out clean.
- Glaze Variations: Lemon juice in the glaze adds a refreshing zing, but a splash of vanilla or even a hint of almond extract can elevate the flavor more subtly. Adjust the consistency by adding more powdered sugar for thickness or more milk for drizzling thinly.
From my own experience, the key is patience—let them cool completely before glazing or slicing to maintain that perfect, clean cut. And don’t be tempted to skip the draining step of the zucchini—it’s the secret to avoiding a soggy disappointment. Oh, and if you’re short on time, you can make the crumble topping ahead of time and store it in the fridge. It’s a handy shortcut that I use often, especially when I’ve got a million things going on. Trust me—this is one recipe that’s as forgiving as it is delicious, and once you get the hang of it, you’ll be making it every season. The smell, the taste, and the simple joy of pulling these out of the oven… it’s cozy baking at its best.
Storing and Reheating Tips
These bars keep surprisingly well—mainly because of the zucchini’s moisture content. If you’re not eating them all immediately, store the leftover bars in an airtight container at room temperature for up to 2 days. Just cover the dish well or keep slices in a sealed container; they’ll stay moist and flavorful for that time.
For longer storage, refrigerate them in an airtight container for up to a week. I recommend letting them come to room temperature before serving again—they taste even better that way! To reheat, pop a slice in the microwave for about 15–20 seconds or warm in a low oven at 325°F (160°C) for a few minutes. The glaze might firm up when cold, so a quick warm-up restores that luscious shine.
If you want to freeze slices, wrap each piece tightly with plastic wrap, then place in a freezer-safe bag or container. They’ll keep for up to 3 months, or until you’re ready for a spontaneous treat. Thaw overnight in the fridge or on the counter for a few hours. Just be sure to add fresh glaze if needed—it’s the finishing touch that makes these bars irresistible every time.
Frequently Asked Questions
Final Thoughts
If you’re still with me, I hope you’re as excited about these zucchini crumble bars as I am. They’re a little bit nostalgic, a little bit creative, and a whole lot delicious. I love how you can customize them—swap spices, add nuts, switch up the glaze—and each batch feels special in its own way. Most importantly, they remind me of home—of summer afternoons, of kids happily munching away, and of simple pleasures that make life sweeter. Once you make these a few times, you’ll find yourself sneaking zucchinis from your garden or farmers market just for an excuse to bake another batch. So go ahead, grab those zucchinis, and get baking! I can’t wait to hear how yours turn out. And if you feel inspired, drop a comment below with your own tweaks—sharing recipes is how we keep the good vibes going. Happy baking!
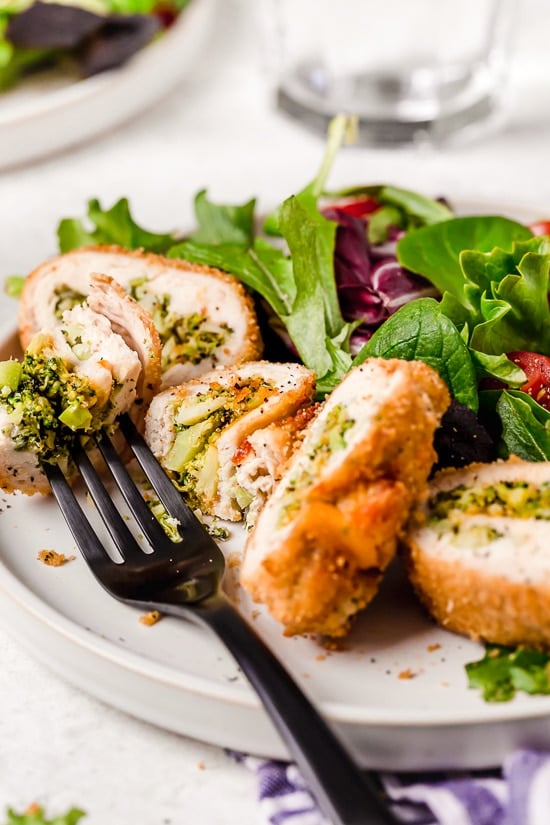
broccoli chicken
Ingredients
Method
- Preheat oven to 425F and spray a baking sheet with oil.
- Microwave broccoli with 1 tablespoon water, cover, and cook 1 minute until soft. Drain and season with 1/4 teaspoon salt.
- In a small bowl, beat egg, water, and a pinch of salt with a fork; set aside. Fill a second bowl with breadcrumbs.
- If chicken isn’t thin enough, pound it flat with wax paper and a mallet. Season both sides with 1/2 teaspoon salt. Place a cheese slice in the center and top with 2 tablespoons broccoli.
- Roll chicken to cover filling, secure with toothpicks if needed.
- Dip chicken rolls into egg wash, then coat with breadcrumbs. Transfer to baking sheet, spray with oil, and bake for 25 minutes. Remove toothpicks before serving.