Easy Baked Feta Pasta Recipe
Honestly, there’s something about biting into a warm slice of zucchini swirl cake that just feels like a hug from an old friend. I remember my grandma baking something similar when I was a kid — that smell of cinnamon and vanilla wafting through the house, making everyone gather around the kitchen counter. Over the years, I’ve tweaked it, played around with the fillings, and now, I can honestly say, this version is my absolute favorite. It’s got the moistness of a loaf but with that luscious swirled ribbon of fruit filling that makes it feel special, even for a quick weekend treat. This one’s a lifesaver on busy nights when you want something comforting but don’t want to spend hours in the kitchen. Plus, the fact that it sneaks in an extra vegetable? Well, let’s just say it’s my kids’ secret weapon to eating more greens!
What is Zucchini Swirl Cake?
Think of zucchini swirl cake as a cozy hybrid — it’s essentially a spiced, moist cake infused with shredded zucchini, finished off with a fruit or cinnamon-spiced filling that swirls beautifully through the batter. The name is pretty straightforward: it’s a cake, but the star hero is zucchini. Sometimes, it’s called a “vegetable cake” at my house, mostly because nobody expects how tender and flavorful it is. The zucchini adds moisture, but when baked, it almost melts into the cake, leaving behind this delicate, subtle sweetness. The swirl or ribbon of fruit or cinnamon filling makes every slice feel like a little celebration, a treat that’s just a tad fancy but so easy to whip up. Think of it as a sneaky way to get everyone eating their greens and enjoying a dessert at the same time.
Why you’ll love this recipe?
What I love most about this zucchini swirl cake is how it strikes that perfect balance between casual comfort and a bit of indulgence. The flavor — a warm combo of cinnamon, vanilla, and hint of nutmeg — is nostalgic and cozy, like something grandma used to bake, but with a modern twist. The texture is just incredible: tender, moist, and with that wonderful swirl of filling that makes each bite interesting and fun. And here’s a bonus — the ingredients are super budget-friendly. No fancy or hard-to-find stuff, just everyday staples, which makes this great for last-minute cravings or any time I want to brighten up a snack with something homemade. Plus, it’s versatile; you can switch out the filling for anything from apples to berries or even chocolate chips, depending on what’s in your pantry. What’s not to love?
How do I make Zucchini Swirl Cake?
Quick Overview
This cake comes together in just a few simple steps. First, you whisk up your dry ingredients, then mix your wet ingredients, fold them gently together to keep that fluffy crumb. The zucchini gets grated and drained lightly (don’t skip that step — excess moisture can turn your batter into a soggy mess!). Then, you pour half the batter into your prepared pan, dollop on the filling, swirl it around with a toothpick or skewer, and finish with the remaining batter. It bakes until golden and a toothpick comes out clean. The best part? The smell that hits your kitchen — cozy, cinnamon-spiced, home-y — will make you wonder why you don’t bake this kind of comfort food every week!
Ingredients
For the Main Batter:
– 2 cups all-purpose flour (I like to use unbleached if I have it for a richer flavor)
– 1 1/2 teaspoons baking powder
– 1/2 teaspoon baking soda
– 1 teaspoon ground cinnamon
– 1/2 teaspoon nutmeg (freshly grated if you can!)
– 1/4 teaspoon salt
– 1/2 cup granulated sugar (trust me on this, it’s enough to keep it sweet but not overly so)
– 1/2 cup light brown sugar (adds depth and richness)
– 1/2 cup neutral oil (like canola or vegetable, but I’ve tested with melted coconut oil, and it’s divine)
– 3 large eggs
– 1 teaspoon vanilla extract
– 1 cup grated zucchini (squeeze out the excess moisture after grating; trust me, the drier, the better!)
For the Filling:
– 1/2 cup fruit preserves (apricot or raspberry work beautifully, but I’ve also used blueberry)
– 1 teaspoon cinnamon
– Optional: 1/4 cup chopped nuts or chocolate chips for texture
For the Glaze:
– 1/2 cup powdered sugar
– 1 tablespoon milk or cream
– 1/4 teaspoon vanilla extract
– Optional: a sprinkle of cinnamon or lemon zest for extra flavor
Step-by-Step Instructions
Step 1: Preheat & Prep Pan
Kick things off by setting your oven to 350°F (175°C). Grease your 9-inch round or square baking pan well — I like to line mine with parchment paper because it makes cleanup a breeze and the cake comes out perfectly. You want everything ready to go because once you start mixing, this comes together fast. Trust me, I’ve learned the hard way — rushing to prepare midway is not fun with sticky batter involved!
Step 2: Mix Dry Ingredients
In a big bowl, whisk together the flour, baking powder, baking soda, cinnamon, nutmeg, and salt. This ensures your leavening is evenly distributed, which is key for a light, fluffy cake. When I first started, I’d forget to do this and ended up with uneven pockets of spice — – lesson learned! The dry ingredients help give the cake its rise and structure, so don’t skip this step.
Step 3: Mix Wet Ingredients
In a separate bowl, beat the eggs, sugars, and oil until smooth and slightly frothy. Then, stir in the vanilla. I’ve tested this with almond milk in place of some eggs, and honestly, it made the cake even creamier! Once combined, gently fold in the grated zucchini, making sure to squeeze out as much moisture as possible beforehand. A dry zucchini makes a big difference in keeping the cake moist without turning it into a soggy mess.
Step 4: Combine
Next, pour the wet ingredients into your dry ingredients and fold gently — don’t overmix! The goal is just to combine everything until no streaks remain. Overmixing can make the cake dense and tough, which is the opposite of what we want. I’ve learned this one the hard way, bunking the gentle folding tip and ending up with a heavier crumb. Be patient and stop when it looks just combined.
Step 5: Prepare Filling
While your batter rests for a minute, mix the fruit preserves with a touch of cinnamon. If you’re feeling adventurous, throw in some chopped nuts or chocolate chips here—my kids actually ask for those extra bits! This filling adds that lovely juicy contrast and an extra layer of flavor to each slice.
Step 6: Layer & Swirl
Pour half the batter into the prepared pan. Dollop spoonfuls of the filling over the batter, then use a skewer or butter knife to swirl it around. Keep it loose — you don’t want to overmix, or you lose the pretty marbled effect. Pour the remaining batter on top and repeat the swirl. When done right, you end up with a wonderful, ribboned look that makes the cake look fancy but is really just easy artistry.
Step 7: Bake
Pop it in the oven and bake for 35-40 minutes, or until the top is golden and a toothpick inserted into the center comes out clean. Every oven is different — I’ve found that my convection oven needs about 5 minutes less, so keep an eye on it as it nears the end. Don’t open the oven door too early — let it set! The smell alone will beckon everyone to the kitchen.
Step 8: Cool & Glaze
Let the cake cool in the pan for about 10 minutes, then transfer to a wire rack. Once fully cooled, mix up your glaze and drizzle it generously over the top. The glaze adds just the right touch of sweetness and a shiny finish. I like to wait until the cake has cooled enough so the glaze doesn’t slide right off, but honestly, a warm drizzle melts into the cake beautifully.
Step 9: Slice & Serve
Use a sharp knife to cut slices cleanly, wiping it off between cuts. I love serving it slightly warm or at room temperature — either way, it’s delicious. My family loves this with a strong cup of coffee or a splash of cold milk. It’s equally good the next day — if it lasts that long! Sometimes, I sprinkle a little extra cinnamon or a dusting of powdered sugar on top for presentation.
What to Serve It With
Honestly, this cake is so versatile, I could go on forever. For breakfast, a slice with your morning coffee or an herbal tea is perfect — the warm cinnamon and zucchini make it feel like a treat and a healthy start all at once. I’ve even served it as part of a brunch spread with Greek yogurt and fresh berries for a more elegant vibe. As a dessert, it’s a cozy choice after dinner, especially when paired with vanilla ice cream or whipped cream. And don’t forget, it’s fantastic with a glass of cold milk or a dollop of honey-coated Greek yogurt on the side. At my house, my kids ask for this all the time, especially when they want something sweet but I don’t want to turn on the oven for a big cake. It’s become a family favorite in part because everyone feels like they’re stealing a little bit of sunshine in each bite.
Top Tips for Perfecting Your Zucchini Swirl Cake
Over the years, I’ve picked up a few tricks I’d love to share. First, always squeeze out as much moisture from the zucchini as possible — nobody wants a soggy bottom! I found that using a clean dish towel to gently press the grated zucchini works wonders, and it keeps the batter from getting too runny. When mixing the batter, be gentle — overmixing is one of the quickest ways to make the cake dense. Speaking of the swirl, I’ve found that a toothpick or skewer works better than a knife because it creates a more natural, random pattern. Don’t be afraid to experiment with fillings — apples with cinnamon, berries with lemon zest, or even dulce de leche — the possibilities are endless! I learned that the glaze is best when it’s slightly thick but still pourable — it should settle into the crevices of the cake without sliding off too quickly. Trust me, this cake is all about those little details that turn a good bake into a memorable one.
Storing and Reheating Tips
This cake keeps beautifully for a couple of days at room temperature, covered with a clean towel or in an airtight container. I wouldn’t store it in the fridge for too long, as the moisture tends to make it less tender and more dense — but if you live in a hot climate, refrigeration is your friend. Wrapped tightly in plastic wrap or stored in an airtight container, it’ll last for about 3 days. Freezing is also an option — just wrap it well in plastic wrap and foil, and it’ll keep for a month. Thaw at room temperature or gently reheat slices in the microwave for about 15 seconds for that just-baked feel. If you want to add the glaze afterward, I suggest glazing right before serving for the best glossy finish and fresh flavor. My tip? Reheat it gently so you don’t dry out the cake — it’s all about keeping that moist, tender crumb.
Frequently Asked Questions
Final Thoughts
There’s something about baking this zucchini swirl cake that feels like bringing a little piece of home into my kitchen, and I hope it does the same for you. Whether you’re looking for a cozy afternoon treat, something to share at a brunch, or just a sneaky way to get more veggies into your kids’ diet, this recipe hits the spot. It’s simple, forgiving, and frankly, addictive — the kind of dessert that disappears in minutes at my house. I love how flexible you can be with fillings and toppings, making it your own little masterpiece every time. Try it out, and I’d love to hear how your version turns out! Happy baking, and don’t forget to leave a comment or share your twists — I’m always experimenting myself and eager to swap ideas.
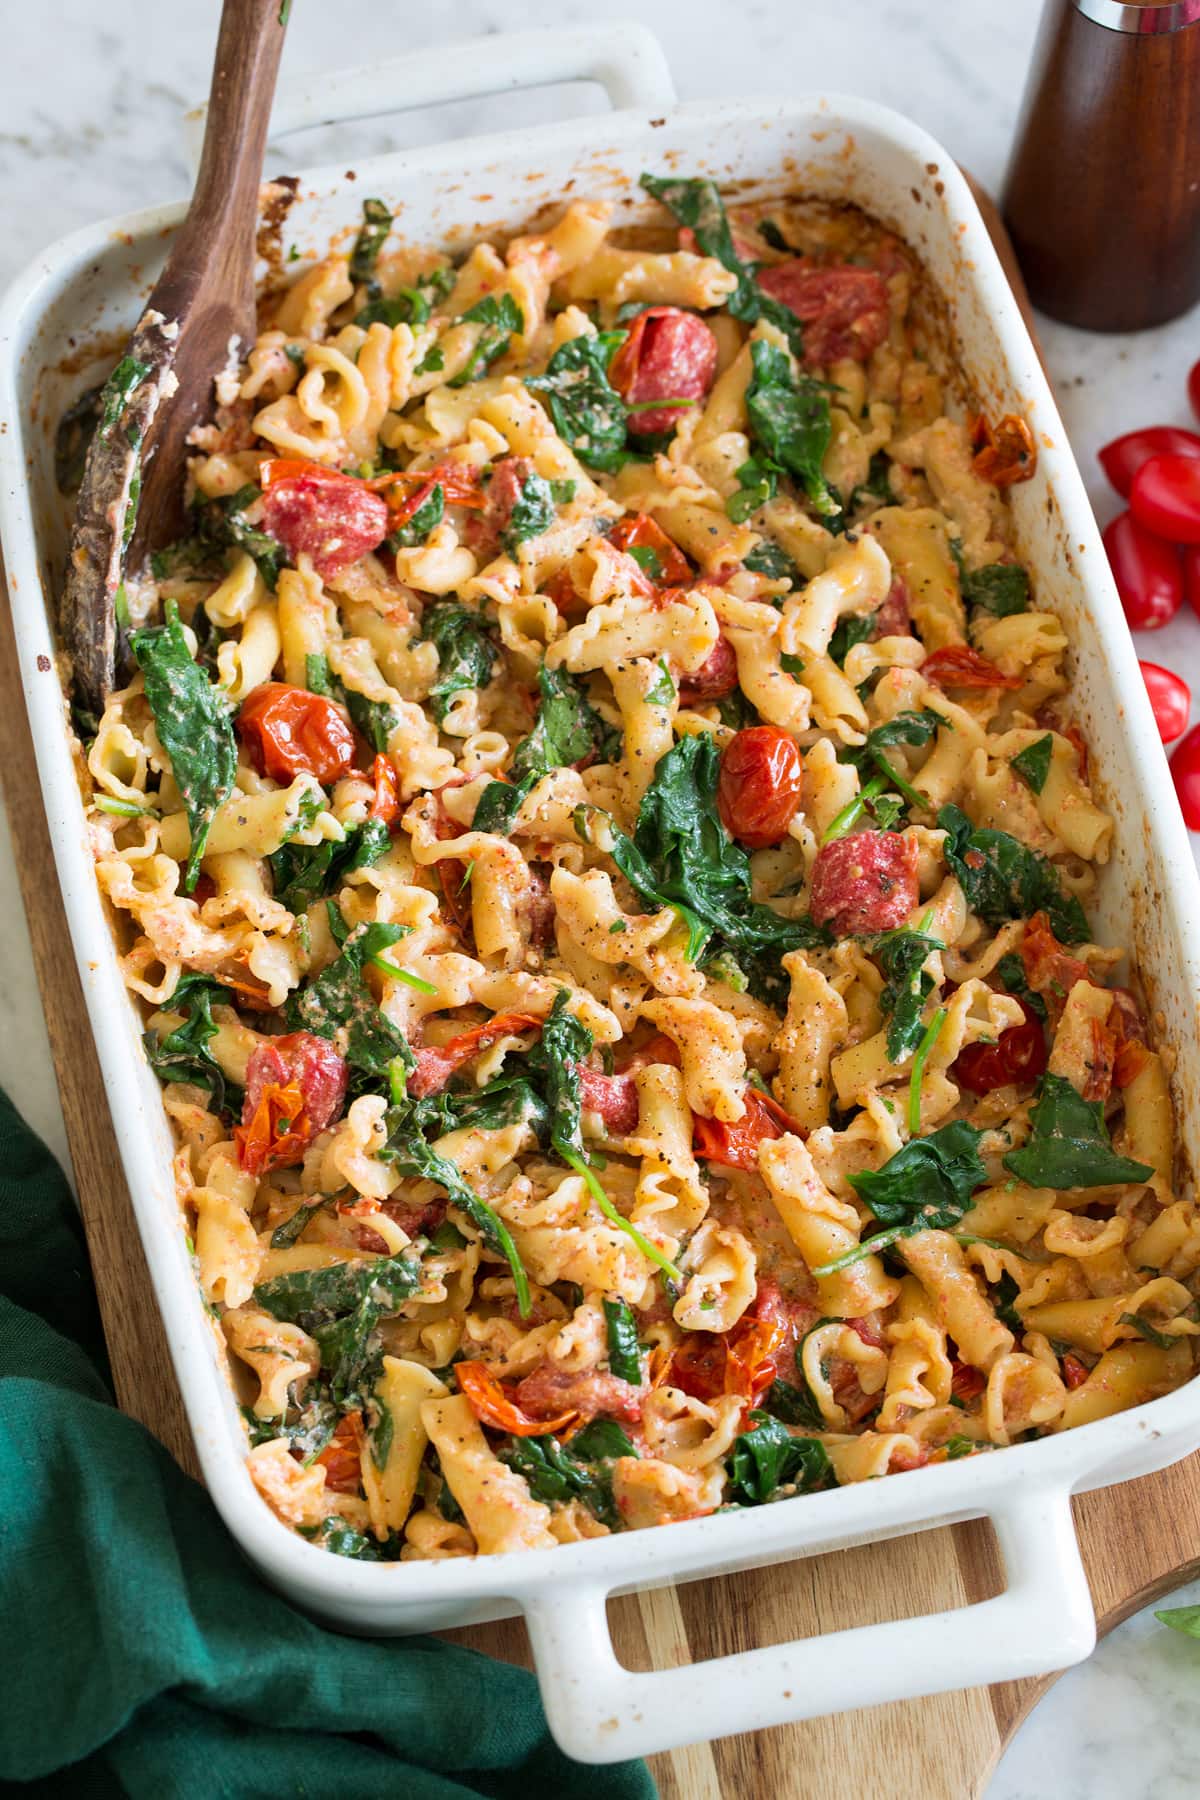
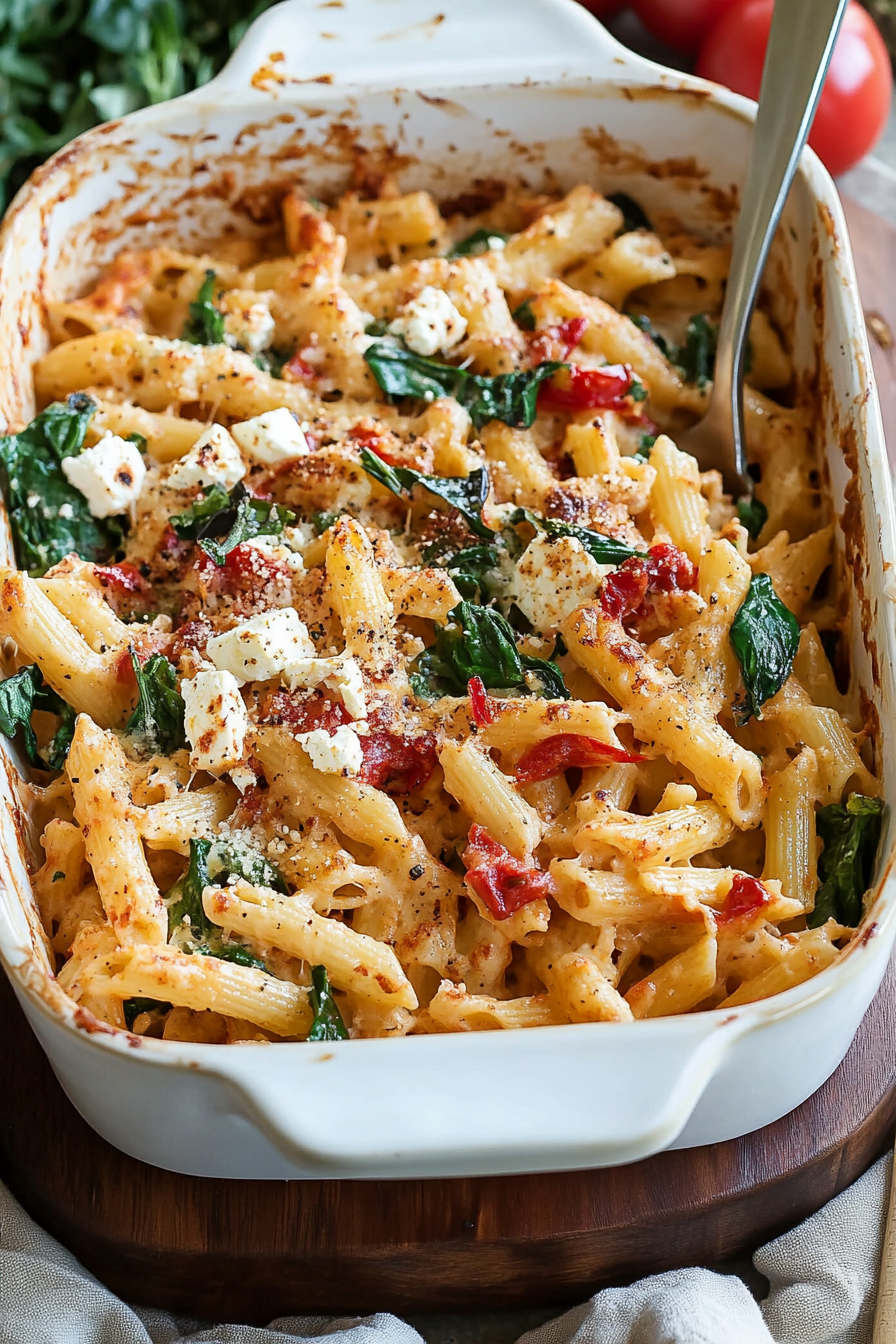
Baked Feta Pasta
Ingredients
Method
- Preheat the oven to 400 degrees F.
- In a 9x13 inch baking dish, add grape tomatoes, garlic, and drizzle with olive oil. Toss to coat. Place feta in the center of the dish.
- Bake in the center of the oven for 30 minutes.
- Increase oven temperature to 450 degrees F and bake for an additional 10 minutes until tomatoes are blistered and feta is golden.
- Meanwhile, cook pasta in salted boiling water until al dente, then reserve 1/2 cup of pasta water and drain.
- Remove baking dish from oven, and mash the feta, tomatoes, garlic, and oil together until combined. Add cooked pasta, spinach, basil, parsley, red pepper flakes, and reserved pasta water. Toss to coat.
- Serve immediately garnished with additional herbs if desired.