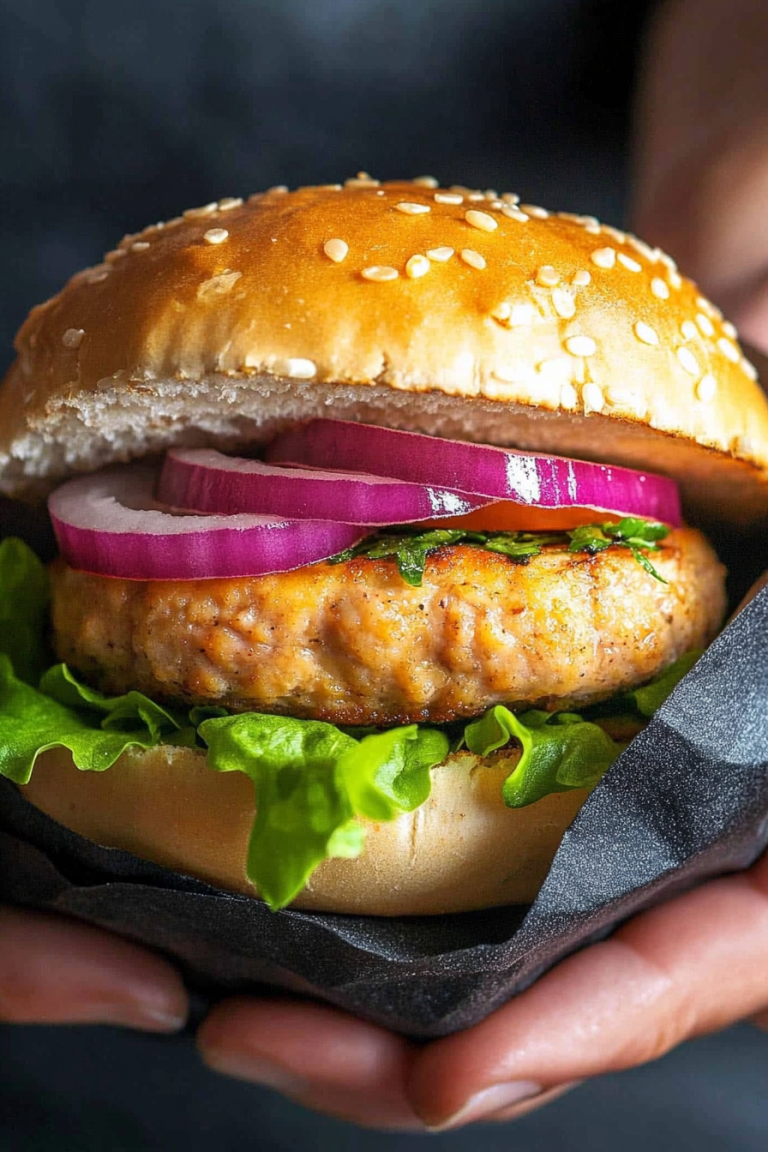
Delicious Chicken Enchiladas Recipe
Let me tell you, there’s something magic about baking bread that smells like a hug on a chilly morning. I remember as a kid, walking into my mom’s kitchen and being hit with that warm, nutty aroma—like everything good in the world was happening right then and there. Ever since, I’ve been obsessed with creating those comforting moments in my own kitchen. This zucchini banana walnut bread? It’s a total game-changer. It’s honestly what I grab when I want something sweet, guilt-free, and just a little indulgent. It’s also ridiculously easy—trust me, even if you’re a baking newbie, you’ll nail this on the first try. My kids ask for this all the time, and I always do this when I have a couple of zucchinis hanging around. Honestly, the smell alone will draw everyone to the kitchen… and before you know it, it’s gone in minutes!
What is Zucchini Banana Bread?
Think of zucchini banana walnut bread as the cozy, hearty cousin of your standard banana bread. It’s essentially a moist, slightly sweet bread made with ripe bananas and fresh zucchini—yes, zucchini! I love that it sneaks in some extra veggies without sacrificing flavor. The name might sound fancy, but it’s super straightforward. It’s like a lazy weekend baking project that results in slices of moist, flavor-packed goodness. The bananas give it that classic sweetness, while the zucchini keeps it tender and slightly springy. Toss in some walnuts, and you’ve got a crunchy, nutty surprise in every bite. It’s kind of like a breakfast muffin, a snack, or even a dessert—because honestly, I’ve served it for all of the above. It’s perfect for when you want a healthy-yet-indulgent treat, or when you don’t want to waste those overripe bananas or zucchinis from your garden. This recipe is a keepsake from my family cookbook—something I’ve made countless times, and it never fails to make my house smell incredible.
Why you’ll love this recipe?
What I love most about this zucchini banana walnut bread is how flexible it is—kind of like a culinary blank canvas. First off, the flavor profile is to die for—the rich sweetness of bananas combined with the subtle earthy hints of zucchini make each bite special. Plus, the walnuts add that perfect crunch that keeps you coming back for more. This recipe is a lifesaver on busy nights because it comes together quickly with pantry staples—you likely already have everything you need! The best part? It’s budget-friendly, calling for humble ingredients like bananas, zucchinis, eggs, flour, and a drizzle of honey or maple syrup. You can easily swap ingredients to make it vegan or gluten-free—trust me, I’ve tested with almond flour and coconut sugar, and it’s just as delicious. I also love how versatile it is—slice it up for breakfast, pack it for lunchboxes, or serve it as a cozy dessert with a dollop of whipped cream. It’s even good toasted with butter or a smear of cream cheese. Honestly, what I love most about this is that everyone at my table asks for seconds. It’s somehow comforting and fancy all at once—a true family favorite.
How do you make Zucchini Banana Walnut Bread?
Quick Overview
This recipe is straightforward and forgiving, making it perfect whether you’re a seasoned baker or just starting out. Essentially, you mix your mashed bananas, grated zucchini, eggs, and oil, then stir in your dry ingredients—flour, baking powder, cinnamon. After that, you gently fold in chopped walnuts and pour the batter into a loaf pan. The magic happens in the oven, where the bread rises beautifully, filling your home with that irresistible aroma. The hardest part? Waiting for it to cool so you can enjoy that first warm slice. It’s quick enough for a last-minute bake, but special enough to feel like a treat. I promise, once you get the hang of it, you’ll want to make this every week.
Ingredients
For the Main Batter:
- 2 ripe bananas, mashed (the more spots, the sweeter!)
- 1 small zucchini, grated (squeeze out excess moisture)
- 3/4 cup granulated sugar or honey
- 1/4 cup vegetable oil or melted coconut oil
- 2 large eggs, at room temp
- 1 teaspoon vanilla extract
- 1 1/2 cups all-purpose flour (or gluten-free blend)
- 1 teaspoon baking powder
- 1/2 teaspoon baking soda
- 1 teaspoon ground cinnamon
- 1/4 teaspoon salt
For the Filling:
- 1/2 cup chopped walnuts (or pecans, almonds)
- Optional: 1/4 cup dark chocolate chips for a richer touch
For the Glaze (Optional):
- 1/2 cup powdered sugar
- 1-2 teaspoons milk or lemon juice
- A sprinkle of cinnamon or vanilla for flavor
Step-by-Step Instructions
Step 1: Preheat & Prep Pan
I always start by preheating my oven to 350°F (175°C). Then, I grease my loaf pan with butter or cooking spray—nothing fancy, just enough so the bread doesn’t stick. Lining it with parchment paper is even better, especially if you want perfect slices. While the oven warms, I grate my zucchini, then squeeze out as much moisture as possible with a clean kitchen towel—trust me, too much moisture can make your bread dense instead of fluffy.
Step 2: Mix Dry Ingredients
In a medium bowl, I whisk together the flour, baking powder, baking soda, cinnamon, and salt. This is a crucial step because it evenly distributes the leavening agents and spices. I’ve overmixed batter before and ended up with a heavy loaf—so I just stir gently until everything looks combined, no more. Set it aside while you handle the wet ingredients.
Step 3: Mix Wet Ingredients
In a large bowl, I mash my bananas until smooth—use a fork or a potato masher. Then, I add the grated zucchini, sugar or honey, eggs, oil, and vanilla. I beat everything together until it’s well combined and a little frothy. This is where the magic starts to smell amazing—I love the smell of ripe bananas mixing with zucchini’s freshness. I tested this with almond milk once, and it made the batter even creamier! Totally optional, but I recommend it if you’re experimenting.
Step 4: Combine
Next, I pour the dry ingredients into the wet and fold gently—no overmixing! I stop just as the flour disappears and see some streaks, but don’t stir until completely smooth; that keeps the bread tender. If you see a little extra moisture in the batter, it’s okay—this bread loves to be a bit moist. This step is key for that perfect texture.
Step 5: Prepare Filling
I chop the walnuts finely—if I do big chunks, I worry they’ll sink or burn—but that’s personal preference. If I want a chocolate kick, I toss in a handful of chips. Keep your filling ready to go because now it’s time to layer.
Step 6: Layer & Swirl
Pour half of the batter into your loaf pan, then sprinkle with some walnuts or chocolate. Add the remaining batter, and for that beautiful swirl, I use a skewer or knife to gently drag through the batter—creating a marbled effect. It’s so pretty, and every bite has a surprise of crunch or chocolate.
Step 7: Bake
Into the oven it goes for about 50-60 minutes. I start checking around the 50-minute mark—insert a toothpick into the center and if it comes out clean, it’s ready. If it’s still gooey, I pop it back in for 5-minute increments. Ovens vary, so don’t stress—just keep an eye out.
Step 8: Cool & Glaze
I let the bread cool in the pan for 10 minutes, then transfer it to a wire rack. Once completely cooled, I drizzle with a simple glaze made from powdered sugar and a splash of milk or lemon juice. It’s totally optional but adds a lovely sweet shine and extra flavor. I’ve learned that if I glaze it too early, the sugar melts into the bread, so patience is key here.
Step 9: Slice & Serve
Use a serrated knife for clean slices—wait until it’s just warm or fully cooled for neat cuts. It’s perfect on its own or with a smear of butter. I love serving it with a cup of coffee or tea. Warm, fragrant, and just enough sweetness to satisfy that late-night craving or early-morning boost. It’s the kind of bread that disappears fast at my house, and I bet it will at yours too.
What to Serve It With
This zucchini banana walnut bread is so versatile—you can enjoy it in a bunch of different ways. For breakfast, I typically toast a slice and slather it with butter or cream cheese. It’s also fantastic with a dollop of Greek yogurt and fresh berries for brunch. My family loves it after dinner—sliced thick with a drizzle of honey or a sprinkle of powdered sugar. It’s also a quick snack during the day when you need a little pick-me-up. Sometimes, I cut a slice and warm it up in the microwave for 10 seconds; the bread becomes crusty on the outside but tender inside. It’s like comfort in every bite. When I have friends over, I serve it alongside coffee or herbal tea—it’s the perfect accompaniment to conversations or lazy weekend mornings. Honestly, I’ve never made this and had anyone say no—I think because it’s cozy yet elegant enough to impress.
Top Tips for Perfecting Your Zucchini Banana Walnut Bread
Every time I make this, I learn a little more. Here are some tricks that make this bread even better:
- Zucchini Prep: Always squeeze out as much moisture as you can. Wet zucchini will make your bread dense or soggy. I like to grate it on the fine side and then press it in a clean cloth—works like a charm.
- Mixing Advice: Avoid overmixing once you combine the wet and dry ingredients. This keeps the bread light and fluffy. Stop mixing as soon as the flour disappears, even if there’s a few lumps—those will bake out.
- Swirl Customization: For prettier marbling, drop big dollops of batter and swirl gently with a toothpick. You can even add a layer of nut or chocolate between, then swirl for more drama.
- Ingredient Swaps: I’ve experimented with coconut sugar, and it gives a richer flavor—just remember it’s a little wetter. For gluten-free, I recommend a blend of almond and rice flour; don’t skip the xanthan gum if your mix doesn’t already contain it.
- Baking Tips: If your oven runs hot, reduce the temperature slightly or check doneness earlier. Every oven is different. Also, placing the pan on the middle rack ensures even baking.
- Glaze Variations: Add lemon zest or vanilla extract to the glaze for extra flavor. Or sprinkle with cinnamon sugar before baking for a caramelized top.
This is a recipe I’ve tested with different nuts, sweeteners, and add-ins—I’ve learned that the key is balancing flavor and moisture. It’s forgiving, but paying attention to a few details makes all the difference. My biggest lesson? Don’t skip squeezing the zucchini—it’s the secret ingredient for that perfect moist crumb.
Storing and Reheating Tips
This bread stays fresh for days—and actually gets better after a day or two. Keep it inside an airtight container at room temperature for up to 3 days. If you’re not going to eat it all quickly, I recommend wrapping it tightly in plastic wrap and refrigerating for up to a week. Just warm slices in the microwave for a few seconds—trust me, it restores that freshly-baked feel. For longer storage, freeze slices individually—wrap them well with plastic wrap, then foil. When you want a comforting snack, thaw at room temperature or pop in the microwave. The flavor and texture honestly hold up beautifully. If you glazed it, wait until it’s fully thawed before adding the glaze again for that glossy finish. I’ve noticed that storing it properly keeps the bread moist and delicious, and it’s a lifesaver when I have unexpected guests or sudden cravings.
Frequently Asked Questions
Final Thoughts
This zucchini banana walnut bread isn’t just a recipe; it’s a recipe for cozy moments and happy memories. I love how it captures those simple pleasures—sweet bananas, zesty zucchini, and crunchy walnuts—wrapped into a loaf that’s tender and flavorful. Plus, it’s versatile enough to enjoy for breakfast, snack, or dessert, and it’s a way to use up those ripe bananas and zucchinis lurking in your kitchen. Honestly, once you make this, you’ll find yourself reaching for it every few days. It’s foolproof, wholesome, and so satisfying—my secret weapon for when I want something sweet but also nourishing. Do me a favor—bake it, enjoy it, and then come back and tell me how yours turned out! I’d love to hear all about your tweaks and favorite toppings. Happy baking!
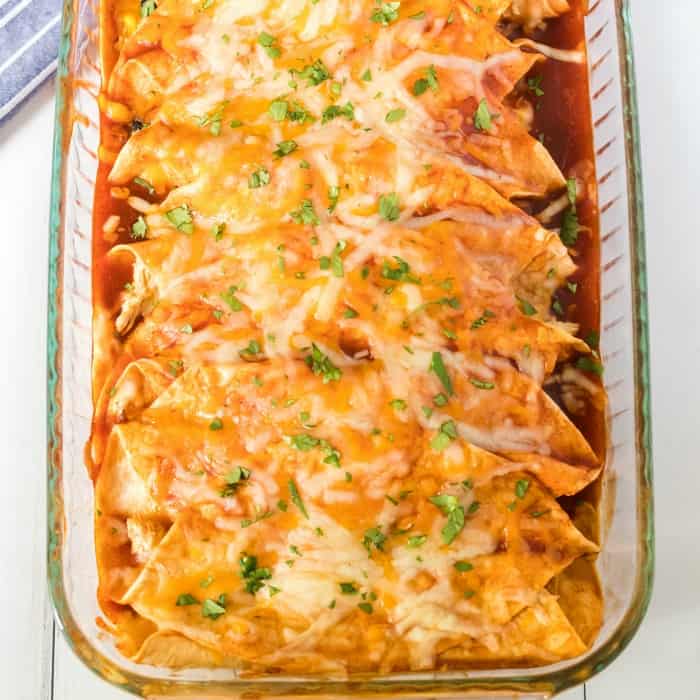
The BEST Chicken Enchilada Recipe
Ingredients
Method
- Preheat the oven to 350 degrees.
- In a large bowl mix together chicken, beans, corn, tomatoes, and spices.
- Divide cheese evenly into 2 separate bowls. Set one bowl of cheese to the side, you will use it for topping once all the enchiladas are assembled.
- Pour 0.5 cup enchilada sauce into the bottom of a 9x13 pan and spread evenly.
- Pour 1 can of enchilada sauce into a shallow bowl. Dip a tortilla in the enchilada sauce, covering both sides with sauce. Let the excess drip off. Place about 1/3 cup chicken mixture in the middle of the tortilla and top with cheese. Roll tortilla around the chicken mixture and place seam side up in the baking dish.
- Assemble remaining enchiladas and place them all in the 9x13 pan. Top enchiladas with remaining enchilada sauce and sprinkle on the remaining cheese.
- Bake for 20 minutes. Remove from the oven and top with chopped cilantro.
- Serve warm! Enjoy with more cilantro, sour cream, salsa, tomato and avocado.