Crispy Fried Pickles How to Make Them
There’s something about baking a cake that feels like hugging a friend — warm, comforting, and a little bit nostalgic. I remember the first time I made this zucchini cinnamon swirl cake; the smell alone brought my family rushing into the kitchen, noses upturned and grins ready. It’s honestly become one of those recipes I turn to when I want something sweet but don’t want to spend hours baking. Plus, it’s a sneaky way to get a veggie into everyone’s hands — my kids ask for this all the time, and I love that they don’t even realize how healthy it is. This one’s a lifesaver on busy nights or when I want to impress friends without breaking a sweat. Trust me, once you try it, it’ll become a treasured staple in your baking arsenal — cozy, versatile, and downright delicious.
What is a Zucchini cinnamon swirl cake?
This zucchini cinnamon swirl cake is a delightfully moist and tender treat that combines the subtle sweetness of zucchini with warm cinnamon and a gooey swirl of tasty filling. Think of it as a cross between a coffee cake and a quick bread with a fancy twist. It’s essentially a simple sponge-like cake dotted with shredded zucchini, which keeps it super moist, and layered with a cinnamon-sugar swirl that adds a hint of spice and a beautiful marbled look when sliced. I’ve adapted this recipe from an old family favorite, giving it a little modern flair with a tender crumb and just the right amount of sweetness. The name comes from its main star — zucchini — and that irresistible cinnamon swirl running through it, making each bite taste like a cozy hug in cake form. Whether it’s for breakfast, a snack, or dessert, this cake somehow always hits the spot.
Why you’ll love this recipe?
What I love most about this zucchini cinnamon swirl cake is how effortlessly it comes together, yet it looks and tastes like something you’d buy at a fancy bakery. The flavor is incredible: moist, subtly sweet, with a hit of warming cinnamon that just makes everything feel special. The aroma alone is enough to draw everyone into the kitchen — I swear, my house smells like a cinnamon spice wonderland when this is baking. Plus, it’s so budget-friendly. You probably already have most of the ingredients lurking in your pantry or fridge — shredded zucchini is a sneaky vegetable that adds incredible moisture without fussiness, and the basic batter can be jazzed up with extras like chopped nuts or a splash of vanilla. Just as versatile as a classic banana bread, I find myself serving this with coffee in the mornings, as a quick snack in the afternoon, or sliced up for dessert with a dollop of whipped cream. It’s one of those all-rounder recipes that’s perfect for any occasion and genuinely loved by everyone who tastes it.
How do I make Zucchini Swirl Cake?
Quick Overview
This cake is a breeze to make: whisk together your dry ingredients, then blend in the wet until just combined. Stir in shredded zucchini (trust me on this one — it keeps the cake so moist!), pour half into your prepared pan, spread a generous cinnamon-sugar filling, then top with the remaining batter. Swirl it beautifully, bake until golden, and glaze or dust with powdered sugar if you like. It’s so simple and forgiving, even if you’re a beginner. The key is not overmixing, which keeps it tender, and patience during baking to check for doneness — you won’t regret a few extra minutes in the oven if it means a perfect slice.
Ingredients
For the Main Batter:
– 2 cups all-purpose flour (I use unbleached for a richer flavor)
– 1 ½ teaspoons baking powder
– ½ teaspoon baking soda
– ½ teaspoon salt
– 1 teaspoon ground cinnamon
– ¾ cup granulated sugar
– ½ cup light brown sugar
– ½ cup vegetable oil (or melted coconut oil for a tropical twist)
– 3 large eggs
– 1 teaspoon vanilla extract
– 1 ½ cups grated zucchini (about 1 medium zucchini, skin on or off depending on your preference)
For the Filling:
– ¼ cup packed light brown sugar
– 1 teaspoon ground cinnamon
– 2 tablespoons melted butter (or coconut oil)
– Optional: chopped nuts or a touch of nutmeg for extra warmth
For the Glaze (Optional):
– ½ cup powdered sugar
– 1-2 teaspoons milk or cream
– A splash of vanilla extract
Step-by-Step Instructions
Step 1: Preheat & Prep Pan
Preheat your oven to 350°F (175°C). Grease a 9-inch round or square baking pan with butter or non-stick spray, then line the bottom with parchment paper — this makes for easier slicing later. I always do this because it saves me from the cake sticking and tearing. Setting everything up early makes the process smooth and stress-free.
Step 2: Mix Dry Ingredients
In a large bowl, whisk together the flour, baking powder, baking soda, salt, and cinnamon. This step ensures your leavening agents are evenly distributed, helping your cake rise beautifully. I’ve learned to do this first to prevent lumps and to keep the cinnamon from hovering at the bottom.
Step 3: Mix Wet Ingredients
In a separate bowl, beat the eggs, sugar, and brown sugar until well combined — I use a whisk or hand mixer for about a minute until it’s light and slightly frothy. Then, add in the oil and vanilla, blending just until smooth. The smell of vanilla combined with cinnamon is already making my kitchen smell like a cozy bakery.
Step 4: Combine
Pour the wet mixture into the dry ingredients and stir gently with a spatula or wooden spoon until just combined. Do not overmix! A few lumps are okay — this keeps your cake tender. Now, stir in the grated zucchini; I always squeeze out a little excess moisture before adding to prevent the batter from becoming too runny.
Step 5: Prepare Filling
In a tiny bowl, mix together the brown sugar, cinnamon, and melted butter. I love introducing a bit of nutmeg sometimes or tossing in some chopped walnuts for extra crunch. Set this aside while your batter rests briefly.
Step 6: Layer & Swirl
Pour half of the batter into your prepared pan, then spread the cinnamon-sugar filling evenly over the top. Add the remaining batter on top and gently spread it out. Now, for the fun part — use a knife or skewer to swirl through the batter, creating marbled patterns that will be stunning once baked. Trust me, the swirls hide a little bit of imperfection and still look gorgeous.
Step 7: Bake
Pop it in the oven and bake for about 45-50 minutes. The top will turn golden and a toothpick inserted into the center should come out with a few moist crumbs (not wet batter). Every oven behaves differently, so start checking around 45 minutes, and give it a few extra minutes if needed. I always set a timer but keep an eye on that beautiful browning — it’s the sign it’s ready.
Step 8: Cool & Glaze
Let your cake cool in the pan for about 15 minutes before transferring it to a wire rack. Patience here is key — rushing to cut a hot cake is a sure way to make a mess. Once cooled, mix up your glaze or dust it with powdered sugar. The glaze is a nice touch if you want that glossy, sweet finish — I do it more for presentation, but it’s equally good plain.
Step 9: Slice & Serve
Use a sharp serrated knife to cut clean slices. Serve slightly warm, at room temperature, or chilled if you prefer a cooler dessert. I love slicing this into thick pieces and serving with a dollop of yogurt or a spread of cream cheese. It’s just luscious and comforting every time. Trust me, this cake disappears quickly around here — my kids ask for seconds, and I happily oblige.
What to Serve It With
This cake is pretty flexible and perfect at all times of day. For breakfast, pair it with a strong black coffee or a warm chai latte. The cinnamon pairs beautifully with those spiced drinks, making your morning feel extra special. It’s also wonderful for brunch — serve it alongside scrambled eggs, a fruit salad, or some buttery croissants for an elegant spread. When it’s time for dessert, consider topping a slice with whipped cream, vanilla ice cream, or a drizzle of caramel sauce. I love serving it with a big mug of hot cocoa or spiced tea in the evening, especially if I want a cozy, comforting vibe in the house. My family loves this cake as an afternoon snack too, served with cold milk or a cup of herbal tea. It’s one of those baked goods that easily becomes part of your routine and tradition.
Top Tips for Perfecting Your Zucchini Cinnamon Swirl Cake
Having made this cake countless times, I’ve picked up a few tricks. First, don’t skip squeezing out excess moisture from the zucchini — I use a clean kitchen towel or cheesecloth to gently press out the water after grating. Too much liquid can make the batter spoony and dense, and nobody wants that. When mixing, be gentle — overmixing can develop the gluten and lead to a tougher crumb. Just fold until things are combined; the batter should be thick but pourable. For the swirl pattern, I like to drop dollops of the cinnamon filling in streaks and then swirl in one or two directions for a marbled look. You can experiment with different spices or add chopped nuts into the filling — I tested this with pecans, and it was divine. When baking, place the cake on the middle rack to ensure even heat, and keep an eye on the color. If the top browns too fast, loosely tent it with foil and continue baking. Trust your nose — when it’s golden and fragrant, it’s usually ready. To make it extra moist, I’ve tried swapping half the oil for applesauce or Greek yogurt, which is a game-changer if you want a healthier version. I also learned that a softer glaze or a sprinkle of powdered sugar just before serving elevates the look without added effort. Definitely test your oven’s temperature with an oven thermometer; many home ovens run hotter or cooler than the dial suggests, which can affect baking times. This recipe is forgiving, so don’t stress if it takes a couple of tries to perfect your personal favorite — it’s all about enjoying the process and sharing something delicious with loved ones.
Storing and Reheating Tips
This cake stays good for up to 3 days at room temperature if covered loosely with foil or a cloth — but I usually prefer to keep it airtight in the fridge. Wrap it tightly in plastic wrap or store in an air-tight container; it’ll stay moist and fresh for about 5 days. Reheating individual slices in the microwave for 10-15 seconds helps revive that just-baked feel if you want to serve it warm. For longer storage, freezing slices is a good option — wrap each piece tightly with plastic wrap, then foil, and they’ll keep well for up to a month. To thaw, leave them at room temp or warm briefly in the microwave. If you’ve added glaze, wait until the cake is fully thawed before drizzling over or re-glazing, as freezing can sometimes cause the glaze to crack or become dull. When you’re ready to serve again, a quick warm-up in the microwave makes everything cozy and comforting, as if you just baked it. This flexibility means your beloved zucchini cinnamon swirl cake can brighten up a quick breakfast or be a centerpiece for weekend brunch without any fuss. Trust me, once you’ve tried storing it properly, you’ll find yourself reaching for leftovers more often than you’d expect. That moist crumb and spicy aroma are worth every extra minute in the fridge or freezer.
Frequently Asked Questions
Final Thoughts
This zucchini cinnamon swirl cake is more than just a dessert — it’s a hug in baked form, perfect for sharing with loved ones or savoring as a cozy treat for yourself. Its simplicity and flexible ingredients make it a go-to recipe when I want something homemade but don’t want to fuss. The moist crumb, warm cinnamon aroma, and marble-like swirl patterns make every slice feel special. Plus, knowing I can sneak in some vegetables makes me feel good about serving it to my family. Over the years, I’ve tested a million variations — adding nuts, swapping oils, even sneaking a bit of orange zest for extra brightness — and each time, it turns out wonderful. If you give this a try, I’d love to hear how you personalized it! Baking is all about experimenting and making recipes your own. Happy baking, my friend — I hope this becomes a favorite in your kitchen too. Drop a comment below with your tweaks or photos of your beautiful slices!
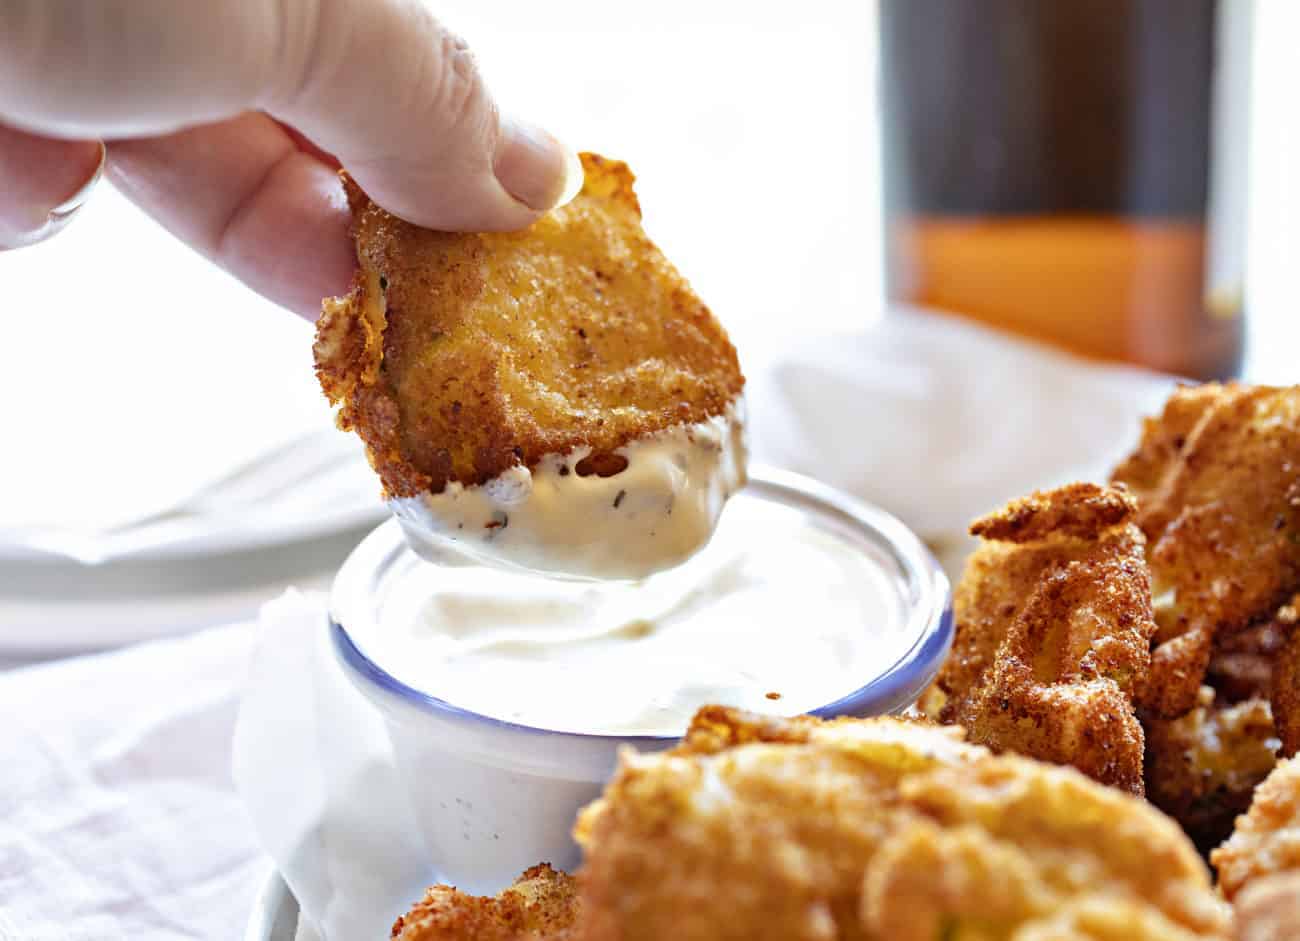
Fried Pickles
Ingredients
Method
- In a small bowl, add 0.5 cup of all-purpose flour. Set aside.
- In a medium bowl, whisk together 1 cup of all-purpose flour, cornmeal, baking powder, salt, pepper, cayenne, and beer until all lumps are gone. Set aside.
- In a small bowl, add bread crumbs. Set aside.
- Add canola oil to a large pot (fill to about 2 inches deep) and heat to 350° Fahrenheit. Maintain this heat throughout cooking.
- Add pickle chips one at a time to the first bowl of flour, tossing to coat each side.
- Transfer the floured pickle chip to the beer batter, coating each side, then lightly shake off excess batter.
- Next, add the pickle chip to the bread crumbs, lightly coating each side. Carefully place the coated pickle into the hot oil.
- Fry until golden brown on both sides, about 1 to 2 minutes per side. Using a sieve or metal spatula, lift the pickle out of the oil, drain, and place on a paper towel to absorb excess grease.