Creamy Peanut Butter White Chocolate Treats
If I’m honest, the first time I ever tasted zucchini banana bread, I thought, “This is a weird combo — but why isn’t everyone doing it?” That soft, slightly moist crumb with pops of sweet banana and a hint of earthiness from zucchini? It’s like a cozy blanket for your taste buds. I always do this when I want something comforting but sneaks in some sneaky veggies — it’s my secret weapon for sneaking nutrients into my kids’ snacks, and honestly, I secretly crave it myself. This bread disappeared faster than I could clean the kitchen, and I knew I had a winner. Over the years, I’ve tweaked the recipe to make it even simpler, more flavorful, and just the right amount of moist without being gummy. It’s perfect on busy mornings, as a quick afternoon pick-me-up, or even sliced and toasted with a pat of butter. Trust me, once you try this, you’ll keep coming back for more — because it’s one of those recipes that just feels like a warm hug, especially when the house smells like cinnamon and bananas. Let’s dive in and make some magic happen in your kitchen!
What is Zucchini Banana Bread?
Think of zucchini banana bread as the lovechild of your favorite classic banana bread and a sneaky vegetable boost. It’s essentially a moist, tender loaf packed with ripe bananas for sweetness and shredded zucchini for moisture and nutrition. The name might sound a little fancy, but honestly, it’s super approachable — the kind of recipe that’s perfect for using up overgrown zucchini from your garden, or those bananas that are a little too ripe to eat straight. It’s called “bread,” but it’s more like a soft, cake-like treat that you can slice up for breakfast, brunch, or an afternoon snack. And the best part? It’s so adaptable. You can add nuts, chocolate chips, or even swap in different flours if you want to mix things up. This bread has a cozy, homey vibe, and I swear it tastes even better the next day — when all the flavors have had a chance to hang out and deepen.
Why you’ll love this recipe?
What I love most about this zucchini banana bread is how effortlessly it hits all the right notes. First, the flavor — it’s sweet, fluffy, and a little indulgent, but with a secret veggie in there that makes it feel just a bit healthier. The bananas provide natural sweetness, and when they’re ultra ripe? Oh man, it’s magic. The zucchini not only keeps the bread moist as can be but also adds that subtle, fresh flavor that keeps it from feeling heavy. This recipe is a lifesaver on busy nights because it’s pretty much foolproof — you toss everything in one bowl, give it a stir, and bake. No fancy equipment or complicated steps. Plus, it’s incredibly budget-friendly! Most of these ingredients are staples in my pantry or fridge, so I can throw this together last-minute when I need something comforting. I’ve also tested it with almond milk and it made the loaf even creamier — so if you’re dairy-free, no worries. It’s versatile, forgiving, and addictive. Whether you’re baking for family, friends, or just a cozy night in, this zucchini banana bread always wins. Honestly, what I love most is how adaptable it is — adding chocolate chips or walnuts? Yes, please! Just slicing a piece and tasting that warm, soft goodness makes me feel like I’ve got a hug from my grandma.
How do you make Zucchini Banana Bread?
Quick Overview
This isn’t one of those complicated baking projects that make you sweat. It’s honestly a one-bowl wonder, where the hardest part is waiting for it to bake. You start by grating fresh zucchini, mixing it with ripe bananas, sugar, eggs, and oil, then folding in your dry ingredients. Layer in some chocolate chips or nuts if you want, pour it into your loaf pan, and bake until it’s golden and a toothpick comes out clean. The aroma alone? Worth it. The trick is to not overmix — just stir until everything’s combined so it stays nice and tender. Trust me, once you get the hang of it, this becomes your go-to recipe whenever you want something sweet, hearty, and secretly healthy.
Ingredients
For the Main Batter:
- 3 ripe bananas, mashed — the riper, the better, because they’re sweeter and easier to mash.
- 1 cup zucchini, shredded — I always do this with a box grater; just make sure to squeeze out excess moisture.
- 1/2 cup sugar (or honey/maple syrup if you want it a tad healthier)
- 1/3 cup vegetable oil or melted butter — I tested with almond oil, and it was divine
- 2 large eggs
- 1 teaspoon vanilla extract
- 1 1/2 cups all-purpose flour (or whole wheat for extra nuttiness)
- 1 teaspoon baking soda
- 1/2 teaspoon salt
For the Filling (Optional):
- 1/2 cup chocolate chips or chopped nuts — I love walnuts here, but chocolate is a game changer
For the Glaze (Optional):
- 1/2 cup powdered sugar
- 1-2 teaspoons milk or lemon juice
- A sprinkle of cinnamon or vanilla if you like
Step-by-Step Instructions
Step 1: Preheat & Prep Pan
Set your oven to 350°F (175°C). Grease your loaf pan with butter or line it with parchment paper — I always do this because it makes cleanup so much easier. And, pro tip: I like to sprinkle a little flour or sugar in the pan for extra non-stick action.
Step 2: Mix Dry Ingredients
In a small bowl, whisk together the flour, baking soda, salt, and any spices you want to add (like cinnamon or nutmeg). Mixing these separately helps prevent clumps and ensures a uniform rise.
Step 3: Mix Wet Ingredients
In a large bowl, mash your bananas until smooth. Then add the shredded zucchini (squeeze out the water first—trust me, this keeps your bread from getting soggy), sugar, eggs, oil, and vanilla. Whisk until it looks gloppy but combined, and the smell — oh, the smell! — is heavenly.
Step 4: Combine
Add the dry ingredients to the wet mixture. Stir gently with a spatula just until there are no pockets of flour. Avoid overmixing because that can make your bread dense. It should be lumpy but combined.
Step 5: Prepare Filling
If you’re using chocolate chips or nuts, fold them in now. You can also leave them out if you prefer a more straightforward bread. For an extra swirl, reserve some batter, mix in the filling, then layer into your pan.
Step 6: Layer & Swirl
If you want a marbled effect, pour half the batter into your pan, dollop in the filling or a contrasting batter, then swirl gently with a butter knife. It doesn’t have to be perfect — rustic is beautiful here.
Step 7: Bake
Pop it into the oven and bake for about 55-60 minutes. Check it around the 55-minute mark with a toothpick inserted into the center — it should come out clean. Ovens vary, so don’t be alarmed if it takes a little more or less time. When done, your house will smell like heaven and your loaf will be golden brown.
Step 8: Cool & Glaze
Let it cool in the pan for about 10 minutes, then transfer to a wire rack. If you’re glazing, wait until it’s just slightly warm so the glaze drips beautifully and sets nicely. Mix the powdered sugar with milk or lemon juice until you get a drizzling consistency, then pop it on top.
Step 9: Slice & Serve
Once cooled completely, slice and serve. I love a thick slice with a smear of butter, maybe some fresh berries on the side. If you’re feeling fancy, dust a little extra cinnamon or chopped nuts on top. This bread is best enjoyed slightly warm or at room temperature, but I’ve sneakily eaten it cold — still amazing.
What to Serve It With
This zucchini banana bread is incredibly versatile. For breakfast, I love it warm with a cup of your favorite coffee or tea — it’s like eating cake for breakfast, but healthier. My kiddos ask for it all the time, and I usually serve it with a side of fresh fruit or yogurt. A dusting of powdered sugar or a drizzle of honey makes it fancy enough for brunch, paired with a mimosa or a glass of cold milk. It’s also one of those desserts you can stash in the fridge and enjoy for a quick sweet fix — toast a slice, add a pat of butter, and sprinkle with cinnamon. Honestly, this loaf feels like a hug on a busy day or a cozy weekend treat. I’ve even packed slices in lunchboxes for a surprise kid-friendly snack. It’s a bakery-worthy feel, but you made it right in your own kitchen!
Top Tips for Perfecting Your Zucchini Banana Bread
Once you’ve baked this a few times, you’ll find little tricks that make it even better. First, about the zucchini — I always do this trick after years of making it: I grate the zucchini and then squeeze out all the excess moisture with a clean towel. Moisture is the enemy of fluffy bread, and this step really makes a difference. Also, never overmix after adding the dry ingredients; I like to fold gently just until combined. For the swirl, placing dollops of contrasting batter and swirling them kind of randomly makes it look pretty and rustic. Be creative with add-ins! I’ve tried dried cranberries, coconut flakes, you name it — just keep the ratios in check so the batter doesn’t get too thick or runny. When baking, I always position my rack in the middle and keep an eye on the loaf after about 50 minutes — every oven cooks differently. If you’re adding glaze, wait until the bread is just cooled enough to prevent the sugar from melting too fast. And for substitutions, whole wheat flour works beautifully, but I’ve also swapped part of the flour with almond meal — it adds a nutty flavor and makes it even more moist. The best tip? Taste as you go — because honestly, this recipe is forgiving and you can tweak it endlessly until it’s perfect for your family’s taste buds.
Storing and Reheating Tips
This loaf is best enjoyed fresh but can keep for a few days. Leave it at room temperature, covered loosely with foil, for up to two days. After that, it’s a good idea to refrigerate, especially if it’s hot outside — just pop it in an airtight container or wrap it well. It still tastes amazing cold or gently warmed in the microwave for about 10 seconds. If you want to keep it for longer, freeze slices individually wrapped in plastic or foil. I find that it keeps nicely for a month in the freezer — just defrost at room temp or warm it up in the oven for a few minutes. If you’re adding glaze, it’s best to apply it just before serving — because, trust me, it’s the finishing touch that makes everything look bakery-perfect and taste fresh.
Frequently Asked Questions
Final Thoughts
Honestly, if you’re on the hunt for a bread that’s cozy, tasty, and secretly sneaky with healthy ingredients, this zucchini banana bread is your new best friend. It’s become a staple in my house — I make it whenever I need a little comfort or when I have ripe bananas and zucchini to use up. Every time I bake it, my kitchen fills with that irresistible aroma of cinnamon, bananas, and warm bread — it’s like a hug in smell form. Plus, it’s so forgiving; you can tweak the add-ins, swap the flour, or skip the glaze and it still turns out wonderful. My kids ask for seconds, and friends always ask for the recipe. The beauty of it is how versatile and simple it is — no fancy ingredients, no complicated steps. Just good, honest baking that makes everyone happy. I hope you give it a try and make it your own! Don’t forget to share your favorite variations or to leave a comment below — I love hearing how it turns out in your kitchen. Happy baking, friends!
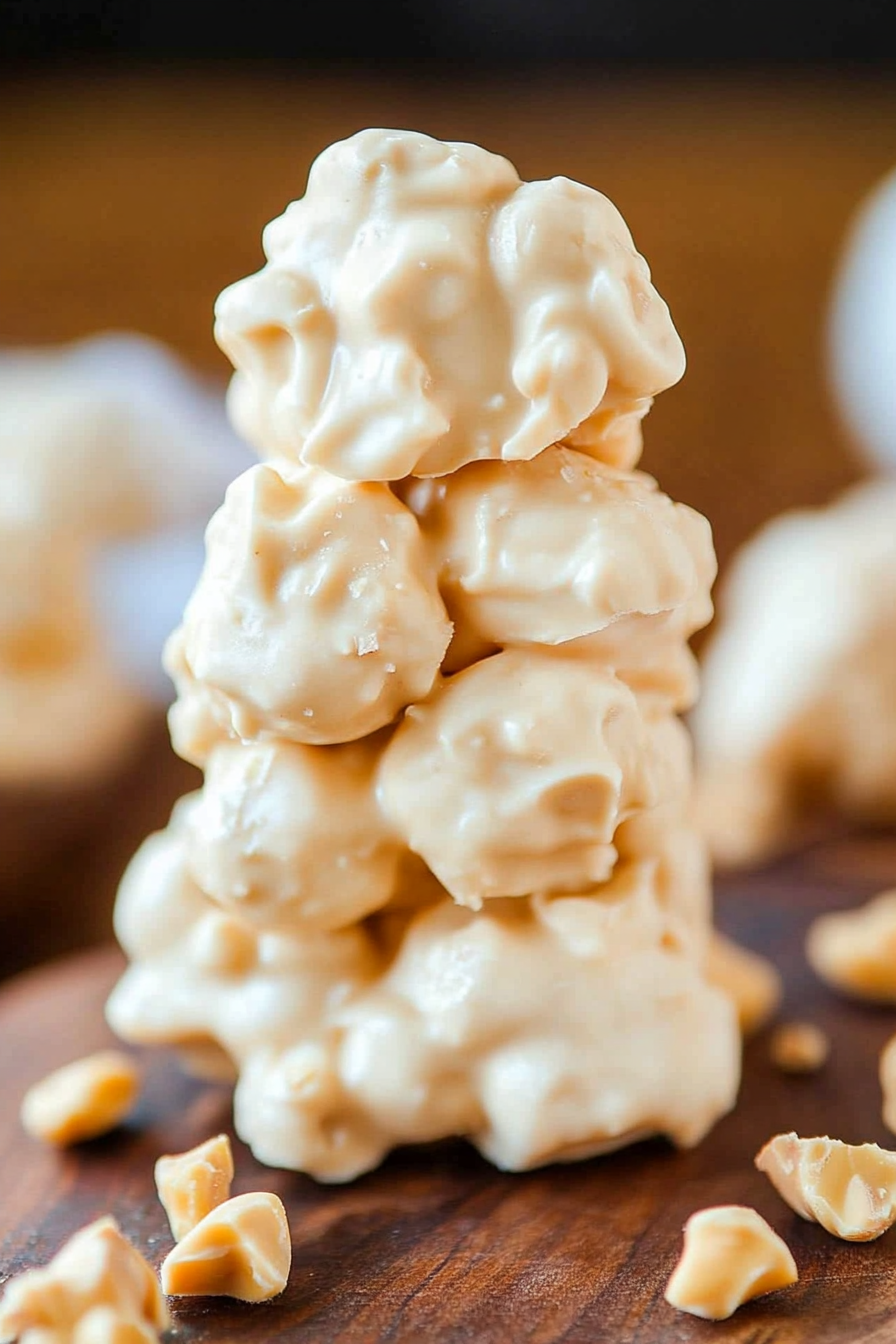
white chocolate peanut butter
Ingredients
Method
- Line two baking sheets with parchment paper and set aside.
- In a large microwave-safe bowl, combine white chocolate and peanut butter. Microwave in 30-second intervals, stirring until smooth.
- Add Rice Krispies, peanuts, and marshmallows to the melted mixture, stirring gently to coat evenly.
- Using a 2-tablespoon scoop or spoon, drop mounds onto prepared baking sheets. Refrigerate for at least 2 hours until firm.
- Store in an airtight container at room temperature for up to 2 weeks or freeze for longer storage.