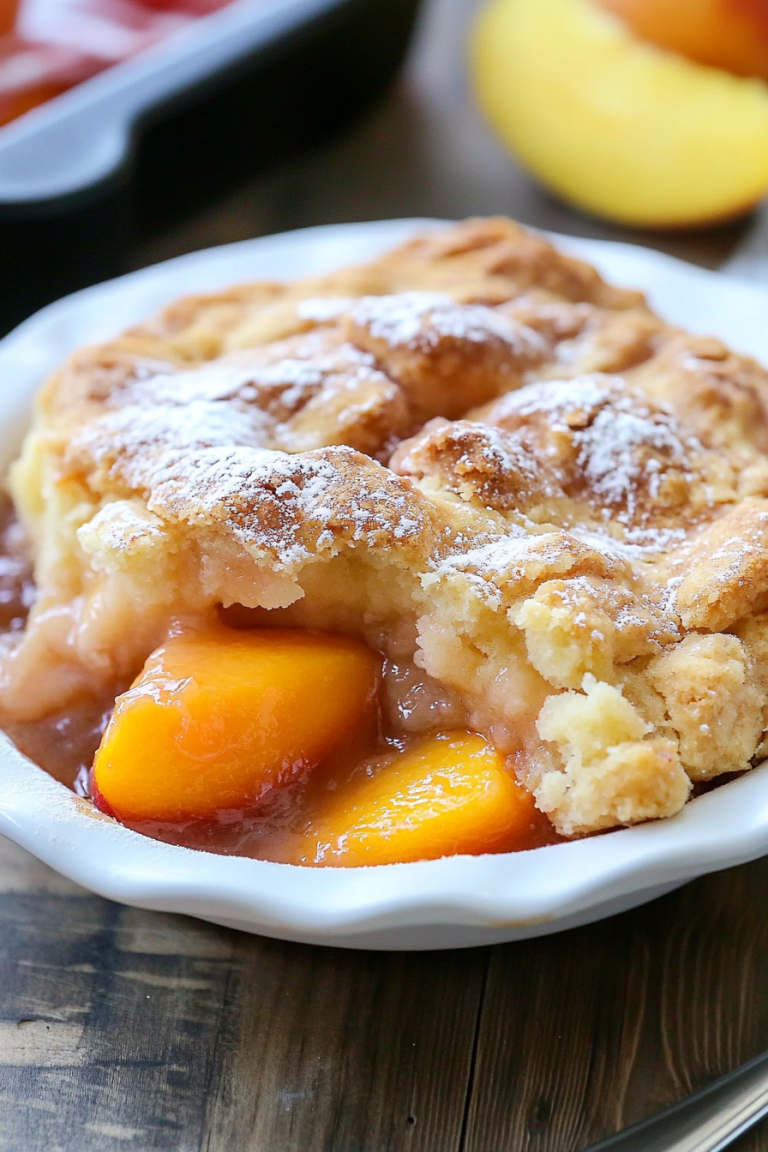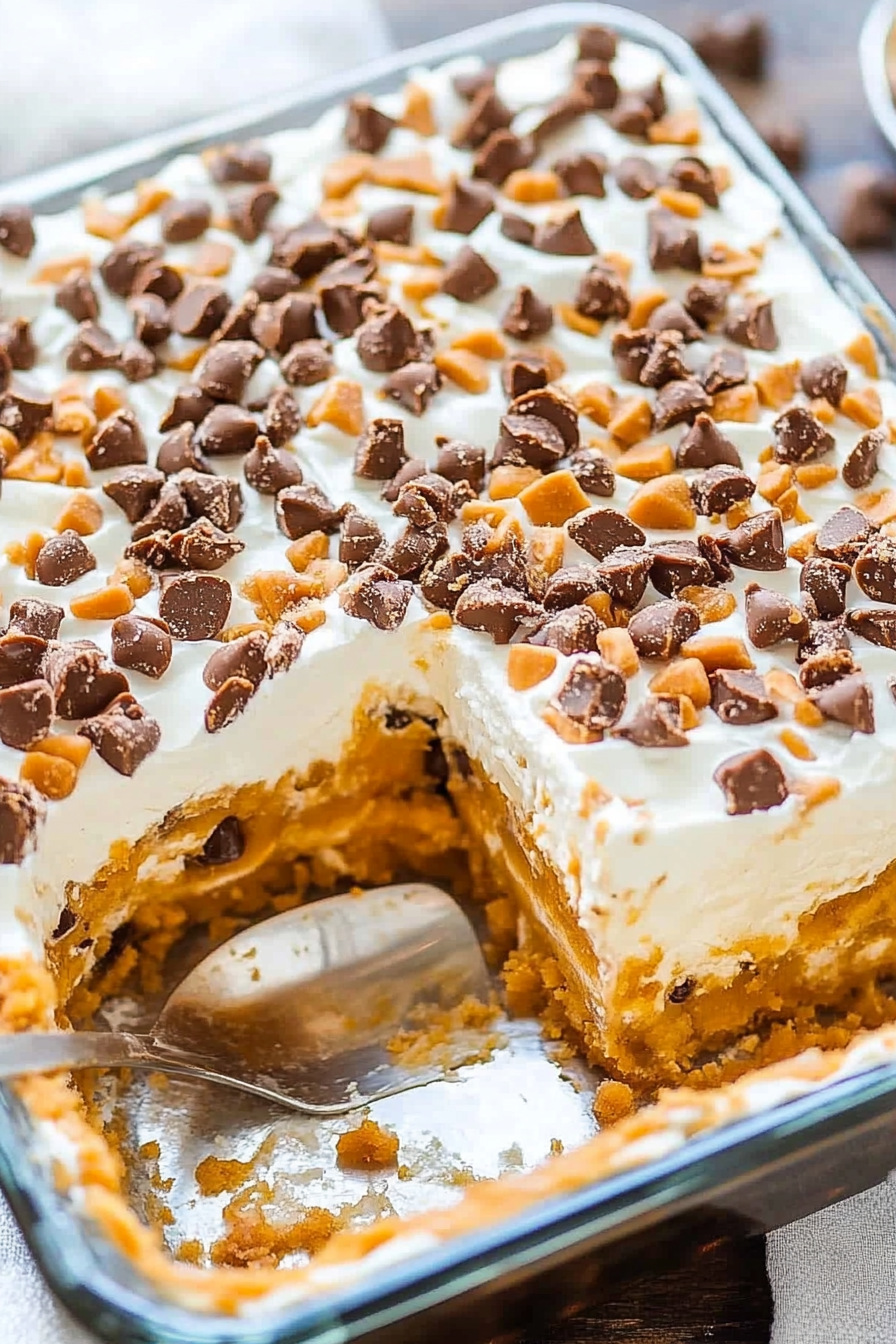
Autumn Delight A Simple Pumpkin Lush
You know those days when you’re craving something rich and chocolatey, but you want it to feel just a little bit special? Well, for me, nothing hits that spot quite like these zucchini swirl brownies. I’ve made them dozens of times, and every single time, they disappear in minutes at my house. The smell alone — warm chocolate with a tiny hint of earthy zucchini — is enough to bring everyone to the kitchen. And honestly, what I love most about this recipe is how it’s both indulgent and sneaky: it’s a way to get some veggies into the kids’ diet without them even noticing. That’s a tiny miracle in my book! Plus, this one’s a lifesaver on busy nights, when I want a homemade treat but don’t have hours to bake. Trust me, the first time I tried this, I was skeptical about the zucchini, but now it’s a firm favorite. It’s cozy for winter afternoons and equally perfect for a spontaneous weeknight dessert. Let’s dive into how I make these irresistible brownies, and I promise you’ll want to keep this recipe on repeat.
What is Zucchini Swirl Brownies?
Think of these as the lovechild of your classic chocolate brownies and a little healthy twist courtesy of zucchini. The name might sound a bit fancy, but this is honestly one of the easiest desserts you’ll ever make. Essentially, it’s a rich, fudgy brownie batter with a generous layer of shredded zucchini swirled right through it — like a marble cake’s cooler, more decadent cousin. The zucchini adds moisture and a subtle earthy flavor that balances out the sweetness and chocolate. When baked, the zucchini melts into the batter, creating a tender crumb that’s just the right amount of fudgy. The swirl pattern makes it look as pretty as it tastes, and it’s proof that you can sneak in some greens (and a little nutrition) without sacrificing any flavor or texture. I love how versatile it is, too — you can top it off with a drizzle of glaze or serve it plain, warm from the oven or cooled down to perfection.
Why you’ll love this recipe?
What I love most about these zucchini swirl brownies is how they combine the best of both worlds: rich, indulgent chocolate with a dash of veggie goodness that your family won’t even notice. The flavor is seriously incredible — think deep cocoa with a hint of earthiness — and the texture is just perfect for me: moist, fudgy, with a slight chew. They’re insanely simple to throw together, even on busy weeknights when I don’t want to mess with complicated recipes. The beauty of this is how budget-friendly it is, too — most of the ingredients are staples in my pantry, and zucchini is the one thing I always have lying around in the summer. Plus, this recipe is super versatile; you can swap out the chocolate chips for chunks of nuts, add a pinch of cinnamon, or even dollop some cream cheese into the swirl for extra richness. Honestly, these brownies are a hit with everyone — kids, adults, even the pickiest eaters. And the best part? They’re a good way to sneak in some veggies without anyone suspecting. My kids ask for seconds all the time, and I feel good knowing they’re getting some greens while enjoying their favorite dessert.
How do I make Zucchini Swirl Brownies?
Quick Overview
This recipe is a straightforward one-bowl wonder, where you mix the wet ingredients, fold in dry, swirl in shredded zucchini, and bake. The key is to keep the batter moist but not overmixed — that’s what gives you that fudgy texture. I like to prepare everything in advance so I can quickly assemble and pop it in the oven, making it perfect when a sweet craving hits unexpectedly. The swirl of zucchini adds a lovely marbled look that makes these brownies feel just a little fancy. Once baked, you’ll have beautiful, gooey brownies that are as cozy to eat as they are satisfying to make. Trust me, you’ll want to keep this recipe in your back pocket for when you need a little chocolate therapy.
Ingredients
For the Main Batter:
– 1 cup all-purpose flour (or gluten-free blend if needed)
– 1/2 cup cocoa powder (high quality, unsweetened)
– 1 teaspoon baking powder
– 1/2 teaspoon salt
– 3/4 cup granulated sugar
– 1/2 cup brown sugar (for deeper flavor)
– 1/2 cup melted unsalted butter (or coconut oil for dairy-free)
– 2 large eggs (room temp works best)
– 1 teaspoon vanilla extract
For the Filling:
– 1 small to medium zucchini, shredded (about 1 cup)
– A pinch of salt (to draw out excess moisture)
– Optional: a drizzle of honey or maple syrup for extra moisture
For the Glaze (optional but lovely):
– 1/2 cup powdered sugar
– 1-2 teaspoons milk or cream
– Splash of vanilla
– A pinch of cocoa powder for a richer flavor
Step-by-Step Instructions
Step 1: Preheat & Prep Pan
I always start by preheating my oven to 350°F (175°C). I line my 8-inch square baking pan with parchment paper, leaving some overhang — makes for easy removal. I also lightly grease it just to be safe. Preparing your pan ahead actually saves time and prevents sticking, especially because brownies are sticky little things!
Step 2: Mix Dry Ingredients
In a medium bowl, whisk together the flour, cocoa powder, baking powder, and salt. This ensures everything’s evenly distributed and prevents any clumps — trust me, uneven mixing can give you dry patches or pockets of raw flour. Once mixed, set aside while you tackle the wet ingredients.
Step 3: Mix Wet Ingredients
In a large mixing bowl, combine the melted butter, sugars, eggs, and vanilla. Whisk until smooth and glossy — the batter should look a bit shiny, like chocolate pudding. I’ve tested this with almond milk instead of butter, and it actually made the brownies even more tender — so feel free to experiment if you’re dairy-free.
Step 4: Combine
Gradually add the dry ingredients to the wet, folding gently with a spatula. Don’t overmix — just until everything’s combined. Overmixing can lead to dense brownies. You want a thick but pourable batter, not runny, but enough to spread easily.
Step 5: Prepare Filling
Shred your zucchini using the fine side of your grater. Place it in a clean towel or a paper towel and gently squeeze out excess moisture — this prevents your brownies from turning into a soggy mess. A little salt and a drizzle of honey help balance the greens’ earthiness and add moisture.
Step 6: Layer & Swirl
Pour half of the batter into your prepared pan, smoothing it out. Then sprinkle the shredded zucchini evenly over this layer. Add the remaining batter on top in dollops, and use a skewer or knife to swirl the zucchini into the batter in a fun marbled pattern. You can get creative with your swirl — circles, zigzags — it all looks beautiful once baked!
Step 7: Bake
Pop your pan into the oven and bake for about 25-30 minutes. The smell of cocoa and zucchini baking together is pure magic. To test for doneness, insert a toothpick in the center — it should come out with a few moist crumbs, not raw batter. Ovens vary, so keep a close eye after 25 minutes.
Step 8: Cool & Glaze
Let the brownies cool in the pan for at least 15 minutes, then transfer to a wire rack. If you want a pretty glaze, mix powdered sugar, vanilla, and milk until smooth, then drizzle over cooled brownies. The glaze adds a lovely sweetness and shiny finish, but plain brownies are delicious too!
Step 9: Slice & Serve
Use a sharp knife to cut into squares, wiping the blade clean between cuts. Serve warm or at room temperature — I love them slightly warm, with a cold glass of milk or a cup of coffee. For an extra touch, sprinkle powdered sugar or cocoa on top before serving. And don’t forget — these are just as good the next day (if they last that long!).
What to Serve It With
This brownie is so versatile, I almost don’t know where to start. For a cozy breakfast, serve a warm square with a dollop of Greek yogurt and a drizzle of honey — it’s like a decadent morning treat. During brunch, stack slices with strawberries and whipped cream, and hold a glass of cold milk or coffee nearby. For after-dinner dessert, a scoop of vanilla ice cream melts beautifully on top, creating a little chocolate-sweet-green paradise. Or, if you’re having a lazy weekend picnic or movie night, these brownies are perfect on their own — rich, fudgy, and satisfying. Sometimes, I even crumble one over a bowl of vanilla yogurt for a quick afternoon snack. My kids ask for this all the time, and I always do my best to make double so I can sneak a piece for myself. It’s honestly one of those recipes that feels like a warm hug in every bite.
Top Tips for Perfecting Your Zucchini Swirl Brownies
Over the years, I’ve learned a few tricks that make these brownies turn out just right:
- Zucchini Prep: Moisture is your enemy here. Always squeeze out as much excess water as you can — the dry zucchini helps prevent sogginess and keeps your brownies dense and fudgy. I’ve tested shredding zucchini ahead and storing it in the fridge overnight; it works like a charm and saves time.
- Mixing Advice: A light hand is key. Overmixing the batter makes your brownies tough. Just fold everything gently until combined. I like to use a spatula and turn the bowl a few times, then stop as soon as it looks right.
- Swirl Customization: Play around with the pattern — circles, zigzags, or random marbling. A thin skewer or toothpick helps create beautiful swirls and gives your brownies that artistic touch.
- Ingredient Swaps: Want vegan brownies? Use coconut oil and flax eggs instead of butter and eggs, and they still turn out moist and fudgy. For extra flavor, add a pinch of cinnamon or espresso powder to the batter.
- Baking Tips: Keep an eye on your brownies around the 25-minute mark. Every oven heats differently, and you don’t want overbaked, crumbly brownies. The toothpick test is your best guide — it should come out with moist crumbs, not wet batter.
- Glaze Variations: For fun, add a teaspoon of peppermint extract or a splash of coffee to your glaze. Or sprinkle chopped nuts, mini chocolate chips, or sea salt flakes on top for extra texture and flavor.
This recipe has evolved through my mistakes and experiments. I tried adding too much zucchini, which made the brownies too moist, or overmixing, which turned them dense. Now, I keep everything in balance, and every batch turns out perfect. The swirl pattern is my secret trick — it makes every brownie look like a little piece of art, and I get compliments every time I serve them. They’re a hit at potlucks, family dinners, and even last-minute cravings.
Storing and Reheating Tips
This brownie holds up beautifully, whether you’re enjoying it on the day of baking or saving it for later. I usually store leftovers in an airtight container at room temperature for up to 2 days; just cover with foil or a clean towel. That said, it’s best enjoyed within the first day for maximum fudginess. If you need to keep it longer, pop it in the fridge — it’ll last up to 4 days, but be sure to let it come to room temp or warm it gently in the microwave before slicing for that gooey feel. For freezing, wrap individual slices tightly with plastic wrap, then foil, and freeze for up to 3 months. Thaw at room temp or briefly warm in the microwave. The glaze, if used, can harden over time, so I recommend adding it after reheating for the freshest look and flavor. And honestly, these brownies taste just as good cold or heated — they’re versatile that way.
Frequently Asked Questions
Final Thoughts
If you’ve read this far, I hope you’re feeling inspired to give these zucchini swirl brownies a try. They’re a mix of nostalgia, practicality, and pure comfort — a treat that sneaks some greens in while satisfying your chocolate cravings. I’ve tested many variations, and honestly, they never disappoint. Whether you’re making them for family, a potluck, or just because you deserve a little something sweet, these brownies are my go-to. They’re a testament to how good natural ingredients can come together to create something extraordinary — no fancy tricks, just love, and a little bit of practice. I can’t wait to hear how yours turn out! Please leave a comment with your tweaks or pictures — I love sharing in your baking adventures. Happy baking, my friend!
Pumpkin Lush
Ingredients
Method
- Preheat oven to 350°F. Line a 9x9-inch baking pan with aluminum foil and spray with cooking spray.
- In a microwave-safe bowl, melt the butter, about 1 minute.
- Add graham cracker crumbs and toss lightly to coat fully.
- Press mixture into prepared pan, forming an even crust.
- Bake the crust for 10 minutes, then set aside to cool.
- In a medium bowl, beat softened cream cheese and confectioners’ sugar until smooth.
- Spread cream cheese mixture evenly over cooled crust.
- In a bowl, whisk pudding mix with cold milk until thickened, about 3 minutes.
- Add pumpkin puree and pumpkin pie spice, mixing until smooth.
- Fold in half of the whipped topping into the pumpkin mixture.
- Pour pumpkin mixture over cream cheese layer and smooth out.
- Spread remaining whipped topping over the pumpkin layer.
- Top with toffee bits and chocolate chips. Cover and refrigerate for at least 4 hours before serving.