Berry Cream Dream Cheesecake Cake
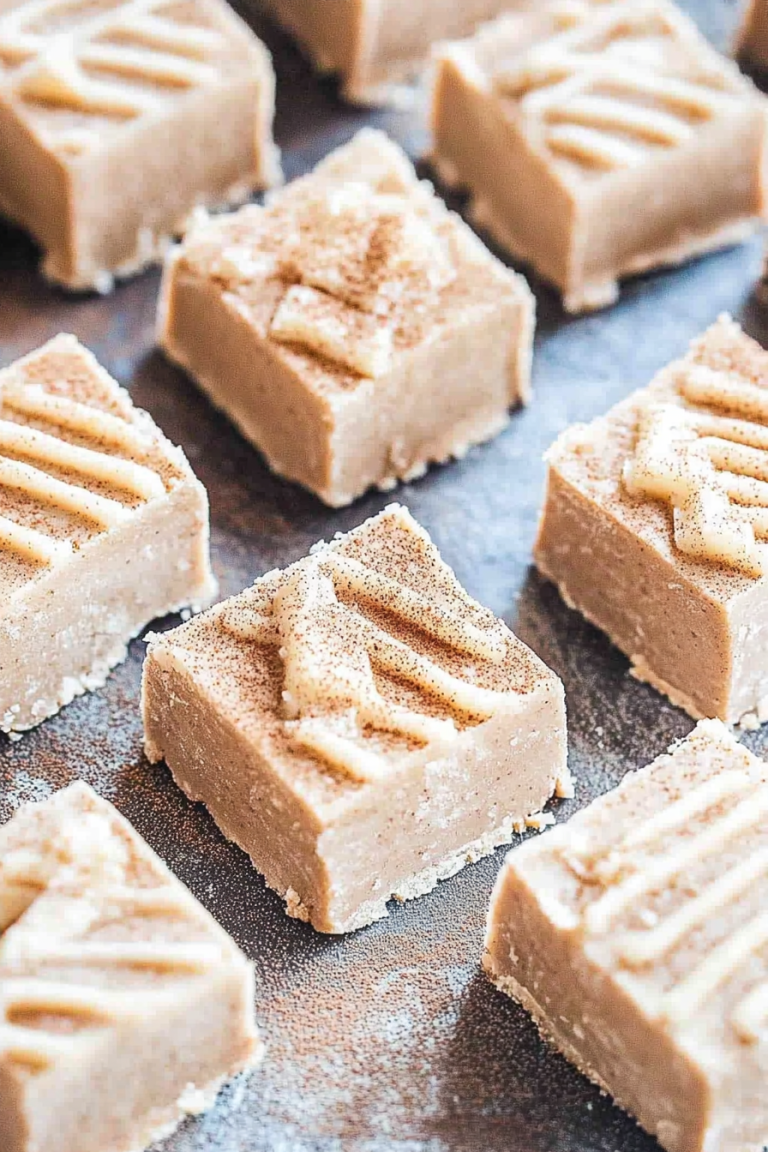
Oh, where do I even begin with this zucchini bread? It feels like just yesterday my grandma was pulling a warm loaf out of her oven, the scent of cinnamon and sweet zucchini filling her tiny kitchen. That aroma, you guys, it’s pure magic. It instantly transports me back to lazy summer afternoons, helping her grate zucchini from her garden, my little hands covered in green bits. This isn’t just any zucchini bread; it’s *the* zucchini bread that has graced our family table for generations. It’s the one that disappears in minutes at holidays, the one my kids beg for when they’re home from college, and honestly, the one I turn to when I need a little bit of comfort in my day. If you’ve ever felt intimidated by baking with vegetables, let me tell you, this recipe is a total game-changer. It’s so incredibly moist and flavorful, you’d never guess the secret ingredient is healthy zucchini! It’s so much better than those overly dry, crumbly muffins you sometimes find. Trust me, this is the one you’ll be making again and again.
What is Zucchini bread?
So, what exactly *is* this magical zucchini bread? At its heart, it’s a quick bread, meaning no yeast, no fuss, just simple ingredients mixed together and baked. Think of it as a delicious cake that’s perfectly acceptable to eat for breakfast. The “zucchini” in the name comes from the star ingredient: grated zucchini. Now, don’t let that scare you! The zucchini’s job is purely to add moisture and a tender crumb, making the bread incredibly soft and decadent without any added fat. It’s totally undetectable in terms of flavor once it’s baked; all you get is this wonderfully sweet, spiced goodness. It’s essentially a love letter to summer’s bounty, transformed into something warm, comforting, and utterly delightful. It’s a classic for a reason, and my family’s version has just a few little tweaks that make it extra special.
Why you’ll love this recipe?
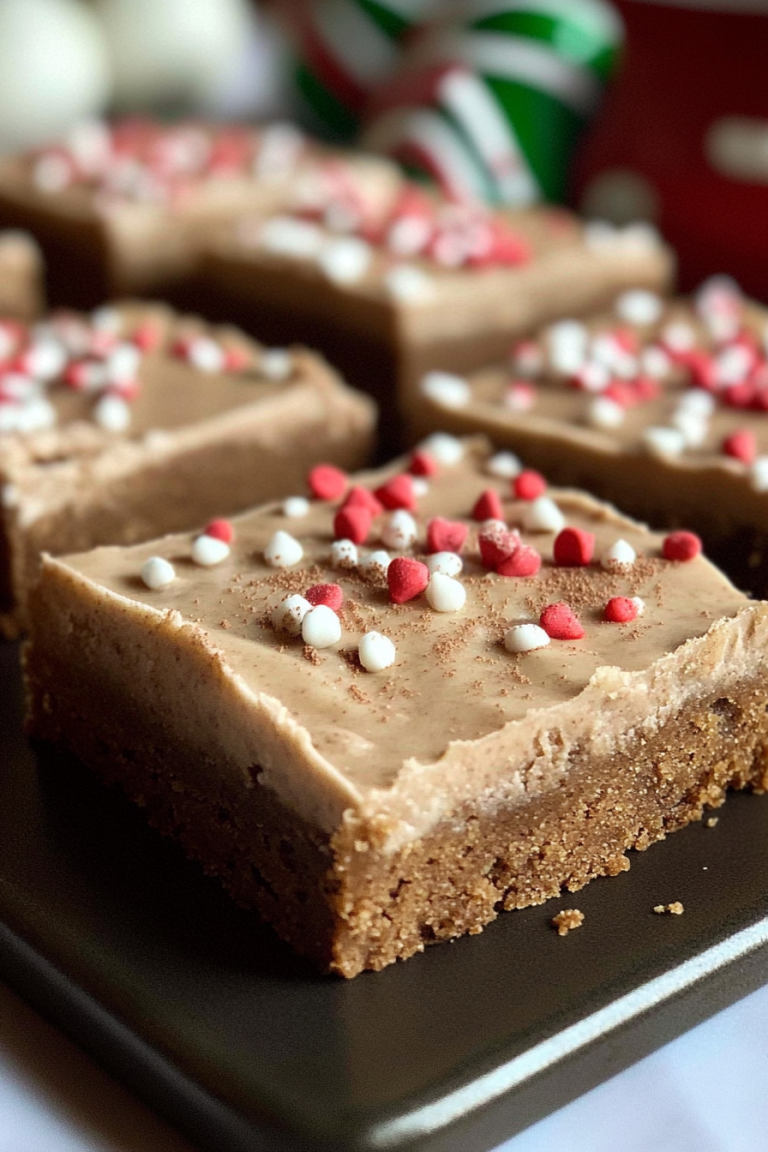
There are so many reasons why this zucchini bread has become my go-to, and I just know you’re going to love it too. First off, let’s talk about the FLAVOR. It’s perfectly spiced with cinnamon and a hint of nutmeg, but the real star is the sweetness that just melts in your mouth. It’s moist, tender, and has this incredible richness that feels so indulgent, yet it’s surprisingly wholesome. And the SIMPLICITY! Honestly, if you can stir a few bowls together, you can make this. It’s a lifesaver on busy weeknights when I need a quick dessert or a special breakfast treat without a ton of effort. My kids actually ask for this all the time, and it’s one of the few baked goods I don’t feel guilty about them eating, thanks to the zucchini! Plus, it’s incredibly COST-EFFECTIVE. Zucchini is usually super affordable, especially when it’s in season, and the other ingredients are pantry staples. It’s a win-win for your wallet and your taste buds. What I love most about this is its VERSATILITY. It’s fantastic on its own, of course, but it’s also incredible with a smear of cream cheese or a dollop of Greek yogurt. You can even add chocolate chips or walnuts to the batter for an extra bit of texture and flavor. It’s like a more wholesome cousin to banana bread, but with its own unique charm. This one truly stands out because of that amazing, almost fudgy texture you get from the careful balance of ingredients.
How do you make Zucchini bread?
Quick Overview
Making this zucchini bread is a breeze, and it all comes down to a few simple steps that ensure maximum flavor and that signature moist texture. You’ll whisk together your dry ingredients, then your wet ingredients separately, and finally, gently combine them before folding in the star of the show – the grated zucchini. A quick swirl of a simple glaze on top and into the oven it goes! The beauty of this recipe is that you don’t need any fancy equipment, and it comes together in under 15 minutes of active prep time. It’s perfect for those moments when you crave something homemade but are short on time.
Ingredients
For the Main Batter:
2 cups all-purpose flour (I always use unbleached for a better texture)
1 teaspoon baking soda
1/2 teaspoon salt
1 teaspoon ground cinnamon
1/4 teaspoon ground nutmeg (optional, but it adds a lovely warmth)
1 3/4 cups granulated sugar (you can reduce this slightly if you prefer, but it does affect the tenderness)
2 large eggs, at room temperature (important for better incorporation!)
1 cup vegetable oil (or any neutral-flavored oil like canola or avocado oil)
1/4 cup milk (whole milk makes it extra creamy, but I’ve tested this with almond milk and it actually made it even creamier!)
1 teaspoon vanilla extract
For the Filling:
2 cups grated zucchini, well-drained (this is key! More on that later)
1/2 cup chopped walnuts or pecans (optional, but so good for crunch!)
1/4 cup brown sugar (for a lovely caramel note)
1 teaspoon ground cinnamon
For the Glaze:
1 cup powdered sugar
2-3 tablespoons milk (or lemon juice for a tangy twist!)
1/2 teaspoon vanilla extract
Step-by-Step Instructions
Step 1: Preheat & Prep Pan
First things first, let’s get your oven ready. Preheat it to 350 degrees Fahrenheit (175 degrees Celsius). Now, grab your loaf pan. I love using a standard 9×5 inch loaf pan. Grease it really well with butter or non-stick spray, and then lightly dust it with flour. Tap out any excess flour. This little step makes sure your beautiful loaf slides out perfectly without any sticking. You can also line it with parchment paper for extra insurance, which I often do when I’m feeling particularly meticulous (or just want zero cleanup).
Step 2: Mix Dry Ingredients
In a large bowl, whisk together the flour, baking soda, salt, cinnamon, and nutmeg. You want to give this a good whisk to make sure everything is evenly distributed. This is super important because it prevents pockets of baking soda or salt in your finished bread. I like to sift my flour sometimes, especially if it’s been packed down in the bag, but a good whisk usually does the trick! The goal here is a light, airy mixture.
Step 3: Mix Wet Ingredients
In a separate medium bowl, whisk together the granulated sugar, eggs, vegetable oil, milk, and vanilla extract. Beat it until it’s well combined and looks smooth and slightly emulsified. Make sure your eggs are at room temperature; they’ll incorporate much better this way, leading to a more tender crumb. If you forget to take them out of the fridge, just pop them in a bowl of warm water for about 5-10 minutes. Easy fix!
Step 4: Combine
Now, pour the wet ingredients into the bowl with the dry ingredients. This is where you need to be gentle! Using a spatula or a wooden spoon, mix just until combined. It’s really, really important not to overmix here. A few streaks of flour are okay – they’ll disappear as you fold in the zucchini. Overmixing develops the gluten too much, which can make your bread tough. We want tender, tender, tender!
Step 5: Prepare Filling
While your batter is resting for a moment, let’s get our delicious filling ready. If you’re using nuts, give them a rough chop. In a small bowl, mix together the grated zucchini, brown sugar, cinnamon, and chopped nuts (if using). Make sure the zucchini is squeezed dry! Seriously, this is the secret to not having a soggy loaf. I usually grate it into a fine-mesh sieve, press down with a spoon, and let it drain for about 10-15 minutes. You’ll be amazed at how much liquid comes out. Discard the liquid and use the dry zucchini in your batter. This is a step I learned the hard way after a few too many loaves that were a bit… mushy. Trust me on this one!
Step 6: Layer & Swirl
Now for the fun part! Gently fold the drained, spiced zucchini mixture into your batter. Again, just fold until it’s mostly incorporated. You don’t want to overmix. Some pockets of the filling are totally fine! Pour about half of the batter into your prepared loaf pan, spread it evenly. Then, spoon the remaining batter over the top. If you want a more swirled effect, you can gently swirl with a knife, but I often just let the zucchini mixture naturally distribute as it bakes.
Step 7: Bake
Pop that loaf pan into your preheated oven. Bake for about 50-65 minutes. The baking time can vary depending on your oven, so start checking around the 50-minute mark. You’ll know it’s done when a toothpick inserted into the center comes out clean, or with just a few moist crumbs attached (not wet batter!). The top should be golden brown and smell heavenly. If the top is browning too quickly, you can loosely tent it with aluminum foil for the last 15-20 minutes of baking.
Step 8: Cool & Glaze
Once it’s out of the oven, let the zucchini bread cool in the pan for about 10-15 minutes. This allows it to set up a bit. Then, carefully invert it onto a wire rack to cool completely. Resist the urge to glaze it while it’s hot – the glaze will just melt and run off! Once it’s fully cooled, whip up the glaze by whisking together the powdered sugar, milk, and vanilla extract until smooth. You want it to be thick enough to drizzle but still pourable. Drizzle it all over the top, letting it drip down the sides. It’s divine!
Step 9: Slice & Serve
Once the glaze has set a bit, slice your beautiful zucchini bread with a serrated knife for clean cuts. Serve it at room temperature. It’s perfect on its own, but a little smear of butter or cream cheese takes it to another level. Enjoy that incredible aroma and the moist, tender crumb!
What to Serve It With
This zucchini bread is a superstar all on its own, but it plays incredibly well with others! For a simple, comforting BREAKFAST, I love it toasted with a generous schmear of butter. It’s also fantastic alongside a strong cup of coffee or a creamy latte. For BRUNCH, it adds a touch of homemade elegance. I like to serve it sliced on a pretty platter alongside fresh berries and maybe a yogurt parfait. It’s a wonderful addition to a spread with eggs and bacon. As a slightly more decadent DESSERT, it’s divine warmed slightly and served with a scoop of vanilla bean ice cream or a dollop of whipped cream. The warm bread and cold ice cream is a match made in heaven! And for those COZY SNACKS, it’s the perfect afternoon pick-me-up. I’ll often just grab a slice (or two!) with a glass of cold milk. My family also loves it with a thin layer of cream cheese frosting when we’re feeling extra indulgent. It’s just so versatile, fitting into any meal or snack occasion with ease and always being a crowd-pleaser.
Top Tips for Perfecting Your Zucchini Bread
I’ve made this recipe more times than I can count, and along the way, I’ve picked up a few tricks that make all the difference. Here are my top tips for achieving zucchini bread perfection:
Zucchini Prep: As I mentioned, squeezing the moisture out of the zucchini is NON-NEGOTIABLE. Grate your zucchini (I prefer the medium holes on a box grater) and then place it in a fine-mesh sieve. Press down firmly with a spoon or your hands to remove as much liquid as possible. Let it sit for about 10-15 minutes to really drain. This step prevents a soggy, dense loaf and ensures a tender, perfectly baked bread. Using fresh zucchini is always best, but if you have frozen, make sure to thaw it completely and drain it extra thoroughly.
Mixing Advice: Remember that “just combined” rule for the batter? It’s crucial. Once you add the wet to the dry, mix only until you don’t see large streaks of flour. A few small lumps are perfectly fine. Overmixing develops gluten, which leads to a tough, chewy texture instead of the light, tender crumb we’re after. Fold in the zucchini gently as well; you don’t want to mash it into a paste.
Swirl Customization: While my basic recipe just folds the zucchini in, if you want to get fancy, you can divide your batter in half after combining wet and dry. Fold the zucchini mixture into one half. Pour the plain batter into the pan, then dollop the zucchini batter on top. Use a knife or skewer to gently swirl the two together for a marbled effect. Don’t over-swirl, or you’ll lose the definition!
Ingredient Swaps: I’ve experimented with this recipe quite a bit! For a slightly healthier version, you can try substituting some of the all-purpose flour with whole wheat flour (about 1/2 cup to 1 cup), but be aware it might make the bread a little denser. You can also reduce the sugar by about 1/4 cup if you prefer it less sweet, though it will affect the moisture and tenderness slightly. For a dairy-free version, use a non-dairy milk like almond, soy, or oat milk – I’ve found almond milk actually makes it incredibly creamy!
Baking Tips: Ovens can be fickle! If your oven tends to run hot, you might want to reduce the temperature by 10-15 degrees. Always use the middle rack for even baking. To test for doneness, a wooden skewer or toothpick inserted into the center should come out with moist crumbs clinging to it, not wet batter. If the top is browning too quickly but the inside isn’t cooked, loosely tent the loaf with aluminum foil.
Glaze Variations: The simple powdered sugar glaze is my go-to, but you can jazz it up! For a tangy kick, use fresh lemon juice instead of milk for part or all of the liquid in the glaze. You could also add a little orange zest or a drop of almond extract for a different flavor profile. If you’re not a fan of glaze, a simple dusting of powdered sugar once cooled is also lovely, or you can skip the glaze altogether!
Storing and Reheating Tips
This zucchini bread is usually gobbled up pretty quickly in my house, but when we do have leftovers, here’s how I store it to keep it as fresh as possible:
Room Temperature: Once it’s completely cooled, I wrap the loaf tightly in plastic wrap or place it in an airtight container. It will stay delicious at room temperature for about 2-3 days. The moisture from the zucchini helps keep it fresh longer.
Refrigerator Storage: If you live in a warm, humid climate, or if you want to keep it for a bit longer, storing it in the refrigerator is a good option. Wrap it well or keep it in an airtight container. It should last for up to a week in the fridge. When you’re ready to eat it, I recommend letting it come back to room temperature for the best texture, or gently warming a slice.
Freezer Instructions: This bread freezes beautifully! Once completely cooled, wrap the loaf tightly in a layer of plastic wrap, then a layer of aluminum foil, or place it in a freezer-safe bag. It can be frozen for up to 3 months. To thaw, unwrap it and let it come to room temperature on the counter, or thaw overnight in the refrigerator. You can also reheat individual slices in a toaster oven or a low-heat oven.
Glaze Timing Advice: If you plan to freeze your loaf, I strongly recommend glazing it *after* thawing. If you freeze it with the glaze on, it can sometimes become a bit sticky or have an odd texture. For loaves stored at room temperature or in the fridge, the glaze holds up well for a few days.
Frequently Asked Questions
Final Thoughts
Honestly, there’s just something so deeply satisfying about pulling a warm, fragrant loaf of homemade zucchini bread out of the oven. It’s a taste of home, a hug in edible form, and a reminder of simpler times. This recipe isn’t just about baking; it’s about creating memories and sharing something truly special with the people you love. It’s the perfect blend of wholesome goodness and delightful indulgence, and I’m so excited for you to try it and make it your own. If you love this recipe, you might also enjoy my classic Banana Bread or my incredibly moist Pumpkin Bread recipes – they’re also family favorites! I really hope this zucchini bread brings as much joy to your kitchen as it does to mine. I can’t wait to hear how yours turns out! Don’t forget to leave a comment below with your thoughts or any fun variations you tried!
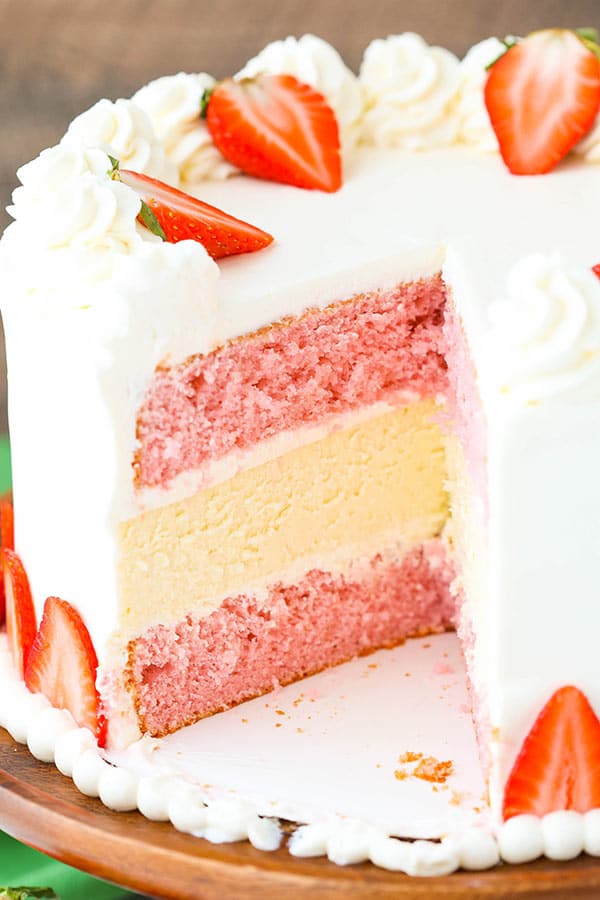
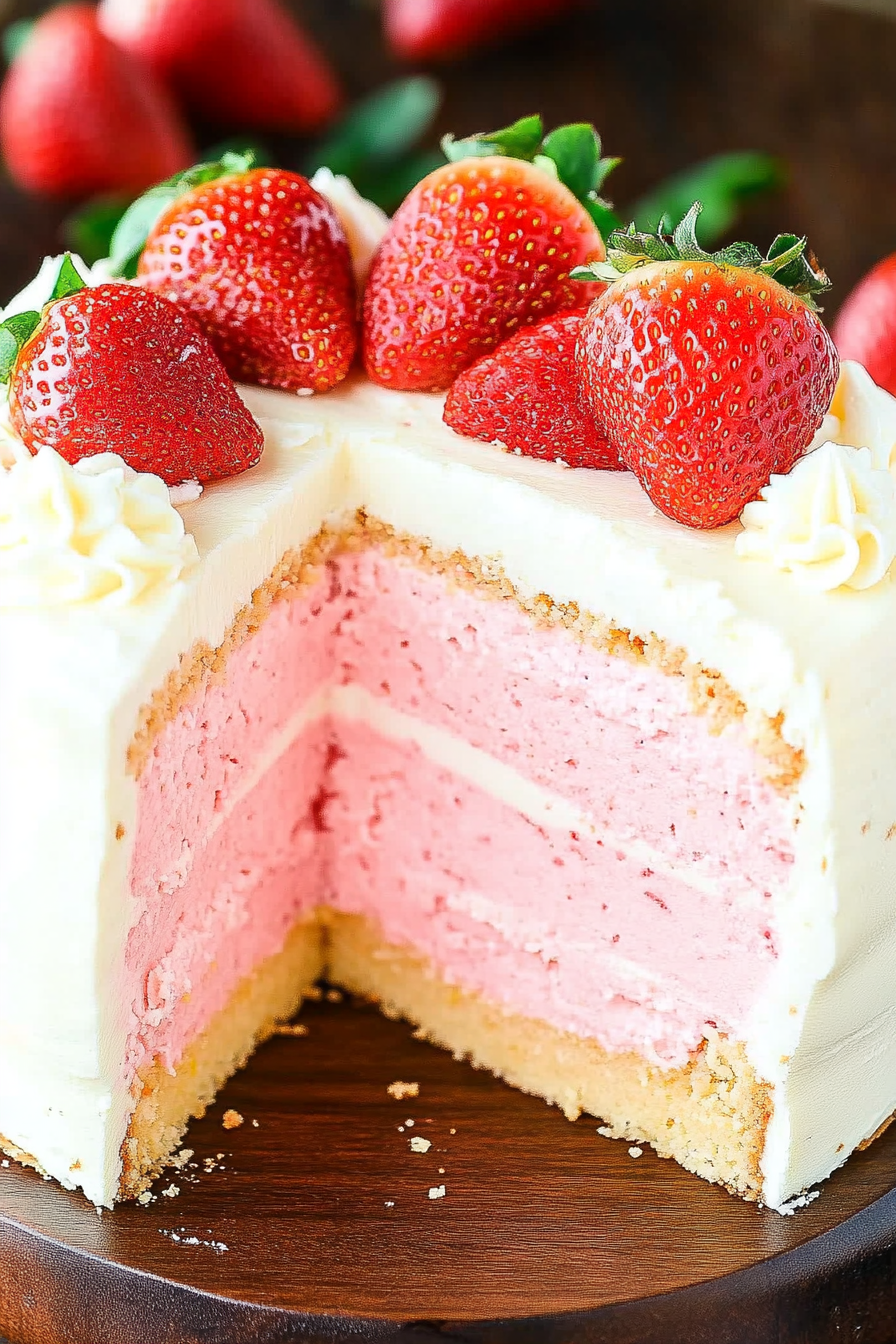
Strawberry Cheesecake Cake
Ingredients
Method
- Preheat oven to 300°F (148°C). Line the entire inside of a 9-inch (23cm) cake pan with aluminum foil. Press it into the pan to get it as flat as you can. You’ll use the aluminum foil to lift the cheesecake out of the pan when it’s baked and cooled.
- In a large mixer bowl, mix the cream cheese, sugar and flour together until combined. Use low speed to keep less air from getting into the batter, which can cause cracks. Scrape down the sides of the bowl.
- Add the sour cream, and vanilla extract and mix on low speed until well combined.
- Add the eggs one at a time, mixing slowly and scraping the sides of the bowl after each addition.
- Pour the cheesecake batter into the lined cake pan.
- Place the cake pan inside another larger pan. I use a larger cake pan, but you can use a roasting pan or any other larger baking pan. Fill the outside pan with enough warm water to go about halfway up the sides of the cake pan. Bake for 1 hour.
- Turn off the oven and leave the cheesecake in the oven with the door closed for 30 minutes. Do not open the door or you’ll release the heat.
- Crack oven door and leave the cheesecake in the oven for another 30 minutes. This cooling process helps the cheesecake cool slowly to prevent cracks.
- Remove cheesecake from oven and chill until firm, 5-6 hours.
- Preheat the oven to 350°F (176°C). Line the bottoms of two 9-inch (23cm) cake pans with parchment paper and grease the sides.
- In a large mixer bowl, cream the butter and sugar together on medium speed until light in color and fluffy, about 3-4 minutes.
- Add the sour cream and strawberry extract and mix until combined.
- Add the egg whites in two batches, mixing until well combined after each addition. Scrape down the sides of the bowl as needed to make sure everything is combined.
- Combine the flour, baking powder and salt in a medium bowl. Combine the milk and strawberry puree in a measuring cup.
- Add half of the flour mixture to the batter and mix until combined.
- Add the milk mixture to the batter and mix until combined.
- Add the remaining flour mixture and mix until smooth. Scrape down the sides of the bowl as needed to ensure everything is being combined. Stir in the food coloring.
- Divide the batter evenly between the prepared cake pans. Bake for 27-30 minutes, or until a toothpick inserted in the middle comes out with a few crumbs.
- Remove the cakes from the oven and allow to cool for 2-3 minutes, then remove from pans to a cooling rack to finish cooling.
- Make the frosting. Add the cream cheese to a large mixer bowl and beat until smooth, then set aside.
- Add the heavy whipping cream, powdered sugar and vanilla extract to another bowl and whip until soft peaks form.
- Add the cream cheese to the whipped cream and whip until stiff peaks form. It will happen fairly quickly. Set whipped frosting in the refrigerator.
- Use a large serrated knife to remove the domes from the top of the cakes.
- Place the first layer of cake on a serving plate or a cardboard cake round. Spread about 1 cup of frosting evenly on top of the cake layer.
- Use the aluminum foil to lift the cheesecake out of the cake pan, remove the foil and place the cheesecake on top of the cake.
- Spread another cup of frosting evenly on top of the cheesecake, then add the second layer of cake on top. If the sides of the cake don’t line up, use a serrated knife to trim off the excess cake or cheesecake.
- Frost the outside of the cake.
- Pipe swirls of the whipped frosting around the top edge of the cake. I used the Ateco 844 icing tip.
- Place sliced strawberries around the bottom edge of the cake. Place strawberry halves on top of the cake around the inside of the swirls.
- Pipe a small shell border around the bottom edge of the cake.
- Store the cake (in an airtight container, if possible) in the refrigerator until ready to serve. Cake is best for 2-3 days.