Sweet Pecan Treats How to Make Them
You know those recipes that just feel like a warm hug? The ones that smell absolutely divine wafting from the oven and make your whole house feel cozier? This zucchini bread is *that* recipe for me. It’s the one I pull out when I need a little bit of magic, whether it’s for a lazy weekend morning, a surprise visitor, or just a craving for something sweet but wholesome. Honestly, it’s so good, it rivals my grandma’s famous apple pie in terms of sheer comfort factor, and that’s saying a lot! I’ve tinkered with this a million times, trying to get it *just* right, and I can confidently say that this version is pure perfection. It’s moist, packed with flavor, and you can’t even taste the zucchini – I promise! This is the ultimate crowd-pleaser, the kind of bake that disappears in minutes. If you’re looking for a go-to, dependable, utterly delicious quick bread, you’ve found it.
What is Zuc
So, what exactly *is* zucchini bread? At its heart, it’s a sweet quick bread where finely grated zucchini is the secret star. Don’t let the “zucchini” part fool you; it’s not a savory dish! The zucchini lends an incredible moisture and tenderness to the crumb that you just can’t achieve with other ingredients. Think of it as a super moist, slightly sweet cake, but with the rustic charm of a loaf. It’s in the same family as banana bread or pumpkin bread, but it has this unique ability to be both light and decadent. The name itself is pretty straightforward – it’s a bread, and it features zucchini. But the magic is in how that humble vegetable transforms into something so delightful. It’s less about the zucchini flavor and more about the incredible texture and moisture it brings. It’s the perfect way to use up that garden bounty or a few extra zucchini from the grocery store!
Why you’ll love this recipe?
Oh, where do I even start with why this zucchini bread is my absolute favorite? First off, the FLAVOR. It’s got this perfect balance of sweetness with a hint of warm spice – cinnamon and a touch of nutmeg, maybe a whisper of vanilla. It’s not overly sweet, which I love, making it incredibly versatile. The texture is just *chef’s kiss* – unbelievably moist, tender, and just dense enough to feel satisfying. What really sets this apart, though, is how surprisingly SIMPLE it is. You don’t need any fancy equipment or skills. It’s a dump-and-mix kind of situation, making it a lifesaver on busy weeknights when I need a quick dessert or breakfast treat. And let’s talk COST-EFFICIENCY. Zucchini is usually pretty budget-friendly, and the other ingredients are pantry staples. You can whip up this incredible loaf without breaking the bank! Plus, it’s incredibly VERSATILE. Have it for breakfast with a smear of butter, slice it thin for a light dessert, or just grab a piece as a mid-afternoon pick-me-up. It’s also a fantastic base for add-ins like chocolate chips, walnuts, or even a swirl of cream cheese. Compared to other quick breads, this zucchini bread truly shines because of its unbeatable moisture and subtle, comforting flavor profile. It’s the recipe I come back to again and again.
How do you make Zucchini bread?
Quick Overview
Making this zucchini bread is surprisingly straightforward. You’ll start by whisking together your dry ingredients, then combine your wet ingredients, and finally, bring them all together. The secret weapon is, of course, the grated zucchini, which we’ll add in to boost that amazing moisture. You’ll then pour it into a prepared loaf pan and bake until a tester comes out clean. The whole process, from start to finish, takes less time than you’d spend waiting for a pizza delivery, and the result is SO much more rewarding. It’s honestly one of the easiest bakes I know, and it never fails to impress.
Ingredients
For the Main Batter:
You’ll need about 2 cups of finely grated zucchini. Make sure to squeeze out as much excess liquid as you can – this is a crucial step! I usually use a box grater on the finest setting. For the flour, all-purpose is your best friend here, about 2 ½ cups. We’ll also need 1 ½ teaspoons of baking soda and ½ teaspoon of salt to give it lift and balance. And for that comforting warmth, 1 teaspoon of ground cinnamon and ¼ teaspoon of ground nutmeg. Oh, and a pinch of ground cloves if you’re feeling adventurous! For sweetness, we’re using 1 cup of granulated sugar, but you could use ¾ cup of brown sugar for a deeper, caramel note. And 2 large eggs, lightly beaten, to bind everything together. Then, ½ cup of melted unsalted butter for richness, and ½ cup of milk – I’ve tested this with almond milk and it actually made it even creamier! A splash of vanilla extract (1 teaspoon) rounds out the flavor beautifully. If you’re adding nuts or chocolate chips, have about 1 cup ready to go.
For the Filling:
This is optional, but it takes the bread to a whole new level! Think of it as a cinnamon-sugar swirl. You’ll need about ¼ cup of packed brown sugar, 1 tablespoon of cinnamon, and a little extra melted butter (about 2 tablespoons) to help it spread. Some folks add chopped nuts or even mini chocolate chips to this swirl too!
For the Glaze:
This is what makes it feel extra special. It’s just a simple powdered sugar glaze. About 1 cup of powdered sugar, whisked with 2-3 tablespoons of milk or cream. You can add a tiny splash of vanilla or even a bit of lemon zest for a brighter flavor. The key is to get the consistency right – thick enough to coat, but not so thick it’s hard to drizzle.
Step-by-Step Instructions
Step 1: Preheat & Prep Pan
First things first, get that oven preheating to 350 degrees Fahrenheit (175 degrees Celsius). While it’s warming up, grab a standard 9×5 inch loaf pan. Grease it really well with butter or non-stick spray, and then dust it with a little flour. You can also line it with parchment paper, leaving some overhang on the sides – this makes it super easy to lift the finished loaf out. I always do this when I bake quick breads; it’s a lifesaver for clean-up and for getting that perfect loaf shape.
Step 2: Mix Dry Ingredients
In a large bowl, whisk together your flour, baking soda, salt, cinnamon, nutmeg, and any other spices you’re using. Whisking them together ensures everything is evenly distributed, so you don’t get little pockets of baking soda or spice. You want a light, airy mix. Some people like to sift their dry ingredients, which is great, but a good whisking works wonders too. This step is all about building that foundation for a tender crumb.
Step 3: Mix Wet Ingredients
In a separate medium bowl, whisk together your lightly beaten eggs, melted butter, milk, and vanilla extract. Make sure your butter isn’t too hot when you add it, or it might scramble the eggs! A gentle whisk is all you need to combine them until they’re smooth and well-blended. Give it a little sniff – doesn’t it already smell promising?
Step 4: Combine
Now, here’s where the magic starts to happen. Add your grated, squeezed zucchini to the dry ingredients and give it a quick toss. This helps coat the zucchini and prevent it from clumping together. Then, pour the wet ingredients into the dry ingredients. Using a spatula or wooden spoon, gently fold everything together until *just* combined. It’s really important not to overmix here. A few streaks of flour are okay; they’ll disappear during baking. Overmixing develops the gluten too much, which can lead to a tough bread, and we want this to be wonderfully soft and tender!
Step 5: Prepare Filling
If you’re doing the cinnamon-sugar swirl, now’s the time to mix up that delicious filling. In a small bowl, combine the brown sugar and cinnamon. If you want it a little easier to swirl, you can stir in about 2 tablespoons of melted butter. This mixture will add pockets of sweet, spiced goodness throughout your bread. It’s like a little surprise waiting in every bite!
Step 6: Layer & Swirl
Pour about half of your batter into your prepared loaf pan and spread it evenly. Now, sprinkle about half of your cinnamon-sugar filling over the top. Then, pour the remaining batter over the filling, smoothing the top. Finally, sprinkle the rest of the filling over the top batter. If you’re feeling fancy, you can take a knife or skewer and gently swirl the filling into the batter. Don’t go too deep, just a few passes to create those beautiful marbled lines. This swirl is what makes it visually stunning, but honestly, it’s delicious even without it!
Step 7: Bake
Pop that pan into your preheated oven. Bake for about 50-65 minutes. Now, oven times can vary, so don’t be afraid to check on it. You’ll know it’s done when a wooden skewer or toothpick inserted into the center comes out clean, or with just a few moist crumbs attached. If the top starts to brown too much before it’s cooked through, you can loosely tent it with aluminum foil. Trust me, the aroma that fills your kitchen during this stage is pure heaven!
Step 8: Cool & Glaze
Once it’s baked, take the loaf pan out of the oven and let it cool in the pan for about 10-15 minutes. This is important because it allows the bread to firm up a bit. Then, carefully invert the pan (or use the parchment overhang to lift it out) and transfer the loaf to a wire rack to cool completely. It’s crucial to let it cool completely before glazing, otherwise, the glaze will just melt off. Once it’s fully cooled, whisk together your powdered sugar and milk (or cream) for the glaze. You want a pourable but not runny consistency. Drizzle it generously over the top of the cooled loaf. It’s so satisfying to watch it drip down the sides!
Step 9: Slice & Serve
Once the glaze has set a little, it’s time to slice and serve! Use a sharp serrated knife for the cleanest cuts. Serve it at room temperature for the best texture. This bread is delicious on its own, but a little butter never hurt anyone, right? Enjoy every single moist, flavorful bite!
What to Serve It With
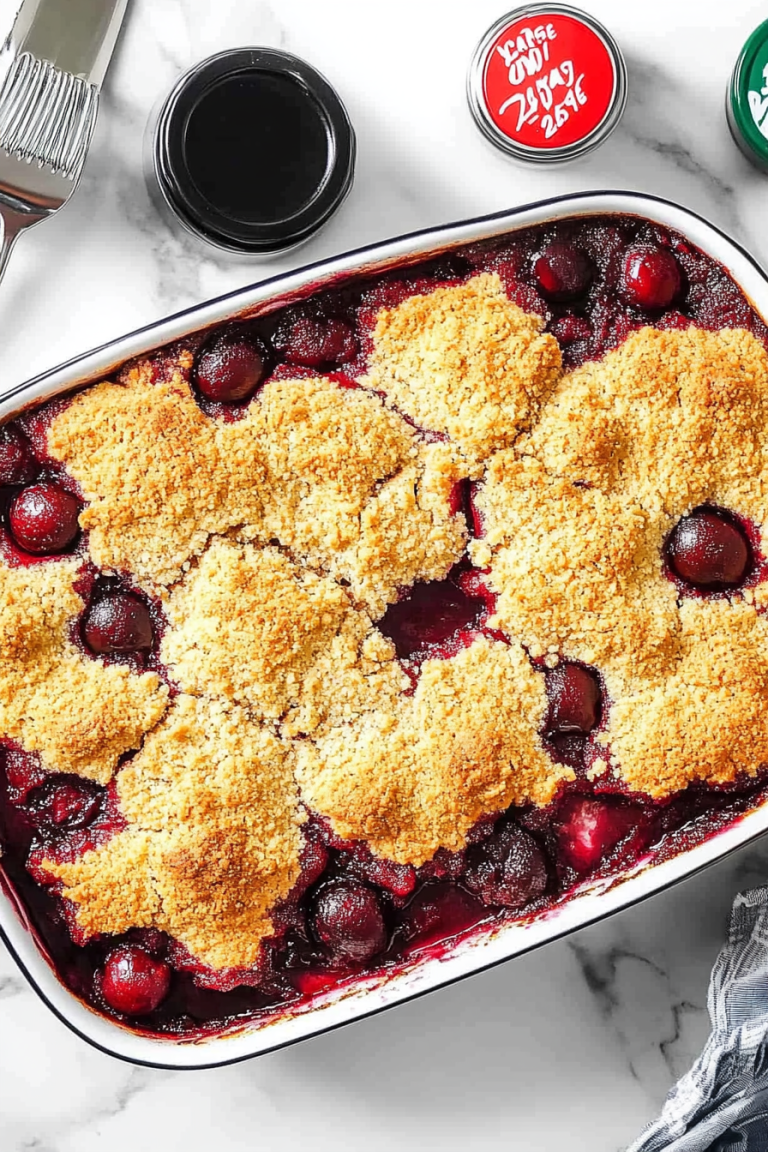
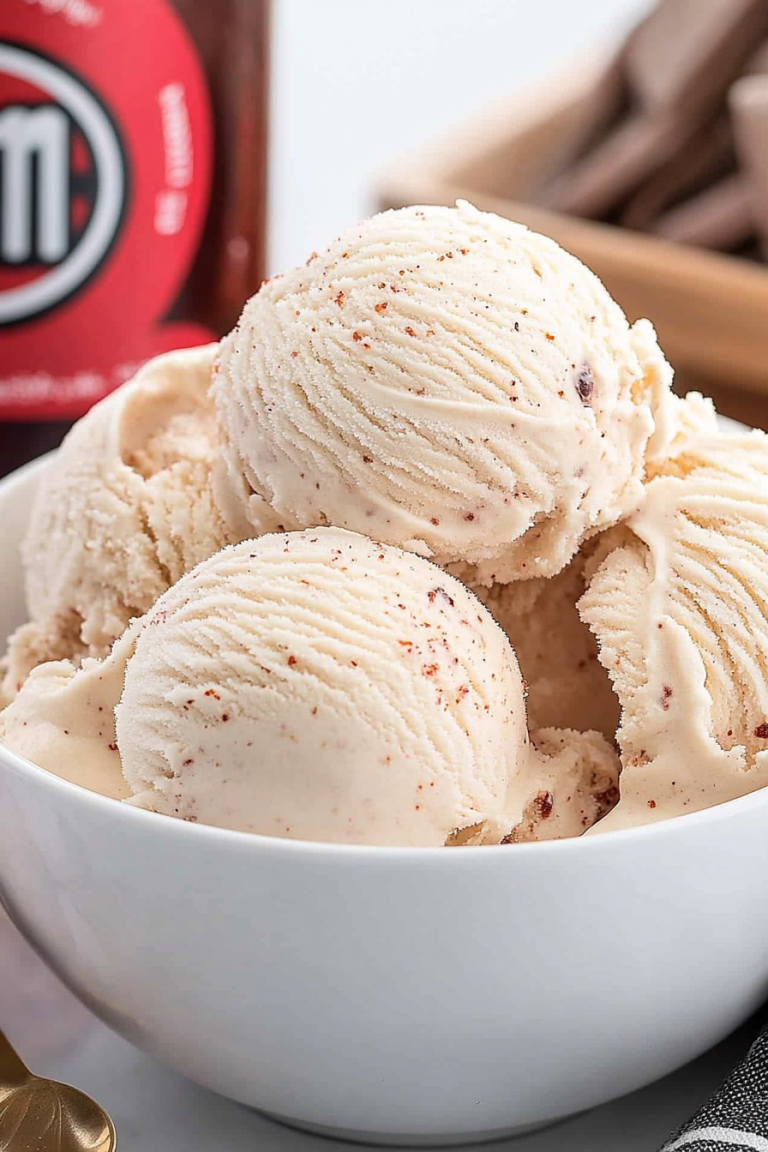
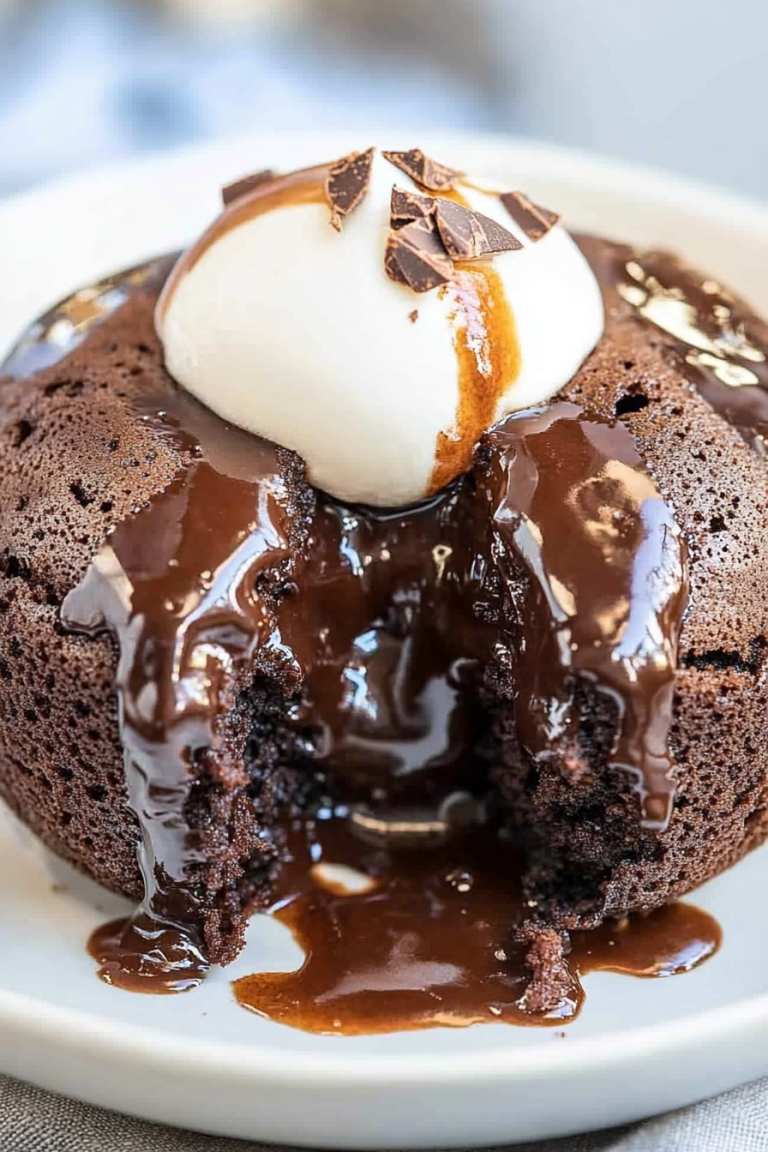
This zucchini bread is a chameleon when it comes to pairing! For a simple **Breakfast**, I love it toasted with a light smear of butter and a mug of freshly brewed coffee. It’s hearty enough to keep you going but not so heavy that you feel weighed down. On **Brunch** days, I elevate it slightly. I’ll serve it alongside fresh fruit salad, maybe a platter of scrambled eggs and crispy bacon. A little dollop of Greek yogurt or a drizzle of honey on top of the bread can also be lovely. It feels elegant but is still delightfully unfussy. When we have it for **Dessert**, it’s often served slightly warmed with a scoop of vanilla bean ice cream or a dollop of whipped cream. It’s the perfect accompaniment to a rich chocolate cake or a fruit tart. And for those **Cozy Snacks**, it’s just perfect on its own with a glass of milk or a cup of tea. My family has a tradition of having a slice with hot chocolate on chilly evenings, and it’s become a cherished ritual. It’s one of those baked goods that just makes any moment feel a little more special, no matter the occasion.
Top Tips for Perfecting Your Zucchini Bread
Okay, let’s talk about a few little secrets I’ve picked up over the years that make this zucchini bread absolutely foolproof. First, on **Zucchini Prep**: squeezing out the water is non-negotiable! If you skip this, your bread will be gummy and dense. I usually grate my zucchini using the small holes of a box grater, then wrap it in a clean kitchen towel or cheesecloth and wring out as much liquid as humanly possible. Seriously, get it all out! For **Mixing Advice**, remember my mantra: do NOT overmix. Once the wet and dry ingredients meet, stir just until they’re combined. A few lumps are fine; they’ll smooth out as it bakes. Overmixing is the quickest way to turn this tender bread into a tough brick. When it comes to **Swirl Customization**, don’t be afraid to get creative! You can add chopped pecans or walnuts to the cinnamon-sugar filling for an extra crunch. For a chocolate lover’s dream, a few mini chocolate chips can be mixed into the filling too. The key is to keep the filling relatively dry so it doesn’t make the batter too wet. When considering **Ingredient Swaps**, if you don’t have milk, any plant-based milk (almond, soy, oat) works beautifully. I’ve even used buttermilk in a pinch, and it added a lovely tang. For the butter, you could use a neutral oil like canola or vegetable oil, but butter really does give it that classic rich flavor. For **Baking Tips**, make sure your oven rack is in the center. This ensures even heat circulation. If you find your loaves always brown too quickly on top, try baking at 325 degrees Fahrenheit for a little longer. Always do the toothpick test to be sure; it’s the most reliable way to know it’s done. Lastly, **Glaze Variations** are endless! If you want a more citrusy glaze, add a little lemon or orange zest. For a cream cheese glaze, soften some cream cheese and whisk it with powdered sugar and a splash of milk. The consistency is key for both the filling and the glaze; you want them to be workable but not watery.
Storing and Reheating Tips
This zucchini bread is wonderful when it’s fresh, but it also keeps surprisingly well, which is a huge bonus! For **Room Temperature** storage, once the loaf is completely cool (and this is important, especially if it’s glazed), wrap it tightly in plastic wrap or place it in an airtight container. It should stay fresh and delicious for about 3-4 days. The moisture from the zucchini helps keep it from drying out too quickly. If you’re planning to keep it longer, **Refrigerator Storage** is your best bet. Again, make sure it’s in an airtight container. It will last for about a week to 10 days in the fridge. When you want to enjoy a slice, you can eat it cold, or I love to gently warm it up for about 15-20 seconds in the microwave to bring back that fresh-baked softness. If you’re really trying to get ahead, **Freezer Instructions** are your friend! Wrap the cooled, unglazed loaf tightly in a double layer of plastic wrap, then a layer of aluminum foil. It will keep well in the freezer for up to 3 months. To thaw, unwrap it and let it sit at room temperature for a few hours, or gently warm it in a low oven (around 300°F or 150°C) for about 10-15 minutes. For **Glaze Timing Advice**, it’s best to glaze the bread just before serving if you’re storing it at room temperature or in the fridge for more than a day, as the glaze can sometimes become sticky or melt. If you freeze the loaf, it’s definitely best to glaze it *after* it has thawed and is ready to be eaten.
Frequently Asked Questions
Final Thoughts
So there you have it – my absolute go-to recipe for the most wonderfully moist and flavorful zucchini bread. It’s the kind of recipe that feels like a warm hug, a true testament to how simple ingredients can create something truly magical. I’ve made this countless times, and it never fails to bring smiles and happy sighs. The ease of preparation, the budget-friendly nature, and that incredible, comforting flavor make it a winner in my book. If you love this recipe, you might also enjoy my Lemon Blueberry Loaf or my Classic Banana Bread – they share that same spirit of comforting, homemade goodness. I truly hope you give this zucchini bread a try. It’s perfect for your next bake sale, a cozy afternoon tea, or just because! Let me know in the comments below how yours turns out, and if you discover any delicious variations. Happy baking!

Pecan Balls
Ingredients
Method
- Add the pecan halves to a food processor. Pulse pecans a few times, then grind on low until they reach a sandy, coarse texture. (This will give you about 0.75 cup when ground)
- Next, whisk together the sweetened condensed milk, flour and vanilla extract in a 2 to 3 quart saucepan over medium heat until the flour is completely incorporated into the sweetened condensed milk.
- Stir the ground pecans into the condensed milk mixture once it's combined and slightly warm, then continue cooking for about 8 to 10 minutes until the mixture has thickened.
- Pour the pecan mixture into a 9x9 baking dish, cover tightly with plastic wrap and chill in the refrigerator for 20 minutes until completely cooled.
- Line a baking sheet with parchment paper.
- Use a 1 tablespoon cookie scoop to scoop out the pecan filling.
- Dampen your hands slightly to prevent the pecan filling from sticking as you roll them into balls. (This should help reduce the amount of the pecan balls sticking to your hands)
- Chill in the refrigerator for 20 minutes.
- Add the dark chocolate candy melts to a microwave safe bowl. Heat in 30 second increments, stirring well after each increment, until completely melted.
- Use a fork or candy dipping tool to dip each pecan ball into the melted chocolate, shaking off excess.
- After dipping the pecan balls in the melted chocolate, sprinkle or roll them in the chopped pecan for garnish, if desired
- Chill in the refrigerator for 20 more minutes, or until ready to serve.