Sweet Pretzel Salad A Simple Delight
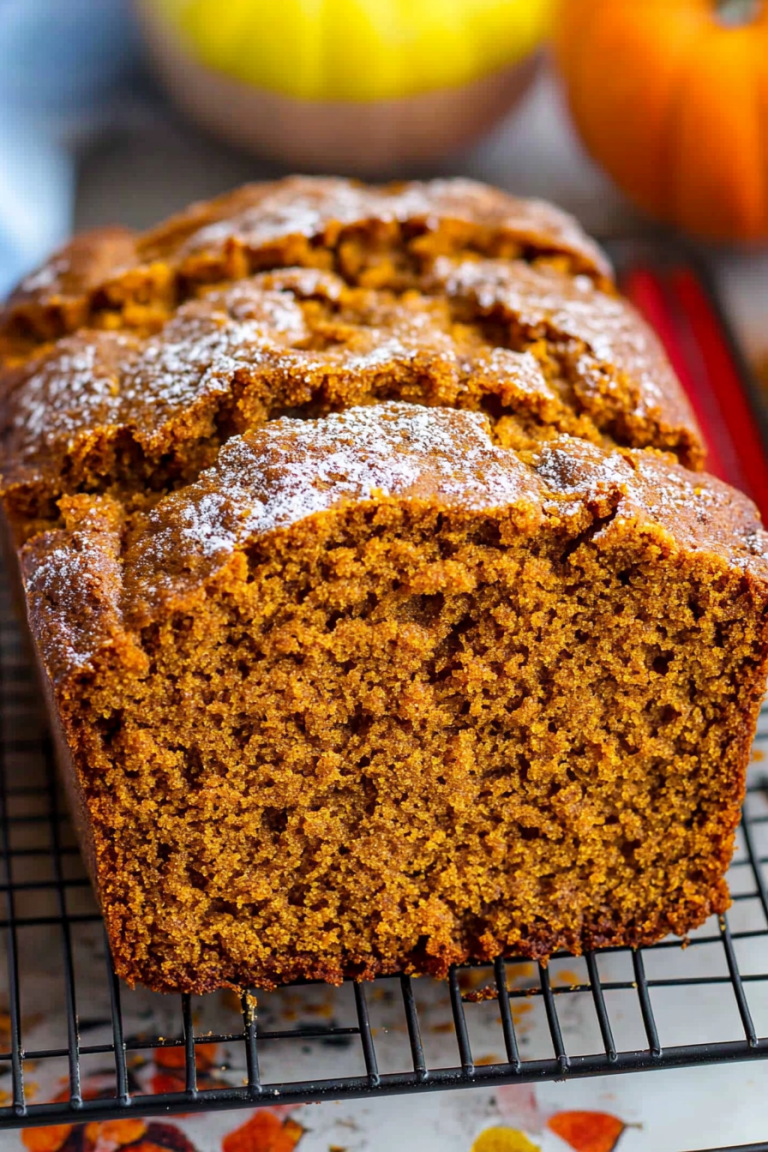
Okay, so confession time: I’m a total sucker for anything that feels like a warm hug in food form, and this zucchini bread recipe? It’s like getting a surprise hug from your favorite person on a chilly morning. It’s the kind of thing I’ve made so many times, I swear I could do it with my eyes closed. It’s not just about the sweet, tender crumb that practically melts in your mouth, or the subtle hint of spice that makes you want another slice (and maybe another). It’s the way the whole house smells when it’s baking – like pure comfort and home. Honestly, when I first perfected this recipe, it was a game-changer. My kids, who can be the pickiest eaters on the planet, devoured it. And then their friends wanted it. And then their friends’ parents wanted it! It’s become our go-to for everything from a quick breakfast to a decadent dessert, and I’m so thrilled to finally share it with you all. If you’ve ever loved a really good banana bread, you’re going to adore this zucchini bread. It’s got that same moist, tender texture, but with a unique lightness and freshness that only zucchini can bring. Let’s get baking, shall we?
What is Zucchini bread?
So, what exactly *is* zucchini bread, you ask? At its heart, it’s a quick bread, meaning it uses chemical leaveners like baking soda and baking powder instead of yeast, so you don’t have to wait around for dough to rise. Think of it like a cake that you can get away with eating for breakfast! The star ingredient, of course, is zucchini. Now, I know what some of you might be thinking – zucchini in a sweet bread? Trust me, it’s pure magic. The zucchini adds an incredible amount of moisture to the batter, which is key to that super tender, almost unbelievably soft crumb. You won’t taste the zucchini itself; it’s completely neutral in flavor. What it *does* do is make the bread incredibly moist and rich without being heavy. It’s essentially a delicious vehicle for all those warm spices and, if you choose, those yummy add-ins like chocolate chips or nuts. It’s a classic for a reason, and this version is my absolute favorite way to make it. It’s the ultimate crowd-pleaser, and everyone always asks for the recipe!
Why you’ll love this recipe?
What are the reasons why zucchini bread is a staple in my kitchen?flavor is just out of this world. It’s got this lovely balance of sweetness from the sugar and a gentle warmth from the spices – cinnamon, nutmeg, maybe a pinch of cloves if you’re feeling adventurous. The zucchini itself is invisible in terms of taste but a superhero for texture, making every bite unbelievably moist and tender. It’s like biting into a cloud that just happens to be bursting with deliciousness. Then there’s the simplicity. Seriously, this is one of the easiest things you can bake. No fancy techniques, no complicated steps. If you can stir ingredients together, you can make this bread. It’s a lifesaver on busy weeknights when everyone’s asking what’s for dessert, or on a lazy weekend morning when you just want something comforting. And let’s talk about Cost-efficiency: What is the best way to measure cost-efficiency?. Zucchinis are usually super affordable, especially when they’re in season. You likely already have most of the other pantry staples on hand, making this a budget-friendly treat that feels incredibly indulgent. What I love most about this recipe is its versatility. You can totally customize it! Add chocolate chips (my kids’ absolute favorite), walnuts or pecans for a bit of crunch, or even a swirl of cream cheese for an extra decadent touch. It’s perfect for breakfast, a snack, or even a dessert alongside a scoop of ice cream. It’s just one of those recipes that always delivers, no matter how you make it. It’s the kind of recipe that makes people think you spent hours in the kitchen, when in reality, you probably just whipped it up during your lunch break.
How to Make Zucchini Bread
Quick Overview
This recipe is all about minimal fuss and maximum flavor. We’ll simply whisk together our dry ingredients, mix our wet ingredients separately, and then combine them until just married – no overmixing allowed! The grated zucchini gets folded in, followed by any delightful add-ins you fancy. Then, it all goes into a loaf pan and into the oven to bake into a golden-brown masterpiece. The secret to its incredible moistness? That lovely grated zucchini! It’s honestly that easy. You’ll be amazed at how quickly this comes together, and the aroma that fills your kitchen is just heavenly.
Ingredients
For the Main Batter:
You’ll need about 2 cups of grated zucchini, which is roughly two medium-sized zucchinis. Don’t worry about peeling them; the skins add extra nutrients and a lovely bit of color. Just give them a good wash! I like to use a box grater on the larger holes. Make sure you squeeze out as much excess moisture as you can – this is super important for texture! You’ll also need all-purpose flour (about 2 cups), granulated sugar (1 cup usually does the trick, but feel free to adjust slightly), baking soda (1 teaspoon), baking powder (1/2 teaspoon), salt (1/2 teaspoon), and our star spices: cinnamon (1 teaspoon) and nutmeg (1/4 teaspoon, or a bit more if you love it like I do!).
For the Filling:
This is where you can get creative! My absolute favorite is a generous cup of chocolate chips – semi-sweet or dark chocolate are my go-to’s. If you’re more of a nut person, about 1/2 cup of chopped walnuts or pecans adds a wonderful crunch. You can even do a mix! Sometimes, when I’m feeling fancy, I’ll swirl in some softened cream cheese mixed with a tablespoon of sugar and a touch of vanilla. It makes it extra rich and decadent, almost like a cheesecake-swirled bread. For the base of the batter, you’ll also need eggs (2 large ones), a neutral oil like vegetable or canola oil (1/2 cup – you can also use melted unsalted butter for a richer flavor, about 1/2 cup too!), and vanilla extract (1 teaspoon) for that classic warmth.
For the Glaze:
This is entirely optional, but I think it takes the bread to the next level! For a simple glaze, I whisk together about 1 cup of powdered sugar with 2-3 tablespoons of milk or even orange juice for a citrusy twist. You want it to be thick but pourable. If it’s too thick, add a tiny bit more liquid; if it’s too thin, add a bit more powdered sugar. Some people prefer just a dusting of powdered sugar right before serving, which is also lovely and a bit less sweet.
Step-by-Step Instructions
Step 1: Preheat & Prep Pan
First things first, let’s get that oven nice and toasty. Preheat it to 350 degrees Fahrenheit (175 degrees Celsius). While the oven is heating up, grab your loaf pan – a standard 9×5 inch pan is perfect. Grease it really well with butter or cooking spray, and then I like to lightly flour it too, tapping out any excess. This extra step ensures your beautiful loaf won’t stick, which is a baking tragedy I’ve learned to avoid!
Step 2: Mix Dry Ingredients
In a large bowl, whisk together your all-purpose flour, granulated sugar, baking soda, baking powder, salt, cinnamon, and nutmeg. Whisking ensures all those leavening agents and spices are evenly distributed, so you don’t end up with pockets of salty or bland bread. Just give it a good mix until everything looks well combined and a lovely pale brown from the spices.
Step 3: Mix Wet Ingredients
In a separate medium bowl, whisk together your eggs. Then, add in your oil (or melted butter) and vanilla extract. Whisk until everything is well combined and looks smooth. If you’re using unsweetened applesauce as a partial fat substitute (which I sometimes do for an even lighter bread!), whisk it in here too. Make sure your eggs aren’t super cold, as they incorporate better when they’re closer to room temperature.
Step 4: Combine
Now, pour the wet ingredients into the bowl with the dry ingredients. This is where you need to be a little gentle. Use a spatula or wooden spoon to stir everything together until it’s *just* combined. You’ll see a few streaks of flour – that’s okay! The absolute worst thing you can do here is overmix. Overmixing develops the gluten in the flour, which can lead to a tough, dense bread. We want tender and fluffy, so stop stirring as soon as you don’t see big pockets of dry flour. Then, gently fold in your grated, well-drained zucchini. Make sure it’s evenly distributed throughout the batter.
Step 5: Prepare Filling
If you’re adding chocolate chips, nuts, or any other mix-ins, this is the time to gently fold them into the batter. Do this *after* you’ve just combined the wet and dry ingredients. If you’re doing the cream cheese swirl, prepare that now: in a small bowl, mash together softened cream cheese with a tablespoon of sugar and a tiny splash of vanilla until smooth. You’ll dollop this on top of the batter in the pan and swirl it in later.
Step 6: Layer & Swirl
Pour about half of the batter into your prepared loaf pan. If you’re doing the cream cheese swirl, dollop spoonfuls of the cream cheese mixture over this first layer of batter. Then, pour the remaining batter over the top, covering the cream cheese mixture. If you’re not swirling, just pour all the batter into the pan and spread it evenly. For the swirl, take a butter knife or skewer and gently swirl the cream cheese mixture through the batter. Don’t over-swirl, or it will all blend together; just a few gentle passes will do. If you’re just using chocolate chips or nuts, they can be mixed into the batter itself, or you can sprinkle some extra on top before baking for a pretty finish.
Step 7: Bake
Pop that loaf pan into your preheated oven. Bake for about 50-65 minutes. The baking time can vary depending on your oven, so keep an eye on it. To check if it’s done, insert a toothpick or a thin knife into the center of the loaf. If it comes out clean (or with just a few moist crumbs attached, especially if you have chocolate chips), it’s ready! If it comes out with wet batter, give it another 5-10 minutes and check again. If the top starts to brown too quickly before the inside is cooked, you can loosely tent it with aluminum foil.
Step 8: Cool & Glaze
Once it’s baked, take the loaf pan out of the oven and let the bread cool in the pan for about 10-15 minutes. This allows it to set up a bit. Then, carefully invert the pan onto a wire rack to remove the bread. Let it cool completely on the wire rack before you even *think* about glazing it. If you try to glaze a warm loaf, the glaze will just melt right off! Once it’s totally cool, whisk together your glaze ingredients and drizzle it over the top, letting it drip down the sides. Or, just a simple dusting of powdered sugar looks beautiful too.
Step 9: Slice & Serve
Once the glaze has set a bit (or if you skipped the glaze), it’s time to slice! Use a serrated knife for clean cuts. I like to serve it at room temperature, but a slightly warm slice is absolutely divine. It’s perfect on its own, or you can serve it with a dollop of whipped cream or a bit of butter if you like.
What to Serve It With
This zucchini bread is so wonderfully versatile, it honestly fits into any meal or occasion! For a quick and cozy breakfast, I love pairing a thick slice with a steaming mug of coffee or a glass of cold milk. Sometimes, I’ll just toast a slice lightly and spread it with a little bit of butter. It’s just perfection. When we’re doing a more relaxed brunch with friends, I’ll cut it into slightly smaller, more elegant squares and arrange them on a platter with fresh berries and maybe some yogurt. It’s a lovely sweet counterpoint to savory brunch dishes like scrambled eggs or bacon. And for dessert? Oh, it’s a winner. A warm slice served with a scoop of vanilla bean ice cream is pure bliss. The warm bread and cold ice cream create an amazing contrast. Sometimes, I’ll even warm up a slice and top it with a drizzle of caramel sauce – decadent, but so worth it! For those quiet, cozy snack moments, whether it’s mid-afternoon or a late-night craving, a slice of this is just what the doctor ordered. It’s satisfying and comforting without being too heavy. My kids always ask for this when they get home from school, and it disappears in minutes. It’s the kind of treat that feels special but is so easy to whip up. I’ve even brought it to potlucks, and it’s always the first thing to go!
Top Tips for Perfecting Your Zucchini Bread
I’ve been making this zucchini bread for years, and I’ve learned a few tricks along the way that I think make all the difference. First, when it comes to zucchini prep, don’t skip draining it! After you grate it, put it in a fine-mesh sieve and press down firmly with a spoon, or even use your hands to squeeze out as much liquid as possible. Too much moisture can make your bread gummy. I’ve also found that grating the zucchini on the larger holes of a box grater yields the best texture – you get nice little shreds that blend beautifully into the batter. For mixing advice, remember my mantra: gentle is key! Stir the wet and dry ingredients until *just* combined. A few tiny streaks of flour are perfectly fine. Overmixing is the enemy of tender baked goods. You want to develop as little gluten as possible. When it comes to swirl customization, whether it’s chocolate, cream cheese, or even a jam swirl, don’t go overboard. Too much filling can make the bread too dense or wet. Just a few strategically placed dollops and gentle swirls are all you need for flavor and visual appeal. For ingredient swaps, I’ve experimented a lot! If you want to reduce the sugar slightly, you can usually shave off about 1/4 cup without much impact, but I wouldn’t go more than that. You can also swap half the oil for unsweetened applesauce for a slightly healthier, more moist bread. I’ve even tried it with brown sugar instead of granulated for a deeper, caramel-like flavor, and it was delicious! For baking tips, always remember that ovens vary. My oven tends to run a little hot, so I might start checking mine around the 50-minute mark. The toothpick test is your best friend here. If the top is browning too fast, place a piece of aluminum foil loosely over the top to shield it while the inside finishes baking. And for glaze variations, don’t be afraid to experiment! A lemon glaze is fantastic if you like a bit of tang, or a maple glaze adds a wonderful autumnal flavor. You can also add a bit of almond extract to the powdered sugar glaze for a lovely nutty note. Remember, the glaze is the crowning glory, so have fun with it!
Storing and Reheating Tips
Proper storage is key to keeping this zucchini bread tasting as fresh and delicious as the day you baked it. If you plan to eat it within a day or two, leaving it at room temperature is perfectly fine. Just wrap it tightly in plastic wrap or place it in an airtight container. I usually find it’s best eaten within 2-3 days for optimal moisture. If you know you won’t get through it that quickly, or if it’s a particularly warm day, storing it in the refrigerator is a great option. Wrap it well in plastic wrap and then place it in an airtight container. It should stay good in the fridge for about 5-7 days. When you’re ready to eat a slice from the fridge, you can either let it come to room temperature on its own or give it a quick zap in the microwave for about 10-15 seconds – just enough to take the chill off. For longer storage, this bread freezes beautifully! Let it cool *completely* (this is crucial for preventing ice crystals), then wrap it tightly in plastic wrap, followed by a layer of aluminum foil, or place it in a heavy-duty freezer bag. It will keep well in the freezer for up to 3 months. When you’re ready to enjoy it, you can thaw it at room temperature overnight, or gently reheat it in a low oven (around 300°F or 150°C) for about 15-20 minutes, or microwave it in short bursts. If you’ve glazed your bread, I usually recommend waiting to add the glaze until *after* it’s been thawed and is ready to be served, especially if it’s been frozen. Glazing a frozen or refrigerated loaf can sometimes make the glaze a bit sticky or watery.
Frequently Asked Questions
Final Thoughts
So there you have it – my go-to, crowd-pleasing, sunshine-in-a-loaf zucchini bread recipe! It’s more than just a baked good; it’s a memory-maker, a comfort bringer, and proof that sometimes the simplest ingredients can create the most magical results. I truly believe this recipe is a must-try for anyone who loves baked goods that are moist, flavorful, and utterly satisfying. It’s the kind of recipe that makes you feel good about what you’re serving, and it’s so forgiving, even beginners can achieve amazing results. If you enjoyed this recipe, you might also love my popular banana bread or my fluffy blueberry muffins – they share that same homemade comfort! I can’t wait to hear how yours turns out, so please leave a comment below and let me know what you think, or if you tried any fun variations. Happy baking, my friends!
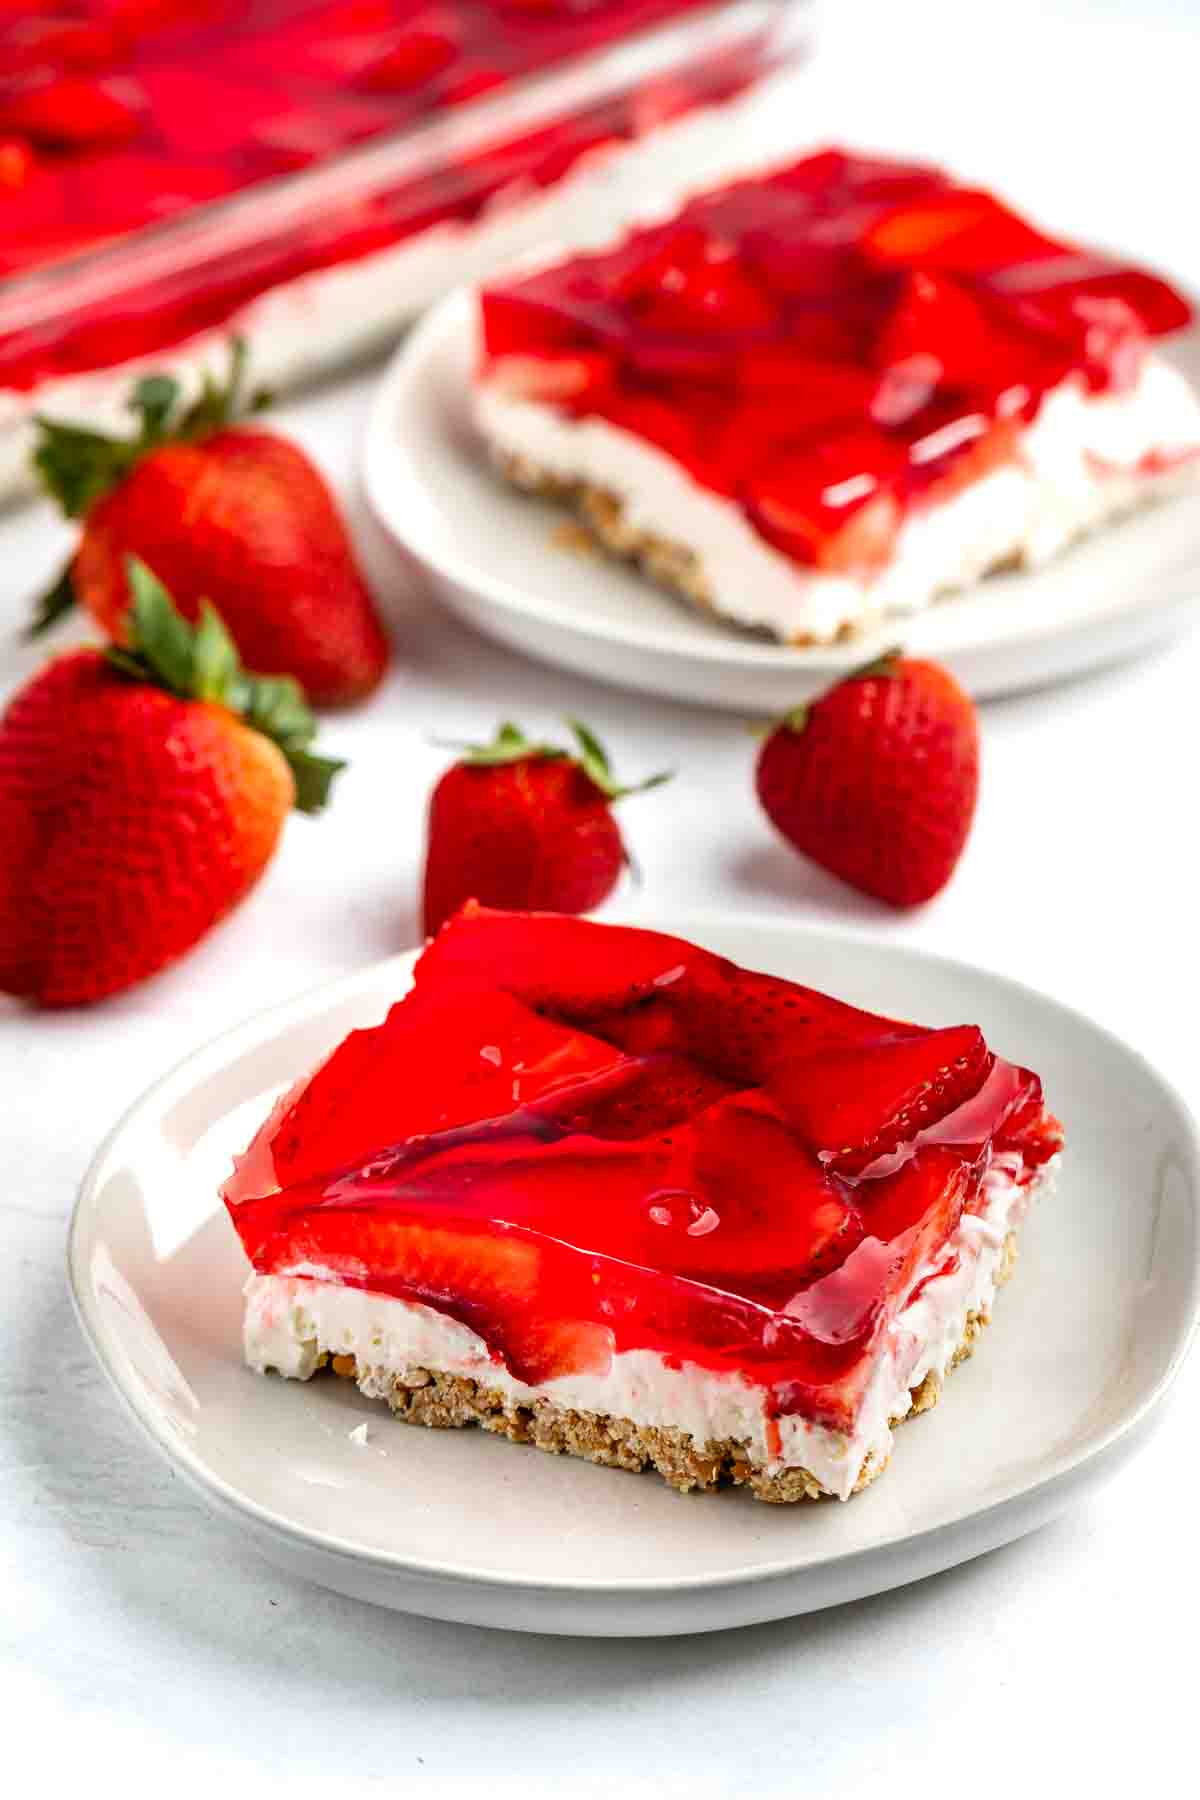
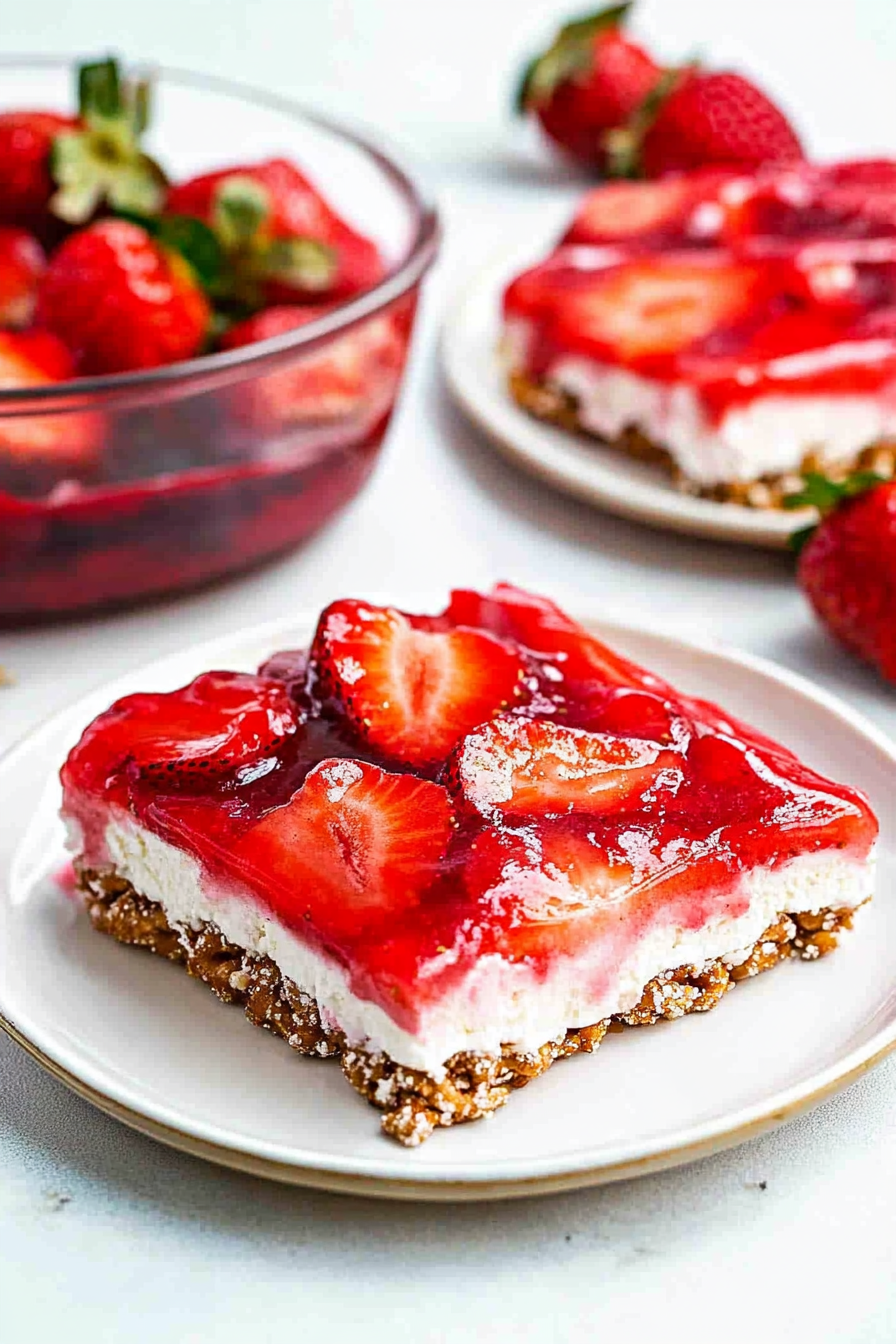
Strawberry Pretzel Salad
Ingredients
Method
- In a medium bowl, combine the crushed pretzels, 0.125 cup sugar, and melted butter. Stir well to combine. Press this mixture evenly into the bottom of a 9x13-inch baking dish. Place in the refrigerator to chill for at least 30 minutes.
- In a large bowl, beat the softened cream cheese and 0.5 cup sugar with an electric mixer until smooth. Fold in the thawed Cool Whip until well combined.
- Spread the cream cheese mixture evenly over the chilled pretzel crust, ensuring it reaches all the edges of the pan. Chill for 1 hour.
- In a separate bowl, dissolve the strawberry Jell-O powder in the boiling water. Stir until completely dissolved. Let it cool to room temperature.
- Arrange the sliced fresh strawberries in a single layer over the cream cheese mixture. Carefully pour the cooled Jell-O mixture evenly over the strawberries and cream cheese layer.
- Refrigerate for at least 3 hours, or until the Jell-O is completely set. Serve chilled.