Sweet Georgia Peaches Cobbler Recipe
You know those recipes that just instantly make you feel good? The ones that smell like your childhood, your grandma’s kitchen, or just pure comfort? This zucchini bread is *that* recipe for me. It’s the one I whip up when I need a little hug in food form, or when I’ve got a surplus of zucchini from the garden (or, let’s be honest, from the grocery store when it’s on sale). It’s not just *any* zucchini bread; it’s the kind of moist, tender, perfectly spiced loaf that disappears the second it’s out of the oven. Forget those dry, crumbly imposters. This one is the real deal, and it’s surprisingly simple, too. If you’ve ever felt intimidated by baking, trust me, you can totally nail this. It’s even better than that fancy bakery loaf you love, and way more satisfying to make yourself.
What is Zucchini bread?
So, what exactly *is* this magical zucchini bread? At its heart, it’s a quick bread – meaning no yeast, no fuss, just a simple batter that bakes up into a moist, flavorful loaf. The “zucchini” part might sound a little odd if you’re new to it, but don’t let that scare you! The grated zucchini essentially melts into the batter as it bakes, lending an unbelievable tenderness and moisture without imparting any strong vegetable flavor. Think of it as nature’s secret to the most decadent, craveable quick bread you’ve ever tasted. It’s like a muffin and a cake had a delicious baby, and it’s always a crowd-pleaser. It’s not meant to taste like vegetables; it’s meant to taste like pure, unadulterated baked goodness.
Why you’ll love this recipe?
Okay, let me count the ways you’re going to adore this recipe. First off, the flavor is just out of this world. It’s perfectly sweet, but not *too* sweet, with just the right amount of warm spice – cinnamon, nutmeg, a hint of clove – that makes you want to curl up with a big slice and a cup of tea. The texture is where this recipe truly shines. It’s unbelievably moist and tender, thanks to that sneaky zucchini, with a lovely slightly crisp crust. And the simplicity! Seriously, I can have the batter mixed up in about 10-15 minutes. It’s a lifesaver on busy weeknights when you need a sweet treat or a quick breakfast. It’s also incredibly cost-effective. Zucchini is usually pretty affordable, and the other ingredients are pantry staples. What I love most, though, is its versatility. You can easily dress it up or down. Add nuts for crunch, chocolate chips for decadence (my kids go crazy for this version!), or even a swirl of cream cheese filling for an extra special touch. It’s so much more satisfying than just grabbing something pre-made. If you love my Banana Bread recipe, you’re going to fall head over heels for this one!
How do you make Zucchini bread?
Quick Overview
Making this zucchini bread is a breeze. You’ll simply whisk together your dry ingredients, then your wet ingredients, combine them gently, fold in the star of the show (the grated zucchini!), and bake until golden and fragrant. The whole process, from gathering ingredients to having a warm loaf cooling on your rack, can take under an hour and a half. It’s the kind of recipe that proves you don’t need to be a master baker to create something truly impressive and delicious. Just a few simple steps and you’re on your way to zucchini bread bliss.
Ingredients
For the Main Batter:
You’ll need about 2 cups of grated zucchini. Now, some people like to peel their zucchini, but honestly, I never do. The skin has nutrients and it blends in beautifully. Just make sure to give it a good wash! For the flour, 2 cups of all-purpose flour is perfect. I always use unbleached, it just seems to bake a bit better. Then, we’ve got 1 teaspoon of baking soda and half a teaspoon of baking powder – this duo gives us that lovely lift. Don’t forget the spices! 1 teaspoon of ground cinnamon and a pinch each of nutmeg and clove are my go-tos. They just make it smell like heaven. A pinch of salt is crucial too, it balances out all the sweetness. And for sweetness, 1.5 cups of granulated sugar. You can dial this back a touch if you prefer, but this is the sweet spot for me. Lastly, 2 large eggs and 1/2 cup of melted unsalted butter (or vegetable oil if you prefer, but butter gives it a richer flavor!). And for that incredible moisture, 1/4 cup of buttermilk or milk. I’ve actually tested this with almond milk and it actually made it even creamier!
For the Filling (Optional, but SO good!):
If you’re feeling fancy, a simple filling makes this loaf extra special. I love a quick cinnamon-sugar swirl. All you need is 1/4 cup packed brown sugar, 1 teaspoon of ground cinnamon, and a tiny pinch of salt. Mix them together until well combined. You can also add in 1/2 cup of chopped walnuts or pecans if you like a bit of crunch!
For the Glaze (Optional):
A simple glaze is the icing on the cake, literally! It’s just 1 cup of powdered sugar, mixed with about 2-3 tablespoons of milk or lemon juice. Lemon juice adds a lovely zing that cuts through the sweetness. Start with 2 tablespoons and add more until you get a drizzle-able consistency. You want it thin enough to drip, but not so thin that it all runs off. A little vanilla extract (1/2 teaspoon) is always a good addition here too.
Step-by-Step Instructions
Step 1: Preheat & Prep Pan
First things first, get your oven preheated to 350°F (175°C). This is super important because we want the oven nice and hot when the batter is ready. Grab a 9×5 inch loaf pan. I always grease mine really well with butter or non-stick cooking spray, and then I like to dust it lightly with flour. Or, even better, line it with parchment paper, leaving some overhang on the sides. This makes lifting the bread out so much easier – a little trick I learned after one too many loaves stuck to the bottom!
Step 2: Mix Dry Ingredients
In a large bowl, whisk together your flour, baking soda, baking powder, cinnamon, nutmeg, clove, and salt. Give it a good whisk to make sure everything is evenly distributed. This is a crucial step for even leavening and flavor. You don’t want any pockets of baking soda or clumps of spice!
Step 3: Mix Wet Ingredients
In a separate medium bowl, whisk together your sugar and eggs until they’re well combined and slightly lighter in color. Then, stir in the melted butter (or oil) and the buttermilk (or milk) until everything is smoothly incorporated. Don’t overmix here, just get it combined.
Step 4: Combine
Now, pour the wet ingredients into the bowl with the dry ingredients. Using a spatula or a wooden spoon, gently fold them together. Stop mixing *as soon as* you no longer see streaks of dry flour. It’s really important not to overmix quick bread batter, or you’ll end up with a tough loaf. A few little lumps are totally fine!
Step 5: Prepare Filling
If you’re making the cinnamon-sugar swirl, this is the time to mix it up in a small bowl. Just brown sugar, cinnamon, and a pinch of salt. Easy peasy.
Step 6: Layer & Swirl
Now for the fun part! Stir your grated zucchini into the batter until it’s just combined. Then, pour about half of the batter into your prepared loaf pan. Sprinkle about half of your cinnamon-sugar mixture evenly over the top. Dollop spoonfuls of the remaining batter over the cinnamon sugar, and then sprinkle the rest of the cinnamon sugar on top. Now, grab a butter knife or a skewer and gently swirl it through the batter a few times to create those beautiful marbled patterns. Don’t go crazy, just a few gentle swirls will do the trick!
Step 7: Bake
Pop that beautiful loaf into your preheated oven. Bake for about 50-65 minutes. The exact time can vary depending on your oven, so start checking around the 50-minute mark. You’ll know it’s done when a wooden skewer or toothpick inserted into the center comes out clean, or with just a few moist crumbs attached. The top should be a lovely golden brown, and it should smell absolutely divine.
Step 8: Cool & Glaze
Once it’s baked to perfection, carefully remove the loaf pan from the oven. Let it cool in the pan for about 10-15 minutes. This is important because it allows the bread to set up a bit before you try to remove it. After that, use the parchment paper overhang (if you used it!) to lift the loaf out and place it on a wire rack to cool completely. If you’re adding a glaze, make sure the bread is mostly cooled before drizzling it over the top. You don’t want the glaze to melt off completely!
Step 9: Slice & Serve
Once it’s fully cooled (or mostly cooled, if you can wait that long!), slice it up with a serrated knife. The best way to get clean slices is to let it cool down quite a bit. Serve it at room temperature. The smell alone is enough to make your mouth water, and the taste is even better. Get ready for requests for seconds!
What to Serve It With
This zucchini bread is a star all on its own, but it also plays wonderfully with a few friends. For a simple breakfast, I love it toasted with a smear of butter or cream cheese. It’s the perfect grab-and-go option when I’m running late, and the kids actually ask for this all the time when they need something quick before school. For a more leisurely brunch, I’ll slice it a bit thinner and serve it alongside a fresh fruit salad and maybe some yogurt. It feels a little more elegant this way. As a dessert, it’s fantastic on its own, but you could certainly serve it with a scoop of vanilla bean ice cream or a dollop of whipped cream for an extra indulgence. And for those cozy evening snacks when you’re craving something sweet but don’t want to bake a whole cake, a thick slice of this with a warm cup of coffee or herbal tea is pure bliss. My mom always made this on Sunday afternoons, and the smell would fill the whole house. It’s a tradition I’ve carried on.
Top Tips for Perfecting Your Zucchini Bread
I’ve made this zucchini bread more times than I can count, and I’ve picked up a few tricks along the way that I think you’ll find helpful. For the zucchini, grating it on the large holes of a box grater works best. You want some texture, but not giant chunks. And while you don’t need to squeeze out every last drop of moisture, giving the grated zucchini a gentle squeeze in your hands can help prevent the bread from becoming too wet, especially if your zucchini is particularly juicy. When mixing the batter, remember that word: *gently*. Overmixing is the enemy of tender quick breads. Fold just until the ingredients are combined. You’re not looking for a smooth, glossy batter; a few lumps are perfectly fine and often a sign of a well-made quick bread. For the swirl, don’t go overboard with the knife. Too much swirling can make the colors muddy. A few quick passes are all you need to create those beautiful ribbons. If you’re using nuts or chocolate chips, fold them in gently at the very end, right after you’ve added the zucchini. This helps prevent them from sinking to the bottom. I’ve experimented a lot with different spices, and I find that a blend of cinnamon, nutmeg, and a tiny pinch of clove is the perfect balance, but feel free to adjust to your liking! If you find your oven tends to bake hot, you might want to reduce the temperature by 25 degrees or check for doneness a bit earlier. Every oven is a little different, so getting to know yours is key. And for the glaze, if it’s too thick, add a tiny splash more milk or lemon juice. If it’s too thin, add a bit more powdered sugar. It’s all about getting that perfect drizzle consistency!
Storing and Reheating Tips
This zucchini bread is so good, it rarely lasts long enough to worry about storing, but when it does, here are my best tips. For best freshness, store the cooled loaf at room temperature in an airtight container or wrapped tightly in plastic wrap. It will stay wonderfully moist for about 2-3 days. If you plan to keep it longer than that, or if your kitchen is particularly warm, the refrigerator is your best bet. Wrap it well to prevent it from drying out, and it should keep for up to a week. The texture might change slightly in the fridge, becoming a bit denser, but it’s still delicious. For longer storage, freezing is a great option. You can freeze the whole loaf, or for easier portioning, slice it first. Wrap the loaf or slices tightly in plastic wrap, then in a layer of aluminum foil or place them in a freezer-safe bag. It will keep well in the freezer for up to 3 months. To reheat, you can gently warm slices in a toaster oven or a conventional oven at a low temperature (around 300°F or 150°C) for a few minutes until warmed through. If you’ve frozen it with the glaze, just let it thaw at room temperature or gently warm it. For a plain loaf, you can add a fresh glaze after reheating if you like.
Frequently Asked Questions
Final Thoughts
This zucchini bread is more than just a recipe to me; it’s a little piece of comfort and joy. It’s the kind of baking that makes you feel accomplished and nourished, and it’s so incredibly forgiving, even if you’re new to the kitchen. The fact that it uses up zucchini is just a bonus! I hope you try it and that it brings as much happiness to your home as it does to mine. If you’re a fan of my other quick bread recipes, like my famously moist banana bread or my spiced apple cake, I guarantee you’ll love this one too. Give it a whirl, share it with your loved ones, and let me know how it turns out in the comments below! I’m always curious to hear about your baking adventures and any delicious variations you come up with. Happy baking, everyone!

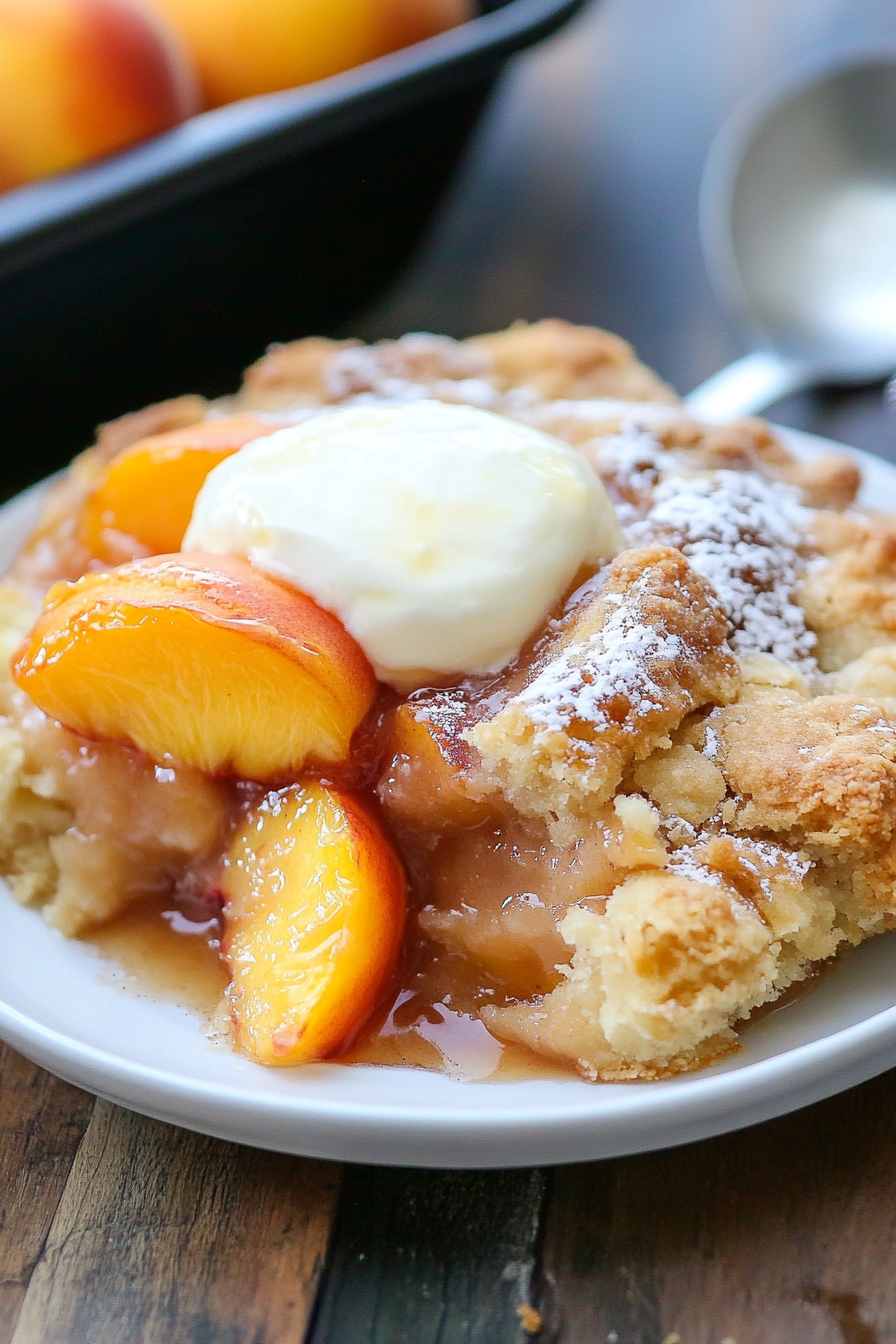
Southern Peach Cobbler
Ingredients
Method
- Preheat oven to 425°F. Place a large baking sheet covered in foil on the lowest rack in the oven. This cobbler overflows a bit almost every time I make it. The baking pan will catch the drips and prevent a mess in the oven.
- In a large bowl, combine the peaches and the lemon juice and then add the rest of the filling ingredients. Stir to coat and then pour into a 9x13 baking dish.
- Bake the peach mixture in the preheated oven for 10 minutes. While the peaches are baking, combine the dry topping ingredients and whisk to combine. Toss the grated butter in the flour mixture. Stir in the boiling water, just until combined, leaving plenty of little lumps of butter.
- Remove the peaches from the oven and drop the topping over them in spoonfuls. Sprinkle the cobbler topping with the cinnamon sugar topping. Bake until the crust is golden and a toothpick inserted into the crust comes out clean, about 28 minutes. Serve warm or at room temperature. Enjoy!
- Freezer Directions: The peach filling can be prepared and frozen in advance. Combine the peach filling ingredients in a large ziploc bag, press the air out and freeze flat. When you are ready to bake the cobbler, thaw in the refrigerator and then pour into the baking dish and proceed with the recipe.