Easy Tomato Mozzarella Omelet Recipe
Okay, friend, pull up a chair and grab your favorite mug because I’m about to share something truly special with you. This isn’t just any zucchini bread; this is *the* zucchini bread. The one that has my kids practically begging for more, the one that disappears from the cooling rack in record time, the one that makes our house smell like pure, unadulterated happiness. If you’ve ever been intimidated by baking, or if you’ve tried other zucchini bread recipes that turned out dry or bland, listen up. This one’s a lifesaver. It’s so incredibly moist and packed with flavor, it’s hard to believe it starts with something as humble as zucchini. Honestly, it puts those fancy bakery loaves to shame, and it’s way easier than you think! Think of it as the ultimate comfort bake, a little slice of heaven that tastes like sunshine and warm hugs.
What is Zucchini bread?
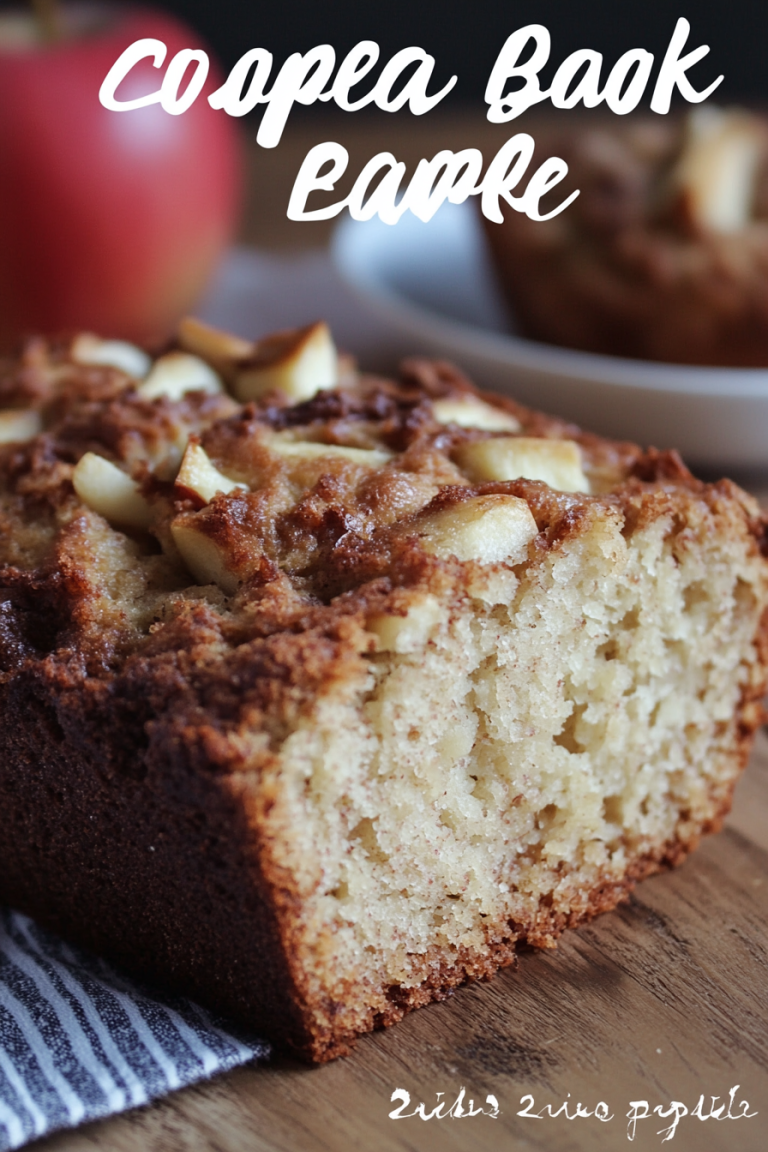
So, what exactly *is* zucchini bread? At its heart, it’s a quick bread, meaning it doesn’t use yeast and comes together super fast. The star ingredient, zucchini, might sound a little unusual in a sweet treat, but trust me, it’s pure magic! When grated and baked, zucchini adds an incredible amount of moisture without any overwhelming vegetable flavor. It’s like a secret weapon for making baked goods unbelievably tender. The name itself, “zucchini bread,” comes straight from its key ingredient. It’s essentially a moist, slightly sweet loaf cake studded with warm spices like cinnamon, and sometimes nuts or chocolate chips if you’re feeling fancy. It’s the kind of thing that makes you feel all cozy inside, whether you’re enjoying it for breakfast, as an afternoon pick-me-up, or even a late-night treat. It’s familiar, comforting, and utterly delicious.
Why you’ll love this recipe?
What are some good reasons to make zucchini bread?flavor. It’s just sublime. That perfect balance of sweet, warm spices, and the subtle richness from the oil and eggs. It’s not overly sweet, which I really appreciate, but it has this deep, comforting flavor that just sings. Every bite is moist and tender; you won’t find a dry crumb in sight. Then there’s the simplicity. Seriously, this recipe is so forgiving. You don’t need any fancy equipment, just a couple of bowls and a whisk. I can whip this up on a busy weeknight after dinner, and it’s ready before I even finish cleaning up. It’s way easier than a traditional cake, and the results are just as impressive. And speaking of impressive, it’s incredibly cost-efficient. Zucchini is usually pretty affordable, and the rest of the ingredients are pantry staples. You get a loaf (or two)versatile! I love it plain, but adding chocolate chips? Game changer. Walnuts for a little crunch? Yes, please. You can even whip up a quick cream cheese frosting for it if you want to make it extra special. What I love most about this recipe, though, is the pure joy it brings. It’s a taste of home, a reminder of simpler times, and it always seems to brighten everyone’s day. It’s what I whip out when friends pop over unexpectedly, and it never fails to get rave reviews. It’s just one of those recipes that makes you feel like a baking rockstar without breaking a sweat!
How to Make Zucchini Bread
Quick Overview
This recipe is all about simplicity and fantastic results. You’ll be whisking together your dry and wet ingredients separately, then combining them gently. The magic happens when you fold in the grated zucchini, which is the key to its incredible moisture. A quick swirl of cinnamon-sugar mixture for extra flavor and texture, then into the oven it goes. The whole process from start to finish, including baking time, is surprisingly quick, making it perfect for busy schedules or spontaneous baking cravings. You’ll end up with a beautifully golden, incredibly tender loaf that smells absolutely divine.
Ingredients
For the Main Batter:
Here’s what you’ll need for the base of our delicious loaf. I always try to use fresh zucchini, and medium-sized ones tend to have the best moisture content. Make sure to wash them well before grating! You can use either all-purpose flour or a gluten-free blend if you need to. And good quality cinnamon makes a world of difference here; it really brings out that warm, comforting flavor.
- 3 cups all-purpose flour (or a 1-to-1 gluten-free baking blend)
- 1 teaspoon baking soda
- 1/2 teaspoon baking powder
- 1 teaspoon ground cinnamon
- 1/2 teaspoon ground nutmeg
- 1/4 teaspoon ground cloves (optional, but I love it!)
- 1/2 teaspoon salt
- 1 1/2 cups granulated sugar
- 1/2 cup vegetable oil (or melted coconut oil for a slightly different flavor)
- 2 large eggs, at room temperature
- 1 teaspoon vanilla extract
- 1 cup grated zucchini (from about 1-2 medium zucchinis, squeezed dry)
For the Filling:
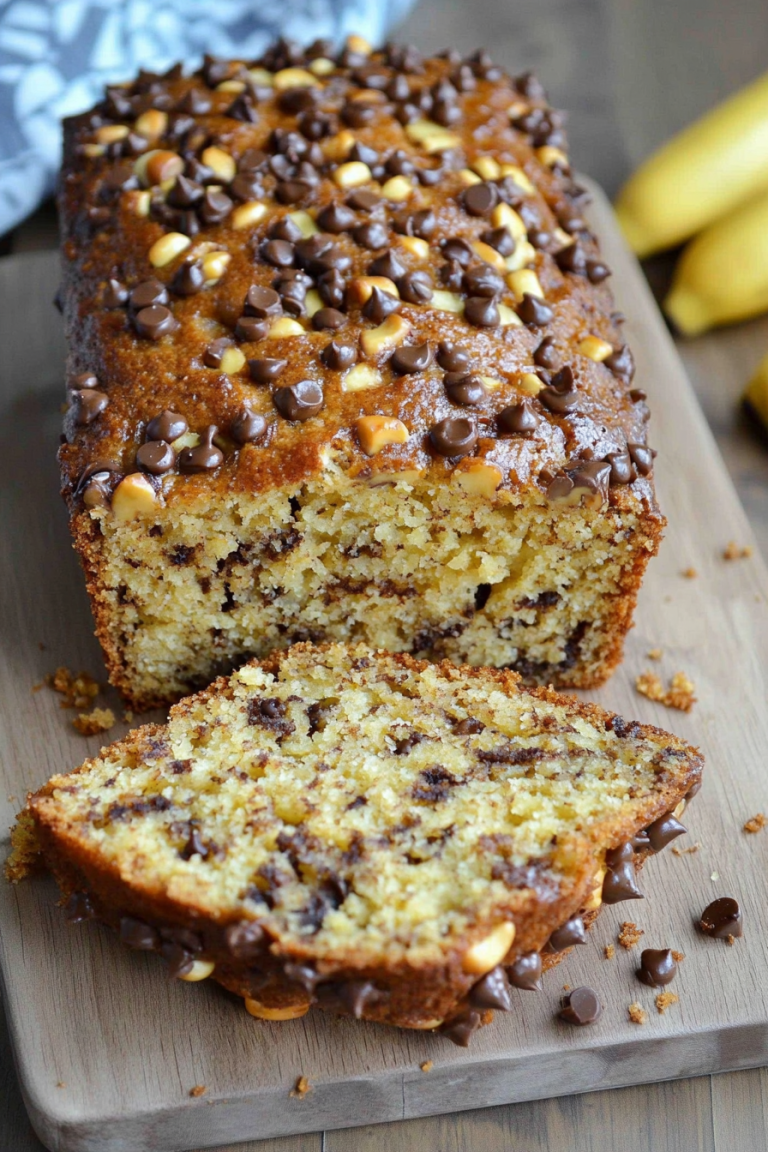
This is optional, but it adds an extra layer of flavor and a lovely streaky look to the bread. It’s super simple and totally worth the extra step. If you’re a chocolate lover, this is where you can toss in about 1/2 cup of chocolate chips! I’ve also tried mini M&Ms, and that was a hit with the kids, though it makes it a bit sweeter.
- 1/4 cup packed brown sugar
- 1 tablespoon ground cinnamon
- 1/2 cup chopped walnuts or pecans (optional)
- 1/2 cup chocolate chips (optional)
For the Glaze:
This is the cherry on top! It’s a simple powdered sugar glaze that adds a touch of sweetness and a beautiful finish. You can adjust the consistency by adding more or less milk. If you don’t like a glaze, a simple dusting of powdered sugar also looks lovely.
- 1 cup powdered sugar
- 2-3 tablespoons milk (or almond milk, which makes it extra creamy!)
- 1/2 teaspoon vanilla extract (optional)
Step-by-Step Instructions
Step 1: Preheat & Prep Pan
First things first, let’s get our oven nice and toasty. Preheat it to 350°F (175°C). While it’s heating up, grab a standard 9×5 inch loaf pan. I like to grease it really well with butter or cooking spray, and then I lightly flour it. This ensures our beautiful loaf doesn’t stick. For extra insurance, you can also line the pan with parchment paper, leaving a little overhang on the sides – this makes lifting the bread out so much easier!
Step 2: Mix Dry Ingredients
In a large bowl, whisk together your flour, baking soda, baking powder, cinnamon, nutmeg, cloves (if you’re using them!), and salt. Give it a good whisk to make sure everything is evenly distributed. This step is super important for making sure you don’t get pockets of baking soda or salt in your finished bread. You want that leavening and flavor to be consistent throughout. The aroma of the spices alone is enough to make you happy!
Step 3: Mix Wet Ingredients
In a separate medium bowl, combine the granulated sugar, vegetable oil, eggs, and vanilla extract. Whisk these together until they’re well combined and the mixture is smooth. Don’t over-beat here, just a good mix. Make sure your eggs are at room temperature; they incorporate much better and help create a more even texture.
Step 4: Combine
Now, it’s time to bring those wet and dry ingredients together. Pour the wet ingredients into the bowl with the dry ingredients. Using a spatula or a wooden spoon, gently fold them together until *just* combined. A few streaks of flour are okay! Seriously, don’t overmix. Overmixing develops the gluten too much, which can lead to a tough loaf. We want tender, tender bread here!
Step 5: Prepare Filling
If you’re adding the optional filling, now’s the time to prepare it. In a small bowl, mix together the packed brown sugar and cinnamon. If you’re using nuts or chocolate chips, stir them into this mixture. This simple cinnamon-sugar swirl is what gives the bread that extra special something. It creates little pockets of spiced sweetness throughout.
Step 6: Layer & Swirl
Gently fold the grated zucchini into the batter. Remember to squeeze out as much excess moisture as possible from the zucchini first; this is crucial for texture! Now, pour about half of the batter into your prepared loaf pan. Sprinkle half of your cinnamon-sugar mixture (or chocolate chips/nuts) over the batter. Then, dollop the remaining batter on top, and sprinkle the rest of the cinnamon-sugar mixture over that. If you want a really swirled look, you can gently run a knife or a skewer through the batter a couple of times. Don’t go crazy, just a few swirls to marble it nicely.
Step 7: Bake
Pop that beautiful loaf into your preheated oven. Bake for about 50-65 minutes. The exact time will depend on your oven, of course. You’ll know it’s done when a toothpick inserted into the center comes out clean or with just a few moist crumbs attached. If the top starts to brown too quickly, you can loosely tent it with aluminum foil for the last 15-20 minutes of baking.
Step 8: Cool & Glaze
Once it’s baked to perfection, take it out of the oven and let it cool in the pan for about 10-15 minutes. This allows it to set up a bit more. Then, carefully invert the loaf onto a wire rack to cool completely. Don’t skip this step! Trying to glaze a warm loaf is a recipe for a melty mess. Once it’s completely cool, whisk together the powdered sugar, 2 tablespoons of milk, and vanilla extract until smooth. Add more milk, a teaspoon at a time, if you want a thinner glaze. Drizzle it over the top of the cooled loaf. It will set up into a lovely, slightly crisp glaze.
Step 9: Slice & Serve
Once the glaze has set, it’s time to slice and enjoy! Use a serrated knife for the cleanest cuts. This bread is delicious at room temperature, but I honestly think it’s even better on the second day. The flavors meld together, and it becomes even more tender. Serve it with a smear of butter, or just as it is!
What to Serve It With
This zucchini bread is wonderfully versatile, which is part of why I love it so much. It’s not just for one specific meal or occasion. For a perfect breakfast, I love to have a slice toasted with a light spread of butter and a steaming cup of strong coffee. The warmth of the toast combined with the moist bread is just divine. For brunch, it feels a bit more elegant when served alongside fresh fruit salad, maybe a yogurt parfait, or even alongside some scrambled eggs and bacon for a sweet and savory contrast. I’ve even served it with a dollop of whipped cream and a few fresh berries as a lighter dessert option. It’s not too rich, so it’s a lovely way to end a meal. And for those cozy snacks? This is where it truly shines. A thick slice with a glass of milk is pure comfort. My kids ask for this all the time when they get home from school, and I honestly don’t mind because it’s packed with good stuff (thanks, zucchini!). It’s just the best for those moments when you need something a little sweet and satisfying.
Top Tips for Perfecting Your Zucchini Bread
I’ve made this zucchini bread more times than I can count, and over the years, I’ve picked up a few tricks that really make a difference. Here are my top tips to help you achieve zucchini bread perfection:
Zucchini Prep: This is probably the most important step! When you grate your zucchini, don’t just toss it into the batter. You *must* squeeze out as much excess moisture as possible. I use my hands, but a clean kitchen towel or cheesecloth works wonders too. Just gather the grated zucchini in the towel and wring it out over the sink. This prevents your bread from becoming gummy or soggy. Also, for the best texture, I find medium zucchini work best. Too large and they can be watery.
Mixing Advice: Remember that “just combined” mantra? It’s crucial for quick breads. Overmixing develops the gluten in the flour, resulting in a tough, dense loaf. Mix the wet and dry ingredients until you no longer see dry flour streaks. It’s okay if there are a few lumps; that’s perfectly fine and actually preferred!
Swirl Customization: While the cinnamon-sugar swirl is delicious, you can get creative. For a richer flavor, add a tablespoon of unsweetened cocoa powder to the cinnamon-sugar mixture for a chocolate swirl. Or, for a pop of color and tartness, add a few tablespoons of dried cranberries. If you’re using chocolate chips, mini chips distribute more evenly than regular ones.
Ingredient Swaps: Don’t be afraid to experiment! I’ve tested this with melted coconut oil instead of vegetable oil, and it adds a lovely subtle tropical note. For the milk in the glaze, almond milk or even a splash of orange juice can add interesting flavor dimensions. And for the spices, feel free to adjust to your liking – a little more cinnamon or nutmeg never hurt anyone!
Baking Tips: Every oven is a little different, so keep an eye on your loaf. If the top is browning too quickly before the inside is cooked, loosely tent the loaf pan with aluminum foil. This deflects the heat and allows the inside to bake through without the top getting too dark. Also, investing in an oven thermometer can be a game-changer; sometimes oven thermostats are not entirely accurate.
Glaze Variations: If you’re not a fan of the powdered sugar glaze, you have options! A simple dusting of powdered sugar with a sieve is elegant. Or, you could try a cream cheese frosting – just whip softened cream cheese with a little powdered sugar and a splash of vanilla. For a brighter flavor, mix a tablespoon of lemon zest into the powdered sugar glaze. The possibilities are endless!
Storing and Reheating Tips
One of the best things about this zucchini bread is how well it keeps! It’s one of those baked goods that actually tastes better the next day. For room temperature storage, I usually wrap the cooled loaf tightly in plastic wrap or place it in an airtight container. It should stay fresh and moist for about 2-3 days. Just make sure it’s fully cooled before wrapping, otherwise, condensation can make it soggy. If you need it to last longer, pop it in the refrigerator. In an airtight container, it will keep well for up to a week. The texture might firm up a little in the fridge, but that’s easily fixed. For longer storage, you can absolutely freeze it! I usually slice the cooled loaf first. Then, I wrap each slice (or the whole loaf) tightly in plastic wrap, followed by a layer of aluminum foil or placing it in a freezer-safe bag. It will last for about 2-3 months in the freezer. To thaw, you can let slices come to room temperature on the counter, or gently warm them in the microwave or a toaster oven. If you plan to freeze it, I recommend waiting to add the glaze until after it’s thawed and you’re ready to serve it, as the glaze can sometimes become sticky when frozen and thawed.
Frequently Asked Questions
Final Thoughts
So there you have it, my friends! This zucchini bread is more than just a recipe; it’s a little piece of home, a guaranteed crowd-pleaser, and my go-to for when I need a baking win. It’s the perfect example of how simple ingredients can create something truly magical. The way it bakes up so incredibly moist and fragrant, with those warm spice notes, just makes you feel good. If you love this recipe, you might also enjoy my Moist Banana Bread with Walnuts or my Easy Blueberry Muffins – they have that same comforting, homemade feel! I truly can’t wait to hear how your zucchini bread turns out. Please, don’t be shy – leave a comment below, rate this recipe, and share any fun variations or tips you discover. Happy baking, and enjoy every delicious bite!

Tomato Mozzarella Egg White Omelet
Ingredients
Method
- Heat a small non-stick skillet over medium heat.
- When hot, add the oil and tomatoes, season with salt and pepper.
- Cook about 1 minute, then add egg whites.
- Top with shredded mozzarella and parmesan.
- Cover and reduce heat to low.
- Cook until the eggs are completely set.
- Top with fresh herbs if desired.