Spiced Pumpkin Bread How to Bake It Easy
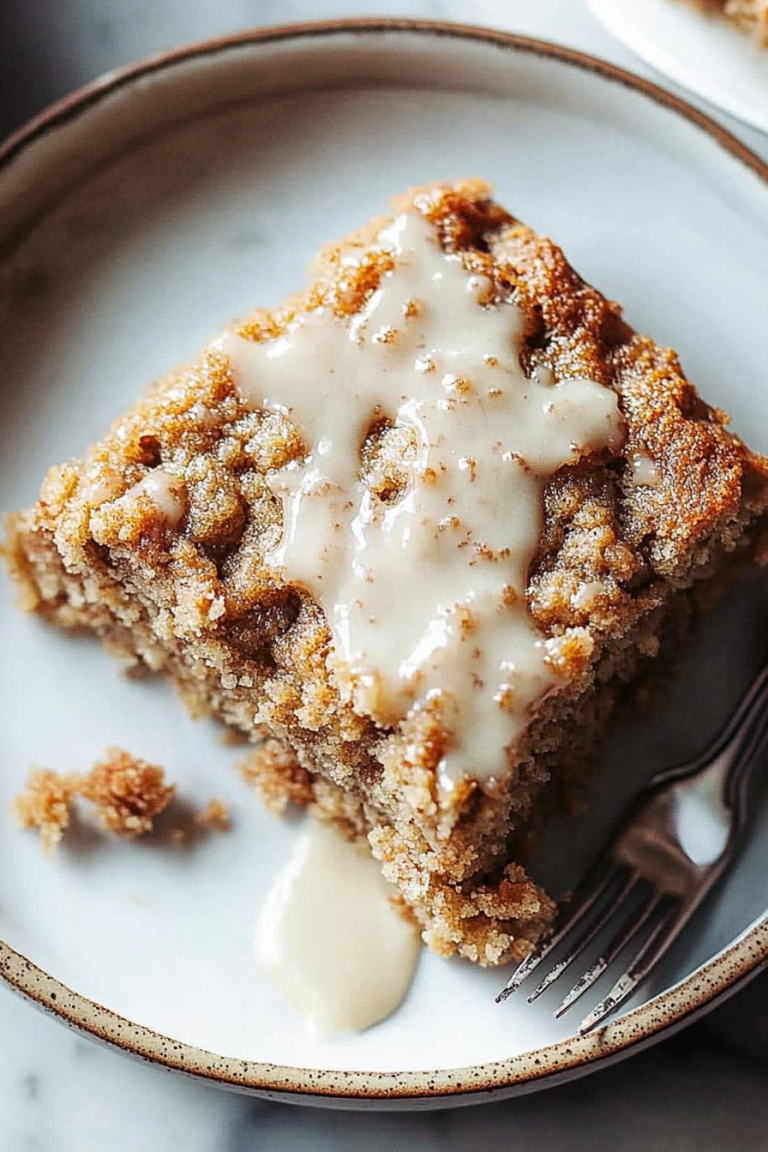
There’s something about the smell of baking that instantly feels like a warm hug, especially on a lazy Sunday morning. I’ll never forget the first time I tried making a zucchini coffee cake — I was craving something sweet but didn’t want to turn on the oven for hours, so I tossed together a quick batter with some leftover zucchini from the garden. The smell alone brought my kids running, and their eyes lit up when I cut the first slice. Honestly, it’s become my go-to comfort treat. Imagine a tender, moist cake with beautiful swirls of cinnamon running through it — it’s sweet, a little spicy, and just the right amount of indulgent. Plus, sneaking zucchini into the batter makes me feel like I’m getting a sneaky veggie in, which I love. Trust me, this disappears in minutes at my house, and it’s one of those recipes I make again and again because it’s simple, cozy, and endlessly versatile. Whether for breakfast, brunch, or just a late-night snack, this zucchini coffee cake never fails to bring a smile.
What is Zucchini Coffee Cake?
Think of zucchini coffee cake as that perfect excuse to enjoy a slice of something sweet with your coffee, but with a little veggie boost. It’s essentially a tender, moist cake made with grated zucchini, giving it a subtle, almost silky texture. The “coffee cake” part just means it’s not overly sweet and comes with a cinnamon-sugar swirl and a crumbly topping — you know, that irresistible crunchy topping you can’t stop nibbling on. The name might seem fancy, but it’s really a cozy, homey kind of treat. It’s like a cross between a quick bread and a dessert, and I love it because it’s so forgiving and versatile. You can add nuts, substitute honey for sugar, or even toss in a handful of chocolate chips if you’re feeling extra indulgent. Basically, it’s a humble, hearty cake that’s packed with flavor, and if you love cinnamon and zucchini as much as I do, you’re going to be obsessed.
Why you’ll love this recipe?
What I love most about this zucchini coffee cake is how it manages to be both comforting and a little sneaky. The zucchini keeps the cake incredibly moist and tender — I’ve tested this with all sorts of zucchini, even those slightly overgrown ones from the garden, and it always comes out perfectly. The flavor is subtly sweet with a warming cinnamon swirl that makes your house smell like fall in a loaf. Plus, it’s incredibly simple to make — I always do this when I need a quick dessert or an easy breakfast for weekend guests. The ingredients are common pantry staples, and even if you’re not a baking pro, this cake comes together easily. Budget-wise, it’s very wallet-friendly, too, since zucchini is cheap and versatile. What I keep coming back to is how adaptable it is. My kids ask for this all the time, and I’ve even swapped in apple sauce or almond milk when I was out of certain ingredients, and it still turned out great. Whether you’re baking for friends, family, or just for yourself during those slow mornings, this coffee cake hits all the right notes.
How do I make Zucchini Coffee Cake?
Quick Overview
This zucchini coffee cake is almost like a one-bowl wonder. First, you grate some zucchini (no peeling needed, which saves time), then mix it into a simple batter that’s just sweet enough. The cinnamon swirl gets mixed into part of the batter for that beautiful marbling effect, and a quick crumb topping adds crunch. You pour everything into a loaf or cake pan, bake until golden, and finish with a drizzle of glaze if you like. It’s truly foolproof — I’ve made this countless times, and it’s always a hit. During busy mornings, I appreciate how quick the prep can be, and the smell alone makes everyone come running to the kitchen.
Ingredients
For the Main Batter:
– 2 cups grated zucchini (about 2 small zucchinis, grated fine)
– 1 ½ cups all-purpose flour (you can swap half for whole wheat if you like)
– ¾ cup sugar (or coconut sugar for a healthier twist)
– 1 teaspoon baking powder
– ½ teaspoon baking soda
– ½ teaspoon salt
– 1 teaspoon vanilla extract
– ½ cup vegetable oil or melted butter
– 3 large eggs (preferably at room temperature)
For the Filling:
– ¼ cup brown sugar
– 1 tablespoon ground cinnamon
– 2 tablespoons all-purpose flour (to help set the swirl and prevent it from sinking)
For the Glaze:
– ½ cup powdered sugar
– 1-2 teaspoons milk or almond milk
– ½ teaspoon vanilla (optional)
Step-by-Step Instructions
Step 1: Preheat & Prep Pan
I always start by preheating my oven to 350°F (175°C). Grease a loaf pan or round cake pan with butter or non-stick spray — I prefer use a parchment lining for easy removal. If you want that pretty swirl, a 9-inch square pan works well, too. Keep the pan ready so once your batter is mixed, you can pour it straight in.
Step 2: Mix Dry Ingredients
In a large bowl, whisk together the flour, sugar, baking powder, baking soda, and salt. This step is crucial — it evenly distributes the leavening agents so your cake rises uniformly and isn’t clumpy. I usually do this first thing while I grate my zucchini so I can move quickly.
Step 3: Mix Wet Ingredients
In another bowl, beat the eggs, then add the oil and vanilla. I like to do this with a whisk until it’s silky. Then, stir in the grated zucchini — no need to squeeze out excess moisture; the moisture helps keep the cake super moist.
Step 4: Combine
Pour the wet mixture into the dry ingredients and fold gently until just combined. Be careful not to overmix — overworking the batter makes it dense. It should be thick but scoopable, not runny.
Step 5: Prepare Filling
Mix the brown sugar, cinnamon, and flour in a small bowl. This will be your cinnamon swirl, so set it aside for now.
Step 6: Layer & Swirl
Pour about half of the batter into your prepared pan. Sprinkle half of the cinnamon mixture evenly over it. Then add the remaining batter on top, and sprinkle the rest of the cinnamon mixture. Use a butter knife or skewer to swirl gently — don’t overmix, or you’ll lose the pretty marbled look. Just a few turns should do the trick.
Step 7: Bake
Pop it in the oven and bake for about 45-50 minutes, or until a toothpick inserted in the center comes out clean. Every oven is different, so start checking at 45 minutes — I’ve had it done sooner, and sometimes it needs the full time. If the top is browning too fast, cover loosely with foil.
Step 8: Cool & Glaze
Let the cake cool in the pan for about 15 minutes, then transfer to a wire rack. Drizzle with the glaze, made by mixing powdered sugar with a splash of milk — I love adding a tiny bit of vanilla for extra flavor. The glaze sets as the cake cools, giving it a shiny, sweet finish.
Step 9: Slice & Serve
Wait until it’s mostly cooled before slicing — the sugar swirl and filling set nicely then. Serve slices on a pretty plate with a cup of coffee or a dollop of whipped cream. This cake is delicious slightly warm or at room temperature. My family loves it at breakfast, tea time, or as an after-dinner treat. I actually keep a stash in the fridge, and it still tastes great cold — the flavors deepen overnight, I swear.
What to Serve It With
Honestly, this cake is pretty versatile. For breakfast, I love pairing it with a robust black coffee or a frothy latte. My kids prefer it with a glass of milk or even hot cocoa on chilly mornings. When it’s brunch, I like serving slices with a dollop of Greek yogurt and fresh berries for added freshness. If I’m making it for dessert, I might add a side of vanilla ice cream or some whipped cream, especially if I want something extra indulgent. And for casual snacking, it’s perfect on a plate with a cup of tea or a warm mug of apple cider in fall. I can’t tell you how many times I’ve whipped this up just because I had zucchini and a moment to bake. It’s become one of those comfort foods that I hope you’ll fall in love with, too.
Top Tips for Perfecting Your Zucchini Coffee Cake
Having baked this a million times, I’ve picked up a few tricks I want to share. First, grate the zucchini finely and remember not to squeeze out all the moisture — the extra juice keeps your cake moist and tender. I’ve tried using different zucchinis, and even larger ones, just grate and stir — it’s forgiving that way. When mixing the batter, I always fold gently to preserve the air, which helps it rise beautifully. If you want a more intense cinnamon flavor, sprinkle extra on top or add a splash of cinnamon to the glaze. For a nuttier touch, toss chopped walnuts or pecans into the batter or sprinkle on top before baking — it’s a game changer. I tested this with almond milk once, and it made the batter even creamier, so feel free to tweak based on what you have. Regarding baking, the middle rack is best — ovens vary, so start checking around the 45-minute mark. When it’s done, a clean toothpick indicates perfect doneness — not wet, not crumbly. Finally, if you’re short on time, you can make mini muffins with this batter! Just reduce the baking time to about 20 minutes, and you’re all set for portable little bites.
Storing and Reheating Tips
This cake stays pretty good for about 2 days at room temperature, covered with a towel or stored in an airtight container. If you want to keep it longer, I recommend refrigerating it in an airtight box — just bring it to room temp or warm slightly before serving so the flavors come alive. Freezing works well, too — wrap slices tightly with plastic wrap and then foil, and it’ll keep for up to 3 months. Thaw in the fridge overnight, then warm in the microwave for a cozy touch. If you’ve added glaze, wait until the cake is fully cooled before drizzling or dipping, or it’ll become soggy. I tested this several times, and honestly, the texture stays moist and delicious even after a few days, as long as you store it properly. The next day, I like to reheat slices gently in the microwave for about 15 seconds, or until warm — that’s when the flavors are at their best. And don’t forget, a dusting of powdered sugar on top after reheating makes it look just as pretty as day one.
Frequently Asked Questions
Final Thoughts
There’s no denying that this zucchini coffee cake has a special place in my kitchen. It’s like old friends — familiar, comforting, and always welcome. I love how it’s so easy to put together, yet it feels like a little celebration every time I slice into it. The subtle sweetness, cinnamon swirl, and moist crumb make it a crowd-pleaser no matter the occasion. I’ve handed out slices at brunches, packed it in school lunchboxes, and even brought it as a hostess gift — it’s that versatile. Honestly, I think the trick is in the zucchini — it keeps the batter tender and even sneaks in some vegetables without anyone noticing. Plus, the aroma alone will have your house smelling like a bakery in no time. If you give this a try, I’d love to hear how it turns out — or if you’ve added your own special twist. Happy baking, my friend — and enjoy every warm, delicious bite!
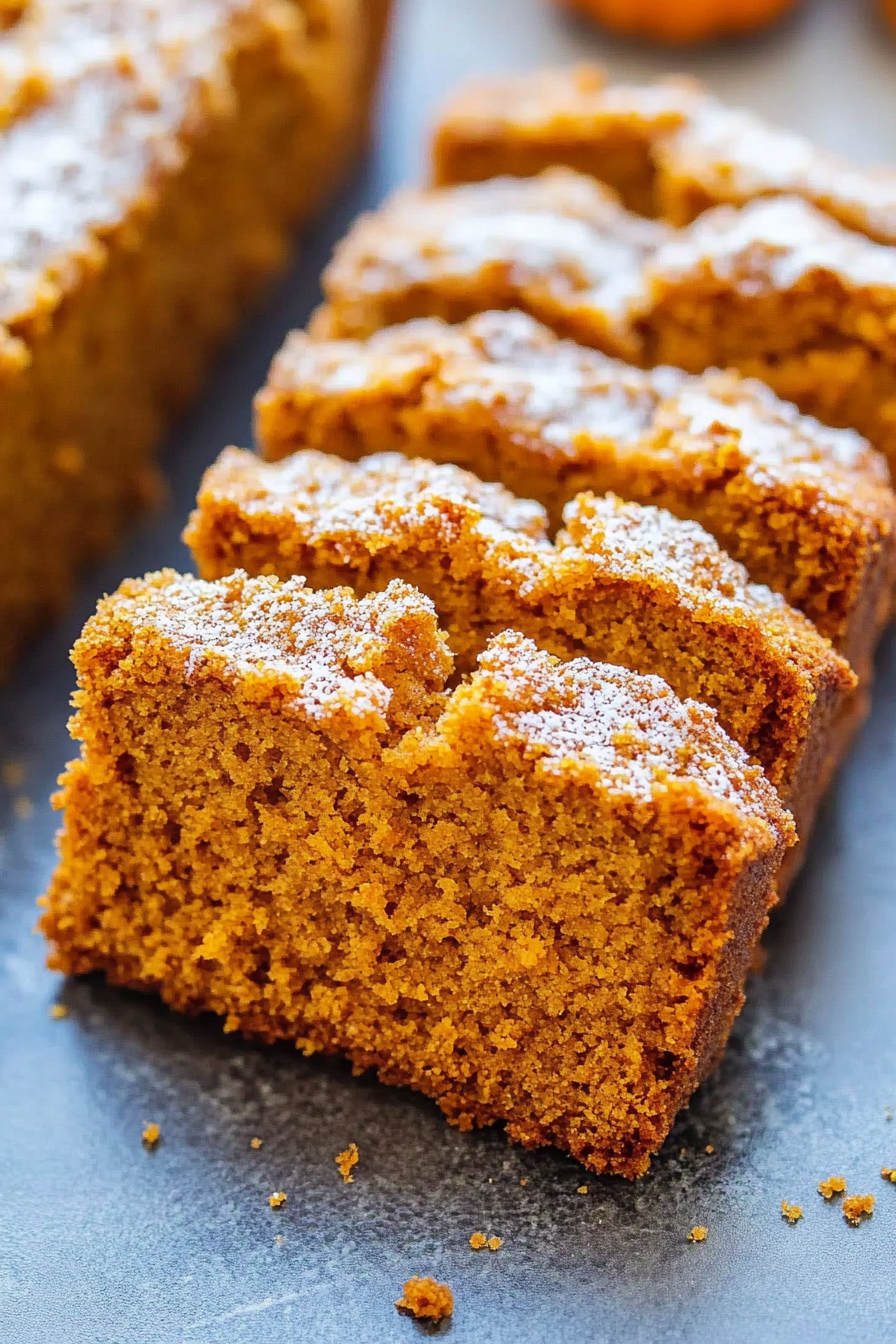
Cinnamon Sugar Pumpkin Bread
Ingredients
Method
- Preheat oven to 400F. Spray three 5x3x2-inch mini loaf pans very well with floured cooking spray or grease and flour the pans; set aside.
- To a large bowl add the flour, baking powder, pumpkin pie spice, salt, and whisk together; set aside.
- To a separate large bowl add the sugars, pumpkin, oil, milk, molasses, vanilla, and whisk until combined.
- Pour the wet pumpkin mixture over the dry ingredients, and stir until just combined; don’t overmix.
- Evenly distribute batter between the 3 prepared pans, filling each about 2/3-full.
- Evenly sprinkle 1 tablespoon sugar over each of the 3 pans.
- Evenly sprinkle 1/2 teaspoon cinnamon over each of the 3 pans and place pans on a baking sheet (easier than dealing with 3 separate small pans in a hot oven).
- Bake for about 40 to 43 minutes, or until tops are set and a toothpick inserted in the center comes out clean or with a few moist crumbs, but no batter. If the tops start browning too quickly, loosely drape aluminum foil over the tops.
- Allow bread to cool in pans for about 15 minutes before removing and placing on a wire rack to cool completely.