Luscious Chocolate Raspberry Cheesecake Delight
Have you ever had those mornings where you want something comforting but don’t feel like turning on a complicated oven-baker? That’s exactly how I felt last weekend when I stumbled upon this recipe—my personal take on a zucchini coffee cake that’s become a family favorite. The smell alone makes everyone in the house come rushing to the kitchen, asking, “What’s baking?” It’s such a sweet, moist treat that my kids ask for it all the time, and honestly, I don’t mind—they’re the best critics. This coffee cake is the perfect blend of tender crumb, a hint of spice, and that irresistible cinnamon swirl. Plus, it sneaks in some hidden zucchini—shhh, don’t tell anyone! It’s incredibly forgiving, super easy, and I always do this when I want a dessert that feels fancy but is actually crazy simple to make. Trust me, once you try this, it’ll become your go-to for brunch, breakfast, or even a cozy snack with a mug of coffee at 10 am—that moment of pure happiness everyone deserves. Let’s dive into making this warm, delightful zucchini coffee cake together.
What is Zucchini Coffee Cake?
This zucchini coffee cake is really just a moist, tender cake that’s loaded with fresh zucchini, topped with a buttery cinnamon sugar swirl, and finished off with a simple glaze if you’re feeling fancy. Think of it as a comforting cousin to your classic morning muffin — only baked in a loaf or square pan. It’s essentially a hybrid between a quick bread and a cake, making it perfect for those days when you want something sweet but don’t want to fuss with layering or complicated frosting. The name “coffee cake” kind of hints at its purpose—it’s the kind of treat you bake up, slice and enjoy with your morning cup of coffee or tea. And because zucchini adds moisture without overpowering, every bite stays soft and flavorful, just like a warm hug from grandma’s kitchen. I love how versatile it is—daybreak, brunch, or even dessert—this cake always hits the spot.
Why you’ll love this recipe?
What I love most about this zucchini coffee cake is how it strikes that perfect balance between comfort and freshness. The flavor? Oh, it’s got this lovely warmth from cinnamon and a touch of vanilla, paired with a subtle vegetable note that makes it feel slightly wholesome, but still indulgently sweet. Plus, it’s incredibly easy to pull together—no fancy techniques here—just a few bowls and a whisk, and you’re good to go. Budget-wise, it’s friendly, too; most of these ingredients are pantry staples or fridge favorites. And the best part? You can easily customize it. Want more spice? Add nutmeg or ginger. Prefer a nutty crunch? Toss in some chopped walnuts or pecans. I’ve made this countless times, and every time, it turns out just as delightful as the first. This coffee cake is a lifesaver on busy nights when I want a quick dessert that everyone loves, or on lazy weekends when I crave something sweet and cozy. I also tested it with almond milk, and honestly, it made the crumb even creamier! Whether it’s a quiet morning or a casual gathering, this cake is a crowd-pleaser that feels homemade and special—because it is.
How do I make Zucchini Coffee Cake?
Quick Overview
This cake is all about simplicity. You start by prepping some fresh zucchini, grating it well, and squeezing out excess moisture. The batter comes together in one bowl with just a few basic ingredients—flour, sugar, eggs, butter, and a little baking soda. Then, you swirl a cinnamon sugar mixture into the batter, pour it into a prepared pan, and bake until golden and a toothpick comes out clean. The glaze is totally optional but adds that lovely shiny finish and a little extra sweetness. The entire process is straightforward, making it a perfect weekend project or a last-minute treat. And the smell—oh my gosh, the smell alone will have everyone hanging around the oven!
Ingredients
For the Main Batter:
- 1 1/2 cups all-purpose flour — I always use unbleached for a richer flavor
- 1 cup granulated sugar — feel free to swap for coconut sugar if you like
- 1/2 teaspoon baking soda
- 1/4 teaspoon salt
- 1 teaspoon ground cinnamon
- 1/2 cup unsalted butter, melted — trust me, real butter makes a difference
- 2 large eggs
- 1 teaspoon vanilla extract
- 1 cup grated zucchini — I usually use about 1 medium zucchini, grated fine
- 1/4 cup milk (or almond milk for extra creaminess)
For the Filling:
- 3 tablespoons brown sugar
- 1 teaspoon ground cinnamon
- 2 tablespoons melted butter or margarine
For the Glaze (Optional):
- 1 cup powdered sugar
- 2-3 teaspoons milk or lemon juice
- A pinch of vanilla (optional)
Step-by-Step Instructions
Step 1: Preheat & Prep Pan
Set your oven to 350°F (175°C). Grease a 9-inch square baking dish or a loaf pan with butter or cooking spray. Line with parchment if you’re feeling fancy, but I usually just grease and flour it. While the oven heats, grate your zucchini and squeeze out the excess moisture with a clean cloth or paper towel. This step is super important—if you leave too much water, your cake might turn out a little soggy.
Step 2: Mix Dry Ingredients
In a large bowl, whisk together the flour, sugar, baking soda, salt, and cinnamon. I always do this first so everything’s evenly distributed—trust me, it makes a huge difference in how uniform the batter turns out.
Step 3: Mix Wet Ingredients
In a separate bowl, beat the eggs, then add melted butter, vanilla, milk, and the grated zucchini. Whisk until smooth. When I first started, I overmixed at this stage—avoid that. Just combine until everything looks nicely blended and no streaks remain. The zucchini will be a little stringy at first, but I promise, it melts into the batter.
Step 4: Combine
Pour the wet mixture into the dry ingredients and gently fold everything together with a spatula. Don’t overmix—you want some lumps, it keeps the cake tender. Overmixing is the quickest way to a tough crumb, and nobody wants that.
Step 5: Prepare Filling
In a small bowl, mix the brown sugar, cinnamon, and melted butter together. This will be your cinnamon swirl. I like to make enough to sprinkle generously—more is better in my book! Feel free to add chopped nuts here for some crunch.
Step 6: Layer & Swirl
Pour half of the batter into your prepared pan. Drop spoonfuls of the cinnamon sugar mixture on top, then add the rest of the batter. Using a knife or a skewer, swirl gently through the batter to create a marbled effect. Don’t overdo it—you want nice ribbons of cinnamon, not a chaotic mess.
Step 7: Bake
Pop it into the oven and bake for about 40-45 minutes. Start checking around 40 minutes—insert a toothpick in the center and if it comes out clean, you’re good. Every oven is different, so don’t rely solely on the clock. If it’s browning too fast, cover loosely with foil for the last 10 minutes.
Step 8: Cool & Glaze
Once baked, let the cake cool for at least 15 minutes—you want it warm but not hot when you add the glaze. Mix the powdered sugar with a little milk and vanilla until you get a pourable consistency. Drizzle over the top for the perfect finishing touch. If you’re in a rush, skip the glaze—they still taste divine.
Step 9: Slice & Serve
Slice with a serrated knife—going straight down will squash those beautiful layers! Serve warm or at room temperature, with a cup of coffee or tea. I love serving this with a dollop of whipped cream or a scoop of vanilla ice cream if I’m feeling extra indulgent. Trust me, it disappears in minutes at my house!
What to Serve It With
This zucchini coffee cake is super versatile. In the mornings, it pairs beautifully with a strong cup of coffee or a steaming mug of tea. I like to serve it alongside fresh fruit—berries or sliced peaches make a lovely, light contrast to the sweet, spicy cake. During brunch, it’s perfect when plated with a dusting of powdered sugar and maybe some yogurt on the side for a little fancy touch. You can even serve it as a comforting dessert—warm slices topped with a scoop of vanilla ice cream or a drizzle of caramel sauce. When I’m craving something casual, I’ll slice it up and wrap a piece in a napkin for a quick on-the-go snack to pack in lunchboxes. My family’s favorite way? Warmed up with a glass of cold milk or a hot cup of coffee. It’s just one of those recipes that seems to make everyone smile, no matter the occasion.
Top Tips for Perfecting Your Zucchini Coffee Cake
Every time I make this, I learn a little more. For starters, always squeeze out as much moisture from the zucchini as possible—that’s the secret to a moist, never-soggy cake. I’ve tested this with both fresh and frozen zucchini (just thaw and squeeze well), and either works fine, but fresh has a slightly brighter flavor. When mixing the batter, I avoid overworking it—stir just until combined. Overmixing can lead to a dense crumb, and no one wants that. If you want a prettier swirl, use a toothpick to drag through the batter and create a marbled effect—trust me, it’s all about the visual appeal. If you prefer a chunkier texture, toss in some chopped nuts or even chocolate chips. Speaking of substitutions, I’ve tried honey instead of sugar and almond milk instead of regular milk, and both worked beautifully, adding their own little twist. The oven temperature is pretty forgiving; I usually give it an extra five minutes if I see a lot of color on top. For the glaze, I sometimes add a splash of lemon juice or vanilla—depends on my mood. Oh, and one more thing: always let the cake cool slightly before slicing—to keep the slices neat and to really enjoy the flavors. This cake gets better the next day if stored properly, but honestly, it’s best enjoyed fresh from the oven—it’s hard to resist!
Storing and Reheating Tips
This cake is surprisingly good the next day, which makes it perfect for make-ahead mornings or weekend baking. Once cooled completely, I store slices in an airtight container at room temperature for up to 2 days—just cover loosely with foil. If I want to keep it longer, I pop it into the refrigerator in an airtight wrap or container for up to 4 days. Just keep in mind that the moisture stays better if it’s not too tightly wrapped, or it might get a little drier. For longer storage, the freezer is your friend—wrap individual slices tightly with plastic wrap and then in foil. They’ll keep for up to 3 months. When reheating, microwave for about 20-30 seconds or warm slices in a 300°F oven for about 10 minutes—preferably covered with foil to retain moisture. If you added glaze, wait until it’s fully cooled before chilling or freezing—otherwise, the glaze might get weird or leak. I’ve tested all these methods, and honestly, it’s just as good reheated as fresh—sometimes even better, because the flavors meld overnight. Just don’t forget to loosen the wrap or cover to keep the moistness intact.
Frequently Asked Questions
Final Thoughts
This zucchini coffee cake is one of those recipes that feels like a warm hug on a busy morning or a lazy Sunday afternoon. It’s simple, forgiving, and adaptable—perfect for both novice bakers and seasoned home cooks alike. The secret is in the moisture from the zucchini and the cinnamon swirl that keeps every bite exciting. I love that it’s not overly sweet, so you can enjoy it for breakfast, snack, or dessert without guilt. Plus, it’s a great way to use up leftover zucchini, especially when summer’s bounty is at its peak. If you try this recipe, I’d love to hear how you customize it—maybe add walnuts, swap the glaze for cream cheese frosting, or even sneak in a handful of chocolate chips. Remember, the best recipes develop over time, so don’t be afraid to tweak and make it your own. Happy baking, and I can’t wait to see your beautiful slices—don’t forget to tag me in your pics!

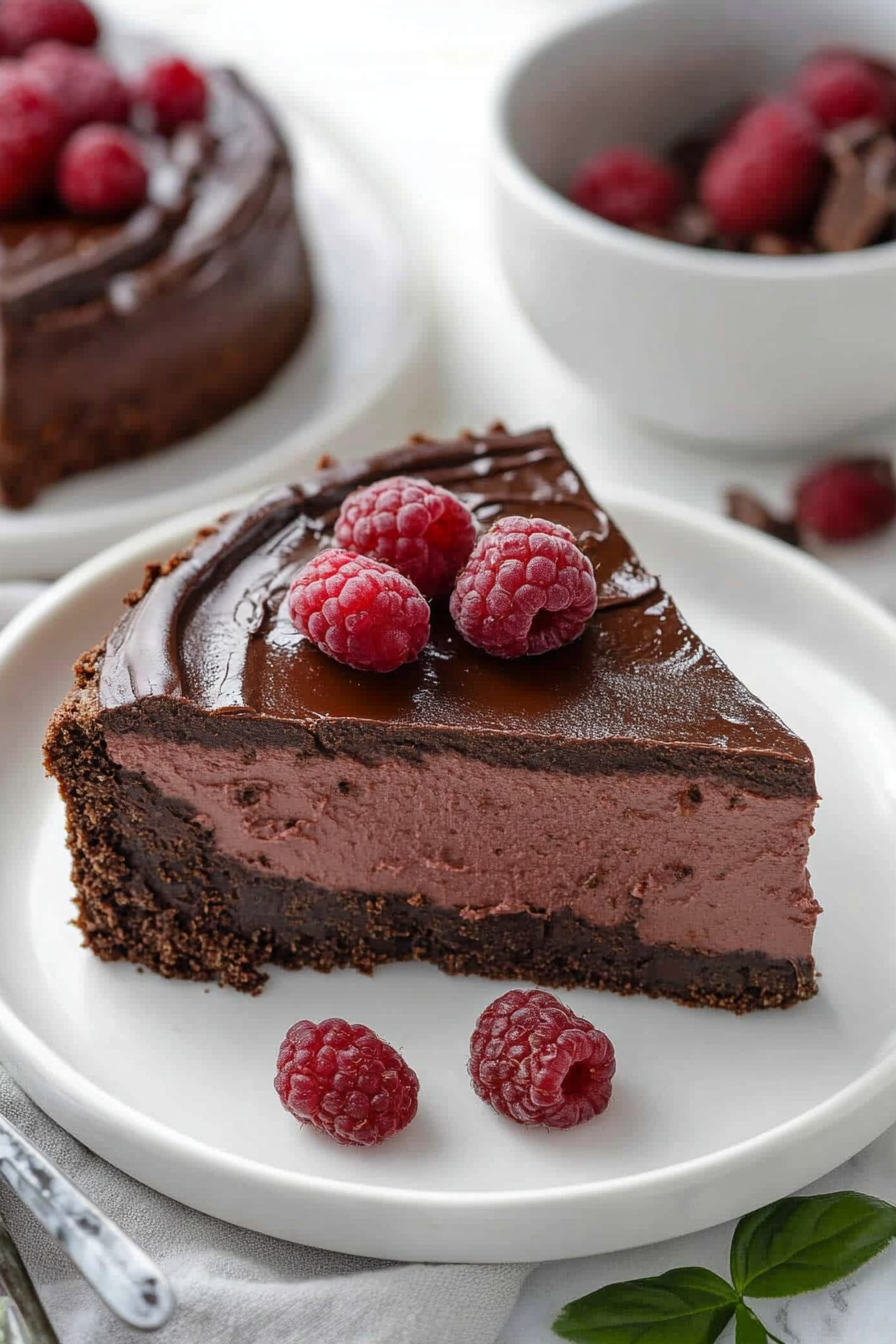
Chocolate Raspberry Cheesecake
Ingredients
Method
- In a medium saucepan over medium heat, combine the frozen raspberries, water, sugar, and cornstarch. Stir to combine. Cook, stirring occasionally, until the raspberries break down and the sauce thickens, about 20-25 minutes. Set aside to cool slightly.
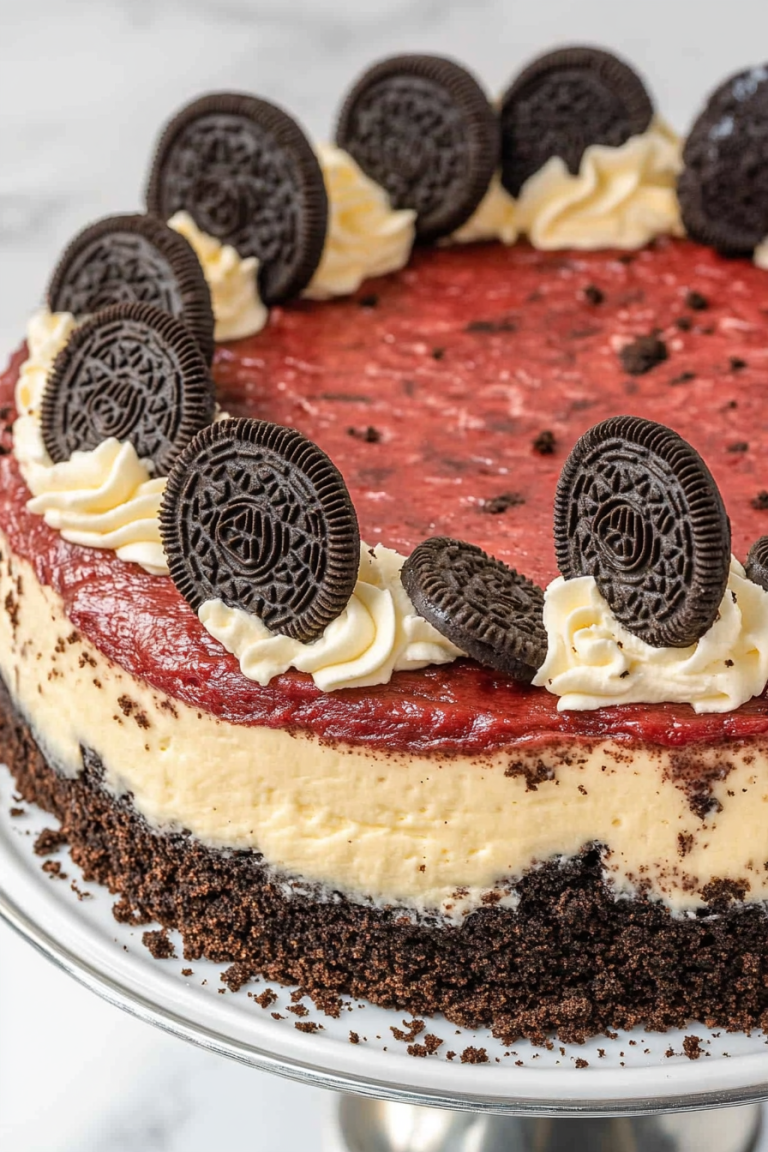
- In a small bowl, combine the crushed Oreo cookies and melted butter, stirring until the crumbs are fully coated. Press the mixture evenly into the bottom of the prepared springform pan. Wrap the bottom and sides of the pan with two layers of heavy-duty aluminum foil. Set aside.
- Preheat oven to 325°F. Lightly grease a 9-inch springform pan. Then, line it with parchment paper. Set aside.
- To a microwave-safe bowl, add the chocolate chips and ¼ cup of the heavy cream. Microwave in 20-second intervals, stirring between each, until the chocolate is melted and the mixture is smooth. Set aside.
- In the bowl of a stand mixer with a paddle attachment, add the cream cheese. Mix until smooth. Add the sugar and cocoa powder, beating until fully incorporated.
- Add the eggs, one at a time, mixing well between each addition. Pour in the remaining ½ cup of heavy cream and vanilla. Mix until combined.
- Gently fold in the melted chocolate mixture. Stir until no white streaks remain.
- Pour half of the cheesecake filling into the crust. Dollop 4 tablespoons of raspberry sauce over the filling. Carefully add the remaining cheesecake batter, then dollop 4 more tablespoons of the raspberry sauce on top. Use a butter knife or skewer to gently swirl the sauce into the filling, creating a marbled effect without disturbing the crust. Do not fully mix the sauce into the filling.
- Place the springform pan into a larger pan, such as a roasting pan. Pour hot water into the larger pan until it reaches about halfway up the side of the springform pan.
- Bake for 100-105 minutes (1 hour 40 to 45 minutes), or until the sides are set and the center is slightly jiggly.
- Remove the cheesecake from the oven and allow it to cool on a wire rack until it reaches room temperature (about 1 hour). Then, transfer it to the refrigerator to chill for at least 4 hours, or overnight.
- Garnish with mint leaves. Serve with the remaining raspberry sauce.