Savory Mushroom Swiss Pasta Recipe
There’s something about pulling a warm loaf of chocolate zucchini bread out of the oven that instantly makes my house feel like a hug. I remember my grandma making it when I was a kid—her kitchen smelled like cocoa and toasted walnuts, and I’d sneak a slice before breakfast. It’s one of those recipes that’s so simple yet so insanely good, it’s become a kind of comfort staple around here. What I love most about this chocolate zucchini bread is that it’s secretly sneaky—full of veggies, but nobody ever guesses! I always do this when I want a sweet treat that’s a little healthier, or when I have zucchini left from the garden that’s begging to be used. This one’s a lifesaver on busy nights or when friends drop by unannounced. Trust me, once you make this, it’ll be another recipe you keep in your back pocket for whenever you need a little comfort and a whole lot of chocolate—no fuss, just pure cozy goodness.
What is chocolate Zucchini bread?
Think of it as a mash-up between your favorite chocolate cake and a sneaky vegetable—so moist, rich, and delightfully indulgent, you won’t even remember it’s healthy-ish. It’s essentially a quick bread that you whip up in one bowl, and the star here is zucchini—yes, that humble garden vegetable that everyone has a million of at the end of summer. The zucchini adds moisture without crowding out the chocolate flavor, making each bite tender and melt-in-your-mouth. The name’s pretty straightforward: it’s chocolate bread made with shredded zucchini, coming together in under an hour. Think of it as the kind of recipe that’s perfect for breakfast, dessert, or just a cozy afternoon snack. My kids ask for this all the time, and honestly, I don’t mind—they’re eating vegetables while getting their sweet fix!
Why you’ll love this recipe?
What makes this chocolate zucchini bread so irresistible? Well, for starters, the flavor is just divine—I mean, rich chocolate with a subtle sweetness that’s perfectly balanced by the tender zucchini. I used good quality cocoa powder here; it really takes this loaf to the next level. Plus, the batter comes together so quickly—no complicated techniques, just whisk, fold, and bake. That’s what I call my kind of baking! And here’s a little secret: I tested this with almond milk instead of regular milk, and it actually made it even creamier—so feel free to tweak it based on what you have in the fridge. It’s budget-friendly, too, using ingredients I always keep in the pantry—flour, cocoa, a bit of sugar, and of course, zucchini. The best part? This loaf is super versatile. My family loves it warm with a dollop of whipped cream, or cooled and sliced for work or school snacks. It’s a win-win every time—a comforting, wholesome treat that hits all the right notes.
How do I make Zucchini bread?
Quick Overview
This recipe is a one-bowl wonder, perfect for busy weeknights or lazy weekend mornings. You start by shredding your zucchini—no need to peel, just rinse and grate. Then, whisk together your wet ingredients—egg, oil, vanilla, and milk—until silky smooth. In another bowl, whisk your dry ingredients: flour, cocoa powder, baking soda, and sugar. Gently fold these together, then combine the wet and dry until just combined; don’t overmix, or the bread can get dense. Stir in chocolate chips and nuts if you’re feeling fancy. Pour the batter into a loaf pan, swirl in your prepped filling, bake for about 45-50 minutes until a toothpick comes out clean, and voila! Warm, gooey, and just the right amount of chocolatey. Enjoy it fresh or cooled—either way, it’s a slice of happiness.
Ingredients
For the Main Batter:
– 1 ½ cups all-purpose flour (I like to use unbleached if I have it)
– ½ cup unsweetened cocoa powder (trust me, good quality cocoa makes a difference)
– 1 teaspoon baking soda
– ½ teaspoon salt
– 1 cup granulated sugar (or a mix of sugar and maple syrup for a softer sweetness)
– 2 large eggs
– ⅓ cup vegetable oil or melted coconut oil
– 1 teaspoon vanilla extract
– ½ cup milk (dairy or almond works perfectly)
– 1 cup shredded zucchini (squeeze out excess moisture so it doesn’t make the bread soggy)
For the Filling:
– ½ cup cream cheese, softened (optional but adds a lovely tang)
– ¼ cup sugar
– 1 teaspoon vanilla
– ½ cup chocolate chips (more if you’re like me and can’t resist)
For the Glaze:
– ½ cup powdered sugar
– 1-2 teaspoons milk or cream
– Optional: a dash of vanilla or cocoa powder for extra flavor
Step-by-Step Instructions
Step 1: Preheat & Prep Pan
I always start by preheating the oven to 350°F (175°C). Line a loaf pan with parchment paper or lightly grease it with butter. This step is key for easy removal and a nice crust on top. Sometimes, I sprinkle a little extra cocoa powder on the bottom of the pan for a chocolatey finish.
Step 2: Mix Dry Ingredients
In a large bowl, whisk together the flour, cocoa powder, baking soda, salt, and sugar. Doing this first ensures your baking soda’s evenly distributed and your bread isn’t clumpy. I always sift the cocoa and flour if I’ve got time—makes for a smoother batter, especially with the cocoa clumping sometimes.
Step 3: Mix Wet Ingredients
In a separate bowl, beat the eggs lightly, then stir in your oil, vanilla, and milk. I like to do this with a fork or a whisk until it’s glistening and smooth. If I’ve got leftover buttermilk or almond milk, I’ll use that. The batter should look shiny and uniform.
Step 4: Combine
Pour the wet mixture into the dry ingredients and gently fold together with a spatula—NO overmixing! You want just combined, with a few streaks of flour remaining. Overmixing can lead to dense bread, which nobody wants.
Step 5: Prepare Filling
If you’re adding cream cheese filling, mix the softened cheese with sugar and vanilla until smooth. Set aside. For a layered look, I like to dollop a spoonful of batter, add spoonfuls of the cream cheese mixture, then top with more batter. For simple swirl, I usually just fold in the chocolate chips directly into the batter.
Step 6: Layer & Swirl
Pour the batter into your prepared loaf pan. If using the filling, carefully add dollops and swirl with a toothpick or skewer to create marbling. It looks pretty and gives each slice a surprise of creamy richness.
Step 7: Bake
Pop it in the oven for about 45-50 minutes. Check for doneness by inserting a toothpick into the center—if it comes out clean, you’re golden! I sometimes cover the top with foil if it’s browning too fast but the inside isn’t quite done yet.
Step 8: Cool & Glaze
Let the bread cool in the pan for about 10 minutes, then transfer it to a wire rack. Once completely cooled, drizzle with your glaze—powdered sugar mixed with a splash of milk or cream. I like to add a tiny pinch of vanilla or cocoa for extra flavor. The glaze isn’t necessary but makes it look extra special.
Step 9: Slice & Serve
Use a serrated knife for clean slices—hot bread can be a bit fragile. Serve slightly warm or at room temperature. My family loves it with a cup of coffee or a glass of milk. Sometimes I simply cut a thick piece and microwave it for 15 seconds for a quick warm-up. It’s even delicious crumbled over ice cream—trust me on this one.
What to Serve It With
This chocolate zucchini bread is incredibly versatile. For breakfast, I love it with a hot cup of coffee or a dollop of Greek yogurt on the side. My kids ask for this as a dessert after dinner—sometimes I warm a slice and top it with whipped cream or a scoop of vanilla ice cream. It’s also fantastic as a casual snack—wrapped in beeswax paper, it travels well for picnics or school lunches. When I serve it for brunch, I like to add fresh berries and a sprinkle of powdered sugar. Honestly, I’ve made this for family gatherings, potlucks, and even as a last-minute hostess gift—you should see how quickly it disappears! It’s a cozy, cheerful bread that always makes everyone smile, no matter the occasion.
Top Tips for Perfecting Your Chocolate Zucchini Bread
Over the years, I’ve learned a few tricks that make this recipe even more foolproof. First, always squeeze out excess moisture from the shredded zucchini—trust me, soggy bread is no fun, and a dry loaf is a happy loaf. I keep a handful of paper towels nearby to pat it dry, especially if the zucchini’s fresh from the garden. When mixing the batter, be gentle—you don’t want to knock out all the air—you want a tender, fluffy crumb. If you’re feeling adventurous, try adding a teaspoon of cinnamon or a pinch of espresso powder to boost the chocolate flavor.
I’ve experimented with different types of cocoa—Dutch-processed gives a more mellow chocolate, while natural cocoa brings brightness. Both work beautifully, so it’s just a matter of preference. For extra texture, toss in chopped nuts or shredded coconut—both are wonderful additions. I’ve also made this with a handful of chopped walnuts, and it adds a lovely crunch.
When baking, oven variations are common—mine likes to run a little hot, so I keep an eye on the loaf around 45 minutes. The toothpick test is my foolproof method. If it’s a little moist but not wet, I leave it in the oven for 5 more minutes. Once out, don’t skip the cooling process—it helps set the structure and makes slicing cleaner. If you want a glossy top, broil it for just 2 minutes at the end, but keep a close eye—I’ve burned more than one loaf this way!
Finally, the glaze can be customized—add a splash of peppermint extract in winter or swirl in some peanut butter for a richer flavor. Experimentation is part of the fun, and I encourage you to make it your own. Every time I tweak something, I discover new favorites, and I love sharing that journey with friends over coffee or family dinner.
Storing and Reheating Tips
This bread keeps beautifully, especially if you store it wisely. If you’re planning to eat it within a day or two, wrap it tightly in plastic or store it in an airtight container at room temperature—that way, it stays tender and moist. I’ve learned not to leave it uncovered—it can dry out quickly, which is the last thing you want with a baked good this good. For longer storage, pop slices in the refrigerator—they stay fresh for about 4 days, and I just reheat slices in the microwave for 15-20 seconds when the craving hits.
If you want to stash it for even longer, the freezer is your friend. Wrap the loaf tightly in plastic wrap and then foil, or slice first and freeze individual pieces—perfect for quick snacks. Thaw at room temperature for about an hour, or microwave from frozen for 30 seconds. Remember, glaze is best added fresh or just before serving, as it can melt or become sticky over time.
Frequently Asked Questions
Final Thoughts
This chocolate zucchini bread has become a bit of a tradition around here; it’s that comforting, homemade treat that everyone asks for. Every time I bake it, I feel like I’m sharing a little piece of childhood warmth and simple joy. Plus, it sneaks in those veggies without anyone batting an eye—my secret weapon on busy mornings or when I want to feel like I’m doing a little good while indulging a sweet craving. Whether you serve it warm with a cup of coffee or cold with a glass of milk, I promise it’ll bring smiles around your table. Don’t be afraid to experiment with add-ins or flavor swaps—baking is all about making it your own. I’d love to hear how yours turns out, so leave a comment below or tag me in your photos—I can’t wait to see your gorgeous loaves. Happy baking!
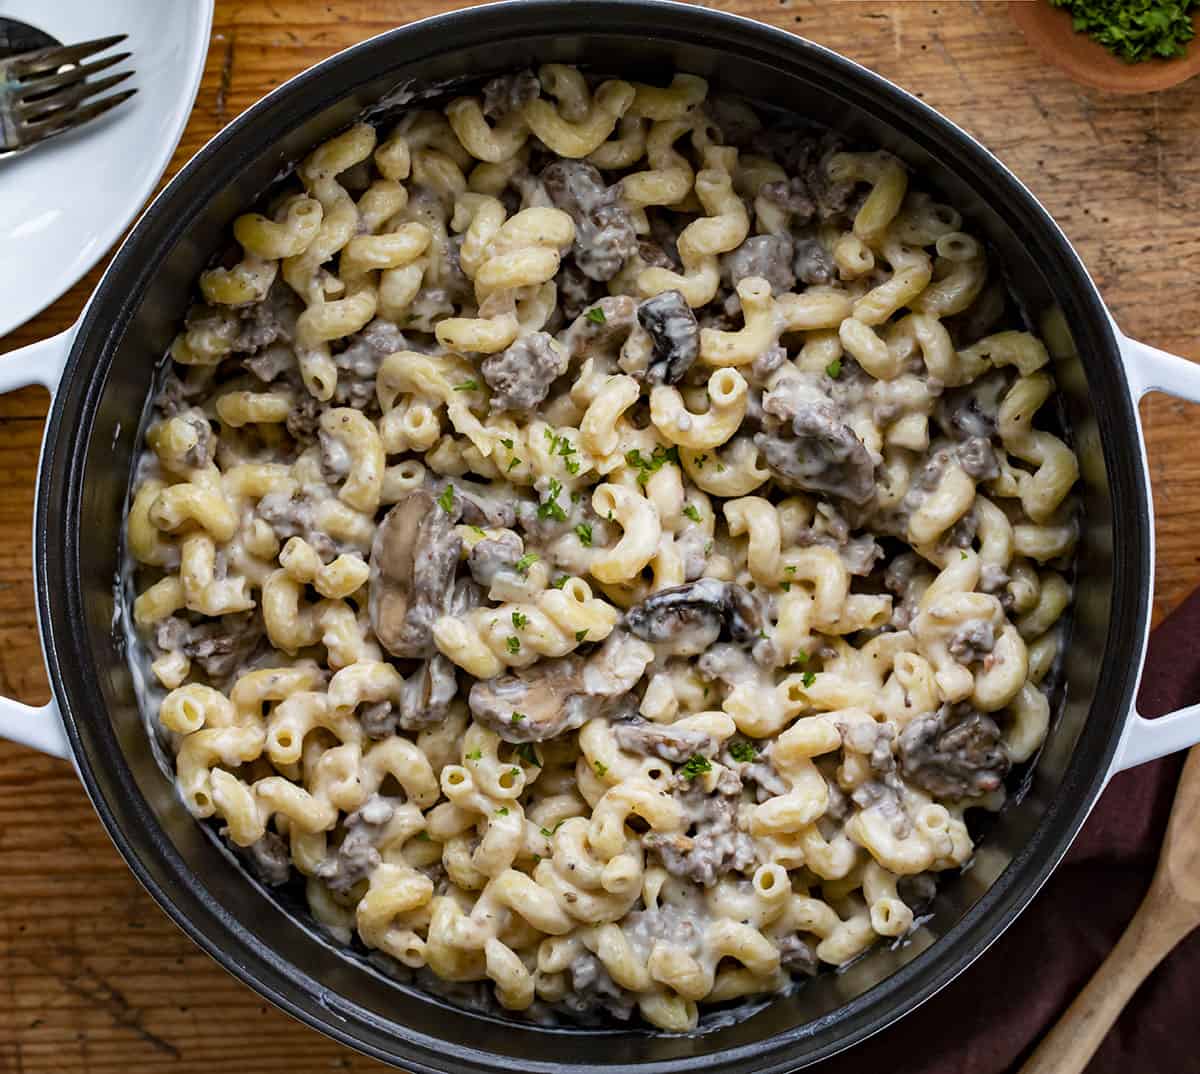
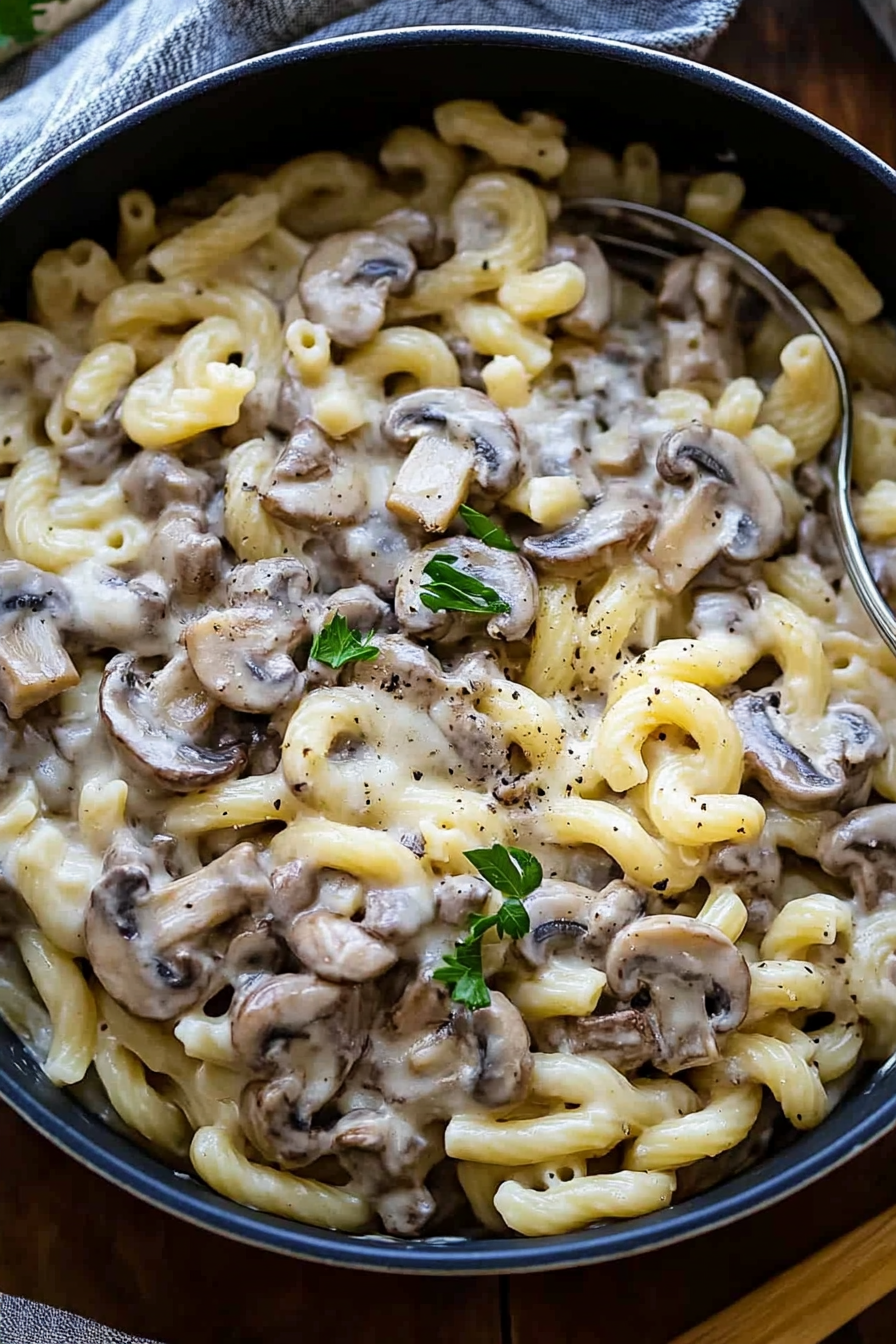
Mushroom Swiss Pasta
Ingredients
Method
- In a large pot of salted water, cook cavatappi noodles al dente according to package instructions (about 9 minutes). Drain noodles when done; set aside.
- In a large skillet over medium heat, melt 2 tablespoons of butter with 0.5 teaspoon of kosher salt. Add the sliced mushrooms and cook for 8-10 minutes, or until tender and slightly browned. Use a slotted spoon to transfer the mushrooms to a small bowl. Tent to keep warm.
- To the same skillet, add the diced yellow onion and minced garlic. Cook for 3-5 minutes, or until the onions are softened.
- Add the ground beef, Worcestershire sauce, seasoned salt, and hamburger seasoning to the skillet. Cook for 8-10 minutes, or until the ground beef is no longer pink. Drain any excess grease.
- Stir the cooked mushrooms into the ground beef mixture. Remove from heat and set aside.
- In a saucepan over medium heat, melt 0.5 cup of butter. Add the flour and whisk constantly for 1-2 minutes, or until slightly browned.
- Remove from heat and gradually pour in the milk, whisking constantly. Return the pan to the heat and whisk for another 3-5 minutes, or until the mixture has thickened.
- Add the 2 teaspoons of kosher salt and 0.5 teaspoon of garlic powder. Stir to combine. Again, remove from heat. Add the shredded Swiss and mozzarella cheeses, stirring to melt.
- To the large pot of cooked noodles, add the ground beef and mushroom mixture. Stir to combine. Pour the cheese sauce over the pasta and stir to combine. Season with salt and pepper to taste. Serve immediately.