How to Make a Luscious Coffee Chocolate Cake
There’s something about the smell of freshly baked zucchini bread that instantly brings a cozy, nostalgic feeling into my kitchen. Maybe it’s because my grandma used to make her version when I was a kid, and I’d stand on a stool just to sneak a slice warm from the oven. Or maybe it’s that perfect blend of sweet spices and moist, tender crumb that sticks with you long after the last crumb is gone. Honestly, this zucchini bread is my comfort food—my secret weapon on busy mornings or lazy weekends when I want something sweet but also wholesome. I always do this when I need a quick breakfast or a treat that my kids actually ask for seconds of. The best part? It’s incredibly forgiving and practically foolproof. Once you get the hang of it, you’ll be making this bread on repeat, experimenting with different add-ins, and maybe even hiding slices for yourself—because trust me, this one’s a lifesaver on busy nights. Plus, it uses simple ingredients I always have in my pantry, which makes it victory guaranteed every single time.
What is Zucchini bread?
Think of zucchini bread as a cozy, slightly grown-up version of the classic zucchini muffin—only baked in a loaf pan. It’s essentially a sweet bread that sneaks in grated zucchini, making it super moist and tender without overwhelming that delicious hint of vegetable. The name might sound fancy, but it’s really just a humble, homey treat that’s perfect for breakfast, brunch, or even an afternoon coffee fix. The idea dates back generations, with recipes passed down from grandmothers to moms, and now to us, sharing that same warm feeling through every slice. What makes it special is how the zucchini dissolves into the batter, enriching every bite with moisture and a subtle sweetness—plus, it’s a sneaky way to get more veggies into the kids and myself! Think of this bread as the delicious result of your favorite muffin and bread hybrid—light, fluffy, and packed with flavor.
Why you’ll love this recipe?
Honestly, what I love most about this zucchini bread is its simplicity. You don’t need fancy tools or hard-to-find ingredients—just a handful of kitchen staples that I bet you already have. It’s forgiving too; I’ve tested this with different types of sweeteners, like honey and maple syrup, and it still turns out perfectly moist. The flavor? Oh, it’s a cozy blend of cinnamon, vanilla, and just a hint of nutmeg that makes each bite feel warm and comforting. I swear the smell alone will turn your whole house into a bakery—windows open, everyone’s nose twitching from the sweet, spiced air. And the versatility? Oh, I’ve gone crazy here. Besides the classic version, I’ve added walnuts, blueberries, and even chocolate chips when I wanted an indulgent spin. Plus, it’s budget-friendly and uses ingredients I usually have on hand. This bread is my go-to for when I want a quick, impressive treat without the fuss. It’s not just a snack; it’s a hug in loaf form.
How do you make Zucchini bread?
Quick Overview
Making this zucchini bread is honestly a breeze. The process involves mixing dry ingredients separately, blending the wet ingredients, then gently combining everything before baking. I love how forgiving the recipe is—overmixing isn’t a big deal, and you can customize the add-ins to suit your mood. The batter comes together quickly, and the smell that hits your kitchen while it bakes? Divine. The whole process takes about an hour, including baking and cooling time. Once you get the hang of it, you’ll keep reaching for this recipe whenever you crave something sweet and comforting—trust me, it disappears faster than you can say ‘snack time.’
Ingredients
For the Main Batter:
- 2 cups grated zucchini (about 2 medium zucchinis, squeezed dry if very moist)
- 1 ½ cups all-purpose flour (or whole wheat for a nuttier flavor)
- 1 teaspoon baking powder
- ½ teaspoon baking soda
- ½ teaspoon salt
- 1 teaspoon ground cinnamon
- ½ teaspoon nutmeg
- 1 cup granulated sugar (or coconut sugar for a healthier twist)
- ½ cup vegetable oil or melted butter
- 2 large eggs
- 1 teaspoon vanilla extract
For the Filling (Optional):
- ½ cup chopped walnuts or pecans
- ½ cup chocolate chips or blueberries
For the Glaze (Optional):
- 1 cup powdered sugar
- 1-2 tablespoons milk or lemon juice
- ½ teaspoon vanilla (if using milk)
Step-by-Step Instructions
Step 1: Preheat & Prep Pan
I always start by preheating my oven to 350°F (175°C). Grease a standard loaf pan with butter or non-stick spray, then lightly dust it with flour, or just line it with parchment paper if you prefer an easy release. Ready the rack in the middle of the oven—baking times can vary a tad depending on your oven, so keep an eye on it!
Step 2: Mix Dry Ingredients
In a large bowl, whisk together flour, baking powder, baking soda, salt, cinnamon, and nutmeg. This step is crucial because it helps distribute the leavening evenly—trust me, uneven rising is no fun! Set this aside for now.
Step 3: Mix Wet Ingredients
In a separate bowl, combine the sugar, oil, eggs, and vanilla. I like to use a whisk here—it breaks everything up nicely and gets the mixture smooth and slightly frothy. Grate the zucchini and squeeze out as much moisture as possible—you don’t want your bread to be soggy, so really squeeze those zucchinis well!
Step 4: Combine
Pour the wet mixture into the dry ingredients and fold gently with a spatula. No need to overmix—just until everything’s combined. The batter will be a bit thick but still creamy—perfect for holding the add-ins!
Step 5: Prepare Filling
If you’re adding nuts or chocolate chips, gently fold them into the batter now. For a twist, I sometimes add a handful of blueberries here—just fold gently so they don’t burst, unless you like a burst of juice in every bite!
Step 6: Layer & Swirl
Pour half of the batter into your prepared loaf pan, then add a layer of the filling or extra add-ins if you like. Top with the remaining batter and, if you’re feeling fancy, swirl a bit with a skewer or knife for a pretty marbled effect.
Step 7: Bake
Bake for about 50-60 minutes, or until a toothpick inserted in the center comes out clean. Keep an eye on it after 45 minutes—every oven is different, and you don’t want it to overbake. If the top browns too quickly, tent with foil for the rest of the baking time.
Step 8: Cool & Glaze
Let the bread cool in the pan for about 10 minutes, then transfer to a wire rack. I like to drizzle the glaze over while it’s still warm; it soaks in beautifully. Just mix powdered sugar with milk or lemon juice until it’s pourable, then let your creativity run wild with flavors!
Step 9: Slice & Serve
Once completely cooled, slice with a serrated knife—patience is key here! Serve it on a pretty plate with a hot cup of coffee or tea. For breakfast, I love adding a dollop of yogurt or a smear of butter; it’s a little indulgent but totally worth it.
What to Serve It With
This zucchini bread is incredibly versatile. For breakfast, it’s wonderful toasted with a smear of cream cheese or butter, paired with your favorite coffee or tea. My family loves it with a cup of hot cocoa on chilly mornings—absolutely cozy! When I make this for brunch, I plate slices alongside fresh fruit and a drizzle of honey or maple syrup—really elevates the rustic charm. It’s also perfect as dessert—warm slices topped with vanilla ice cream are heaven. And for lazy afternoons, I just slice a piece and enjoy with a glass of milk or a cozy cup of tea. My kids ask for this all the time, especially because I sprinkle extra chocolate chips or nuts on top for that fancy touch. And honestly, it’s a surefire crowd-pleaser—my friends always ask me for the recipe, and I happily share. It’s one of those things that feels special but is so simple to make—you get all the warm, happy feelings no matter when or how you serve it.
Top Tips for Perfecting Your Zucchini Bread
Over the years, I’ve picked up a few tricks that make this recipe even better. First, when grating the zucchini, I always use the coarse side of the grater—it gives a nice texture without overloading the batter with too much moisture. Squeezing out excess water is my secret weapon—trust me, a dry zucchini results in a better crumb. I tried adding applesauce instead of oil once, and it made the bread even more moist—give it a shot if you’re looking to cut down on fat. When mixing, don’t overdo it—the more you stir, the tougher the bread can get. Just enough to combine everything is perfect. Swirling the batter with a knife or skewer just before baking gives it such a pretty marbled look, and everyone loves a little surprise in each slice. For ingredient swaps, I’ve tested coconut sugar and it worked beautifully, just a tiny tweak in the sweetness. I also recommend at least 10 minutes of cooling before slicing—hot bread tends to fall apart. Lastly, if your loaf browns too quickly, tent it with foil—this helps it bake through without burning the top. Honestly, the best trick is to trust your nose and do a toothpick test—they rarely fail.
Storing and Reheating Tips
This bread is best enjoyed fresh but keeps well for a few days—if it lasts that long! Store it in an airtight container at room temperature for 2-3 days; I suggest wrapping it loosely in foil or placing it in a bread box to keep the moisture in. If you want it to last longer, pop it in the fridge for up to a week—just know it might lose a bit of its softness. For even longer storage, slice and freeze individual pieces in plastic wrap and then stash them in a zip-top bag. Thaw at room temperature or pop in the microwave for about 20 seconds for a quick snack. I don’t recommend refrigerating if you plan to eat it within a day—refrigeration tends to dry it out faster. About glazing, if you plan to store the bread, I usually wait to add the glaze until you’re ready to serve—otherwise, it can get soggy. A quick reheat in the oven at 350°F for 10 minutes can bring it back to life, making it just as fresh as fresh baked.
Frequently Asked Questions
Final Thoughts
If you’ve ever wanted that cozy, homemade feeling in a loaf, this zucchini bread will become your new best friend. It’s like a warm hug wrapped in a slice—moist, flavorful, and effortlessly adaptable. Whether you’re making it for a quick breakfast, a sweet treat, or just because you need some comfort in your day, trust me, this will never disappoint. The smell alone will draw everyone into the kitchen, and I promise your house will smell like happiness. Once you try it, I bet you’ll start experimenting with add-ins, swapping ingredients, and making it your own signature. So grab some zucchinis, and let’s get baking—your taste buds are in for a treat! Happy baking, and I can’t wait to hear how yours turns out. Don’t forget to leave a comment or snap a pic of your loaf—sharing this recipe is like sharing a piece of my cozy corner of the world.
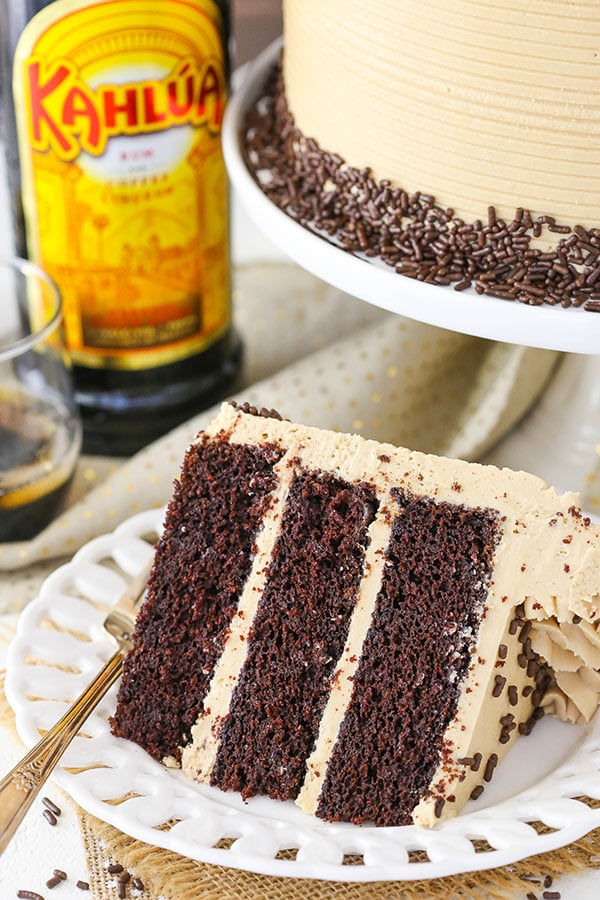
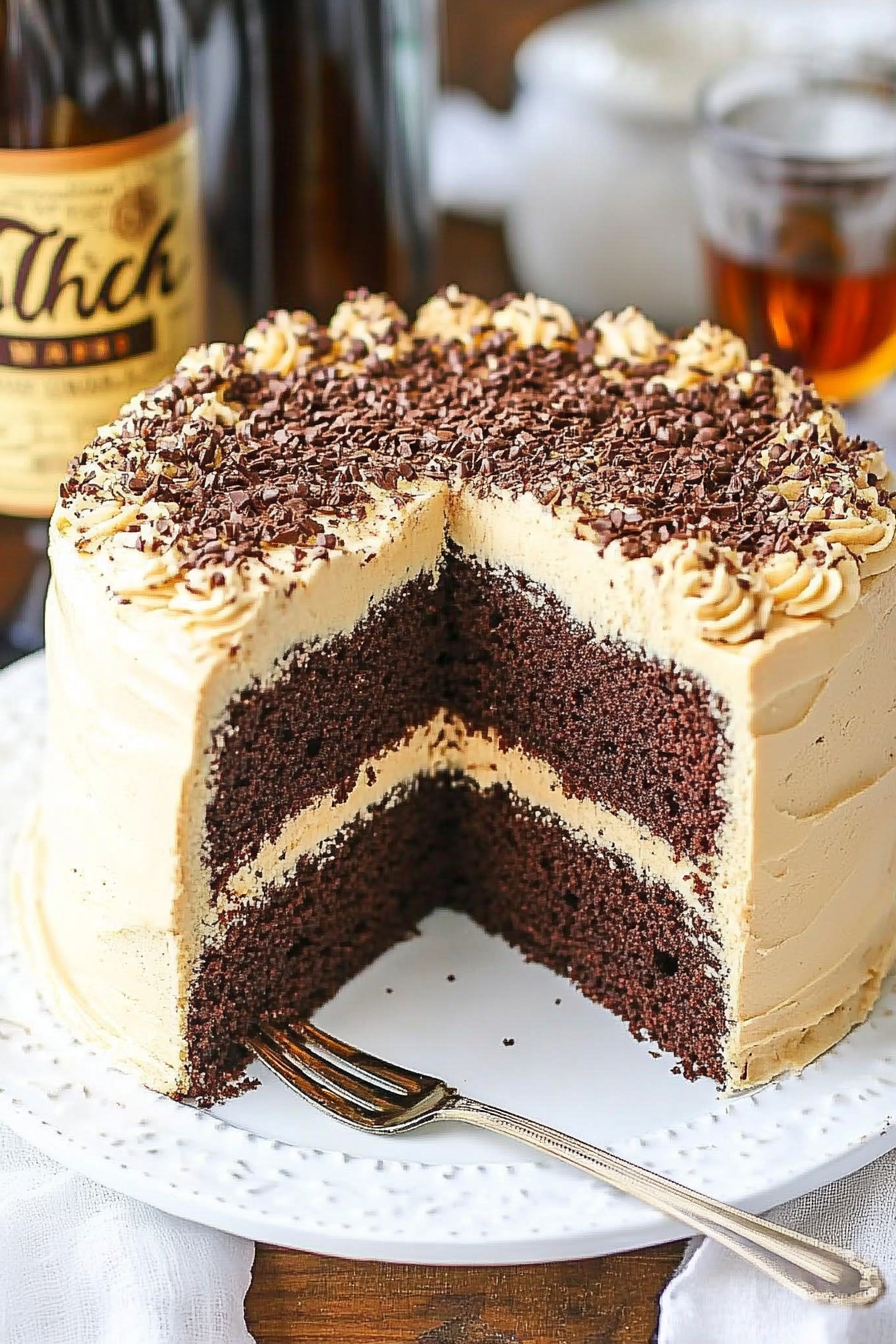
Kahlua Coffee Cake
Ingredients
Method
- Preheat oven to 300°F. Prepare three 8-inch cake pans with parchment paper and grease the sides.
- Combine dry ingredients: flour, cocoa powder, baking soda, and salt in a large bowl.
- Add eggs, milk, oil, Kahlua, and vanilla to the dry ingredients; mix well.
- Gradually add hot coffee and espresso powder; mix until smooth and thin.
- Divide batter evenly into prepared pans and bake for 32-35 minutes or until toothpick comes out clean.
- Cool cakes in pans for 5 minutes, then transfer to racks to cool completely.
- For frosting, dissolve espresso powder in Kahlua, then beat butter and shortening until smooth.
- Gradually add powdered sugar and Kahlua mixture, beating until smooth and desired consistency.
- Level the cakes, then spread frosting between layers, on the sides, and top.
- Decorate with chocolate sprinkles and serve.