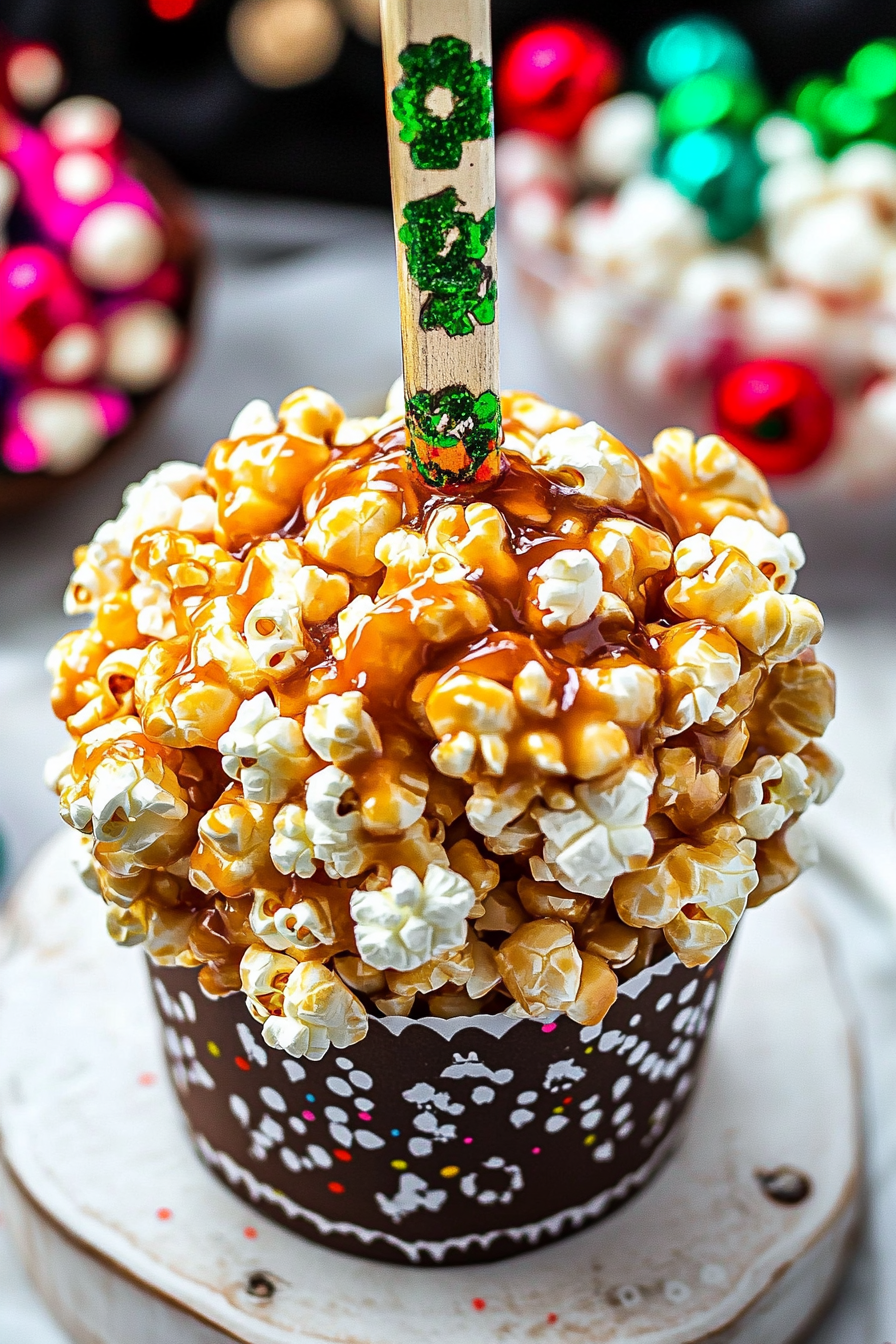
Sweet Caramel Popcorn Balls A Simple Treat
I still remember the first time I tasted this zucchini swirl coffee cake. It was on a chilly fall morning, the kitchen filled with the warm aroma of cinnamon and butter, and my grandma’s gentle voice telling me how this recipe has been in our family for generations. It’s kind of funny how a vegetable like zucchini can turn into something so comforting and decadent — and trust me, my kids actually ask for seconds of this one. On busy mornings, I always do this when I want a quick, satisfying breakfast that feels like a hug in every bite. It’s such a foolproof recipe that I’ve made it hundreds of times, and it never fails to bring smiles around the table. Plus, it’s a sneaky way to get my little eaters to enjoy their veggies without even realizing it. The smell alone brings everyone to the kitchen, and I swear, this disappeared in minutes at my house. Honestly, I think you’re going to love how adaptable and easy this is. The best part? It’s perfect for mornings, brunch, or even a cozy afternoon snack with coffee — because what’s better than a slice of warm cake and a cup of your favorite brew? Let’s get this cozy baking session started!
What is Zucchini Swirl Coffee Cake?
Think of zucchini swirl coffee cake as a love child between a classic cinnamon spiral and a moist, tender loaf packed with fresh zucchini. It’s essentially a sweet, tender cake that’s got this gorgeous marbled pattern swirling through it, thanks to a cinnamon-spiced filling. The name “coffee cake” might make you think of those bready, crumbly treats meant for brunch, but this one’s a bit more special — it’s moist, rich, and slices beautifully. The zucchini keeps it incredibly soft, almost like a velvet texture, and the swirl of cinnamon adds a warm, aromatic kick. I like to think of it as a sneaky veggie dessert that’s perfectly balanced between health and decadence. It’s a recipe that’s been passed down, yet so flexible you can tweak it with your own flavors or toppings. Whether you’re making it for a lazy weekend breakfast or serving it at brunch, it’s always a crowd-pleaser. I’ve even tested this with almond milk, and honestly, it made the cake extra tender and slightly creamier — totally worth a try if you’ve got nut allergies or want a dairy-free version. The best part? It’s so straightforward, even a beginner baker can nail it on the first try.
Why you’ll love this recipe?
What I love most about this zucchini swirl coffee cake is that it checks all the boxes — flavor, ease, and versatility. First off, the taste? Oh my gosh, it’s like fall in every bite. The warmth of cinnamon and the tender crumb are just irresistible. Plus, there’s that slight vegetable twist that makes you feel good about indulging. It’s subtly sweet, but not overpowering, so it’s perfect whether you’re craving a sweet breakfast, a snack, or a dessert with your afternoon coffee. And speaking of coffee, this cake is *made* for those slow weekend mornings when you want to sit back with a mug and just breathe. The process is incredibly forgiving, which is a lifesaver on busy nights or when you’re not feeling super precise — trust me, I’ve overmixed, underbaked, and still wound up with something pretty delicious. Budget-wise, it’s a winner because zucchini is usually super cheap, and most of what you need comes from your pantry. What makes it stand out from other coffee cakes is that beautiful swirl — it’s almost too pretty to cut into! You can also switch up the filling, add nuts, or top it with a simple glaze for extra sweetness. Honestly, once you make this, you’ll find yourself reaching for the ingredients during zucchini season just for the fun of swirling and baking. It’s that good.
How do I make Zucchini Swirl Coffee Cake?
Quick Overview
This recipe comes together quickly with just a few basic ingredients. You start by preparing a simple, moist batter, then make a cinnamon-sugar filling with shredded zucchini. Layer the batter and filling in a loaf pan, swirl gently, and bake until golden and a toothpick comes out clean. The magic is in the marbling — the swirl pattern makes each slice look like a work of art. No fancy techniques here, just good old-fashioned mixing and layering. The smell of cinnamon wafting through my kitchen while it bakes is enough to make anyone smile. I’ve tested this with different oven temps and found that a slightly lower temp for a bit longer gives me the perfect moist crumb without drying out the edges. Trust me on that one — patience really pays off! When it’s done, you want to let it cool just enough to handle, then drizzle with a simple glaze or dust with powdered sugar for that restaurant-quality look. This is one of those recipes that’s forgiving and flexible — and honestly, it might become your new favorite weekend treat.
Ingredients
For the Main Batter:
- 1 ½ cups all-purpose flour — I like to use unbleached for extra flavor, but regular works fine
- 1 cup granulated sugar — the secret to that slightly sweet richness
- 1 teaspoon baking powder — for lift and fluffiness
- ½ teaspoon baking soda — helps with moisture, especially with zucchini
- ½ teaspoon salt — enhances all those flavors
- 1 teaspoon ground cinnamon — because cinnamon makes everything better
- ½ cup vegetable oil — or you can swap in melted coconut oil if you want a little extra flavor
- 2 large eggs — room temperature for better emulsification
- 1 teaspoon vanilla extract — I always do this to boost flavor
- 1 cup grated zucchini — squeeze out excess moisture so your batter doesn’t get soggy
For the Filling:
- ½ cup packed brown sugar — for that rich caramel note
- 1 tablespoon ground cinnamon — again, because cinnamon, duh
- 2 tablespoons unsalted butter, melted — or coconut oil if you prefer
- ½ cup finely chopped nuts or oats (optional) — for added crunch or texture
For the Glaze:
- ½ cup powdered sugar
- 1-2 tablespoons milk or almond milk — to thin it out to drizzle consistency
- ½ teaspoon vanilla extract — optional, for extra flavor
Step-by-Step Instructions
Step 1: Preheat & Prep Pan
Set your oven to 350°F (175°C). Grease a standard loaf pan with butter or non-stick spray, and line it with parchment paper if you want super easy removal. This sets the stage for a smoothly baked cake with clean sides — trust me, this little prep step makes a difference. While you preheat, grate your zucchini and squeeze out as much moisture as possible — I keep a clean towel nearby and give it a good squeeze. Excess moisture in zucchini can make your batter too wet, and then the cake won’t rise properly. The smell of fresh zucchini paired with cinnamon is already making my kitchen cozy. Now, you’re ready for the next step!
Step 2: Mix Dry Ingredients
In a large bowl, whisk together the flour, sugar, baking powder, baking soda, salt, and cinnamon. I always do this first so everything is evenly distributed. The flour mixture should look uniform, with no pockets of baking powder or cinnamon. This step ensures that your batter will combine smoothly later and that the leavening agents work uniformly for an airy, tender crumb. Take a moment to double-check — I’ve caught myself forgetting a pinch of salt or missing a spice and regretted it! Always a good idea to double-whisk to aerate everything.
Step 3: Mix Wet Ingredients
In a separate bowl, whisk together the eggs, oil, vanilla, and grated zucchini. The eggs should be beaten just until combined, and make sure your zucchini has cooled a bit if you just grated it; hot zucchini can start cooking the eggs or make your oil separate. Once combined, the mixture should be slightly frothy and look cohesive. I sometimes add a splash of almond milk here if I want a bit extra moisture, and it actually makes the batter even softer. It’s all about personal tweaks, really. Pour this mixture into your dry ingredients next.
Step 4: Combine
Gently fold the wet into the dry until just combined. Avoid overmixing — it’s okay if there are a few streaks of flour. Overworking the batter can make the cake crumb dense instead of tender. The batter should look moist and slightly thick but pourable. If it’s too thick, a splash of milk can loosen it up. Patience here, because the more you mix, the denser the cake might get. Now, you’re ready to make that swirl.
Step 5: Prepare Filling
In a small bowl, mix the brown sugar, cinnamon, melted butter, and optional chopped nuts. This filling is the star of the swirl — it creates that gorgeous cinnamon ribbon that makes each slice look so appealing. If you want a sweeter or spicier kick, go ahead and add a pinch more cinnamon or a splash of vanilla. For a healthier twist, toss in some oats instead of nuts. Set this aside; it’ll get layered before the batter goes into the pan.
Step 6: Layer & Swirl
Pour half of the batter into your prepared pan, then sprinkle the cinnamon filling evenly over it. Add the rest of the batter on top, and then use a butter knife or skewer to gently swirl through the batter to create a marbled pattern. Don’t overdo it — you just want gentle zigzag motions to suspend the cinnamon in the batter without mixing it too thoroughly. The visual effect is stunning, and each slice looks like a work of art. I like to do a few gentle swirls from top to bottom, side to side, for a beautifully layered cake.
Step 7: Bake
Pop it in the oven for about 45-50 minutes. The exact time depends on your oven — sometimes I check at 40 minutes and cover the top loosely with foil if it’s browning too fast. You’ll know it’s done when a toothpick inserted into the center comes out clean. The top should be golden and slightly cracked — that’s a good sign! If it’s still sticky or wet, give it a few more minutes and keep an eye on it. The wait feels long, but trust me, the smell when it’s almost ready is totally worth it.
Step 8: Cool & Glaze
Let the cake cool in the pan for about 15 minutes, then transfer it to a wire rack. It’s tempting to dig right in, but cooler slices slice better and hold their shape. Meanwhile, mix your powdered sugar, milk, and vanilla to make a simple glaze. Drizzle over the warm cake to add a glossy finish and extra sweetness. If you prefer, dust with powdered sugar instead — either way, it looks pretty and adds that lovely sweetness on top.
Step 9: Slice & Serve
Use a sharp serrated knife to cut clean slices, starting from the edges and working toward the center. I like to serve this slightly warm with a dollop of whipped cream or a cup of coffee. The flavor combination of cinnamon, zucchini, and sweet glaze makes it perfect for breakfast or dessert. Sometimes I sprinkle a few chopped nuts on top for added crunch — my family loves that texture contrast. It’s even better the next day, once the flavors meld and the center thickens a bit. Trust me, this one’s a keeper!
What to Serve It With
This zucchini swirl coffee cake is wonderfully versatile. In the mornings, I love pairing it with a strong cup of coffee or a frothy latte — it’s a match made in heaven. Sometimes, I serve a slice with Greek yogurt and fresh berries for a light but satisfying breakfast. On lazy Sundays, I’ll set it out with a pot of tea or a glass of milk for the kids. This cake also shines as a brunch centerpiece — I often add a side of scrambled eggs or crispy bacon to round out the meal. For dessert, I like to serve it with vanilla ice cream or a splash of caramel sauce. And honestly, it’s so good on its own that sometimes, I just slice it up and have it as a cozy snack in the afternoon, with a book or my favorite podcast playing in the background. When I was testing it, I realized that a simple dusting of powdered sugar or a drizzle of honey makes it a gorgeous presentation for guests. Whatever the occasion, this cake always feels like a little celebration — and your home will smell incredible the entire day.
Top Tips for Perfecting Your Zucchini Swirl Coffee Cake
Like any baking recipe, a few little tricks make all the difference. First, always squeeze out as much moisture from the zucchini as possible — excess water can turn your cake soggy. I learned this tip after a few experiments, and it’s a game-changer. Second, don’t overmix once you combine wet and dry ingredients; a few streaks of flour are okay — it keeps the crumb tender. When making the swirl, use a chopstick or skewer to gently create that marbled effect; don’t over-mix, or the pattern will disappear. If you want a richer flavor, add a dash of nutmeg or a splash of orange zest to the filling — it adds a nice depth without overpowering. Testing different oven temps taught me that baking at 340°F for a little longer keeps the middle moist without drying the edges. Also, try different toppings like chopped walnuts, streusel, or even a cream cheese drizzle for variation. Lastly, I’ve tested this with gluten-free flour blends, and while it’s not exactly the same, it still comes out moist and tasty — just a bit denser. Remember, every oven is different, so keep a close eye in those last few minutes. Making small adjustments based on your oven and ingredients can turn this from good to incredible. The biggest lesson I’ve learned? Be patient and enjoy the process — the smell alone makes the whole house feel like a cozy bakery. Plus, every mistake is a learning moment. Like when I slightly overfilled my pan and it bubbled over — lesson learned: always leave a little extra room. But honestly, even that mess made for a fun cleanup and a story to tell.
Storing and Reheating Tips
This cake is best enjoyed within the first few days, but it keeps surprisingly well. Store leftovers in an airtight container at room temperature for up to 2 days — just cover it loosely so it stays moist. If you want to keep it longer, pop it in the fridge for up to 4 days; I recommend wrapping it tightly to prevent it from drying out. When it’s chilled, I like to warm slices for about 10 seconds in the microwave; it softens the crumb and enhances the warm cinnamon aroma. Freezing works beautifully, too — wrap individual slices tightly in plastic wrap, then foil, and store for up to 3 months. Thaw overnight in the fridge or at room temperature, then warm briefly in the microwave. I always add my glaze or powdered sugar after reheating, so it stays fresh and glossy. If I plan to serve it cold, I just cut and plate directly. The flavor really deepens after a day or two, so don’t be afraid to make this ahead of time for guests or busy mornings. Trust me, this cake is just as delicious reheated as fresh out of the oven — if not more so, once those flavors meld. The key is to store properly and give it a gentle warm-up. You’ll find yourself reaching for leftovers often, just for a quick comfort bite.
Frequently Asked Questions
Final Thoughts
I genuinely hope you give this zucchini swirl coffee cake a try — it’s one of those recipes that feels like a warm hug during busy mornings or lazy weekends. The combination of tender crumb, cinnamon swirl, and that secret veggie surprise makes it a family favorite around here. Over the years, I’ve played with different spices, added nuts, or topped it with streusel, and honestly, it always turns out wonderful. It’s simple enough for a weeknight, special enough for weekend brunch, and versatile enough to customize with your favorite add-ins. Plus, the aroma alone makes the house so inviting — I swear, everyone comes running when they smell it baking. If you bake it, I’d love to hear how it turns out or any fun twists you try. Baking is all about that personal touch, and this one’s a classic with a little extra love. Happy baking, friends — may your slices be moist, your swirls perfect, and your mornings a little sweeter!

caramel popcorn
Ingredients
Method
- Pop the popcorn according to the package instructions and place in a large bowl. Set aside.
- Place caramel candies and butter in a saucepan over medium-low heat. Stir until melted and smooth.
- Pour the melted caramel over the popcorn and toss until well coated. Let it cool for a few minutes.
- Melt the chocolate chips using a microwave or double boiler until smooth.
- Shape the popcorn into balls and insert a stick into each.
- Dip each popcorn ball into melted chocolate and roll in sprinkles. Place on parchment paper to set.