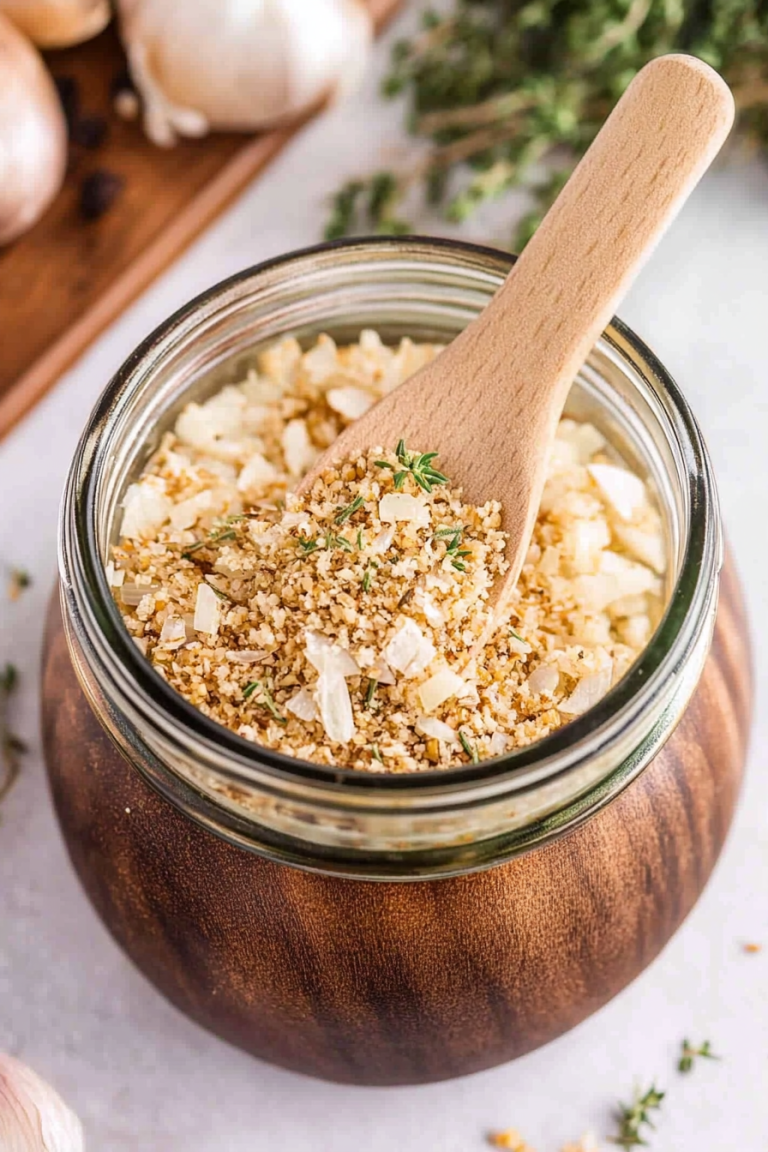
How to Store Garlic for Winter
There’s something about the smell of a fresh baked coffee cake that instantly warms my heart — maybe it’s childhood memories of weekend mornings or those lazy Sunday afternoons when my grandma used to bake for us. But honestly, I love a good coffee cake any day of the week, especially when it’s packed with zucchini. Yep, you heard me right! Zucchini in coffee cake? It sounds a little odd at first, but trust me on this—it’s a total game-changer. The zucchini melts right into the batter, keeping it incredibly moist and tender, while adding a subtle hint of earthiness that balances out all that sweet cinnamon swirl goodness. This one’s a lifesaver on busy nights when I want something cozy and homemade but don’t want to fuss too much. Plus, it’s a sneaky way to get more veggies into my kids’ diet without the fuss. The best part? The smell alone brings everyone rushing to the kitchen, noses in the air, asking, “Is that coffee cake? Can I have a piece?” That’s my favorite kind of happy chaos!
What is Zucchini Coffee Cake?
Think of zucchini coffee cake as a warm hug in dessert form. It’s basically a tender, crumbly cake layered with a generous cinnamon-sugar swirl, baked to golden perfection. The star ingredient, zucchini, is like the quiet hero here—softened, shredded, and folded right into the batter. When baked, it turns into a moist, almost velvety texture that’s hard to stop savoring. The name comes from its classic pairing with coffee—or really, any cup of tea or milk. It’s similar to a loaf but often baked in a round pan or square dish, making it perfect for slicing into squares or wedges. What I love about this recipe is how adaptable it is; you can add nuts, raisins, or even a touch of lemon zest if you’re feeling fancy. Think of it as a shortcut to something cozy and indulgent that everyone will come back for—my kids actually ask for this all the time, especially before school!
Why you’ll love this recipe?
There are a million reasons to fall in love with this zucchini coffee cake. First, the **flavor** — that sweet cinnamon swirl paired with the gentle earthiness of zucchini just hits all the right notes. It’s not overly sweet, which makes it perfect for breakfast, a snack, or dessert. Second, the **simplicity** — I’ve made this countless times, and it NEVER fails. The batter comes together in one bowl, and the cinnamon swirl is basically a no-brainer. Plus, everything bakes in just about an hour, making it the perfect quick bake when you’re craving something warm and comforting. Third, it’s definitely **budget-friendly** — zucchini is cheap and plentiful in summer, and most of the other ingredients are staples I always have around. And last but not least, the **versatility** — I’ve swapped in whole wheat flour, used almond milk for an extra-rich crumb, and experimented with adding chopped walnuts or dried cranberries. What I love most about this is how it transforms a humble vegetable into a show-stopping treat. Plus, it’s a crowd-pleaser in my house—my kids ask for seconds, and there’s rarely any leftovers. Honestly, this could become your go-to baker’s secret too!
How do I make Zucchini Coffee Cake?
Quick Overview
This zucchini coffee cake is surprisingly straightforward. You start by shredding zucchini — no need to peel it, just wash and go! Mix up a moist batter with butter, sugar, eggs, and flour. Then, swirl in cinnamon-sugar goodness, layer it all in a pan, and bake until golden. The magic is in how the zucchini keeps every bite tender without overpowering the flavor. It’s the kind of baking you can do on a weekend when you want to cozy up the kitchen but don’t want anything complicated. Plus, the cinnamon swirl makes it look as pretty as it tastes, especially when you give it a quick drizzle of glaze at the end. Expect a breakfast-worthy, snack-time classic that’ll have everyone asking for the recipe.
Ingredients
For the Main Batter:
- 2 cups of grated zucchini (about 2 medium zucchinis) — I always squeeze out a little excess moisture so it doesn’t make the batter soupy.
- 1 cup all-purpose flour — feel free to swap in whole wheat or gluten-free blend if you prefer
- 1 teaspoon baking powder
- ½ teaspoon baking soda
- ½ teaspoon salt
- ¾ cup granulated sugar — I tested with coconut sugar and it was just as good
- ½ cup unsalted butter, melted — or olive oil, if you want it dairy-free
- 2 large eggs
- 1 teaspoon vanilla extract
For the Cinnamon Sugar Swirl:
- ½ cup packed brown sugar
- 2 teaspoons ground cinnamon
For the Glaze (optional but recommended):
- ½ cup powdered sugar
- 1-2 teaspoons milk or almond milk
- ½ teaspoon vanilla extract
Step-by-Step Instructions
Step 1: Preheat & Prep Pan
Set your oven to 350°F (180°C). Grease a 9-inch round cake pan or a square baking dish with a little butter or non-stick spray. If you want neat slices, line it with parchment paper—trust me, it makes life easier!
Step 2: Mix Dry Ingredients
In a large bowl, whisk together the flour, baking powder, baking soda, salt, and cinnamon (for the swirl). This ensures your leavening is evenly distributed and your cake rises beautifully.
Step 3: Mix Wet Ingredients
In a separate bowl, beat the eggs, add the sugar, melted butter, and vanilla. Stir until smooth and light. I always do this first—your batter will come together much easier. If the eggs are cold, I let the melted butter cool just a tad so the eggs don’t cook when you mix them.
Step 4: Combine
Add the wet ingredients to the dry, folding gently with a spatula or wooden spoon. Don’t overmix — a few lumps are okay. This step keeps the cake light and fluffy. If you overmix, it can get dense or gummy.
Step 5: Prepare Filling
In a small bowl, mix the brown sugar and cinnamon. This will be the swirl—spread a little love (and sugar) into every bite!
Step 6: Layer & Swirl
Pour half of your batter into the prepared pan. Sprinkle half of the cinnamon-sugar over it, then spoon the remaining batter on top. Use a butter knife or skewer to swirl the cinnamon layer into the batter gently—don’t overdo it, or you’ll lose the beautiful marbling.
Step 7: Bake
Pop it in the oven for about 40-45 minutes. Check with a toothpick—if it comes out clean, you’re golden. The top will be fragrant and a little crispy around the edges. If it’s browning too fast, tent it with foil and keep baking until a skewer poked in the center comes out moist but not wet.
Step 8: Cool & Glaze
Let the cake cool in the pan for about 15 minutes, then transfer to a wire rack. If you’re glazing, whisk together the powdered sugar, vanilla, and milk. Drizzle it over the cooled cake—this adds a shiny, sweet finish that’s just irresistible.
Step 9: Slice & Serve
This is best served warm or at room temperature. Use a sharp knife to get neat slices. I love it with a dollop of whipped cream or a side of fresh berries if I want to make it extra special. It’s perfect for breakfast, brunch, or whenever you crave that cozy, cinnamon-spiced aroma in your home.
What to Serve It With
This zucchini coffee cake is super versatile, so it’s great no matter what time of day. At breakfast, I love pairing a warm slice with a bold cup of coffee or a glass of milk—the kids think it’s a treat and I agree. For brunch, I’ll serve it alongside fruit salad or strained yogurts with a drizzle of honey. When I serve it as dessert, I add a scoop of vanilla ice cream or a dollop of whipped cream, and maybe a few fresh berries for a pop of color and freshness. And on casual afternoons, it’s just perfect with a hot cup of tea or a glass of cold milk. My family has a tradition of having this with weekend brunch, and it’s become a centerpiece for our lazy mornings. If you want to switch things up, try adding chopped walnuts or shredded coconut to the batter before baking — the nutty crunch pairs beautifully with that cinnamon swirl. Trust me, this will quickly become a staple in your baking arsenal!
Top Tips for Perfecting Your Zucchini Coffee Cake
After making this recipe multiple times, I’ve picked up a few tricks I want to share. First, prep your zucchini properly: I always shred and then squeeze out as much moisture as I can — this keeps the batter from getting too wet, which can make the cake dense. Use a clean kitchen towel or cheesecloth to wring out the excess. Second, don’t overmix once you combine wet and dry ingredients; that can develop gluten and lead to a tougher crumb. Fold gently and just until combined.
For the cinnamon swirl, I sometimes sprinkle a little nutmeg or add a pinch of ground ginger for a more complex flavor. If you prefer your swirl more pronounced, you can double the cinnamon-sugar mixture. When it comes to baking, oven temperatures can vary — so keep an eye on your cake after 40 minutes. If the top is browning unevenly, tent with foil and continue baking. I’ve also tested using almond milk or coconut milk, which keeps the batter ultra moist and adds a subtle extra flavor, but regular milk works perfectly too.
Glazes and toppings are where you can really personalize. I love adding a splash of bourbon or vanilla extract to the glaze for an adult twist. If you’re in a rush, a simple dusting of powdered sugar looks charming and feels just as festive. Always let the cake cool completely before glazing — otherwise, the glaze will melt right off. And if you’re craving a crunchier top, sprinkle it with a bit of coarse sugar right before baking. Little tweaks like these have made me fall more in love with this humble but mighty zucchini coffee cake, and I know you’ll find your own favorites too.
Storing and Reheating Tips
This cake keeps surprisingly well. At room temperature, wrapped tightly in plastic or stored in an airtight container, it’s good for up to two days. Just make sure to keep it out of direct sunlight so it doesn’t get stale. For longer storage, pop it in the fridge — it’ll last about 4 days. I like to reheat individual slices in the microwave for about 20 seconds; it restores that freshly-baked warmth and aroma.
If you want to freeze it, slice the cake first and wrap each piece in plastic wrap, then put in a zip-top bag or airtight container. It’ll keep in the freezer for up to 3 months. Thaw overnight in the fridge or leave at room temperature for about an hour. The flavor and moistness hold up beautifully, especially if you add a little extra glaze or a dusting of powdered sugar after reheating. I’ve also experimented with freezing the unglazed cake, then adding the glaze fresh after thawing — that way, it’s still shiny and perfect. Trust me, this cake is like a good friend—able to be frozen, reheated, and still taste just as amazing.
Frequently Asked Questions
Final Thoughts
What I love most about this zucchini coffee cake is how it combines familiar comfort with a little twist of surprise. It’s a reminder that baking doesn’t have to be complicated to be amazing—sometimes, the simplest ingredients make the most memorable treats. The moistness from the zucchini, the aromatic cinnamon swirl, and that tender crumb—these are the things I keep coming back to. It’s perfect for early mornings, cozy afternoons, or whenever you need a little sweetness in your day. Give it a try, tweak it to your liking, and I promise, it’ll become a staple in your home too. Plus, it’s a fun way to sneak more veggies into your family’s diet without anyone noticing! Happy baking, friends—can’t wait to hear how yours turns out!
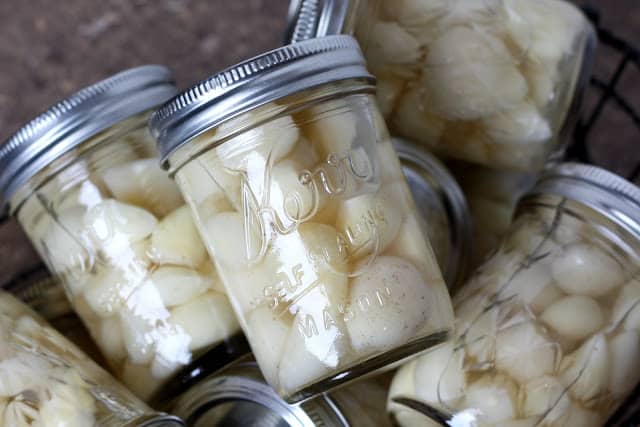
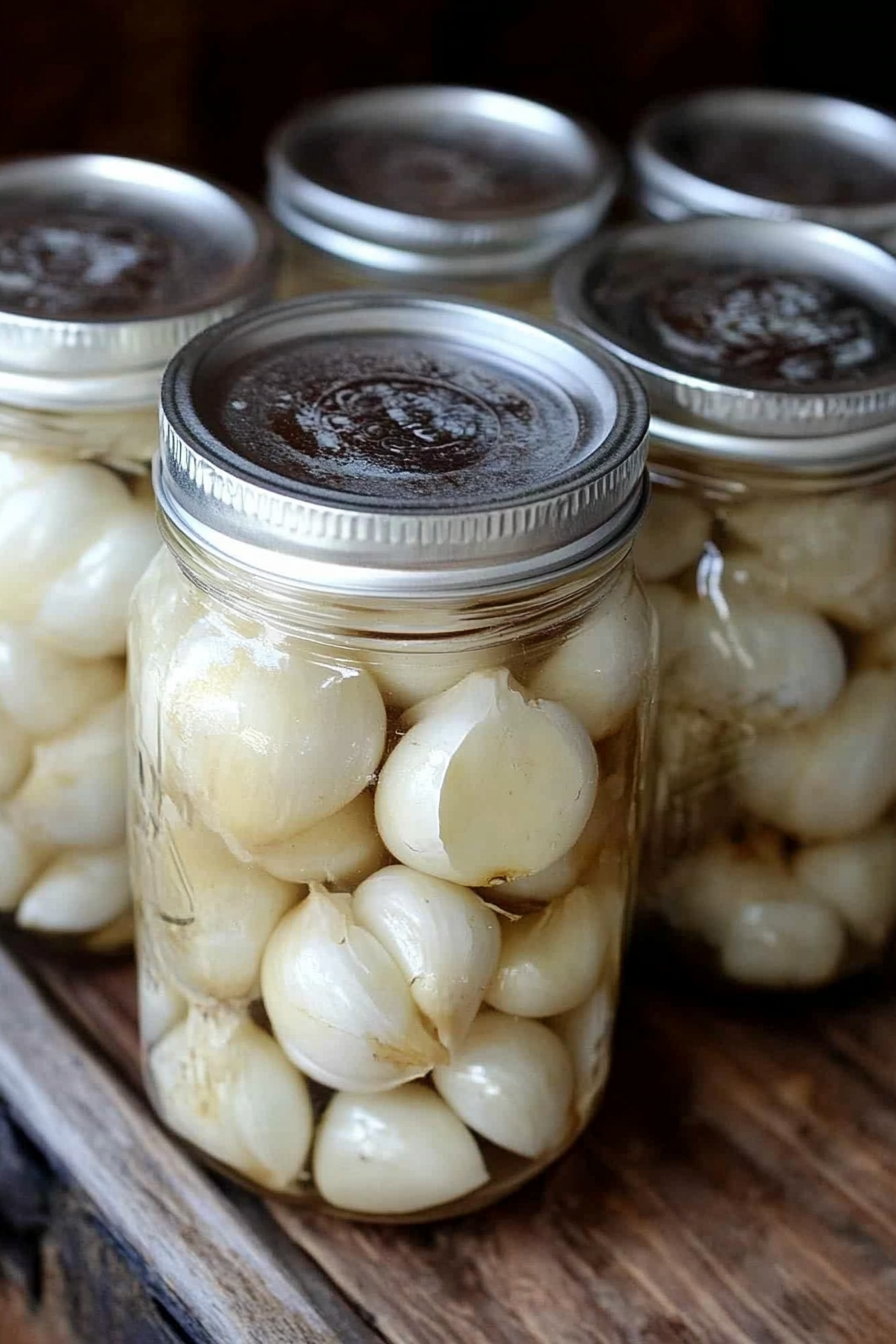
preserving garlic
Ingredients
Method
- Break apart your heads of garlic and peel the cloves. Place the peeled cloves of garlic in a large mixing bowl and fill with water. Use your fingertips to scrub any dirt off of the cloves. Once the cloves are cleaned, transfer them to a large strainer and rinse well.
- Depending on when your garlic was harvested, you might have very few brown spots on the cloves. Use a small paring knife to trim the spots and then transfer the cleaned and trimmed cloves back to the strainer. Rinse again.
- Bring the vinegar to a boil in a large pot. Place the clean garlic cloves into small jars. Once the vinegar has boiled, pour it over the garlic and screw the lids on tight.
- Let the jars come to room temperature on the counter overnight and then store in the refrigerator. This will keep in the refrigerator for up to a year. Enjoy!