Easy DIY Dog Treats Your Pup Will Love
There’s something so comforting about pulling a warm slice of cake out of the oven, isn’t there? I remember my grandma’s kitchen, the smell of cinnamon and butter wafting through the air, making everyone gather around just waiting to dig in. That’s exactly what this zucchini cinnamon swirl cake reminds me of—home, warmth, and a little bit of nostalgic magic. If you’re like me, always on the lookout for a sweet treat that’s easy to whip up on a busy weeknight but still hits all those cozy, comforting notes, then you’re in for a real treat today. And trust me, this one’s a lifesaver on busy nights when I want something homemade without spending hours fussing in the kitchen. It’s incredibly flavorful, moist, and the cinnamon swirl is a showstopper. My kids ask for seconds every time, and it’s become a go-to recipe for me when I need a quick kind of homemade warmth. Plus, if you’re a zucchini lover, you’ll find this recipe makes the most out of those summer garden finds in the best way possible. Let’s go ahead and dive into what makes this cake so special, shall we?
What is a Zucchini cinnamon swirl cake?
Think of this zucchini cinnamon swirl cake as a tender, moist quick bread turned cake—kind of like a cinnamon-infused guilt-free indulgence. It’s essentially a moist, sweet loaf with a delightful ripple of cinnamon-sugar swirling through the center, giving it that gorgeous marbled appearance and a punch of flavor in every bite. The zucchini might sound unusual, but really, it’s a brilliant way to add moisture and a subtle veggie boost—kind of like sneaking spinach into a smoothie. The name comes from the star ingredient—fresh zucchini—that keeps this cake unbelievably tender, even days after baking. It’s the perfect way to use up that bounty from your garden or those oversized zucchinis you got at the farmers’ market. Think of it as a warm hug in cake form—simple, comforting, and a little bit fancy with the cinnamon swirl. Whether you call it a quick bread, a cake, or even a breakfast treat, it’s a household favorite that’s as versatile as it is delicious.
Why you’ll love this recipe?
Honestly, what I love most about this zucchini cinnamon swirl cake is how it combines just a few humble ingredients into something that feels special. The flavor—oh, the flavor! The sweet cinnamon swirl paired with the tender zucchini makes every bite a little celebration. It’s like a cinnamon roll and a healthy snack all in one, minus the fuss. Plus, it’s so easy to put together. No fancy equipment needed—just mixing bowls, a spatula, and your oven. I’ve made this with almond milk instead of regular milk, and I swear it made it even creamier—so don’t be afraid to experiment! And the best part? It’s budget-friendly. Zucchini is so inexpensive, and the pantry staples like sugar, flour, and cinnamon are always around. This recipe is incredibly versatile too—you can serve it warm for breakfast, as a dessert after dinner, or even enjoy it as an afternoon snack with a cup of tea. My kids request this all the time, and I love knowing I’ve got something wholesome yet just a little indulgent in my back pocket. And trust me, once you taste that cinnamon swirl melting into the moist cake, you’ll be hooked too. It’s comfort food that’s good for your soul.
How do I make Zucchini Swirl Cake?
Quick Overview
This cake comes together so easily—you basically just mix your wet ingredients, toss in the dry, layer in the cinnamon sugar, swirl it up, and bake. The trick to that beautiful swirl is simply layering the cinnamon mixture into the batter before giving it a gentle swirl with a knife. The batter is super forgiving, which is perfect for bakers of all levels. Once out of the oven, you’ll want to let it cool just a bit before drizzling a simple glaze or dusting it with powdered sugar. No complicated steps, no fancy techniques—just good old-fashioned baking magic. And the smell—oh, the smell alone will bring everyone running into the kitchen. Honestly, I usually make this when I have a few zucchinis that need using, and it’s always a hit. It’s moist, flavorful, and has that gorgeous marbled look from the cinnamon swirl. It’s a sweet, cozy comfort that feels like a secret little family recipe I love sharing. Ready to get your hands dirty in the kitchen? Let’s do it!
Ingredients
For the Main Batter:
– 2 cups grated zucchini (squeeze out excess moisture, I always do this to keep it from getting soggy)
– 2 cups all-purpose flour (or use whole wheat for a healthier twist)
– 1 ½ teaspoons baking powder
– ½ teaspoon baking soda
– ½ teaspoon salt
– 1 cup granulated sugar (feel free to cut back if you prefer less sweetness)
– ½ cup vegetable oil or melted unsalted butter
– 3 large eggs
– 1 teaspoon vanilla extract
– ½ cup milk (dairy or almond milk work perfectly)
For the Filling:
– ⅓ cup packed brown sugar
– 2 teaspoons ground cinnamon
– 1 tablespoon melted butter (for mixing with the cinnamon sugar, if you like a richer swirl)
For the Glaze:
– ½ cup powdered sugar
– 1–2 tablespoons milk or cream
– ½ teaspoon vanilla (optional but nice for flavor)
Step-by-Step Instructions
Step 1: Preheat & Prep Pan
I always start by preheating my oven to 350°F (175°C). Grease a standard loaf pan or a 9-inch round cake pan with butter or non-stick spray. Lining it with parchment paper makes life even easier when it’s time to remove the cake. This helps avoid sticking and makes cleanup a breeze.
Step 2: Mix Dry Ingredients
In a large bowl, whisk together the flour, baking powder, baking soda, salt, and cinnamon. I like to do this first so everything is evenly distributed. It prevents clumping and ensures your baking soda and baking powder are evenly spread, giving that perfect rise.
Step 3: Mix Wet Ingredients
In another bowl, whisk together the sugar, eggs, oil, vanilla, and milk until smooth. The mixture might look a bit thick at first, but keep whisking—it all comes together nicely. I always add the grated zucchini last to the wet mixture. Make sure you squeeze out excess moisture from the zucchini with a clean dish towel or paper towels—this prevents the batter from turning too watery.
Step 4: Combine
Pour the wet mixture into the dry ingredients and fold gently with a spatula until just combined. The key here is not to overmix—stop as soon as you don’t see any more flour streaks. Overmixing can make the cake dense rather than moist and fluffy. You want a tender crumb, so fold gently.
Step 5: Prepare Filling
In a small bowl, mix the brown sugar, cinnamon, and melted butter if using. This mixture will create that irresistible cinnamon swirl. I like it slightly gooey; if you prefer a drier swirl, skip the butter. Set aside. The smell alone of the cinnamon and sugar together is intoxicating.
Step 6: Layer & Swirl
Pour about half of the batter into your prepared pan, then sprinkle the cinnamon sugar evenly over the surface. Spread the remaining batter on top. Using a butter knife or skewer, give the batter a gentle swirl—think marbling but with care, so the cinnamon isn’t too concentrated in one spot. The swirl pattern looks pretty when sliced, and it really infuses flavor throughout.
Step 7: Bake
Pop it into the oven and bake for about 50-60 minutes, or until a toothpick inserted in the center comes out clean. If you notice the top browning too quickly, tent it loosely with foil. My oven sometimes bakes unevenly, so I rotate the pan halfway through—always a good trick for even baking.
Step 8: Cool & Glaze
Let the cake cool in the pan for at least 15 minutes. Then transfer to a wire rack to cool completely—this prevents sogginess. Mix the glaze ingredients, adding milk a teaspoon at a time until you get a smooth, pourable consistency. Drizzle over the cooled cake and let it set for a few minutes. The glaze adds that perfect touch of sweetness and shininess.
Step 9: Slice & Serve
Use a sharp knife to slice cleanly through the cake—if it’s still a little warm, wait a few minutes so the glaze doesn’t run all over. Serve on a pretty plate with a cup of coffee or a glass of milk. Trust me, this cake disappears in minutes at my house!
What to Serve It With
This zucchini cinnamon swirl cake is such a versatile treat—I’ve served it in so many ways over the years. For breakfast, I love steaming it slightly and slathering a little butter on top, paired with a strong cup of black coffee. It’s also lovely as a brunch centerpiece, paired with fresh fruit and a splash of cream. Sometimes I warm a slice and serve it with vanilla yogurt or whipped mascarpone for a fancy twist. As a dessert, it’s perfect with a scoop of vanilla ice cream or a dusting of powdered sugar—my family always asks for seconds. When I want something more casual, I just grab a piece, and it’s my go-to snack while working or reading. The cinnamon aroma alone is enough to make the whole house smell inviting. It’s become a family tradition—baking this on lazy Sunday mornings or for a quick afternoon treat. I love how it’s a sweet, cozy comfort with hints of nutrition thanks to the zucchini. Honestly, it’s the kind of recipe that makes you feel just a little more at home, no matter what’s happening outside the kitchen.
Top Tips for Perfecting Your Zucchini Cinnamon Swirl Cake
After making this countless times, I’ve picked up a few tricks that help make it truly exceptional. First, squeeze out as much moisture as possible from your zucchini after grating—this is crucial to keep the cake moist but not soggy. I often press it in a colander or wrap it in a clean towel and give it a good squeeze. Overmixing is my biggest lesson—stir until just combined. I used to overdo it, and the texture got dense. Now, I fold gently and stop as soon as everything looks combined. When it comes to the swirl, don’t overdo the mixing once you add the cinnamon sugar—just a few folds to marbelize the batter. I tested adding chopped nuts or raisins—delicious! Just fold them in with the batter or sprinkle on top before swirling. Want a healthier spin? Swap whole wheat flour, reduce sugar slightly, or use coconut sugar. For a more dramatic cinnamon punch, double the cinnamon in the filling or sprinkle extra on top before baking. Baking times can vary depending on your oven—start checking at 50 minutes, and if the top is browning too quickly, tent the cake with foil. For the glaze, I like it thick enough to just drizzle, but you can loosen it with more milk if needed. I’ve learned that patience is key—let the cake cool completely before glazing so the syrup doesn’t melt away. Trust me, the effort pays off, and every batch gets better as I tweak little things here and there. It’s a forgiving recipe that lets you experiment while still turning out perfect every time!
Storing and Reheating Tips
This cake keeps surprisingly well. If I plan to serve it all in one day, I store leftovers at room temperature, covered lightly with foil or a clean towel. It stays moist and tender for about two days this way. For longer storage, I wrap it tightly in plastic wrap or put it in an airtight container and stash it in the fridge—usually up to four days. To keep it fresh, I recommend bringing it back to room temperature or giving it a quick zap in the microwave for a few seconds. Freezing is also a great option—just wrap slices individually in plastic wrap and place in a freezer bag. It’s good for up to three months. To reheat, microwave for 20-30 seconds—just enough to warm the center without drying it out. If you’ve glazed it, I recommend adding the glaze after reheating, as it’s best fresh. When you want to serve it later, I find that letting it sit at room temperature for 10 minutes before slicing helps it cut beautifully. This way, every piece feels fresh, and the flavors stay vibrant. Trust me—this cake’s moisture and flavor hold up beautifully, especially if you keep it wrapped well and stored properly.
Frequently Asked Questions
Final Thoughts
This zucchini cinnamon swirl cake has become a little piece of my comfort kitchen. It’s unassuming but packed with flavor, moist with a tender crumb, and just sweet enough to satisfy any craving. I love how versatile it is—perfect for breakfast, brunch, or a cozy afternoon snack. Plus, it’s a fantastic way to sneak veggies into dessert—my kids never suspect, and they ask for it all the time! Every time I bake it, I’m reminded of how simple ingredients can come together to create something special, almost like a warm hug in slice form. I encourage you to try it, tweak it to your taste, and experiment with different fillings or toppings. Baking should be fun, not stressful—and this recipe is proof of that. Happy baking, and I can’t wait to hear how yours turns out! Don’t forget to comment below with your favorite variations or any tips you pick up along the way. Let’s keep sharing those family favorites!
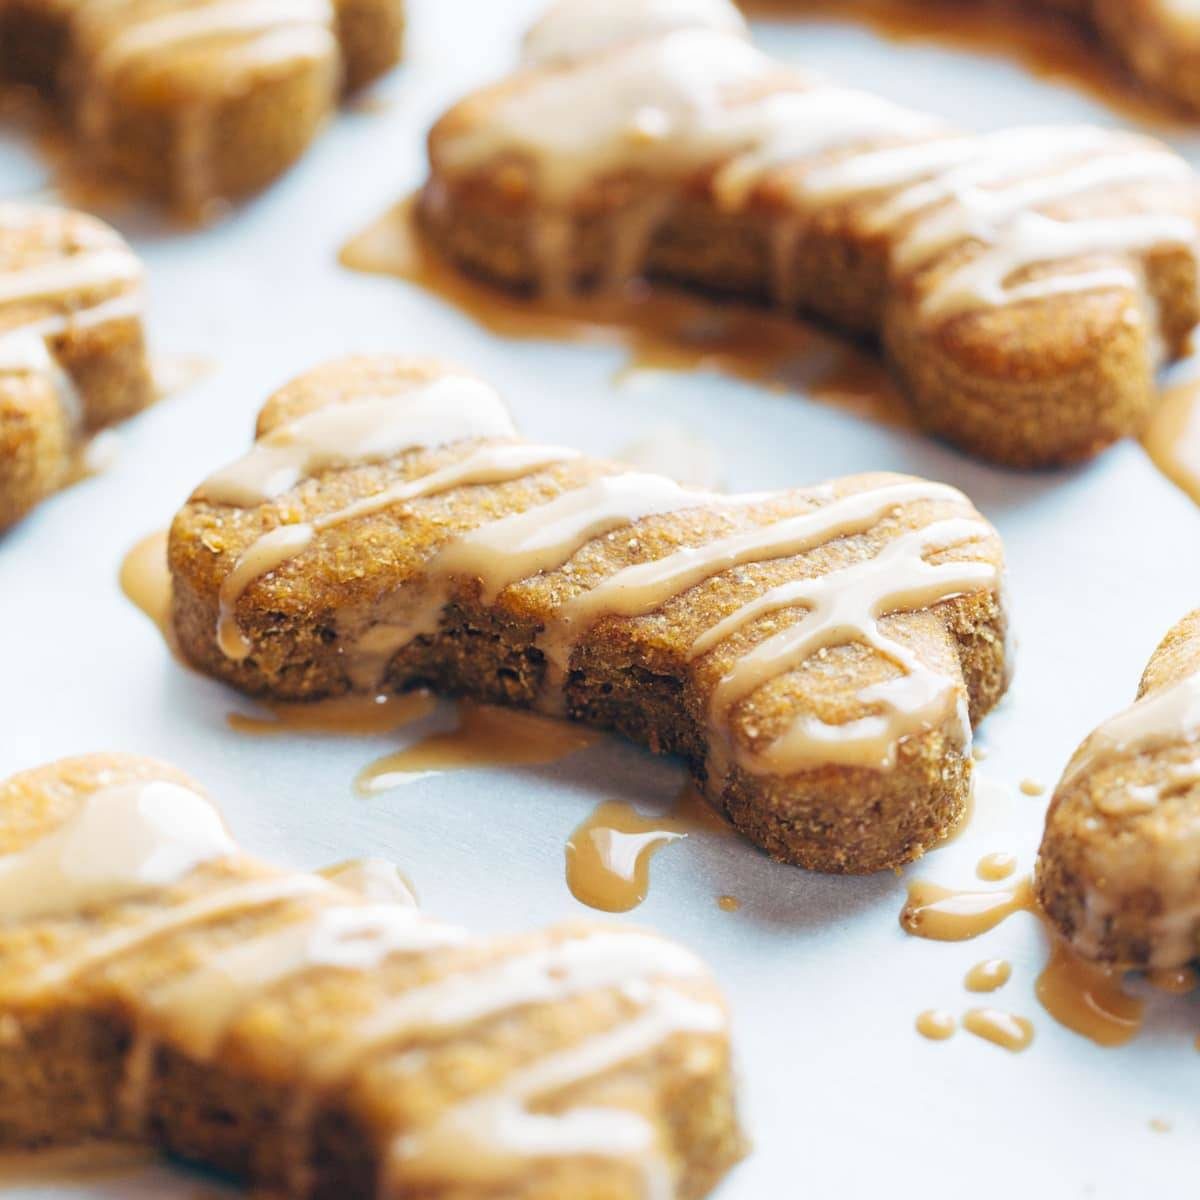
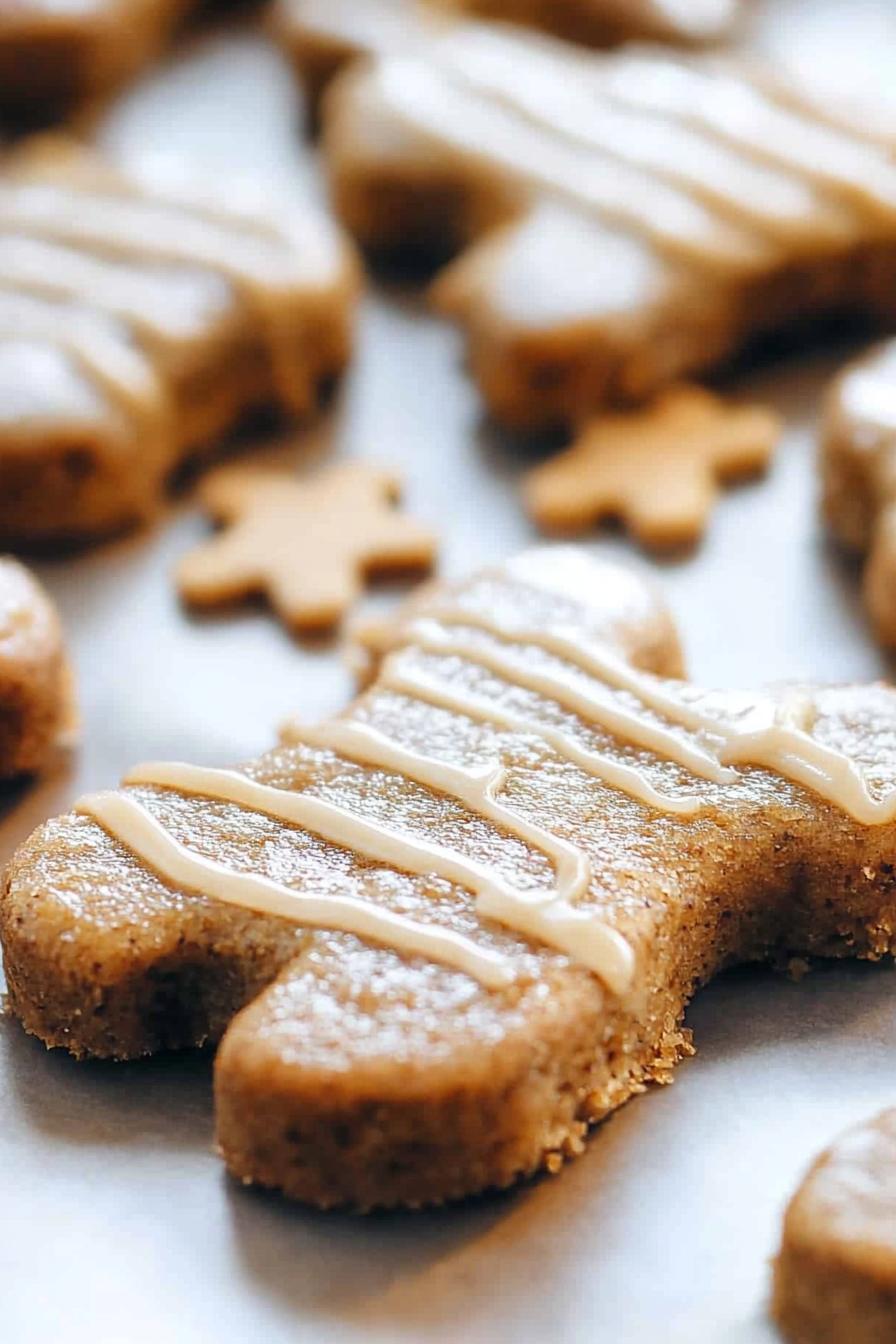
dog treats
Ingredients
Method
- Preheat oven to 350 degrees.
- Combine pumpkin, peanut butter, eggs, and oil in a bowl. Add in baking soda and wheat flour. Stir until a stiff dough forms. Knead dough or mix just until flour is incorporated.
- Roll out dough with a rolling pin and cut into desired shapes. Bake for 15 minutes.
- Whisk bacon grease and peanut butter until smooth. Drizzle over treats and cool until glaze hardens.