Fizzing Cream How to Make Pepper Ice Cream
You know those mornings when you wake up craving something sweet but don’t want to spend hours in the kitchen? That’s where this zucchini swirl coffee cake has been my saving grace. I’ve made this countless times and it never fails to bring a cozy smile to my face — the aroma alone pulls everyone into the kitchen faster than I can say “grab a fork.” I remember the first time I tried it, I thought, “Really? Zucchini in a cake?” But trust me, once you taste that tender, moist crumb with the sweet cinnamon swirl winding through it, you’ll be hooked. It’s just the right balance — indulgent yet sneaky enough to sneak some vegetables into your day. I love how this feels like a warm hug first thing in the morning or on lazy weekend brunches. And honestly, it’s so easy, I always do this when I want to impress friends without the fuss. Plus, it’s a great way to use up those zucchini hiding in my fridge—who knew veggies could taste this good in dessert?
What is Zucchini Swirl Coffee Cake?
This zucchini swirl coffee cake is basically a tender, moist cake, flavored with warm cinnamon and packed with the natural sweetness of shredded zucchini. Think of it as a cross between a classic crumb cake and a zucchini bread — but in a way that’s totally effortless and cheesy good. The “swirl” part is what makes it special: a cinnamon-sugar mixture that gets folded into the batter, creating beautiful marbling when baked. It’s essentially a breakfast cake that doubles as dessert, with a texture that’s moist enough to make you forget it’s even healthy. The name might throw some folks off — I mean, zucchini sounds too savory for a cake, right? — but once you take a bite, all that skepticism melts away. It’s a crowd-pleaser, kid-friendly, and perfect for when you want to sneak some greens into a treat without anyone noticing.
Why you’ll love this recipe?
What I love most about this zucchini swirl coffee cake is how it manages to be both simple and spectacular at the same time. The smell alone is worth making it—think warm cinnamon, sugar caramelizing slightly at the edges, with a hint of nutty zucchini. It’s crazy how a veggie can blend so seamlessly into a cake that tastes rich and indulgent. This one’s a lifesaver on busy nights when I want something homemade without a lot of fuss, because the batter comes together in minutes and the swirl is really flexible—sometimes I add chopped nuts or a dash of vanilla for extra flavor. And guess what? It’s budget-friendly, too. I always have the ingredients on hand—flour, sugar, zucchini, cinnamon—and it’s versatile enough to serve at breakfast, brunch, or even as a sweet snack with afternoon coffee. My kids ask for this all the time, and I love how they think it’s a “special treat,” not realizing it’s secretly good for them. The best part? It’s delicious warm or cooled, and it keeps well in the fridge, making leftovers a real gift.
How do I make Zucchini Swirl Coffee Cake?
Quick Overview
This coffee cake is a breeze to put together, especially once you get the rhythm of mixing wet and dry ingredients. The batter is soft and slightly sticky, infused with cinnamon, and the zucchini adds moisture without diluting the flavor. The cinnamon-sugar filling is just a simple mix of brown sugar and cinnamon — but don’t skimp on the butter; it’s what gives that nice crispy topping and swirl contrast. After layering the batter and swirling in the cinnamon mixture, it bakes into a beautifully marbled cake that smells like heaven. My favorite part? The glaze at the end. It’s just powdered sugar and milk, but it seals the deal and makes it look professional, even if I’m just baking in my pajamas. Simple, satisfying, and perfect for breakfast or dessert—what more could you ask for?
Ingredients
For the Main Batter:
– 2 cups all-purpose flour (I like unbleached for a richer flavor)
– 1 ½ teaspoons baking powder (make sure it’s fresh!)
– ½ teaspoon baking soda
– ½ teaspoon salt
– 1 teaspoon ground cinnamon
– 1 cup granulated sugar
– ½ cup unsalted butter, melted (trust me, melted butter keeps it moist)
– 2 large eggs
– 1 teaspoon vanilla extract
– 1 cup zucchini, shredded and gently squeezed to remove excess moisture
– ½ cup sour cream or Greek yogurt (for added creaminess)
For the Filling:
– ½ cup brown sugar
– 1 tablespoon ground cinnamon
– 2 tablespoons unsalted butter, melted
– Optional: chopped nuts or chocolate chips for a fun twist
For the Glaze:
– 1 cup powdered sugar
– 2-3 tablespoons milk or cream
– A splash of vanilla (optional)
Step-by-Step Instructions
Step 1: Preheat & Prep Pan
First thing, I always set my oven to 350°F (180°C). Grease a 9-inch round or square cake pan, or line it with parchment paper. It’s a small thing, but making sure the pan’s ready helps the cake come out clean. I also like to lightly dust it with flour or spray with non-stick spray—just a quick step that saves frustration later.
Step 2: Mix Dry Ingredients
In a medium bowl, whisk together the flour, baking powder, baking soda, salt, and cinnamon. Having all these dry ingredients well combined makes sure your cake bakes evenly. I do this first so I don’t forget — plus, it helps aerate the flour and spices.
Step 3: Mix Wet Ingredients
In another large bowl, beat the eggs, sugar, and vanilla until lightly fluffy. Pour in the melted butter, stirring until smooth. Then, add the shredded zucchini and sour cream — this keeps everything moist and tender. I find that folding the zucchini in gently helps it distribute evenly without deflating the batter.
Step 4: Combine
Gradually add the dry mixture into the wet ingredients, mixing gently just until combined — don’t overmix! Overmixing can make the cake dense, and we want this to be soft and fluffy. If it feels a little thick, that’s okay; it should scoop easily but still hold its shape.
Step 5: Prepare Filling
In a small bowl, mix the brown sugar, cinnamon, and melted butter. It should resemble wet crumbs. Sometimes I add chopped nuts here or some chocolate chunks — it’s a constant experiment. This filling will swirl through the batter, creating those wonderful cinnamon ribbons.
Step 6: Layer & Swirl
Pour half of the batter into your prepared pan. Dot with half of the cinnamon-sugar mixture, then dollop the remaining batter on top. Use a butter knife or skewer to gently swirl the layers together — don’t overdo it, just a few gentle zigzags to create pretty marbling.
Step 7: Bake
Bake for 35–40 minutes, or until a toothpick inserted in the center comes out clean. Ovens vary, so start checking at 35 minutes. If the top looks too brown but the middle isn’t set, tent it loosely with foil. I also love to smell this baking—it’s pure comfort smell that wafts through the house.
Step 8: Cool & Glaze
Let the cake cool in the pan for about 15 minutes, then transfer to a wire rack. While still warm, drizzle with the glaze. I like mine a little runny so it seep into all the nooks and crannies, but you can thicken it up if you want a more icing-like finish. The glaze makes everything look so finished and adds just the right touch of sweetness.
Step 9: Slice & Serve
Once cooled, slice with a sharp, serrated knife. I find it’s easiest to wipe the knife clean between slices. Serve with a cup of coffee or tea, and enjoy that first tender bite—so moist, cinnamon-y, and comfortingly familiar. Leftovers are great for breakfast the next day, and honestly, I think this tastes even better the day after because the flavors have had time to meld.
What to Serve It With
This cake is pretty versatile. For breakfast, I love serving it with a dollop of Greek yogurt—or a smear of cream cheese if I’m feeling a little indulgent. It pairs beautifully with a steaming mug of black coffee or chai tea, especially when the weather’s turning chilly. If I’m hosting brunch, I’ll set out a platter of fresh fruit alongside it—berries or slices of apple work beautifully. On special occasions, I like to sprinkle a little extra cinnamon sugar on top before serving to add a little sparkle. Or, if it’s a casual snack, I’ll warm up a slice and top it with a pat of butter or a drizzle of honey. This cake would also be lovely warmed with a scoop of vanilla ice cream for dessert. My family’s favorite way? Just a big slice with a strong cup of coffee — pure comfort, pure joy.
Top Tips for Perfecting Your Zucchini Swirl Coffee Cake
Every baker learns a few tricks along the way, and I’ve definitely had my fair share of missteps with this cake—learning as I go makes it more forgiving and fun! Here are some tips I swear by:
- Zucchini Prep: Always squeeze out excess moisture after shredding. It keeps the batter from getting too wet and prevents sinking or wobbling during baking. I’ve tested with both grated zucchini and chopped zucchini chunks—shredded works better here for that fine crumb.
- Mixing Advice: Overmixing the batter is the enemy. I always fold ingredients gently and quickly—at the risk of a patchwork crumb, a tough cake is no fun.
- Swirl Pattern: To get pretty, even cinnamon ribbons, use a skewer or toothpick to gently swirl in straight lines, then rotate the pan for a crosshatch effect. Trust me, the visual impact is worth the little extra effort.
- Ingredient Swaps: Want to make it gluten-free? Substitute all-purpose flour with a 1:1 gluten-free blend. For a dairy-free version, swap in coconut yogurt or almond milk, though I find the cake a little lighter with sour cream.
- Baking Tips: If your oven runs hot, reduce the temperature slightly or cover the top with foil early on. Start checking at 35 minutes to avoid overbaking—nothing worse than a dry cake.
- Glaze Variations: Try adding lemon juice or vanilla extract to the glaze for a different flavor profile. Or sprinkle shredded coconut or chopped nuts on top before glazing for extra texture. Trust me, it’s these little touches that take it from good to unforgettable.
This is one of those recipes I’ve tweaked over the years, and I finally feel like I’ve nailed the perfect balance—moist, flavorful, beautifully marbled, and full of cozy cinnamon goodness. The trick is in the gentle mixing, squeezing out the zucchini, and patience for that perfect swirl.
Storing and Reheating Tips
This cake keeps surprisingly well. I usually wrap it tightly in plastic wrap or store it in an airtight container. At room temperature, it stays fresh for about 2 days—perfect for breakfast or a quick snack. If I want to keep it longer, I pop slices into the refrigerator, where they keep well for up to 4 days. Just make sure to let leftovers come to room temp a bit before serving so it’s still moist and tender. For longer storage, freezing is a great option—wrap slices in plastic wrap and then foil, and they’ll keep for up to 3 months. Thaw at room temperature or in the microwave with a quick 10–15 second burst to bring back that warm, homey feel. As for the glaze, I usually add it fresh when serving, but if I’m saving the cake, I store it unglazed and add the finishing touch just before slicing. That way, it stays shiny and extra delish.
Frequently Asked Questions
Final Thoughts
If you’re anything like me, baking is all about comfort, memory, and little surprises. This zucchini swirl coffee cake ticks all those boxes. It’s moist, flavorful, and surprisingly easy to whip up—you don’t need fancy ingredients or special skills. Plus, it’s a great way to sneak some veggies into a sweet treat without anyone batting an eye. I’ve shared this with friends, brought it to family brunches, and even made it last-minute when unexpected guests popped by, and it always gets rave reviews. The versatility is what keeps me coming back—serve it warm with coffee, chill it for a more cake-like texture, or add your favorite toppings. So go ahead, get that zucchini shredded, your ingredients ready, and give this a try. I can’t wait to hear how yours turns out. Happy baking!
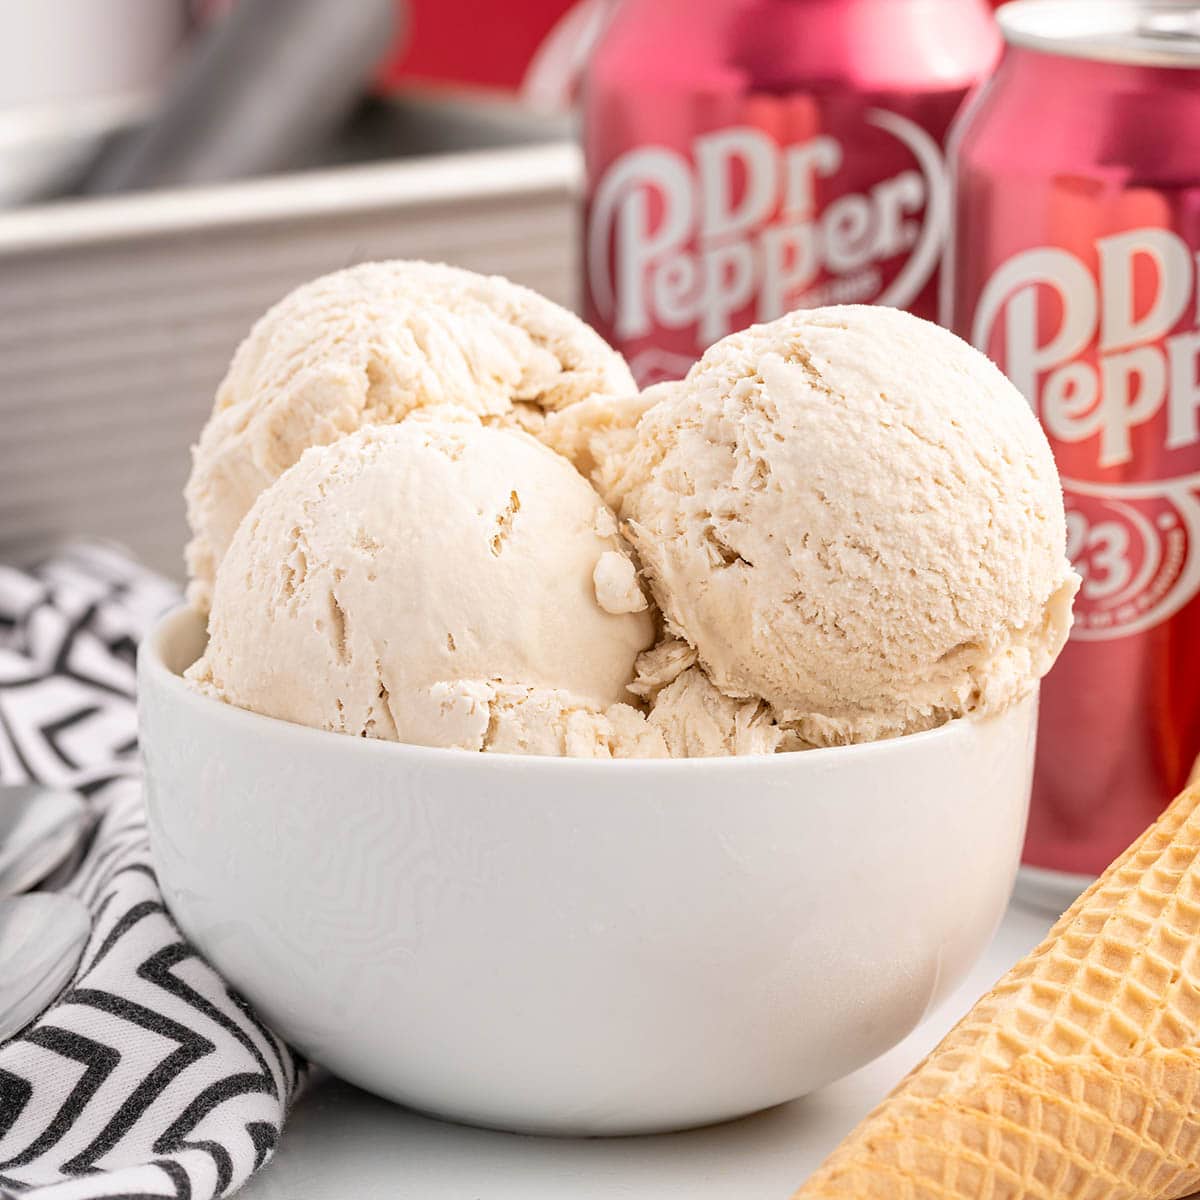
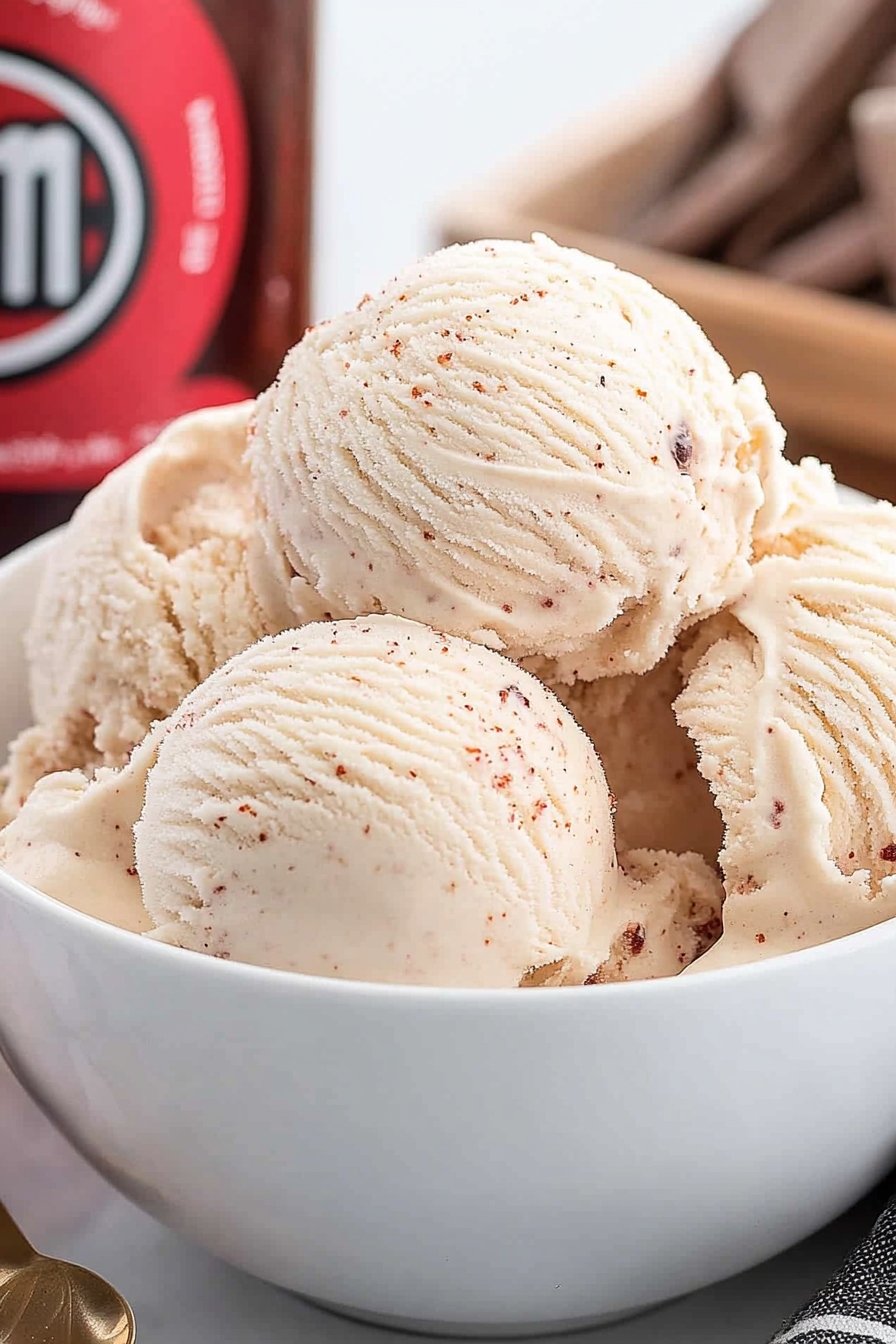
Dr Pepper Ice Cream
Ingredients
Method
- Place a 10x5x3 loaf pan, the bowl and whisk attachment of a stand mixer, or a medium size (2-3 quart) mixing bowl and the beaters of a handheld mixer in the freezer for 30 minutes.
- Add the sweetened condensed milk in a medium size bowl.
- Slowly stir the Dr. Pepper into the sweetened condensed milk. Stirring the soda in slowly helps reduce the amount of bubbles when combining. The ice cream will freeze a bit quicker if the soda is cold when mixing into the sweetened condensed milk.
- Next, remove the mixer bowl and attachments from the freezer.
- Add the cold heavy cream to the cold mixing bowl. Beat on medium-high speed until the cream is slightly frothy, about 1 minute. Increase the mixer speed to high and continue to mix until the cream forms stiff peaks, about 1.5 - 2 minutes.
- Use a silicone spatula to gently fold the beaten heavy cream into the Dr. Pepper milk mixture, 1 cup at a time. Folding is a way to gently combine 2 different textures together without deflating the whipped cream.
- Remove the loaf pan out of the freezer. Evenly spoon the ice cream base into the cold loaf pan. Use an offset spatula, or a silicone spatula to smooth the top of the ice cream.
- Cover tightly with heavy-duty aluminum foil and freeze for 6 hours, or until the ice cream is firm. Remember that all freezers cool differently, so you can begin checking the firmness of the ice cream around the 4-hour mark.
- When you are ready to serve, scoop the Dr. Pepper ice cream into bowls or into ice cream cones. You can also serve in a glass with more Dr. Pepper poured over the ice cream for a Dr. Pepper float.