Spice Cake Brownies How to Bake Bliss
There’s something about baking a loaf of zucchini swirl bread that feels like a warm hug from the inside out. I remember my grandma making a version of this when I was a kid—her kitchen always smelled like cinnamon and fresh-baked goodness, and honestly, I’d sneak bites straight from the pan before it even cooled. Now, whenever I bake this, it takes me right back to those carefree afternoons, with my family gathered around the kitchen table. It’s incredible how a simple recipe can hold so many memories. The best part? It’s so darn easy that I can whip it up on a busy weekday or a lazy weekend. Plus, it’s pretty sneaky as a way to get kids to eat their veggies—my kids ask for this all the time, sometimes even asking for seconds! If you love comforting baked goods with a hint of sweetness and a little veggie boost, then trust me on this one—it’s a total lifesaver on nights when you want something sweet, but don’t feel like turning on the oven for hours.
What is Zucchini Swirl Loaf?
Think of zucchini swirl loaf as a cozy hybrid between banana bread and a classic cinnamon roll, but with a sneaky veggie twist. It’s essentially a moist, tender quick bread layered with a cinnamon-sugar filling and swirled with grated zucchini. The name’s pretty straightforward—since zucchini gets folded in to keep things super moist, and the cinnamon swirl adds that warm, spicy aroma everyone loves. It’s a homey, approachable baking project that feels just fancy enough to serve for brunch or afternoon tea but is honestly so simple that even beginner bakers could nail it on their first try. The zucchini doesn’t just add moisture; it also makes the loaf slightly dense and rich without knocking the sweetness. Plus, you can easily customize the filling and glaze—think nuts, chocolate chips, or even a splash of vanilla—to make it your own. One bite, and you’ll see why this has become one of my hardest-to-resist comfort snacks.
Why you’ll love this recipe?
What I love most about this zucchini swirl loaf is how it hits all the right notes—sweet, spicy, and just a little earthiness from the zucchini. The flavor is everything you want in a loaf—warm cinnamon, sugary richness, and a subtle vegetable sweetness that surprises people. And it’s crazy easy to make, even after a long day. I’ve tested this with regular all-purpose flour, but honestly, I’ve also used whole wheat or gluten-free blends, and it still comes out beautifully—just a bit denser, which I actually like. Plus, this is a budget-friendly recipe; I usually use odds and ends from the fridge to make the filling—brown sugar, a pinch of nutmeg, maybe some chopped walnuts or chocolate chips if I’m feeling naughty. This loaf is incredibly versatile. You can serve it as a quick breakfast, a brunch centerpiece, or even a cozy snack with a cup of tea in the afternoon. My family always unanimous—this disappears in minutes at my house. The smell alone brings everyone to the kitchen, and I swear, the first slice is the best, still warm from the oven. Honestly, it’s one of those recipes that fits into your life because it’s so forgiving and endlessly customizable. Plus, it’s a sneaky way to sneak some veggies into dessert—who’s winning now?
How do you make Zucchini Swirl Loaf?
Quick Overview
This zucchini swirl loaf recipe is a simple one-bowl batter with a cinnamon-sugar filling layered in, then swirled with a toothpick or knife before baking. You start by prepping your zucchini—grated and moisture-extracted—then mix all your wet ingredients. The dry ingredients come together separately, which I find helps keep everything smooth and lump-free. The filling is a quick combo of cinnamon, sugar, and butter—easy to keep in the fridge or at room temp. Layer everything in your loaf pan, swirl, and bake until golden. The beauty is that it’s forgiving—no overmixing, no complicated steps—just wholesome, cozy baking that makes your kitchen smell like a dream.
Ingredients
For the Main Batter:
- 2 cups all-purpose flour (or whole wheat for a healthier twist)
- 1 teaspoon baking soda
- 1/2 teaspoon baking powder
- 1/2 teaspoon salt
- 1 teaspoon ground cinnamon (more if you really love that spicy aroma)
- 1/2 cup granulated sugar (or coconut sugar for a deeper flavor)
- 1/2 cup light brown sugar
- 1/2 cup vegetable oil (or softened butter if you prefer a richer loaf)
- 3 large eggs
- 1 teaspoon vanilla extract
- 1 1/2 cups grated zucchini (squeeze out excess moisture)
For the Filling:
- 1/3 cup granulated sugar
- 2 teaspoons ground cinnamon
- 2 tablespoons unsalted butter, melted
- A handful of chopped nuts or chocolate chips (optional but highly recommended)
For the Glaze (optional but adds that perfect finishing touch):
- 1 cup powdered sugar
- 2-3 teaspoons milk or lemon juice
- 1/2 teaspoon vanilla extract
Step-by-Step Instructions
Step 1: Preheat & Prep Pan
Set your oven to 350°F (175°C). Grease a standard loaf pan with butter or baking spray and line the bottom with parchment for easy removal. As I always do, I like to get this ready first—nothing more annoying than trying to do this last minute! While the oven heats, grate your zucchini: I use a box grater, and then I squeeze out as much moisture as I can with a clean dish towel or paper towels. Trust me, moisture is your enemy here—too much and the loaf gets gummy, not tender. Set aside the prepared pan and zucchini.
Step 2: Mix Dry Ingredients
In a large bowl, whisk together the flour, baking soda, baking powder, salt, and cinnamon. Doing this first keeps everything light and prevents clumping. It also helps you ensure an even cinnamon distribution—important if you want a nice swirl in every slice.
Step 3: Mix Wet Ingredients
In a separate bowl, whisk together the sugars, oil, eggs, and vanilla. I like to do this with a hand whisk—makes it feel more hands-on, and I find that it emulsifies everything nicely. Add in the grated zucchini last, stirring until just combined. The zucchini should be evenly dispersed, giving the batter that lovely speckled look.
Step 4: Combine
Pour the wet mixture into the dry ingredients, then gently fold until everything is just combined—be careful not to overmix. Overmixing can make the bread dense and tough, and no one wants that. A few lumps are okay—remember, slow and steady wins the baking race.
Step 5: Prepare Filling
Mix the sugar and cinnamon in a small bowl, then add the melted butter—stir until it’s crumbly and paste-like. If you’re adding nuts or chips, toss them in here. This step is flexible—you can sprinkle the filling directly on the batter or make a thicker cinnamon swirl by adding a little more butter or brown sugar, depending on your mood.
Step 6: Layer & Swirl
Pour about half the batter into your prepared loaf pan. Spread evenly, then sprinkle your cinnamon mixture over this layer. Cover with the remaining batter, smoothing the top with a spatula. Now, grab a toothpick or skewer and swirl it through the batter—make big, looping motions to get that beautiful marble effect. This is my favorite part—seeing those spirals come to life!
Step 7: Bake
Pop the loaf into the oven and bake for about 50-60 minutes. Keep an eye on it—start checking around 50 minutes with a toothpick inserted into the center; if it comes out clean, it’s done. If it’s still sticky or wet, give it a few more minutes. The top should be golden and slightly cracked, like a good crust on bread.
Step 8: Cool & Glaze
Let the loaf cool in the pan for about 15 minutes, then transfer to a wire rack. Patience is key here—cooling prevents the layers from sliding apart when you slice. Once cooled, whisk together your glaze ingredients and drizzle generously over the top—that shiny, sweet glaze makes this loaf irresistible.
Step 9: Slice & Serve
Use a sharp serrated knife to slice neat pieces—my kids love it sliced thick like bread, and I prefer it thinner with a cup of coffee. Serve slightly warm or at room temperature. This makes a gorgeous breakfast, a lovely afternoon snack, or even a cozy dessert. And, trust me, leftovers keep well—just wrap in foil or store in an airtight container.
What to Serve It With
This zucchini swirl loaf is so versatile that I often keep it simple, but here are some ideas to elevate it for different occasions:
For Breakfast: Pair it with a strong cup of coffee or a latte, and slice it thick with a pat of butter melting on top. The buttery aroma coupled with a hot drink is *heavenly*. Sometimes I like to add a dollop of Greek yogurt and fresh berries on the side—my kids think it’s fancy brunch style.
For Brunch: Serve slices with an assortment of cheeses, fresh fruit, and even a drizzle of honey. It’s super pretty on a breakfast board and makes everyone feel indulgent. Add a mimosa for the grown-ups, and you’ve got a simple celebration!
As Dessert: Warm slices with a scoop of vanilla ice cream or a splash of caramel syrup turn this into a no-fail dessert. My favorites are when it’s still warm and a little gooey—the contrast of cold ice cream and warm bread is just divine.
For Cozy Snacks: Cut thick slices, toast lightly, and spread with cream cheese or almond butter. It’s a cozy, satisfying way to tide yourself over. Plus, it feels a little special—like a treat you grabbed straight from grandma’s kitchen.
This loaf has become a staple in our house, and it always sets the tone for a good day or a relaxing afternoon. I love how adaptable it is—I’ve even played around with adding shredded carrots or swapping out the cinnamon for pumpkin pie spice during fall. When I have friends over, I throw a few chopped nuts on top before baking for some extra crunch. Honestly, I think the secret to this recipe is the love that goes into it—and the smell that fills the house while it bakes.
Top Tips for Perfecting Your Zucchini Swirl Loaf
Every time I make this, I learn a little more about how to get it just right. Here are some tips I swear by now:
- Zucchini Prep: Always squeeze out as much moisture as possible after grating. I actually use a cheesecloth or a clean dish towel to wring out the zucchini—this keeps the loaf from turning into soggy mush. Fresh zucchini should be firm and bright green; if it’s limp or yellowed, I skip it.
- Mixing Advice: Be gentle when folding the wet and dry ingredients—overmixing is the quickest way to dense bread. I like to fold just until everything looks combined, with occasional streaks of flour remaining.
- Swirl Patterns: Don’t overdo it—big, loose swirls are prettier and more flavorful than tight spirals. I find that dragging the skewer from the center outward creates those lovely streaks that look like a swirl in a cinnamon roll.
- Ingredient Swaps: Using applesauce instead of oil makes the loaf even moister and cuts some calories. You can also swap the cinnamon for nutmeg or cardamom for a different flavor profile—trust me, it’s fun to experiment!
- Baking Tips: Keep an eye on the oven—every oven is different. If your loaf starts browning too quickly, tent it with foil and lower the temperature slightly. The toothpick test is your best friend—don’t rely solely on how golden it looks.
- Glaze Variations: If you want a more tart glaze, add lemon juice instead of milk. Or sprinkle some finely grated lemon zest on top for an extra zing—delicious!
This recipe is deceptively forgiving. I’ve made it with slightly different ratios, with or without nuts, and every time it turns out cozy and delicious. Honestly, the secret is just patience—and a love for simple, wholesome baking. And oh, don’t forget to taste the filling before layering—sometimes I add a pinch more cinnamon or a splash of vanilla to make it pop even more. It’s these little tweaks that make the recipe your own, and that’s the fun of baking, isn’t it?
Storing and Reheating Tips
This loaf keeps surprisingly well—my secret is wrapping it tightly in plastic or storing it in an airtight container. At room temperature, it’s still moist and fresh for about two days, especially if you keep it out of direct sunlight. After that, I toss it in the fridge—perfect for slicing and toasting in the mornings. To reheat, just give it a quick 10-15 second zap in the microwave or pop slices in a toaster oven until warm and crispy.
If you want to make it ahead for the week, the freezer is your best friend. Wrap individual slices tightly in plastic wrap, then double-bag in a freezer-safe container or zip-top bag. When ready to eat, thaw at room temperature or reheat. The texture might be a little denser, but the flavor is just as good. Just remember, if you’re planning to add the glaze later, wait until it’s thawed—adding it beforehand can make the loaf soggy.
I’ve tested all kinds of storage methods, and honestly, I think the key is to keep moisture in—so don’t leave it uncovered. And if the glaze has set a bit during storage, just give it another sprinkle or drizzle when serving to bring back that shiny, irresistible look. Keep in mind, this loaf is best eaten within a week for peak freshness, but trust me, it rarely lasts that long around here!
Frequently Asked Questions
Final Thoughts
Honestly, this zucchini swirl loaf has become one of those recipes I go back to again and again. It’s homey without feeling boring, and the smell—it’s practically impossible to resist. I love how a few simple ingredients transformed into something so comforting and versatile. Whether you’re baking it for weekday breakfast, a casual get-together, or just because you need a little extra love, this loaf delivers. Plus, it’s a sneaky way to get some veggies in your dessert, which I consider a win for my busy, always-hungry family. I hope you try it and make it your own—swap ingredients, add your favorite nuts or chocolate, or experiment with different spices. And finally, don’t forget to share your photos and variations—baking is just way more fun that way. Happy baking, friends—I can’t wait to hear how yours turns out!
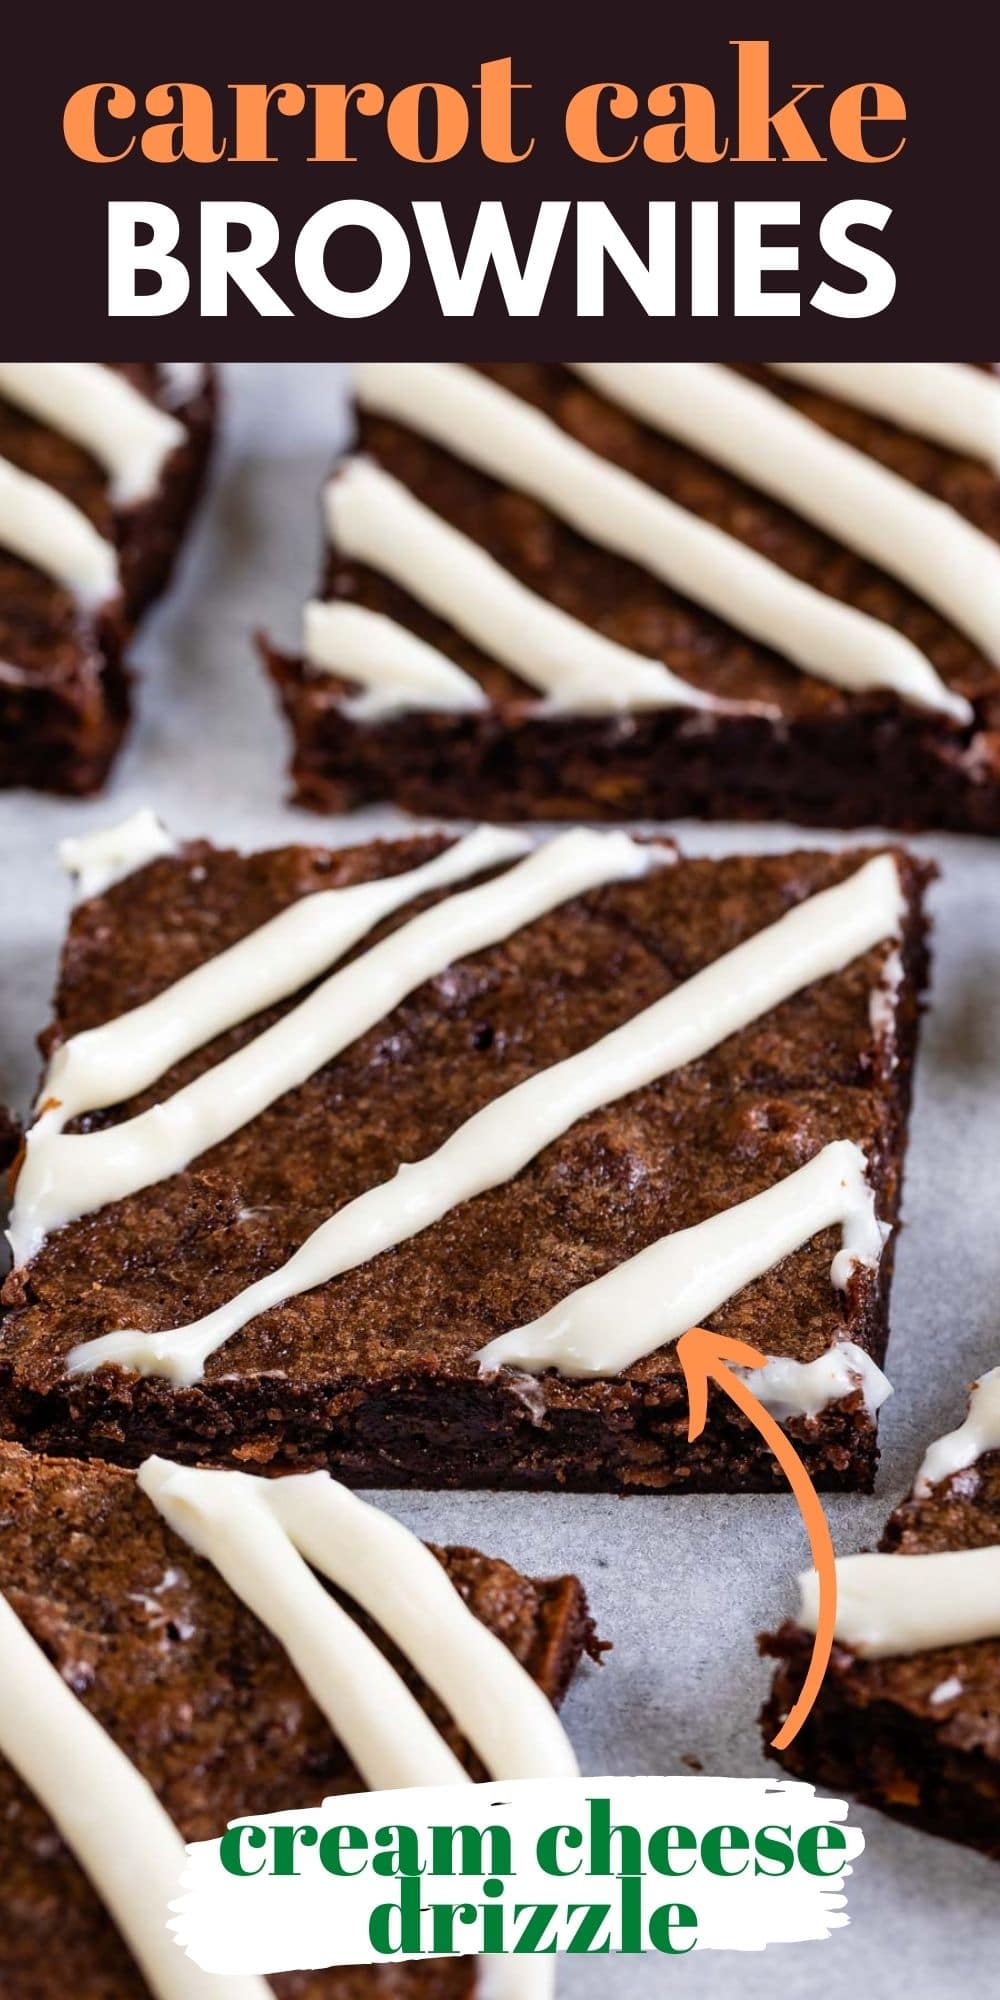
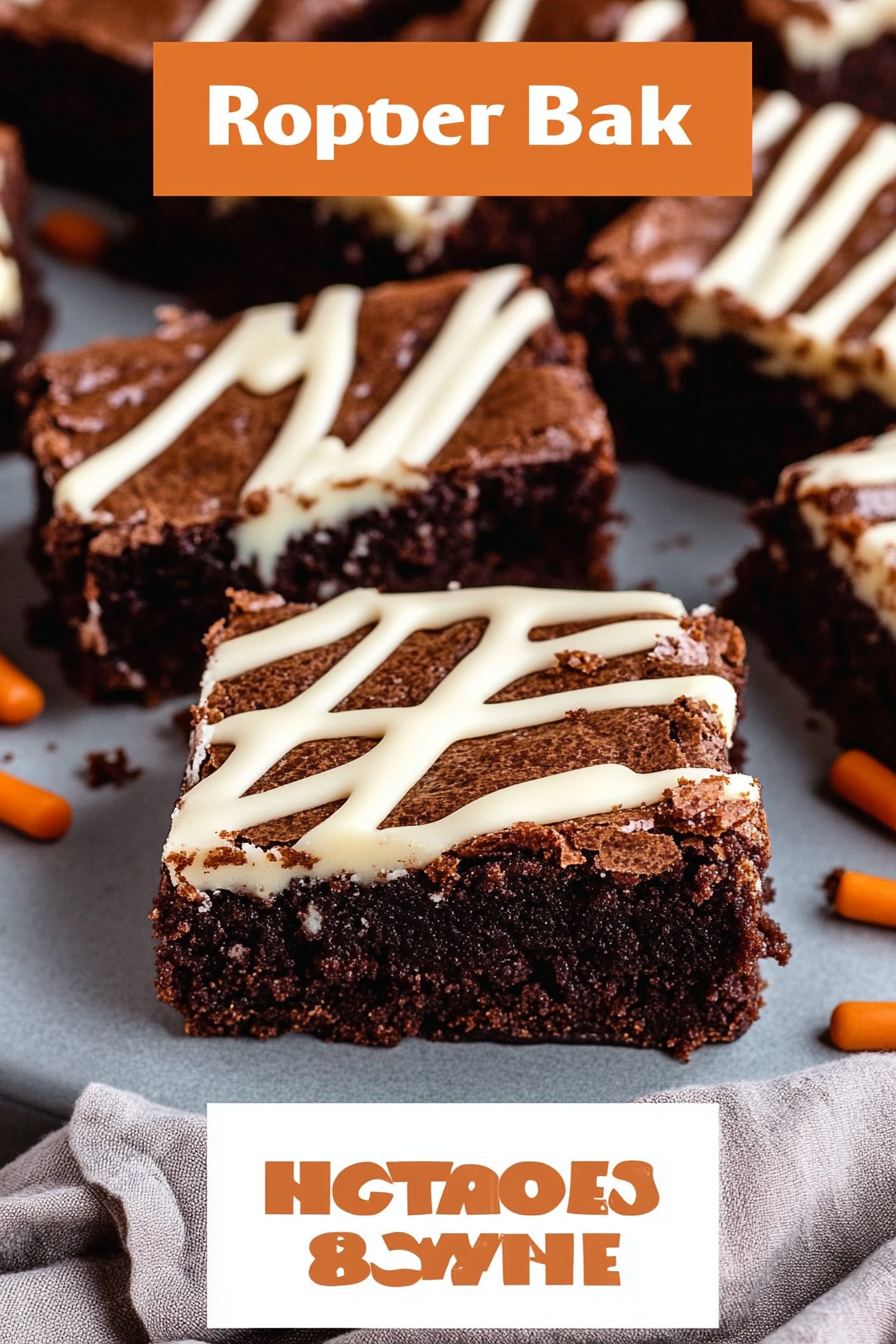
carrot cake brownies
Ingredients
Method
- Preheat oven to 350°F. Line a 9x9 inch pan with parchment paper and spray with non-stick spray.
- In a bowl, stir together oil, granulated sugar, and eggs until well combined. Stir in cocoa powder, vanilla, salt, and cinnamon. Gradually mix in flour, then fold in shredded carrots.
- Pour batter into prepared pan and bake for 25 minutes or until a toothpick inserted in the center comes out clean. Let cool completely before frosting.
- To prepare the frosting, beat softened cream cheese and powdered sugar until smooth. Mix in vanilla and milk, adding more milk if needed to reach desired consistency.
- Spread frosting over cooled brownies. Slice into squares and serve.