Autumn Spice Snickerdoodles How to Bake Them
There’s just something about a warm slice of homemade coffee cake that feels like a hug in the middle of a hectic day. I remember sneaking bites of this zucchini coffee cake when I was a kid—those mornings when my mom would whip up something sweet, and the comforting smell of cinnamon and lemon would drift through the house. Over the years, I’ve tweaked the recipe, adding a little zest here and a touch of almond flavor there, but the heart of it is still the same: moist, tender, with just the right amount of sweetness and a tangy glaze that makes every piece irresistible. Honestly, what I love most about this recipe is that it’s incredibly easy to make. It’s perfect when you’re craving something sweet at 10 pm but don’t want to be up all night baking a huge cake. Plus, it’s a sneaky way to get your kids to eat their veggies—because, let’s face it, zucchini never tasted so good! Trust me on this one, once you make it, it’ll become a staple for breakfast, coffee dates, and even after-dinner treats.
What is Zucchini Coffee Cake?
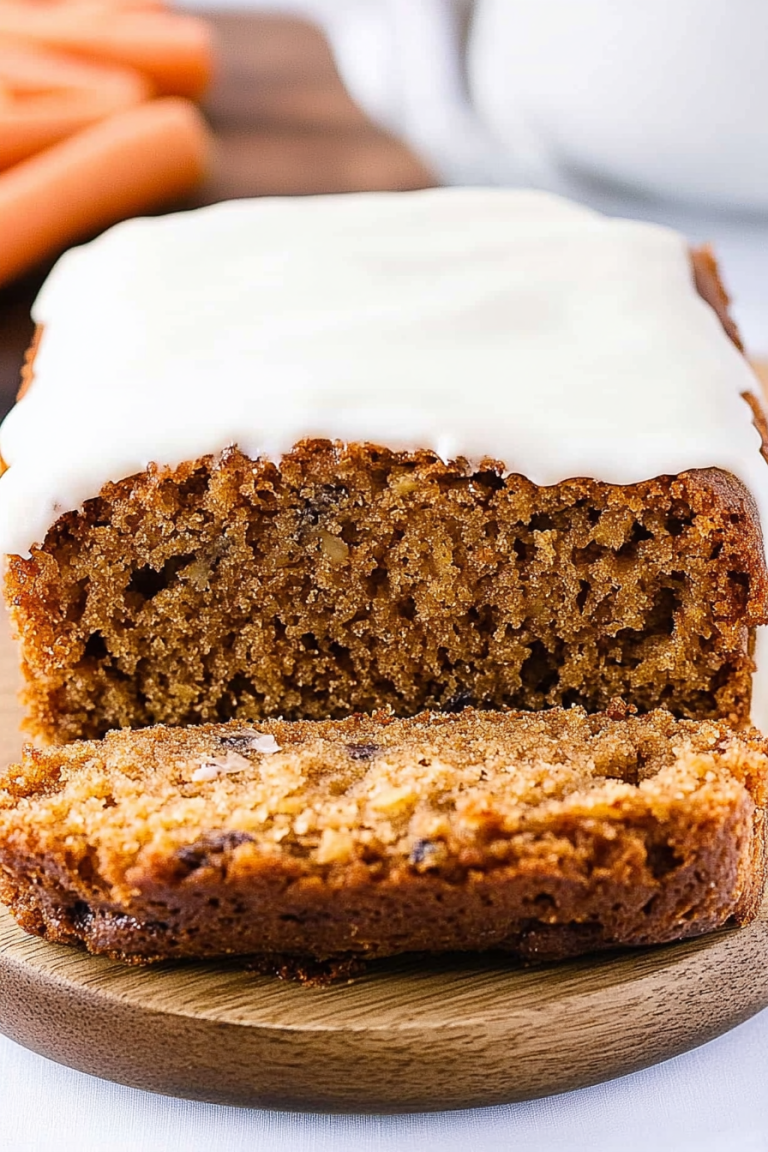
This zucchini coffee cake is basically what happens when you take a classic crumb-topped cake and add in shredded zucchini—think of it as a sneaky way to get some greens into a sweet treat. It’s moist, a little dense in the best way, with a crumbly topping that’s buttery and cinnamon-spiced. The zucchini keeps everything super tender and adds a little extra moisture, so it almost melts in your mouth. It’s called a “coffee cake” because it’s meant to be served with coffee or tea, but honestly, I think it’s just as perfect with a cold glass of milk or even a dollop of whipped cream. The name might make you think it’s only for breakfast, but I’ve served it at brunch, after dinner, and even as a quick snack, and it always disappears in minutes. Think of it as a universally loved treat that’s both homey and elegant, all in one loaf.
Why you’ll love this recipe?
First off, the flavor—oh my goodness, the aroma alone is enough to make everyone in the house come running. You get a warm hit of cinnamon, sweet lemon zest, and that comforting, home-baked smell that instantly relaxes you. The zucchini keeps it incredibly moist, so every bite is satisfying without feeling heavy. I always do this when I want something comforting but don’t have hours to bake; it’s a one-bowl wonder, and cleanup is minimal. Plus, it’s budget-friendly—nothing fancy needed here, just simple pantry staples. And versatility? Oh, you can switch up the flavor a bit. Want it more citrusy? Add a splash of orange zest. Prefer it less sweet? Lighten the sugar. I’ve even tested this with whole wheat flour, and it comes out just as tender—bonus points for making it a little healthier! This one’s a lifesaver on busy nights or when I need a little pick-me-up. Sometimes, my kids ask for this all the time, and I happily oblige because I love how it makes the house smell and how happy everyone looks with a slice in hand.
How do I make Zucchini Coffee Cake?
Quick Overview
This zucchini coffee cake comes together in just a few steps—simply mix your dry ingredients, then whisk your wet ingredients, combine everything, pour into a pan, add the topping, and bake. The magic lies in the simplicity: the shredded zucchini keeps the cake super moist, while the cinnamon-sugar crumb gives it that irresistible crunch on top. Once it’s baked and cooled just a little, you drizzle a lemon glaze over it. No fancy equipment or complicated techniques needed—just a good spoon, a whisk, and a loving touch. Trust me, you’ll want to make this again and again, especially when that sweet tooth hits and you want something quick, cozy, and full of flavor.
Ingredients
For the Main Batter:
– 2 cups all-purpose flour (I like unbleached, but regular works too)
– 1 cup sugar
– 1 teaspoon baking powder
– ½ teaspoon baking soda
– ½ teaspoon salt
– 1 teaspoon ground cinnamon
– 1 cup grated zucchini (squeeze out excess moisture—no soggy cake! This is where a little salt on the grated zucchini helps pull out extra water)
– ½ cup vegetable oil (or melted butter if you prefer richer flavor)
– 2 large eggs
– 1 teaspoon vanilla extract
For the Filling (optional but delicious):
– ½ cup chopped walnuts or pecans
– 2 tablespoons brown sugar (for that caramel touch)
For the Lemon Glaze:
– ½ cup powdered sugar
– 2-3 tablespoons fresh lemon juice
– Lemon zest (a teaspoon for extra zing)
Step-by-Step Instructions
Step 1: Preheat & Prep Pan
Set your oven to 350°F (180°C). Grease a 9-inch loaf or round cake pan with butter or line it with parchment paper—trust me, this cake is sticky enough, so don’t skip this step. A quick spray of non-stick spray also works wonders to keep cleanup easy.
Step 2: Mix Dry Ingredients
In a big bowl, whisk together the flour, sugar, baking powder, baking soda, salt, and cinnamon. I always do this first to ensure everything’s evenly distributed. That way, every bite gets a little spicy cinnamon love.
Step 3: Mix Wet Ingredients
In a separate bowl, whisk the eggs, then add the oil, vanilla, and grated zucchini. I like to grate the zucchini right into a paper towel or clean dish towel, then squeeze out all the excess moisture—this avoids a soggy cake. It sounds like extra work, but I promise, it makes a world of difference.
Step 4: Combine
Pour the wet ingredients into the dry, gently folding everything together with a spoon or spatula. Don’t overmix—just until everything looks combined. Overmixing can make the cake dense, and nobody wants that.
Step 5: Prepare Filling
If you’re adding nuts and sugar, stir them into the batter now. I love this added crunch—it makes every bite interesting and adds a little extra sweetness.
Step 6: Layer & Swirl
If you want to add the filling layer, pour about half the batter into your pan, sprinkle the filling, then top with the rest of the batter. Use a skewer or butter knife to swirl the top layer gently, creating pretty marbling that hints at what’s inside. Trust me, the swirl looks pretty and makes every piece feel special.
Step 7: Bake
Pop it into the oven and bake for about 40-45 minutes. It’s done when a toothpick inserted in the center comes out clean or with just a few moist crumbs. Keep an eye on it around the 40-minute mark—every oven is different! If the top browns too quickly, cover loosely with foil.
Step 8: Cool & Glaze
Let the cake cool in the pan for about 15 minutes, then transfer to a wire rack. While it’s still warm, mix your lemon glaze—powdered sugar, lemon juice, and lemon zest—until smooth. Drizzle generously over the cake. The warm cake helps the glaze soak in ever so slightly.
Step 9: Slice & Serve
Once cooled completely—if you can wait that long!—slice with a serrated knife. The cake is super tender, so gentle sawing is best. Serve with a hot cup of coffee or tea, or even some vanilla yogurt for extra richness. Oh, and I love adding a dollop of whipped cream to dress it up!
What to Serve It With
This cake is so versatile that it really suits any occasion. For breakfast, I love pairing it with a strong black coffee or a glass of cold milk. The kids are happy with a slice alongside their orange juice, and I’ve been known to even serve it as a fancy dessert—warm, topped with a scoop of vanilla ice cream, it’s heavenly.
At brunch, a dusting of powdered sugar or a dollop of whipped cream elevates the presentation. When I serve this after dinner, I like to add a little extra lemon zest or fresh berries on top for a burst of brightness. This cake is also fantastic as a cozy snack by the fireplace—just toast a slice and enjoy every gooey crumb. Honestly, you can’t really go wrong. It’s like a little slice of comfort that everyone loves.
Top Tips for Perfecting Your Zucchini Coffee Cake
Zucchini Prep: Always squeeze out the excess moisture from the zucchini—this prevents sogginess. I keep a handful of salt on hand when grating—sprinkle it over, let it sit for 10 minutes, then squeeze out the water with your hands or a towel. It’s a game-changer.
Mixing Advice: Gently fold wet into dry; overmixing toughens the crumb. Seeing it just come together is perfect—lumps are okay.
Swirl Customization: To make prettier swirls, swoosh your batter with a skewer or toothpick in a figure-eight pattern. Keep the filling visible, but don’t overmix—this creates that beautiful marbled look.
Ingredient Swaps: I tested this with coconut oil, and it was delicious! Whole wheat flour works too, just add an extra tablespoon of milk if it looks too thick.
Baking Tips: Always check early—every oven bakes at a different pace. Use a toothpick test—if it comes out clean, it’s ready. If not, give it a few more minutes.
Glaze Variations: For a richer flavor, add a splash of vanilla or a tiny pinch of cardamom to your glaze. If you like it less sweet, cut back on powdered sugar; for more zing, add more lemon zest or even a dash of lime juice.
Over the years, I’ve learned that patience is key. Letting it cool fully helps it set and makes slicing neater. Also, a quick spray of warm water on the knife helps cut through the sugary glaze smoothly. Little tricks like these make baking more fun and less stressful. Honestly, every time I make this, I get a little excited because I know how much my family loves it. Plus, I always discover small tweaks that just improve the texture or flavor — baking is a journey, after all, and I’m still learning every time I turn on the oven.
Storing and Reheating Tips
This cake keeps beautifully, which is another reason I love it. If I have leftovers, I store slices in an airtight container at room temperature for up to two days. Just make sure to keep it covered—nothing ruins that moist crumb faster than drying out. For longer storage, wrap individual slices tightly with plastic wrap and stash in the fridge for up to a week. I actually like it chilled because the flavors become even more pronounced, especially the lemon glaze. When reheating, I microwave a slice for about 20 seconds—just enough to warm it through without turning it rubbery. You can also gently warm it in the oven at 300°F for about 10 minutes if you want to revive that freshly baked feel. And remember, if it’s been in the fridge, you might want to add a little extra glaze or a squeeze more lemon juice to freshen up the flavor. Freezing works well too—wrap slices tightly, and they’ll keep up to 3 months. Just thaw in the fridge overnight before serving. I swear, this cake tastes just as good reheated as it does fresh!
Frequently Asked Questions
Final Thoughts
This zucchini coffee cake is truly a testament to how something seemingly simple can become a favorite in my home. It’s got a perfect balance of moistness, sweetness, and that cozy cinnamon scent that makes everyone smile. Every time I bake it, I feel a little nostalgia, remembering those quiet mornings of my childhood but also celebrating how versatile and forgiving this recipe is. The best part? It’s so beginner-friendly that I often whip it up on busy weekends, and my kids ask for seconds before I even get it out of the oven. Whether you’re new to baking or a seasoned pro, this cake is a win—trust me. I hope you give it a try and that it brings a little warmth to your kitchen like it does mine. Don’t forget to leave a comment and tell me how yours turns out—happy baking, friends!

Pumpkin Snickerdoodles
Ingredients
Method
- In a mixing bowl, whisk together flour, cornstarch, cream of tartar, baking soda, salt, cinnamon, ginger, nutmeg, and cloves for 20 seconds. Set aside.
- In the bowl of an electric stand mixer fitted with the paddle attachment (or in a mixing bowl using an electric hand mixer), cream together butter, brown sugar, and granulated sugar until well blended.
- Mix in egg yolk, then mix in pumpkin and vanilla extract. Scrape down the mixing bowl.
- With the mixer set on low speed, slowly add in the dry ingredients, then mix until combined.
- Spread the dough up the sides of the bowl with a well in the center for even chilling. Cover and chill for 45 minutes to 1 hour.
- Preheat oven to 350°F (175°C) during the last 15 minutes of refrigeration.
- In a small bowl, whisk together the cinnamon sugar coating ingredients.
- Scoop dough out about 2 tablespoons at a time and shape into a ball. Roll the dough ball in the cinnamon sugar mixture to evenly coat, then transfer to parchment paper-lined baking sheets, spacing cookies 2 inches apart.
- Bake in the preheated oven for 12-14 minutes (they should look just slightly under-baked as they'll cook slightly once removed from the oven). Cool on the baking sheet for about 5 minutes, then transfer to a wire rack to cool completely.