Easy Chicken White Bean Enchiladas Recipe
There’s something so comforting about slicing into a warm, sticky loaf that’s bursting with flavor. I remember my grandma’s kitchen filled with the smell of bananas baking — she’d always have a ripple of dark chocolate tucked inside, just like this recipe. Honestly, this chocolate banana swirl loaf is a family favorite that I’ve made countless times, especially on those busy mornings when I need a quick treat that feels special. It’s surprisingly simple to whip up, doesn’t require fancy ingredients, and the way the dark chocolate melts into the sweet banana batter? Pure magic. Plus, it’s a great way to use up those too-ripe bananas that no one wants to eat anymore. Trust me, this one’s a lifesaver on busy nights or lazy weekends — my kids ask for it all the time, and I swear, it disappears in minutes at my house. I’ve even tested this with almond milk, and it actually made it even creamier! So, whether you’re baking for your family or just craving something warm and chocolaty, this loaf hits all the right notes — gooey, comforting, and just a little indulgent.
What is chocolate banana swirl loaf?
Think of this as a cozy, slightly decadent take on banana bread, but with a delightful twist — a ribbon of melted dark chocolate swirled right through the batter. It’s essentially a loaf that combines the sweetness of ripe bananas with the rich indulgence of chocolate, baked together into something that’s both nourishing and totally crave-worthy. The name kinda gives it away, but I like to think of it as a “banana-chocolate hug in loaf form.” It’s a relaxed, homestyle dessert or snack that feels like you’re bringing a little bit of bakery magic to your kitchen — but honestly, it’s so easy you’ll want to make it every week. Whether I serve it for breakfast, brunch, or a sweet afternoon treat, everyone always asks for seconds. The best part? It’s versatile enough to adapt with your favorite nuts, a sprinkle of sea salt, or even a drizzle of caramel — all personalized touches that make it even closer to my heart.
Why you’ll love this recipe?
What I love most about this chocolate banana swirl loaf is how it balances simplicity with that wow-factor bite. The flavor? Oh, it’s incredible. You get the gooey sweetness of ripe bananas paired with pockets of bitter-sweet dark chocolate that somehow make everything better. It’s like a hug in every slice. Plus, the process is straightforward — no fancy equipment needed, and you probably already have everything in your pantry. I always do this when I want a little indulgence without the fuss: mix, swirl, bake, enjoy. It’s a budget-friendly recipe too, using ordinary ingredients like bananas, flour, eggs, and chocolate chips or chunks. And the versatility? Endless. Want to add walnuts? Go for it. Or dried berries? Yes, please. This loaf is perfect when you’re craving something sweet at 10pm but don’t want to turn on the oven for a whole cake — it’s small enough to serve as a quick treat or breakfast. I’ve made this dozens of times, tweaking a little here and there, and it never fails to bring smiles around my table. Honestly, I think what sets this apart is the texture — moist, tender, with those curious little pockets of melted chocolate throughout. Every bite is a little celebration.
How do you make a chocolate banana swirl loaf?
Quick Overview
In essence, you’ll mash up some ripe bananas, mix with the dry ingredients, then fold in a simple chocolate batter. Pour half the batter into your loaf pan, spoon on a generous layer of melted chocolate or chocolate chips, then top with the remaining batter. Swirl gently with a butterknife or toothpick, bake until golden, and — voilà! — you’ve got a beautiful loaf that looks fancy but is honestly super simple to put together. This method keeps it foolproof, and the swirl technique is just enough to make each slice look like a little piece of art. You’ll love how quick it comes together, especially when you have bananas on the verge of ripening — or if you’re like me, I often freeze overripe bananas just for this.
Ingredients
For the Main Batter:
– 3 ripe bananas, mashed (trust me, the riper, the better—so sweet!)
– 2 cups all-purpose flour (or gluten-free alternative)
– 1 teaspoon baking soda
– 1/2 teaspoon salt
– 1/2 cup granulated sugar (or coconut sugar to make it a little healthier)
– 1/3 cup vegetable oil or melted butter
– 2 large eggs
– 1 teaspoon vanilla extract
For the Filling:
– 1/2 cup dark chocolate chips or chopped dark chocolate (I like real bittersweet for depth, but semi-sweet works too)
– Optional: 2 tablespoons each of cocoa powder or espresso powder for a richer flavor
– A handful of chopped nuts (walnuts, pecans) if you’re feeling crunchy
For the Glaze (optional):
– 1/4 cup melted chocolate or chocolate syrup
– A pinch of sea salt or a sprinkling of crushed nuts for garnish
– A drizzle of caramel or honey for extra sweetness
Step-by-Step Instructions
Step 1: Preheat & Prep Pan
Set your oven to 350°F (175°C). Grease your loaf pan well — I use butter and a little flour, but parchment paper is an easy alternative. Make sure your oven rack is in the middle, so it bakes evenly. I always do this first so I’m ready to pour the batter as soon as it’s mixed — the bananas start reacting quickly with the baking soda, and I don’t want to delay.
Step 2: Mix Dry Ingredients
In a medium bowl, whisk together the flour, baking soda, salt, and cocoa or espresso powder if you’re using. This step helps distribute the leavening evenly — I learned this the hard way when my muffins were a bit unevenly risen. Set it aside and focus on the wet stuff.
Step 3: Mix Wet Ingredients
In a larger bowl, mash your bananas until totally smooth (I do this with a fork, but a potato masher works too). Then, add sugar, oil, eggs, and vanilla. Whisk everything until it’s well combined. It might look a little lumpy, but that’s okay! The riper the bananas, the sweeter and more flavorful the batter. I tested this with a splash of almond milk once, and it made the loaf even moister — totally worth trying if you’re experimenting.
Step 4: Combine
Pour the dry ingredients into the wet, folding gently with a spatula until just combined. Overmixing can make the loaf dense — trust me, I did this the first dozen times. It’s better to see a few streaks of flour in the batter. That’s perfect. Now, fold in your chocolate chips or chopped chocolate chunks.
Step 5: Prepare Filling
For the filling, melt your dark chocolate gently over a double boiler or in short bursts in the microwave. Let it cool slightly so it doesn’t seize into the batter. You can add a pinch of salt or a dash of cinnamon here for extra flavor. If you want nuts, stir them into the melted chocolate or sprinkle on top later for crunch.
Step 6: Layer & Swirl
Spread half the batter in your loaf pan. Dollop or drizzle half of the melted chocolate over the batter. Spread the remaining batter on top, then add the rest of the chocolate. Use a toothpick or skewer to gently swirl through the batter — aim for a marbled effect, not a freaky ribbon. The visual impact is just as satisfying as the taste, I promise.
Step 7: Bake
Place the loaf in the oven and bake for about 50-60 minutes. Check doneness by inserting a toothpick in the center — it should come out clean or with a few moist crumbs. Every oven is different; I’ve had mine ready in 48 minutes, and sometimes it takes closer to an hour. Keep an eye on the edges — if they brown too fast, tent lightly with foil.
Step 8: Cool & Glaze
Let the loaf cool in the pan for about 15 minutes before transferring it to a wire rack. Patience is key here — if you cut it too early, it squishes and the chocolate swirls might lose their definition. If you want that glossy, extra-chocolate finish, warm the optional glaze slightly and drizzle over the cooled loaf. A sprinkle of sea salt or chopped nuts on top makes it pretty and adds contrast.
Step 9: Slice & Serve
Slice with a serrated bread knife for clean edges. This loaf is best enjoyed warm or at room temperature. I love it with a cup of coffee or a big glass of cold milk. For brunch, I sometimes serve it with fresh berries or a dollop of Greek yogurt. It’s great leftover, too — just pop a slice in the microwave for 15 seconds and enjoy that melt-in-your-mouth goodness all over again.
What to Serve It With
This loaf is versatile enough to shine at any meal or snack time. For breakfast, I typically heat a slice and top it with a spread of butter and a sprinkle of extra chocolate shavings — makes mornings feel special. My kids love it with a dash of cream cheese or a smear of peanut butter, turning it into a filling, decadent treat. When I serve it for brunch, I like to add fresh berries on the side and coffee that’s strong enough to cut through the richness. As an afternoon dessert, a cold glass of milk or a shot of coffee pairs beautifully, making each bite even more indulgent. And, honestly, I sometimes hide a slice for myself after dinner — it’s that addictive. This loaf isn’t just a treat; it’s a little tradition in my house. A slice or two, warmed up, is pure comfort. I recommend keeping a stash in the freezer, wrapped tightly, so you always have a cozy, chocolatey hug ready when cravings strike!
Top Tips for Perfecting Your Chocolate Banana Swirl Loaf
When I first started making this, I made a few mistakes but learned a lot along the way. Here are some tips I swear by now:
Zucchini Prep: Honestly, I don’t use zucchini here, but if you want to sneak in a little extra moisture, grated zucchini works great — just squeeze out the excess water first! It’s a great way to boost nutrition without changing the flavor much.
Mixing Advice: Overmixing is the enemy of fluffy loaves, so fold the ingredients gently and stop as soon as the batter looks just combined. Also, letting the batter rest for 5-10 minutes before baking can help it rise better.
Swirl Customization: Use a chopstick or skewer for swirling — it makes clean, sharp lines and distributes the chocolate evenly. For a more artistic marbling, layer the batter and chocolate in different spots, then swirl softly.
Ingredient Swaps: Dried cranberries or chopped dried apricots make nice fruity additions. If you don’t have dark chocolate, white chocolate chips or butterscotch chips are nice substitutes, but aim for at least 70% cocoa for depth.
Baking Tips: If your oven runs hot, lower the temperature slightly or start checking at 45 minutes. Cookies and cakes love a gentle heat; a quick tour with a toothpick tells you when it’s done. Also, placing a baking sheet on the rack below can catch drips and prevent an oven full of burnt chocolate smell.
Glaze Variations: For a different topping, mix a little coconut oil with cocoa powder for a shiny, vegan-friendly glaze. Or dust the top with powdered sugar and cocoa for a pretty, rustic look. I’ve even drizzled honey over warm slices — divine!
Lessons learned? Always measure your bananas, not your emotions — trust me, this loaf always tastes best when it’s just slightly underbaked in the center, leaving it wonderfully moist. And don’t be afraid to experiment with flavors. The basic formula is forgiving and way more versatile than it looks.
Storing and Reheating Tips
If you don’t gobble up the loaf in one sitting, here’s what I do:
Room Temperature: Wrap it lightly with foil or store in an airtight container for up to 2 days. Keep it somewhere cool — I hide mine on the counter away from little hands.
Refrigerator Storage: Wrap slices individually or store the whole loaf in an airtight container for up to a week. The flavor actually improves after a day, as the banana and chocolate meld more.
Freezer Instructions: Wrap tightly in plastic wrap and then foil or pop into a freezer bag. It’ll last for 3-4 months. To enjoy, thaw at room temp or warm in the microwave for about 20 seconds. It’s almost as good as fresh!
Glaze Timing: If you want the shine and extra chocolate flair, add the glaze after the loaf has cooled completely. If you refrigerate, re-glaze before serving for that glossy, inviting look.
Frequently Asked Questions
Final Thoughts
Honestly, this chocolate banana swirl loaf has become a little tradition in my home. It’s cozy, quick to whip up, and downright addictive. Every time I bake it, I’m reminded of those lazy Sunday mornings with the smell drifting through the house, making everyone smile before even taking a bite. It’s perfect for breakfast, a snack, or dessert — and I love how adaptable it is. You can add nuts, switch up the chocolate, or even sneak in a handful of oats. The best part? Seeing how much my family loves it, especially when I tell them I threw it together in under an hour. I hope you give this a try and find as much joy in it as I do. Please, share your own modifications or photos — it truly warms my heart to see how everyone’s making this recipe their own. Happy baking! And remember, the kitchen is your happy place — may your loaf come out perfectly every time!
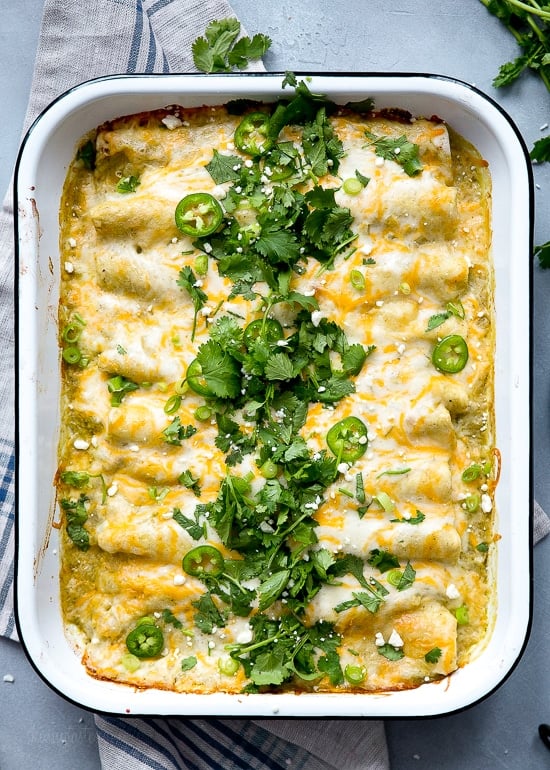
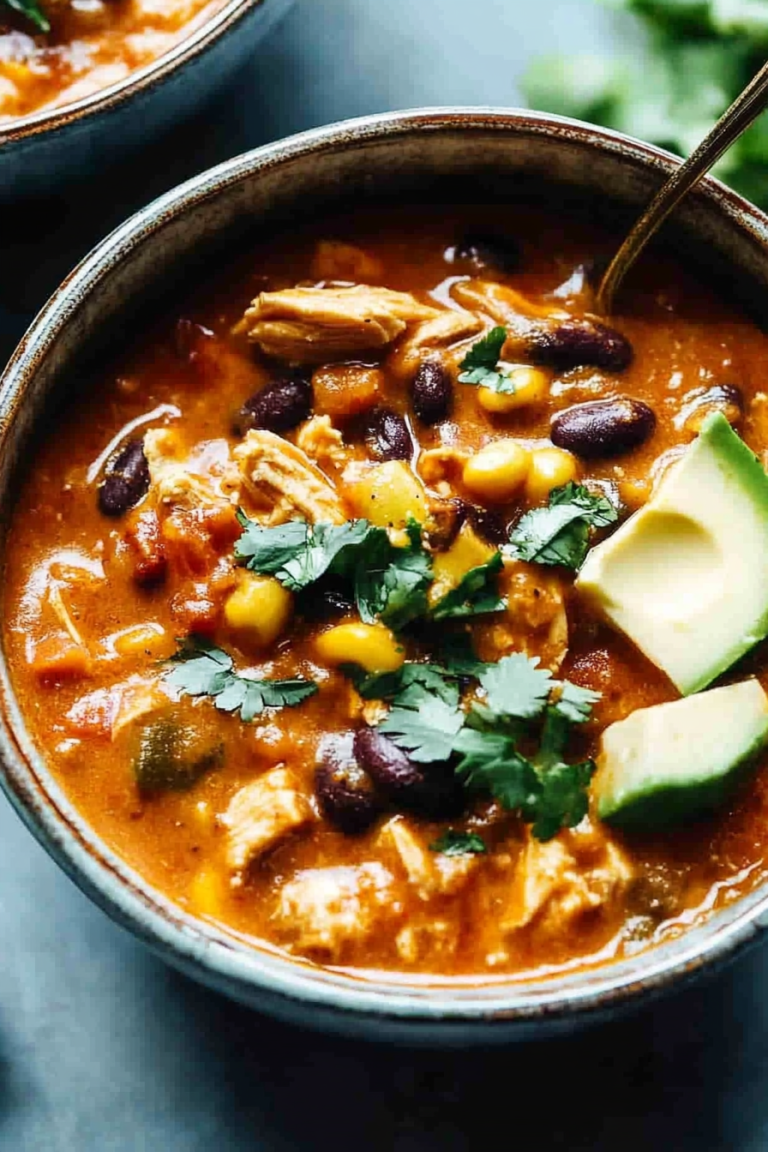
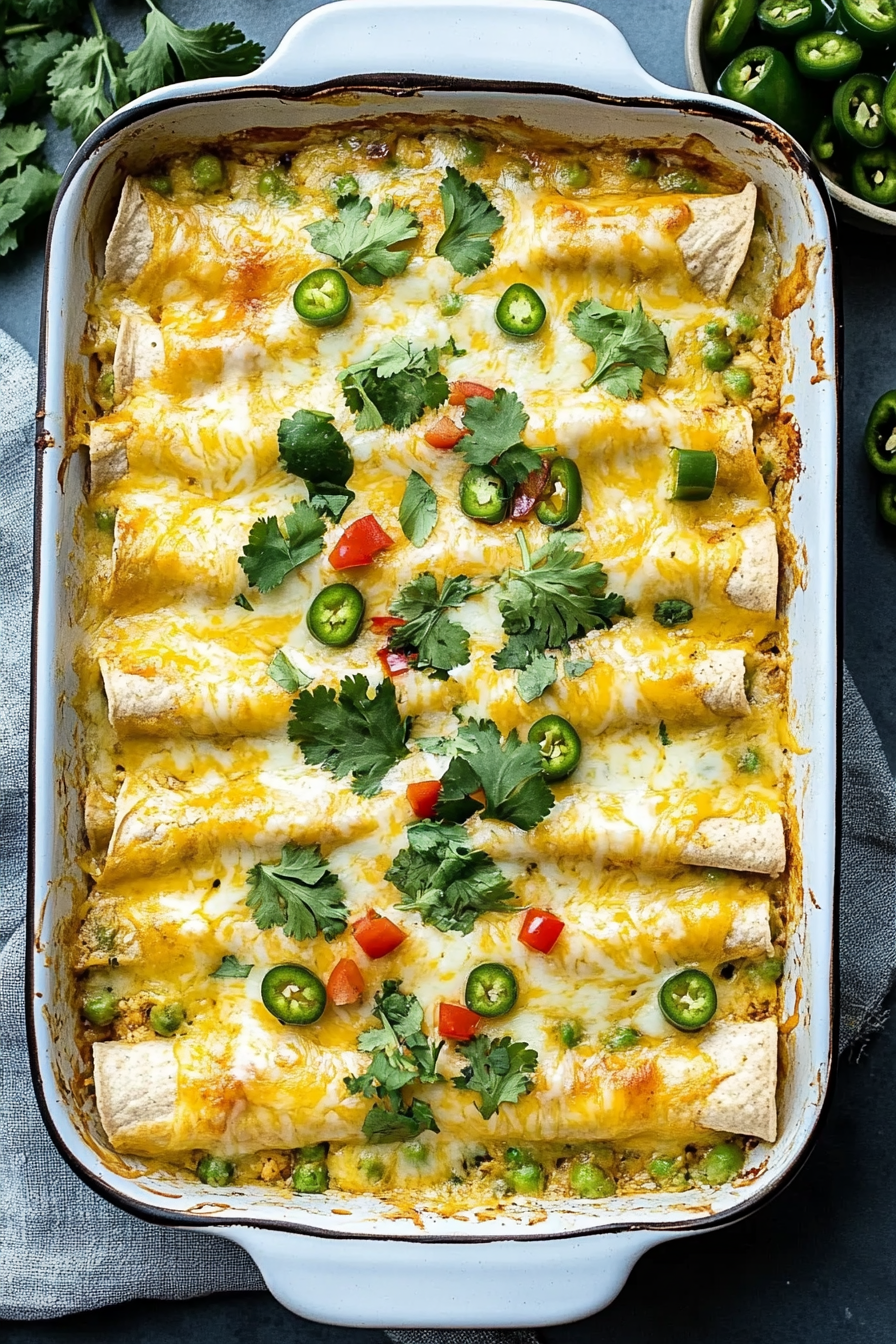
Chicken and White Bean Enchiladas with Creamy Salsa Verde
Ingredients
Method
- Preheat oven to 375°F (190°C).
- For the Filling: In a medium pan, heat olive oil on low. Add onions, garlic and sauté until soft, about 2-3 minutes.
- Add green chiles, beans, water, bullion, and cumin. Mix well and cover. Simmer on low for 15 minutes.
- Remove cover, add chicken and cook an additional 5 minutes, or until it thickens and liquid boils down. Set aside.
- For the Creamy Salsa Verde Sauce: In a large nonstick pan, melt the butter over medium heat. Add onion and cook, stirring occasionally, until the onion softens and starts to turn translucent, about 3-4 minutes.
- Add flour and stir well. Cook for 1 minute, stirring constantly. Slowly whisk in the chicken broth. Whisk until the sauce becomes smooth.
- Cook over medium heat until the sauce boils and thickens, about 4-5 minutes. Add green chiles, jalapeños, and salt to taste.
- Cook another minute then remove from the heat. Stir in the sour cream.
- To Assemble: Spread about 1/4 cup of the enchilada sauce on the bottom of a 9x13 inch baking dish.
- Fill each tortilla with about 1/3 cup of the chicken/white bean filling.
- Roll the tortillas and place seam side down in the prepared baking dish. Continue filling the remainder of the tortillas.
- Pour the enchilada sauce over the top of the enchiladas. Top with cheese.
- Cover with aluminum foil and bake for 20-30 minutes, until the enchiladas are hot and the cheese is melted. Remove from oven and top with fresh cilantro or scallions.